3 Ways to Back up Samsung Gallery to Google Drive You Need Know
Apr 27, 2022 • Filed to: Backup Data between Phone & PC • Proven solutions
Many cloud storage platforms help people save their important data and files online to reach them from anywhere secure. Google Drive is one of the examples of a cloud storage platform that millions of people use daily to save and edit their data in a secured place. Also, people use this platform as a backup to keep their essential stuff like photos and videos intact.
Similarly, Samsung users also prefer to backup Samsung gallery to Google Drive to access their photos and videos even if they have lost the phone or they have accidentally deleted all the existing data from the phone. Therefore, if you are a Samsung user, you must benefit from Google Drive to save all the data of your gallery as a backup.
Find out how to save photos from Samsung to Google Drive quickly and simply through this well-detailed article.
Part 1: Backup Samsung Gallery Photo to Google Drive Using Samsung Share Option
You can directly backup Samsung photos to Google Drive by using the share option provided by Samsung. This method is quite simple and easy to use.
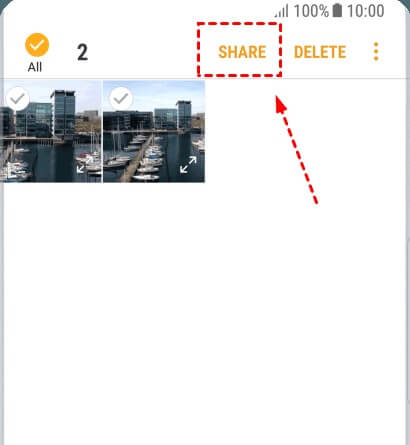
Step 1: First, gather the photos you want to upload on Google Drive. You can directly go to your Samsung phone’s gallery and select them. After selecting them, tap on the option "Share" from the top. Now on the pop-up menu, select "Save to Drive."
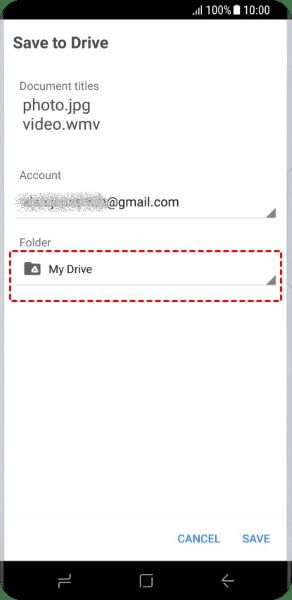
Step 2: Now, confirm your Google Drive account by checking your email address. Under your account's address, tap on the option of "Folder" and choose the location to save the photos.
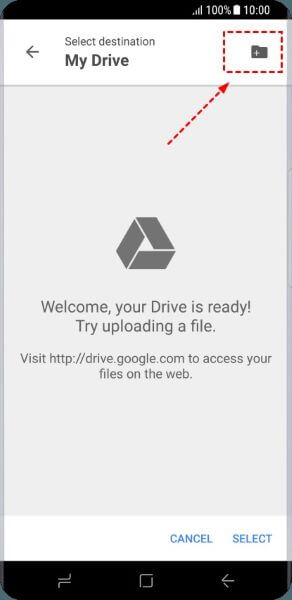
Step 3: Now, your Google Drive will open up, and you can also create a separate folder by tapping "Create a new folder" on the top right corner. Once all your photos get uploaded on Google Drive, tap on the option “Save” from the bottom corner of the screen.
Part 2: Easy Way to Backup your Samsung Gallery: Dr.Fone – Phone Backup
If you have failed to back up all your photos to Samsung through other methods, quickly use and trust Dr.Fone - Phone Backup. This unique tool can backup all the data present in your Samsung device, and you can also restore it anytime you want. To be more precise, you can pick and choose the data and have a selective backup.
By trusting this platform, even if you have accidentally removed all the data from your phone, Dr.Fone will store all the photos, videos, and files in a backup.
Ultimate Guide to Use Dr.Fone- Phone Backup for Samsung Photos
Step 1: Select Phone Backup
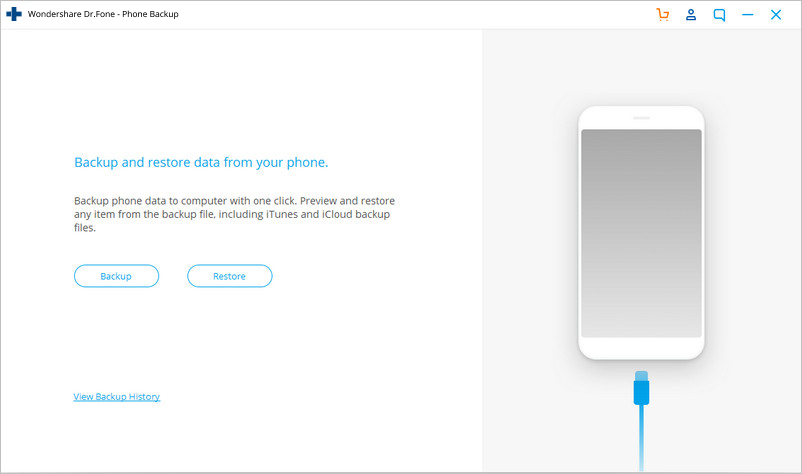
Begin launching Dr.Fone on your computer and then choosing “Phone Backup” to initiate the process.

Step 2: Establish a Connection with Samsung
Now connect your Samsung device to the computer using a USB cable. A pop-up notification will display on your screen that will ask your permission for all USB debugging. To continue, click on "OK." Afterward, select "Backup" to initiate the backup of your phone's data.
Step 3: Select Samsung Files
Now you can pick and select the files that you want to backup. The tool will automatically fetch all the files for you to select them quickly. Once done, tap on "Backup."
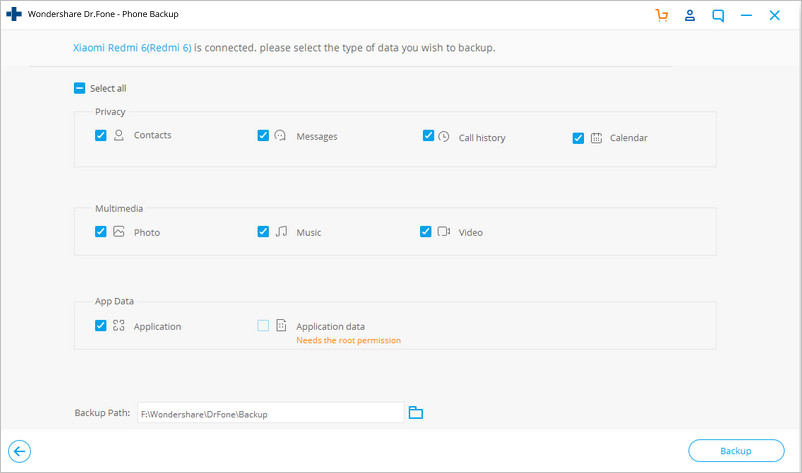
Step 4: View your Files
The backup process may take some time, so make sure your device is correctly connected to your computer. Once the process is completed, you can view the backup images by clicking on the view option.
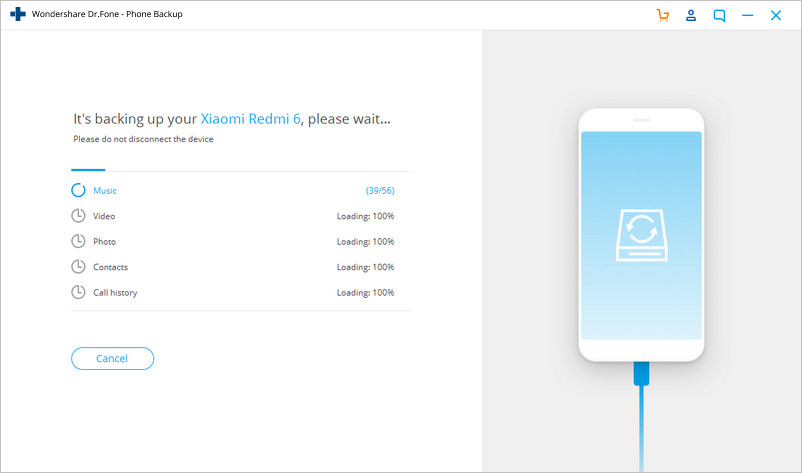
Part 3: Upload Samsung Photo from Gallery Save to Google Drive
Google Drive also gives various ways for its users to save photos or videos. This method is straightforward for all Samsung users to backup Samsung galleries on Google Drive.
Step 1: Begin heading to Google Drive from your Samsung home screen. Afterward, sign in to your account by entering your username and password.
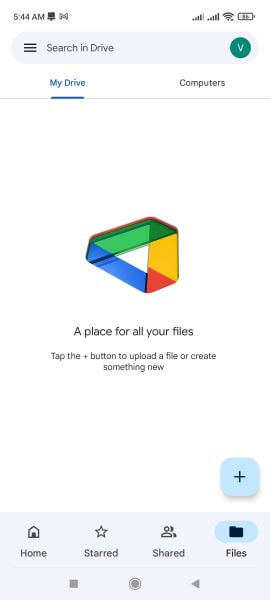
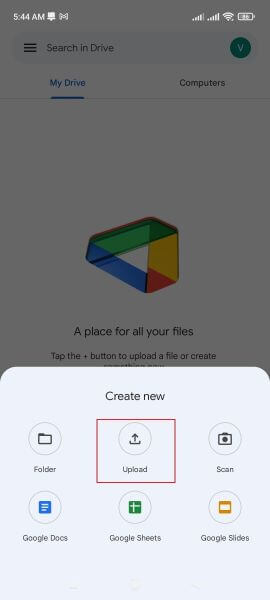
Step 2: Once done logging into your Google Drive, select the “Plus” icon by tapping on it. Now tap on “Upload” to proceed.
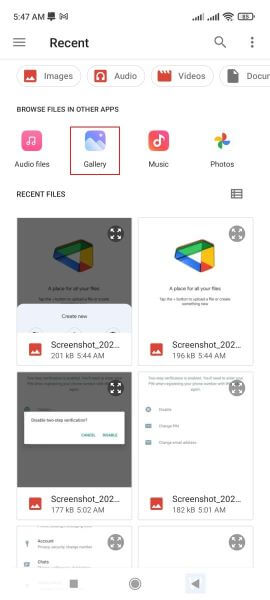
Step 3: Select the photos by checking your “Gallery” and tap on the image until you see a blue tick adjacent to it. Now tap on the "Tick" option to upload all the selected photos on your Drive. If you are uploading photos in bulk, wait for some time until all images get uploaded.
Part 3: Backup Samsung Gallery to Google Drive Using Google Backup and Sync
Another reliable method to backup Samsung photos to Google Drive is syncing your Samsung photos to Google Drive. You will use a computer to sync all your photos to Google Drive directly.
Step 1: First, build the connection between your Samsung device and your computer through a data cable. Then, find the folder where all your Samsung photos are saved.
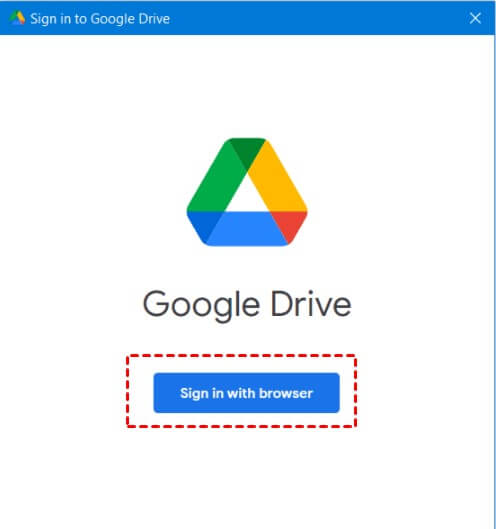
Step 2: On the other hand, download "Google Drive for desktop" to your computer with a strong internet connection. Please open it and sign in to your Google account by entering your username and password.
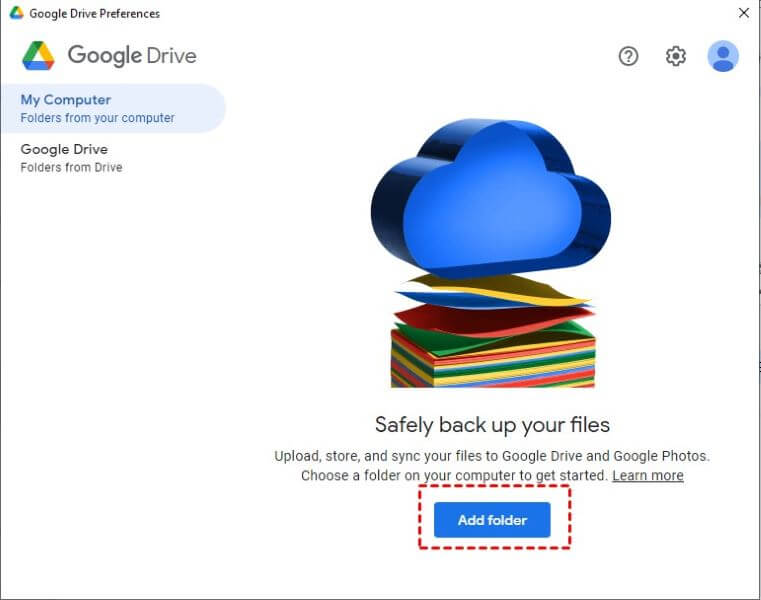
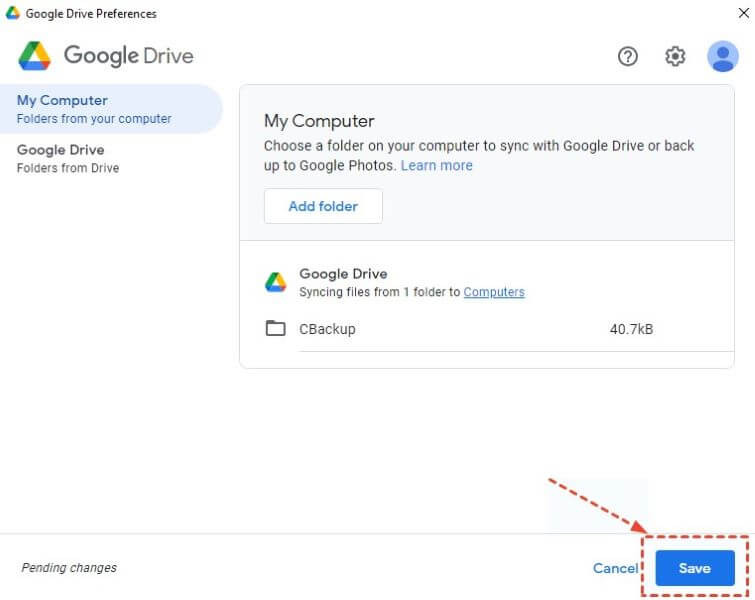
Step 3: Now, under the category of "My Computer," select the option of "Add Folder." Afterward, select the folder where you have saved all the Samsung images and upload them to the Drive. From desktop settings in Drive, you can also check the resolution and size of the images you want to upload.
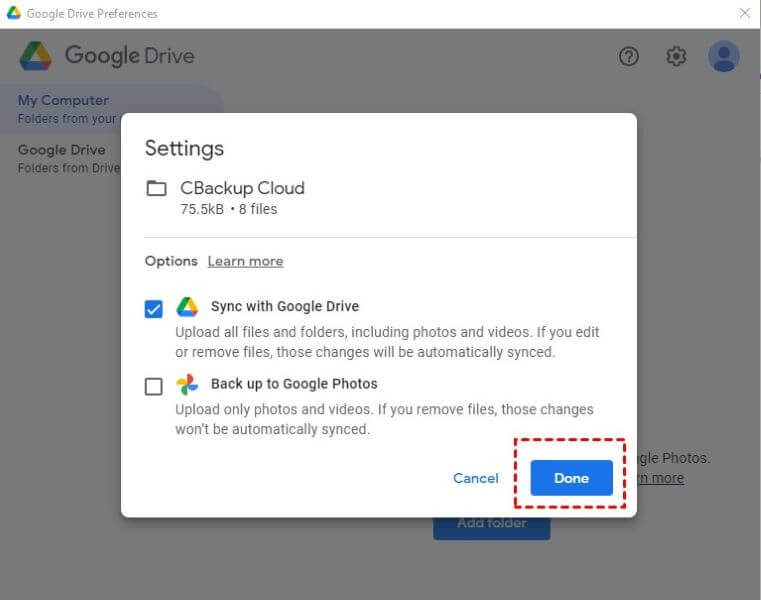
Step 4: A pop-up menu will appear where you have to choose “Sync with Google Drive” and then tap on “Done” to continue.
Step 5: Now it’s time to save all the done changes on your Drive. So click on the “Save” button to finish the process. Now all your Samsung photos will be synced to Google Drive automatically.
Conclusion
Backup is the most reliable option to save your images and other necessary data permanently. Samsung users widely use Google Drive as a secure platform for backup purposes. This article will also guide you to backup Samsung gallery to Google Drive in the easiest ways.
Android Backup
- 1 Android Backup
- Android Backup Apps
- Android Backup Extractor
- Android App Backup
- Backup Android to PC
- Android Full Backup
- Android Backup Software
- Restore Android Phone
- Android SMS Backup
- Android Contacts Backup
- Android Backup Software
- Android Wi-Fi Password Backup
- Android SD Card Backup
- Android ROM Backup
- Android Bookmark Backup
- Backup Android to Mac
- Android Backup and Restore (3 Ways)
- 2 Samsung Backup


Selena Lee
chief Editor