Android Recovery Mode: How to Enter Recovery Mode on Android
Apr 27, 2022 • Filed to: Data Recovery Solutions • Proven solutions
Entering recovery mode can be used to fix a number of issues with your Android device. Whether you simply want to fast-boot your device, recover, wipe data or simply find out more information about your device, recovery mode can be very useful. In this article we are going to take a critical look at the Android Recovery mode and how to use it to fix issues.
- Part 1. What is Android Recovery Mode?
- Part 2. What Can recovery Mode do for your Android?
- Part 3. Backup your Android Data before Entering Recovery Mode
- Part 4. How to use Recovery mode to Fix Android Issues
Part 1. What is Android Recovery Mode?
In Android devices, recovery mode refers to the bootable partition in which the recovery console is installed. This partition contains tools that that help to repair installations as well as to install official OS updates. This can be done by pressing a combination of keys or instruction from a command line. Because Android is open the recovery source code is available and accessible making the building of customized ROM relatively easy.
Part 2. What Can recovery Mode do for your Android?
With the growth of the mobile phone industry, we have experienced a complexity of the functions we can accomplish with our phones. These complexities also bring about a number of issues that your device can experience. Recovery mode can be used to fix some of these issues such as failed OS update, common Android Errors or even an unresponsive device. Android Recovery is also very useful when you are looking to install custom ROM as well as install OS updates successfully. It is therefore very necessary that you are aware of how to get into and out of Android Recovery. You never know when you might need it.
Part 3. Backup your Android Data before Entering Recovery Mode
Before you attempt to put your Android device in recovery mode, it is important to back-up your data. This way you can always get all your data back just in case something goes wrong. Dr.Fone - Android Data Bacup & Restore will help you easily create a full backup of all the data on the device.

Dr.Fone - Android Data Backup & Resotre
Flexibly Backup and Restore Android Data
- Selectively backup Android data to computer with one click.
- Preview and restore backup to any Android devices.
- Supports 8000+ Android devices.
- There is no data lost during backup, export or restore.
After downloading and installing the program, run it on your computer and follow the step-by-step guide below to get your Android device backed up.
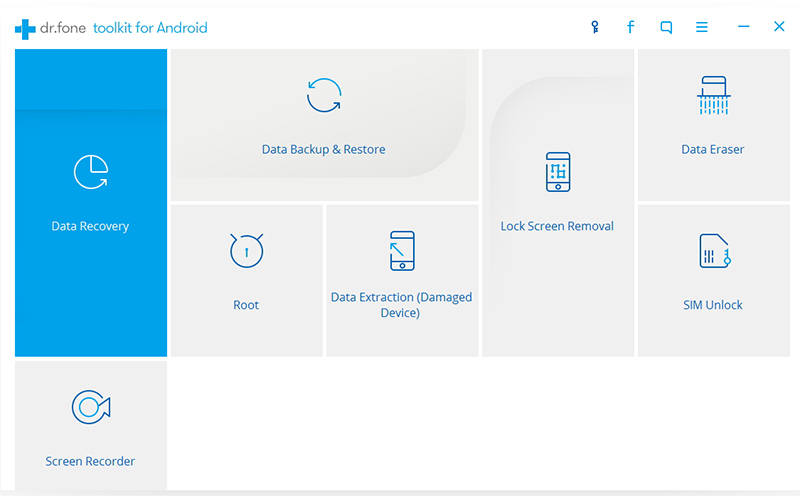
Step 1. Choose "Data Backup & Restore"
Dr.Fone toolkit gives you a few options to do different things on your device. To backup data on your Android, click "Data Backup & Restore", and move forward.
Step 2. Connect your Android device
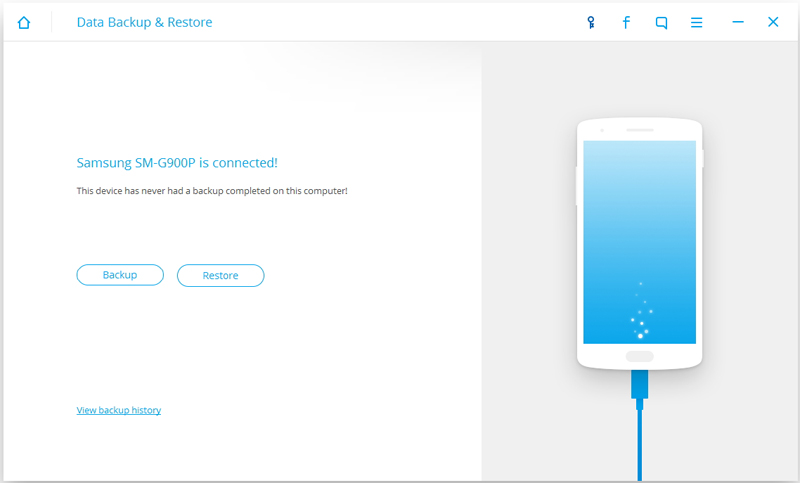
Now get your device connected. When the program detects it, you will see the window diaplayed as follows. Click on Backup option.
Step 3. Select the file types to backup
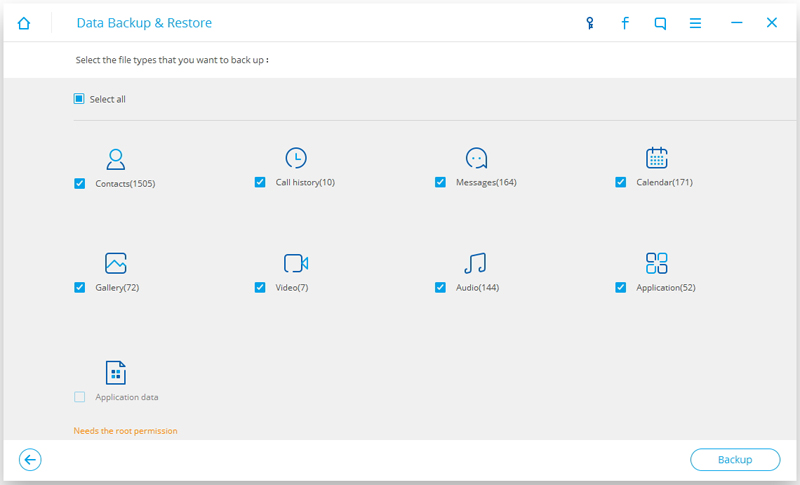
Dr.Fone supports to backup most of the data types on Android devices. Just select the data types you would like to backup and click Backup.
Step 4. Start to backup your device
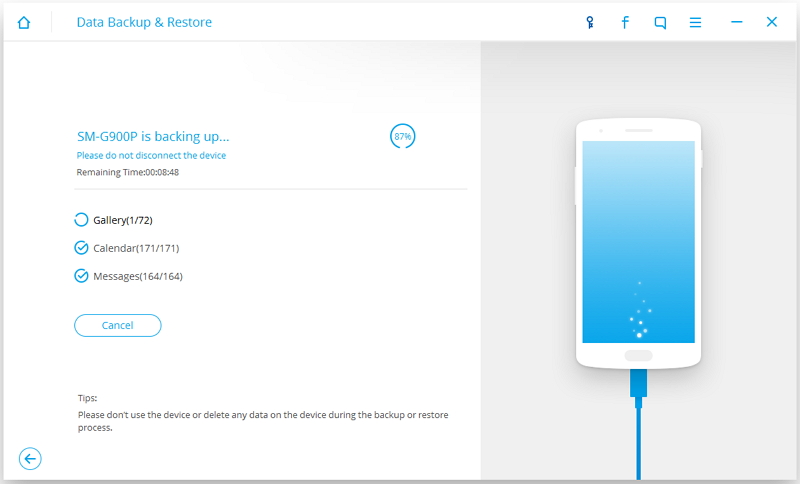
Then it will begin to backup all the selected files to the computer. When the process is complete, you will get a message popped up to tell it.
Part 4. How to use Recovery mode to Fix Android issues
Getting into recovery mode on Android devices will be slightly different for different devices. The Keys you press will be slightly different. Here’s how to get into recovery mode for a Samsung device.
Step 1: Turn off the device. Then, press the Volume up, Power and home buttons until you see the Samsung Screen. Now release the Power button but continue to press the Home and Volume up buttons until you get to the stock recovery mode.
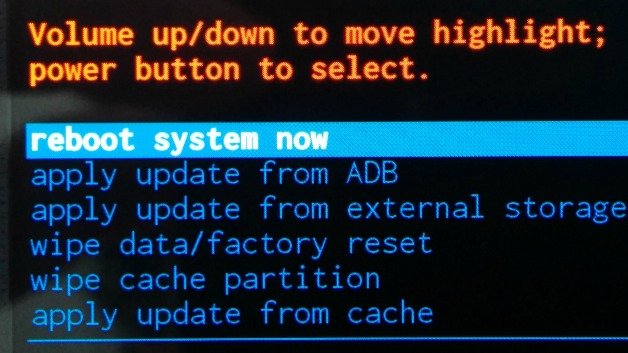
Step 2: From here, select the menu option that will fix your particular problem. For example, choose “Wipe Data/ factory reset” if you want to reset the device.
Buttons to use on other Android devices
For an LG device, press and hold the Power and Volume button simultaneously until the LG logo appears. Release the keys and then press the Power and Volume button again until the "reset menu" appears.
For Google Nexus Device press and hold the volume down and volume up buttons and then press and hold the power button until the device turns off. You should see "Start" with an arrow around it. Press the volume button twice to see “Recovery” and then press the power button to get to the recovery menu.
If your device is not described here, see if you can find information in the device manual or do a Google search on the right buttons to press.
Recovery mode can be used to solve a number of problems and is useful in more ways than one. With the above tutorial, you can now easily enter recovery mode on your Android device and use it to fix any issue you might be facing.
Android Data Recovery
- 1 Recover Android File
- Undelete Android
- Android File Recovery
- Recover Deleted Files from Android
- Download Android Data Recovery
- Android Recycle Bin
- Recover Deleted Call Log on Android
- Recover Deleted Contacts from Android
- Recover Deleted Files Android Without Root
- Retrieve Deleted Text Without Computer
- SD Card Recovery for Android
- Phone Memory Data Recovery
- 2 Recover Android Media
- Recover Deleted Photos on Android
- Recover Deleted Video from Android
- Recover Deleted Music from Android
- Recover Deleted Photos Android Without Computer
- Recover Deleted Photos Android Internal Storage
- 3. Android Data Recovery Alternatives


Selena Lee
chief Editor