4 Solutions to Fix Error 492 In Google Play Store
Apr 27, 2022 • Filed to: Fix Android Mobile Problems • Proven solutions
Multiple users have experienced various errors while operating the Google Play Store and Error 492 is one of the prominent ones. So, in this article, we have mentioned the various steps that can be taken to eradicate the error code 492and ensure the user a smooth function for his Android.
Part 1: What is Error 492?
The Android Error 492 is a very common error that can be found in the Google Play store. There have been many reports that have been filed by multiple users while trying to download or update their apps. Most reports have been filed because the user cannot update an application, but only a few have reported that the error code 492 came up when they just started downloading a new application for the first time.
If one analysis the problem faced, they can classify the problems caused is basically due to four main reasons for the Error code 492. They are as follows,
- 1. The cache files can be one of the prime reasons for this error
- 2. There is a high probability that the app is corrupted
- 3. A corrupted or unoptimized SD card can cause the Error.
- 4. The Gmail ID that has been signed into Play Store can also act as a cause for the error.
Updating apps on your phone is very important but getting an error like the play store error 492, in doing so is frustrating. But be assured, this article will definitely provide you four different ways by which you can get rid of this problem.
Part 2: One-click Solution to fix Play Store Error 492
The most effective method to fix play store error 492 would be Dr.Fone-SystemRepair (Android). The tool is specially designed for fixing various types of Android issues. Including app keep on crashing, download failed, etc. It comes with many remarkable features that make the software most powerful when it comes to repairing the Android operating system.

Dr.Fone - System Repair (Android)
Fix Play Store error 492 in one click
- The software has a one-click operation to resolve error code 492.
- It is the world’s 1st Android repair software to fix the Android operating system.
- You don’t need to be a tech-savvy person to use this tool.
- Fully compatible with all old and new Samsung devices.
- It is virus-free, spy-free and malware-free software.
- Supports various carriers such as Verizon, AT&T, Sprint and etc.
Note: The Dr.Fone-SystemRepair (Android) is a powerful tool, but it comes with a risk and it is that it may erase your Android device data. Thus, it is recommended to backup your device existing data so that you can easily restore your precious data if it gets lost after repairing your Android system.
Here is the guide on how to come out of error 492 issue using Dr.Fone-SystemRepair (Android):
Step 1: Visit its official site and download the software on your computer. After installing it successfully, run it and then, select the “System Repair” option from the utility main interface.

Step 2: Next, connect your Android phone using a correct digital cable and then, click on “Android Repair” option from its left bar.
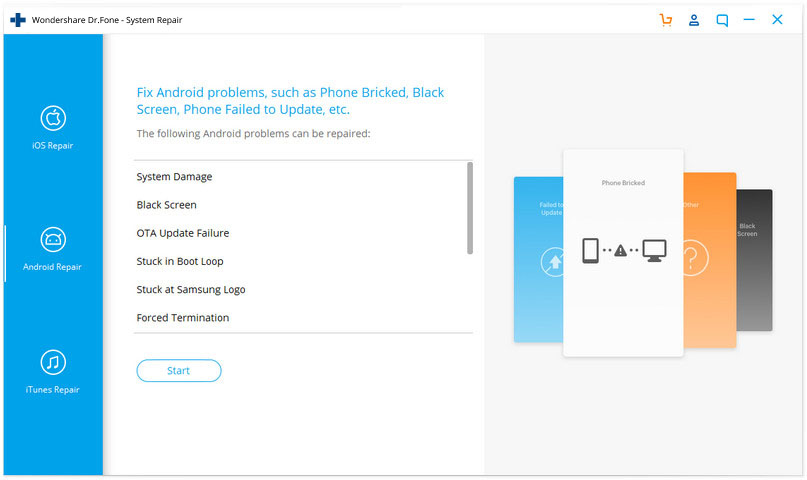
Step 3: Now, follow the instructions displayed on software interface to put your device in download mode. Next, the software will download required firmware to repair your device system.
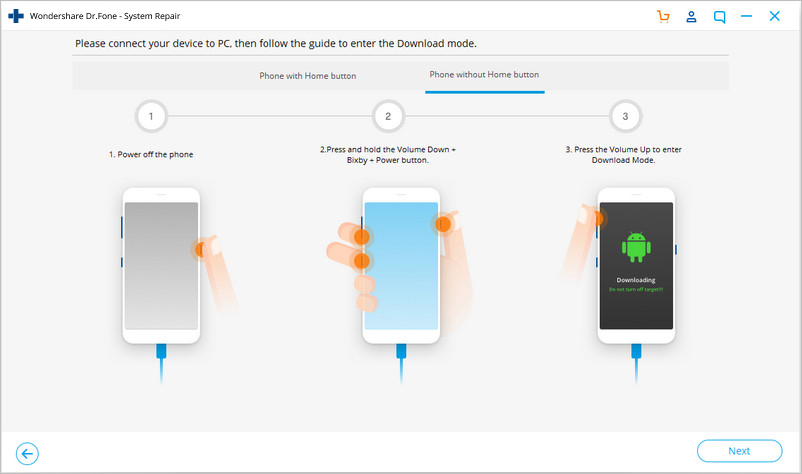
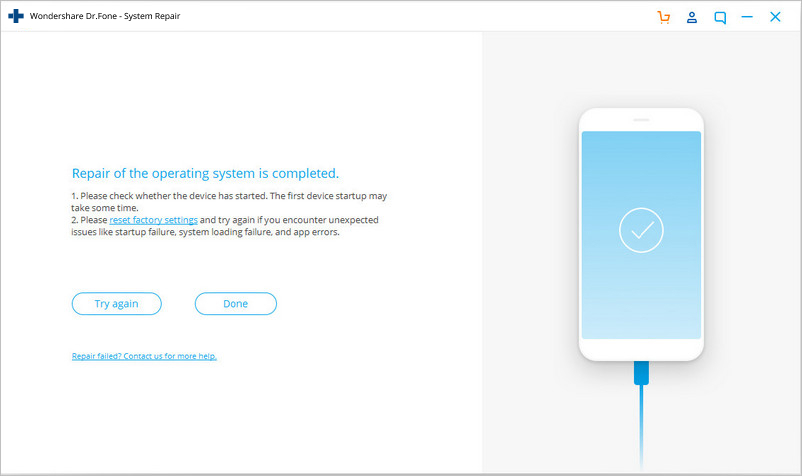
Step 4: Thereafter, the software will begin repairing your Android system and wait for a while, the software will fix the error you are facing.
Part 3: Traditional Solutions to Fix Error Code 492
METHOD 1: Clearing the Cache Data Of the Google Play Services and Google Play Store
STEP 1:
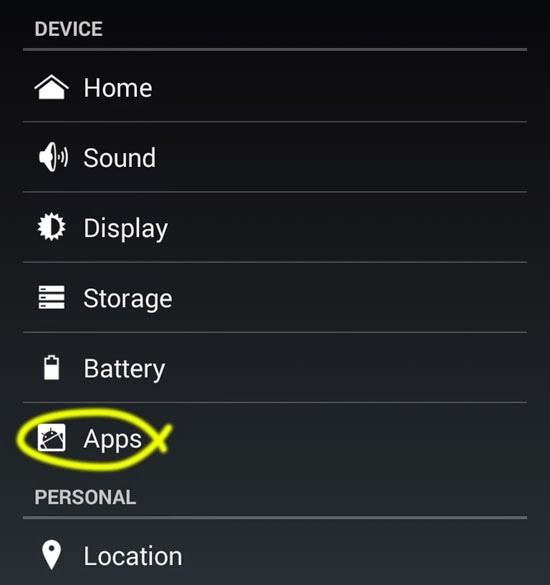
Go to the “Settings” section of your Android device and then open the “Apps” section.
STEP 2:
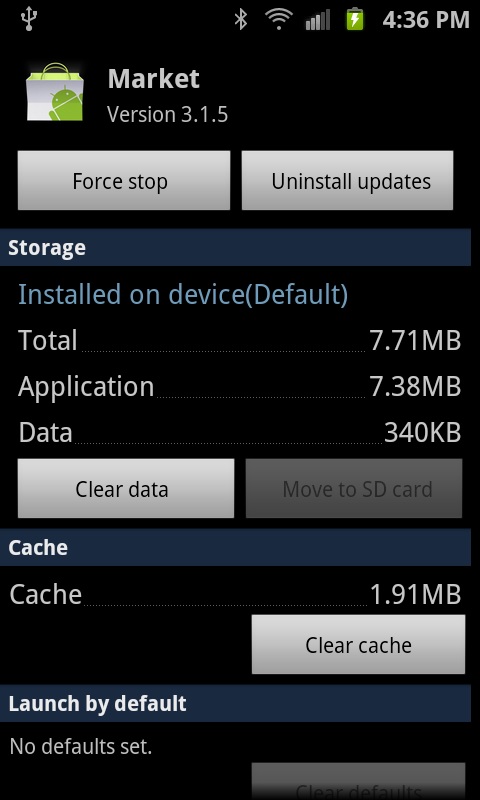
In the “Apps” section find the “Google Play Store” and then tap on the “Clear data” & “Clear Cache” options. After Tapping on this all the cache memory and data will be cleared.
STEP 3:
Repeat the same process after finding the “Google Play Services”. Soon clearing the Cache data of both the Google Play Store and The Google Play Services, The Error Code 492 should be eradicated.
METHOD 2: Re-installing The Applications
The error code 492 occurs while installing or updating the application. So whenever the error 492 comes in on The Google Play Store, then try this trick and see if you can fix the error quickly and swiftly.
If it’s the first time that you are installing the application, then quickly stop the download and close the Play Store and open the recent apps tab and close the Google Play Store from that also. After doing all that try re-installing the application that way. Sometimes it just happens like pure magic, if it works by doing that then you were experiencing a small server problem.
Now if you experienced the Error Code 492 while updating the application, what you have to do now is that, click on the okay option of the error popup box so that the pop-up box closes down. After that, I need you to uninstall that application that you were trying to update. After uninstalling the application, install it all over from the start again by clicking okay and giving it the necessary permission that usually comes up while downloading and installing an application for the first time. Following these steps might fix the Error Code 492 that you experienced.
METHOD 3: FORMAT the SD Card
STEP 1:
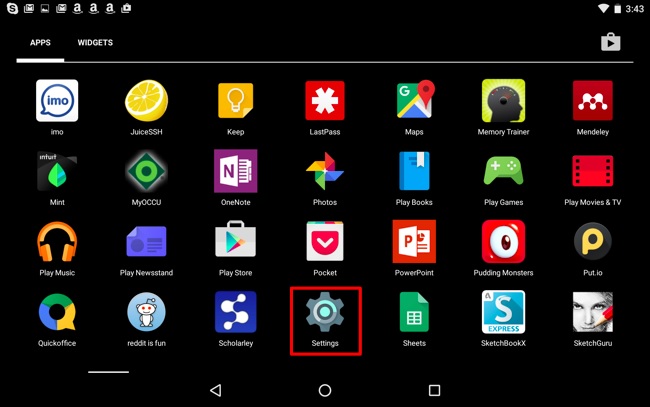
Find the “Settings” icon in your app drawer.
STEP 2:
Scroll down in the Settings app until you find the “Storage” section. Tap on it or view it for the next step.

STEP 3:
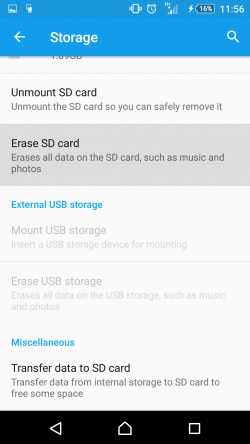
Scroll down to find the SD Card option. You can see what all apps take up how much space and even change the storage of certain apps to or outside the SD card through this option. After going through a few options you will see an option either mentioned as “Erase SD card” or “Format SD card”. The language of this might change from one device to another.
STEP 4:
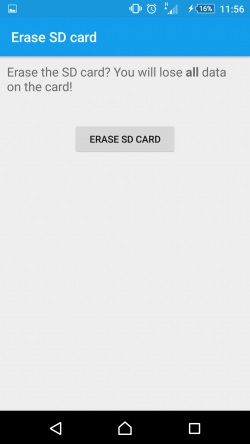
Confirm that you want to wipe the SD card by taping on the “Erase SD card option” or “Format SD card” option. After confirming your SD card will be wiped out clean. You don’t have to worry about your internal storage because that part will be untouched and unharmed and it’ll be just the SD card data that will be erased.
METHOD 4: Uninstalling updates from Google Play and Removing your Google account
STEP 1:
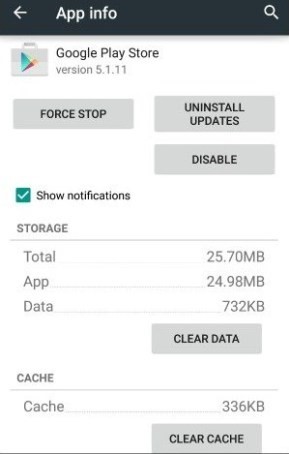
Open the settings menu of your handset and go to the “Apps” section in it and find “Google Play Store”.
STEP 2:
Once after tapping on the “Google Play Store” section. Tap on the “Uninstall updates” option. On doing so all further updates that has been installed after the factory version of your handset will be uninstalled from your device.
STEP 3:
Repeat the same process as mentioned in STEP 2 but this time the only difference will be that you will be uninstalling the updates for “Google Play Services” instead of Google Play Store.
STEP 4:
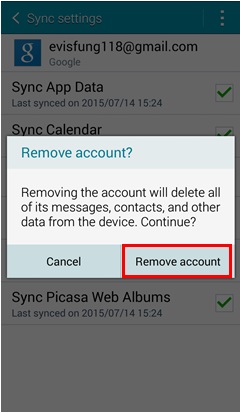
Now go back to the “Settings” section and find the section which is named “Accounts”. This is the section where all your accounts have been saved or linked to your phone. In this section, you can add and remove accounts of various different applications.
STEP 5:
In the accounts, section finds the “Google Account” section.
STEP 6:
Inside that part, there will be an option that mentions “Remove Account”. Once you tap on that option your Google account will be removed from your handset.
STEP 7:
Now all you have to do is re-enter your Google account and go and open your Google Play Store and download the app that you previously couldn’t. But only this time there won’t be any Error 492 stopping you from getting what you want to download. So now your problem with Error Code 492 has come to an end and you don’t ever have to worry about such errors ever again.
Towards the end of this article we have come to know that Google Play Error Code 492 is mainly caused due to four distinct issues, either by the cache problem, a problem with the SD card, because of the application or finally because of a problem with the Google account. We have discussed the solution for each type which are as follows,
1. Clearing the Cache Data Of the Google Play Services and Google Play Store
2. Re-installing The Applications
3. Formatting the SD Card
4. Uninstalling updates from Google Play and Removing your Google account.
These steps will ensure you that the Play Store Error 492 does not ever arise for you again.
Android System Recovery
- Android Device Issues
- Process System Isn't Responding
- My Phone Won't Charge
- Play Store Not Working
- Android System UI Stopped
- Problem Parsing the Package
- Android Encryption Unsuccessful
- App Won't Open
- Unfortunately App Has Stopped
- Authentication Error
- Uninstall Google Play Service
- Android Crash
- Android Phone Slow
- Android Apps Keeps Crashing
- HTC White Screen
- Android App Not Installed
- Camera Failed
- Samsung Tablet Problems
- Android Repair Software
- Android Restart Apps
- Unfortunately the Process.com.android.phone Has Stopped
- Android.Process.Media Has Stopped
- Android.Process.Acore Has Stopped
- Stuck at Android System Recovery
- Huawei Problems
- Huawei Battery Problems
- Android Error Codes
- Android Tips


Alice MJ
staff Editor
Generally rated4.5(105participated)