[Çözüldi] iCloud-dan suratlary nädip almaly?
28-nji aprel 2022 • Iberilen: Enjam maglumatlaryny dolandyrmak • Subut edilen çözgütler
If you’re an iPhone user, you’re most likely to be well-familiar with iCloud. It’s Apple’s official cloud storage app that allows users to sync their data across different iDevices and keep a backup for emergencies. Whether you’re planning to switch to a newer iPhone or simply want to install the latest iOS update, iCloud will allow you to back up your data and retrieve it later on.
However, it’s also worth noting that iCloud is prone to unexpected situations. Many iOS users have encountered situations where they accidentally deleted files, mainly photos, from their iCloud with no clue on how to recover them. If you’re reading this right now, there’s a huge probability that you’re stuck in a similar situation.
So, to help you get back the deleted photos from iCloud, we’ve put together a detailed guide on how to retrieve photos from iCloud using different solutions.
Part 1: How iCloud save photos?
Before giving away the working solutions, let’s first take a moment to understand how iCloud stores photos on the cloud. First and foremost, “iCloud Photos” must be enabled in your iPhone. It’s a dedicated iCloud feature that’ll automatically backup your photos, given that it’s enabled.
Even though iCloud Photos is enabled by default, there are many users who accidentally turn it off without actually knowing it. So, to check if there is an iCloud backup of your photos, go to Settings>Your Apple ID>iCloud.
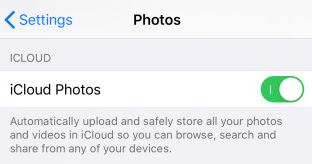
Once you’re in the “iCloud” window, click on “Photos” and make sure that the switch next to “iCloud Photos” is toggled. If the feature is enabled, it’ll be comparatively easier to recover photos from iCloud.
When this feature is enabled, iCloud will automatically sync your photos to the cloud and you’ll be able to access them across different Apple devices. This means that even if you end up deleting a specific photo from your iPhone, you can still find it in iCloud’s library.
Well, not really! Unfortunately, if “iCloud Photos” is enabled, your photos will be removed from the iCloud as well, should you delete them from your iPhone. This happens due to the “Auto-Sync” feature. So, unless you have an iCloud backup to recover those files, you’ll have to look for different solutions to recover them.
Part 2: Ways to retrieve photos from iCloud
Bu pursatda, iCloud-yň işleýşi hemmeler üçin gaty bulaşyk bolup görünýär. Emma, gowy habar, bu çylşyrymly işleýşine garamazdan, iCloud-dan öçürilen suratlary alyp bilersiňiz.
Şeýlelik bilen, iCloud-dan suratlary nädip almalydygy barada iş çözgüdi bilen başlalyň.
1. Dr.Fone - Maglumatlary dikeltmek (iOS) ulanyň
“ICloud” -dan öçürilen suratlary dikeltmegiň iň aňsat usuly, “ Dr.Fone - Data Recovery” (iOS) ýaly professional maglumatlary dikeltmek guralyny ulanmakdyr . Üç dürli dikeldiş tertibi bolan aýratyn programma üpjünçiligi. “IPhone” -yň ýerli ammaryndan, “iCloud” sinhronlanan faýllaryndan we hatda “iTunes” ätiýaçlyk faýlyndan maglumatlary alyp bilersiňiz.

No doubt, you can also use the traditional method of restoring an iCloud synced files, but that would overwrite the current data on your iPhone. This means that you’ll be able to get back the deleted photos, but in return, you’ll be losing all the new files on your iPhone.
With Dr.Fone - Data Recovery, you don’t have to deal with this situation. The tool is tailored to recover files from iCloud synced files without affecting the current data on the iPhone. This is one of the major benefits of using a third-party tool for data recovery in iOS.
As far as features are concerned, Dr.Fone - Data Recovery (iOS) is packed with a wide variety of useful features. For instance, you can use the software to recover different types of files including photos, videos, documents, and even contacts/call logs.
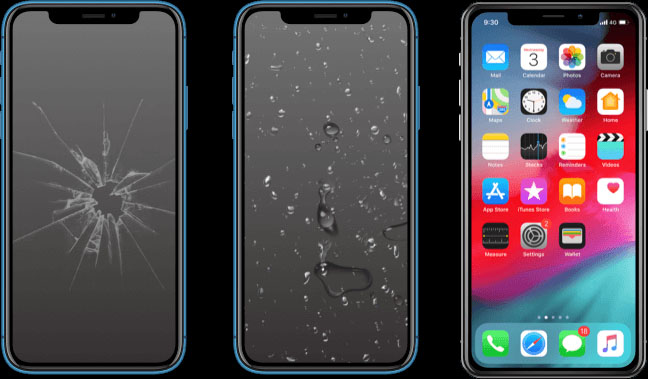
Secondly, Dr.Fone will help you recover files in different situations. Let’s say your iPhone has experienced water damage or its screen has completely shattered and become unresponsive. In either case, Dr.Fone - Data Recovery will help you recover your data to the PC without any hassle.
Let’s take a look at a few of the features of Dr.Fone - Data Recovery that’ll make it much easier to recover photos from iCloud.
- Compatible with all iOS versions including iOS 15
- Easy-to-use Interface will help you instantly recover files from an iCloud synced files
- Recover photos without overwriting the current data on your iPhone
- Supports Selective Recovery, i.e., you can choose which files you want to recover from the iCloud backup
- The best part about this is that it is available for both Windows and Mac
Here’s the detailed step-by-step process on how to retrieve photos from iCloud synced files using Dr.Fone - Data Recovery (iOS).
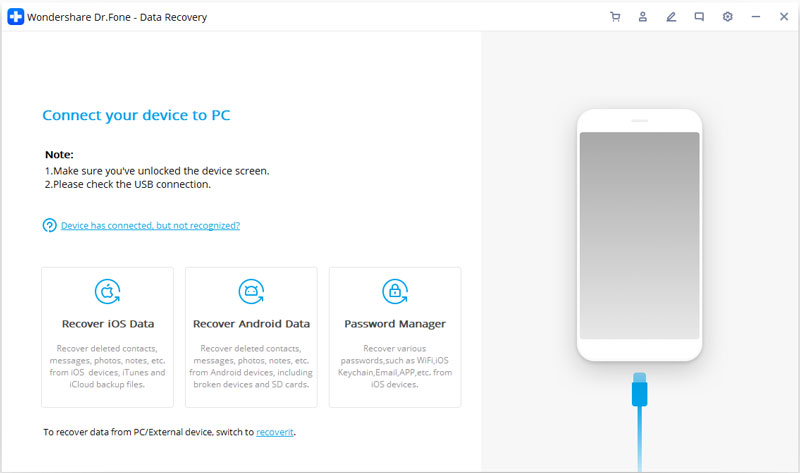
Step 1 - Install Dr.Fone on your PC and launch the software. On its home screen, select the “Data Recovery” option.

Step 2 - In the next screen, you can either connect your iDevice to the PC or click the “Recover iOS Data” to recover files from an iCloud synced file. Since we want to use iCloud synced files, select the latter.
Step 3 - Sign in your iCloud credentials to continue further.
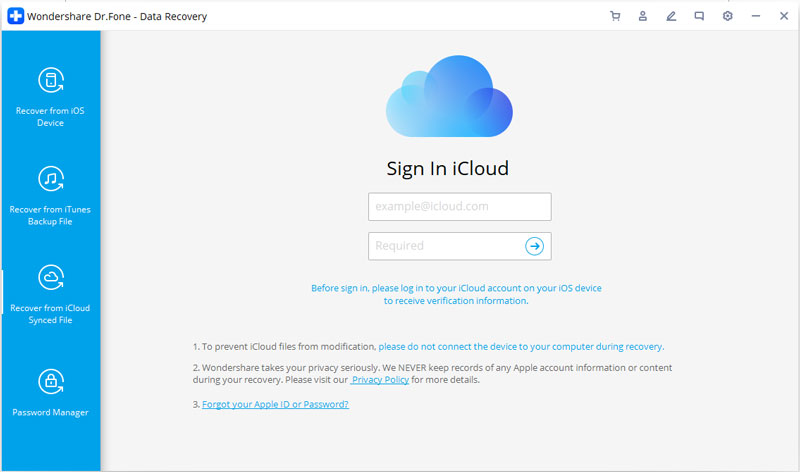
Step 4 - Once you’re logged into iCloud, Dr.Fone will fetch out and display a complete list of iCloud backups. Select the backup that you want to recover files from and click the “Download” button next to it.
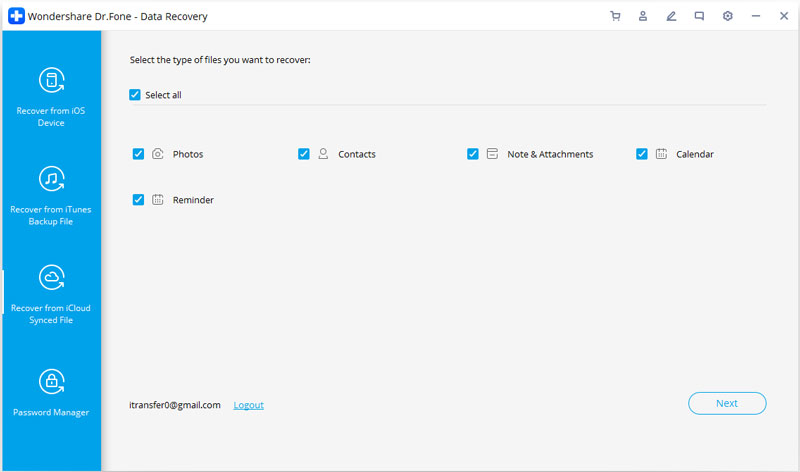
Step 5 - As we mentioned earlier, you can select the files that you want to recover from the iCloud backup. Since we only need photos, select “Camera Rolls” as the file type and click “Next”.
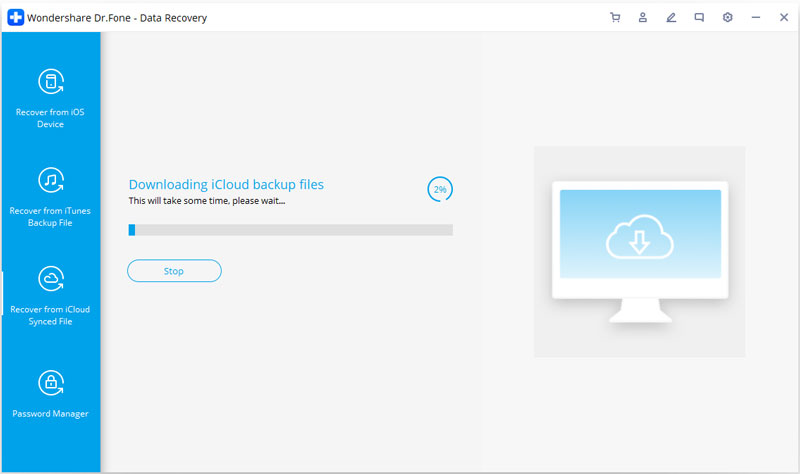
Step 6 - After Dr.Fone successfully scans the select backup, it’ll display a list of photos on your screen. Choose the photo that you want to get back and click “Recover to Computer”. Finally, select a destination folder on your PC and you’ll be good to go.
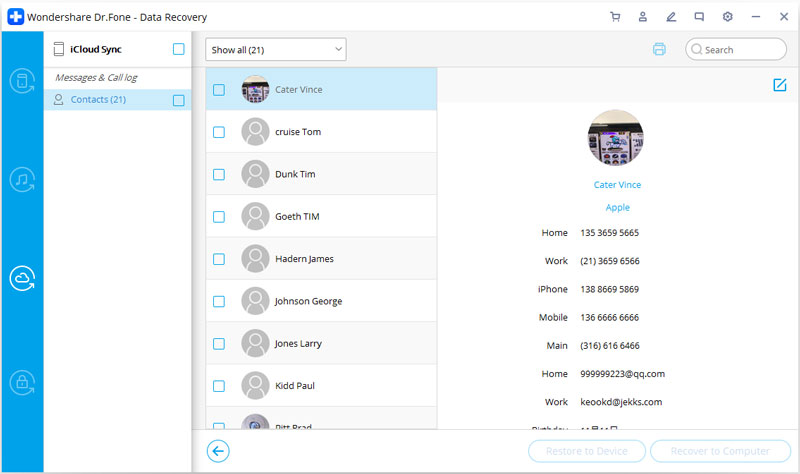
That’s it; the selected photo will be stored on your PC and you can easily transfer it to your iPhone via AirDrop to USB transfer. So, if you have deleted the photo from your iPhone and have an iCloud backup, make sure to Dr.Fone - Data Recovery (iOS) to recover it.
2. Recover Photos from iCloud’s “Recently Deleted” Folder
“ICloud” media kitaphanasyndan bir suraty pozan bolsaňyz, üçünji tarap programma üpjünçiligini ulanmazdan aňsatlyk bilen dikeldip bilersiňiz. Kompýuteriňiz ýaly, hatda iCloud-da “Recentakynda ýok edilen” albomy diýlip atlandyrylýan ýörite “Gaýtadan işlemek binasy” bar.
Her gezek iCloud hasabyňyzdan bir suraty pozanyňyzda, "Recentlyakynda öçürilen" bukjasyna geçiriler we 30 güne çenli dikeldip bilersiňiz. 30 günden soň suratlar iCloud hasabyňyzdan hemişelik ýok ediler we suratlary dikeltmek üçin öňki usuly ulanmaly bolarsyňyz.
Şeýlelik bilen, öňki 30 günde iCloud hasabyndan suratlary pozan bolsaňyz, iCloud-yň “Recentlyakynda ýok edilen” albomyndan suratlary nädip almaly.
1-nji ädim - Kompýuterde iCloud.com-a giriň we şahsyýet maglumatlaryňyz bilen giriň.
Step 2 - Select the “Photos” option and switch to the “Albums” tab in the next screen.

Step 3 - Scroll and click the “Recently Deleted” album.
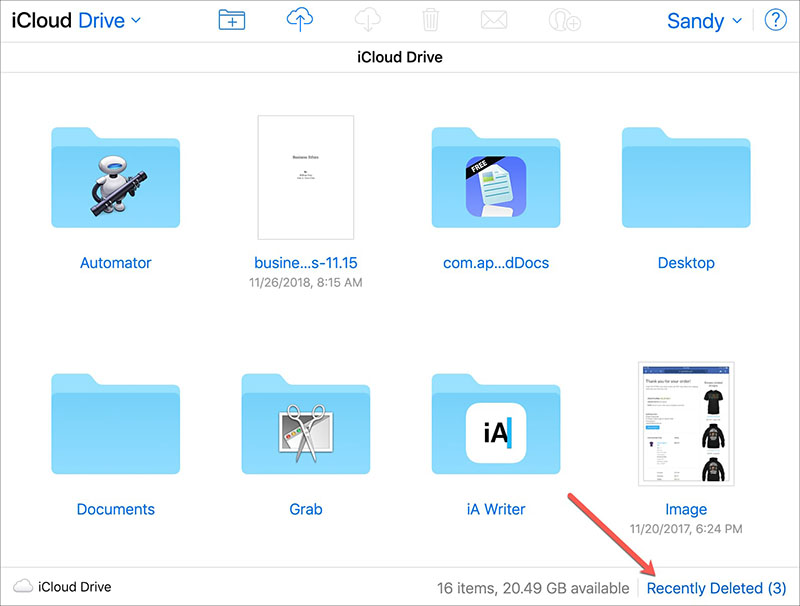
Step 4 - All the photos that you’ve deleted in the past 30 days will be displayed on your screen. Browse through the pictures and select the ones that you want to recover.
Step 5 - Finally, click on “Recover” to move them back to the iCloud media library.
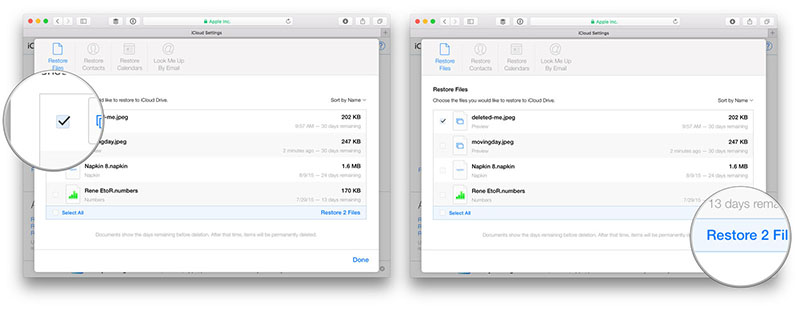
Keep in mind that this method will be only applicable if you’ve deleted the photos from your iCloud account in the last 30 days. In case you’ve already surpassed the 30-days time frame, you’ll have to stick to Method 1 to retrieve photos from iCloud.
3. Retrieve Photos from iCloud Drive
In many cases, users have deleted photos from their iPhone, but they’re stored in iCloud Drive. If that’s the case, downloading these photos to your iPhone will be a piece of cake. Let’s walk you through the step-by-step process of retrieving photos from iCloud Drive.
Step 1 - On your iPhone, go to iCloud.com and login with your credentials.
Step 2 - Click “Photos” and then tap “Select” to choose the images that you want to download.
Step 3 - After you’ve selected the Photos that you want to retrieve, click the “More” icon and select “Download”.

All the selected images will be combined in a dedicated Zip folder automatically and it’ll be downloaded on your iPhone. After this, you can use any Zip extractor to extract the photos from the Zip folder.
Conclusion
Thanks to the iCloud media library and iCloud backup, recovering deleted photos will not be a challenging task at all. However, since Apple keeps changing its features every now and then, you might find it challenging to recover the files using the above-mentioned steps. If that’s the case, simply stick to using Dr.Fone - Data Recovery (iOS) and you’ll be able to recover the deleted photos easily. So, we hope this guide helped you understand how to retrieve photos from iCloud in different situations.
iCloud
- Delete from iCloud
- Fix iCloud Issues
- Repeated iCloud sign-in request
- Manage multiple idevices with one Apple ID
- Fix iPhone Stuck on Updating iCloud Settings
- iCloud Contacts Not Syncing
- iCloud Calendars Not Syncing
- iCloud Tricks
- iCloud Using Tips
- Cancel iCloud Storage Plan
- Reset iCloud Email
- iCloud Email Password Recovery
- Change iCloud Account
- Forgot Apple ID
- Upload Photos to iCloud
- iCloud Storage Full
- Best iCloud Alternatives
- Restore iCloud from Backup Without Reset
- Restore WhatsApp from iCloud
- Backup Restore Stuck
- Backup iPhone to iCloud
- iCloud Backup Messages


Alice MJ
staff Editor