iOS 14 Data Recovery - Recover Deleted iPhone/iPad Data on iOS 14
Apr 28, 2022 • Filed to: Tips for Different iOS Versions & Models • Proven solutions
Losing iPhone or iPad data can be a nightmare for many. After all, some of our most important data files are stored on our iOS devices. It doesn’t matter if your device has been corrupted by a malware or if you have accidentally deleted your data, it can be retrieved after performing iOS 14/iOS 13.7 data recovery. Lately, we have got lots of queries from our readers who wish to recover their lost files. Therefore, we have come up with this in-depth guide to teach you how to perform iOS 14 data recovery in different ways.
Part 1: How to recover lost data directly from iPhone running on iOS 14/iOS 13.7?
If you haven’t taken a backup of your device, then don’t panic! Your data can still be recovered with the help of Dr.Fone - iPhone Data Recovery. Having the highest success rate, the application provides a secure and reliable way to recover deleted files on various iOS devices. Though, in order to get productive results, you should perform the recovery operation as soon as you can. A part of the Dr.Fone toolkit, the application is compatible with every leading iOS version and device (iPhone, iPad, and iPod Touch).
Since it provides a secure and effective solution to perform iOS 14data recovery, it is already used by lots of users the world over. It doesn’t matter if your device has been stuck in the recovery mode or if an update has gone wrong – Dr.Fone iOS Data Recovery has a solution for every adverse situation. It can help you recover your photos, videos, contacts, call logs, notes, messages, and almost every other kind of content.

Dr.Fone - iPhone Data Recovery
World's 1st iPhone and iPad data recovery software
- Provide with three ways to recover iPhone data.
- Scan iOS devices to recover photos, video, contacts, messages, notes, etc.
- Extract and preview all content in iCloud/iTunes backup files.
- Selectively restore what you want from iCloud/iTunes backup to your device or computer.
- Compatible with latest iPhone models.
Now, follow these steps to recover data on your iOS device.
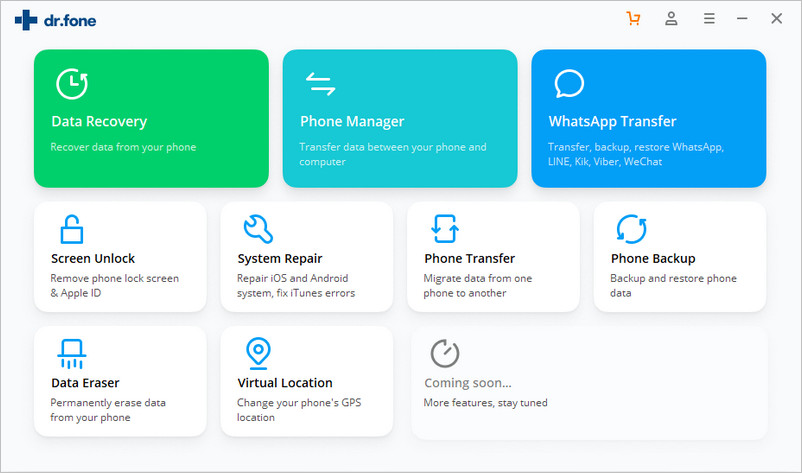
1. Install Dr.Fone iOS Data Recovery on your Windows or Mac and connect your iOS device to it. After launching it, select the option of “Data Recovery” from the welcome screen. Additionally, select “Recover from iOS Device” to proceed.
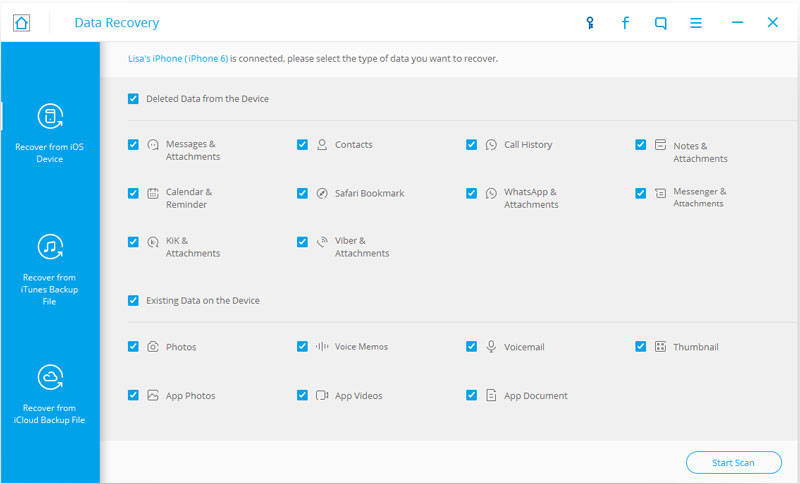
2. Simply choose the kind of data files you wish to scan. You can select existing as well as deleted files. Once you are done, click on the “Start Scan” button to initiate the scanning of data.
3. This will commence the scanning process. It might take a while, depending on the volume of data to be scanned. Make sure that your iOS device is connected to the system until the process is completed.
some of the media content file like music, video, phone have not been scanned, you can try to recover them from iTunes backup. If you are using iphone 5 and before, you have no need to worry about that some media fill can't be recover. please distinguish the text content and media content.
Text Contents:Messages (SMS, iMessages & MMS), Contacts, Call history, Calendar, Notes, Reminder, Safari bookmark, App document (like Kindle, Keynote, WhatsApp history, etc.
Media Contents: Camera Roll (video & photo), Photo Stream, Photo Library, Message attachment, WhatsApp attachment, Voice memo, Voicemail, App photos/video (like iMovie, iPhotos, Flickr, etc.)
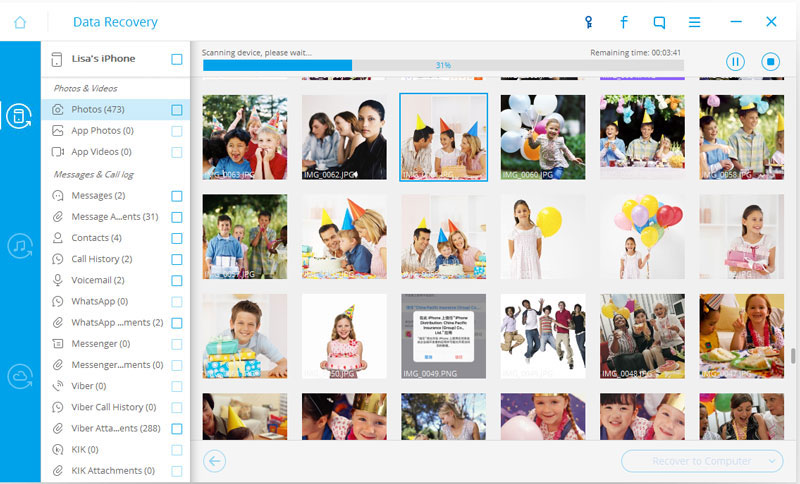
4. Afterward, you can view all the recovered data on the interface. Additionally, you can check the “Only display the deleted items” option to view only deleted data. Your files would be segregated into different categories for your convenience.
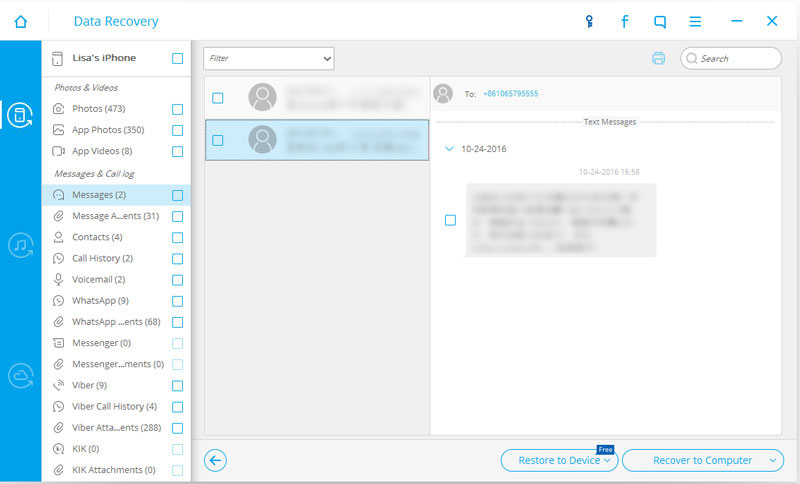
5. From here, you can select the files you want to retrieve and send them to your computer or your device storage. After selecting the files, click on either “Restore to Device” or “Recover to Computer” option.

Wait for a while as your lost information would be retrieved after completing the iOS 14 data recovery process.
Part 2: How to recover lost data from iTunes backup selectively for iOS 14/iOS 13.7 devices?
Most of the iOS users always prepare for the worst-case scenario and prefer taking a timely backup of their data on iTunes. If you have also taken a backup of your iOS device on your system via iTunes, then you can easily use it to restore your content. Though, while performing the iTunes backup restore operation, all your data would be retrieved which will restore your phone entirely.
Therefore, you can simply take the assistance of Dr.Fone - iOS Data Recovery to perform a selective retrieval of the iTunes backup. In this technique, you can simply handpick the kind of data you want back on your device. To perform selective iOS 14 data recovery, simply follow these steps:
1. Connect your iOS device to the system and launch Dr.Fone toolkit. From the welcome screen, click on the “Data Recovery” option. Now, from the left panel, select the option of “Recover from iTunes Backup”.
2. The interface will automatically detect the existing iTunes backup files stored on your system. Additionally, it will provide details regarding the backup date, device model, etc. Simply select the respective backup file and click on the “Start Scan” button to proceed.
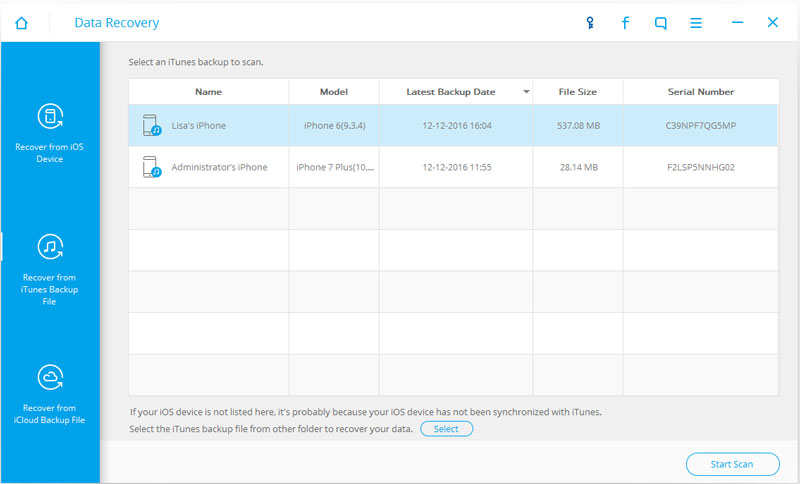
3. Wait for a while as the interface will prepare a bifurcated view of your data. You can simply visit the category to view your content or can even use the search bar to look for a specific file.
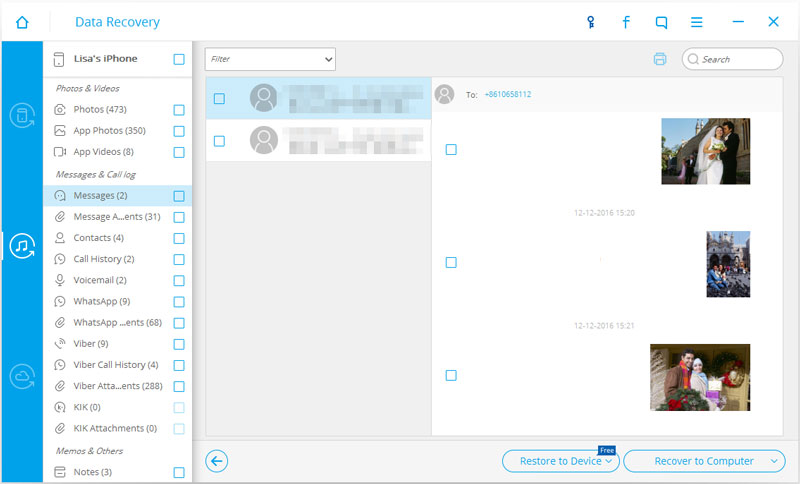
4. To retrieve your data, just select it and choose to either restore it to your device or the local storage on your computer.

Part 3: How to recover lost data from iCloud backup selectively for iOS 14/iOS 13.7 devices?
Just like iTunes backup, Dr.Fone toolkit can also be used to restore selective data from iCloud backup. To keep their data safe, lots of iOS users enable the feature of iCloud backup on their device. This creates a second copy of their content on the cloud that can later be used to restore the device.
Though, in order to restore content from iCloud, one needs to reset their device. Apple only allows the restoring of iCloud backup while setting up the device. Also, there is no provision to perform a selective iOS 14 data recovery. Thankfully, with the help of Dr.Fone -iOS Data Recovery, you can make it happen. All you need to do is follow these easy instructions.
1. Connect your device to the system and launch the Dr.Fone application. On its welcome screen, click on the “Data Recovery” option. From the Recovery dashboard, choose the option of “Recover from iCloud Backup Files" to start the process.
2. Provide your credentials and login to iCloud from the native interface.
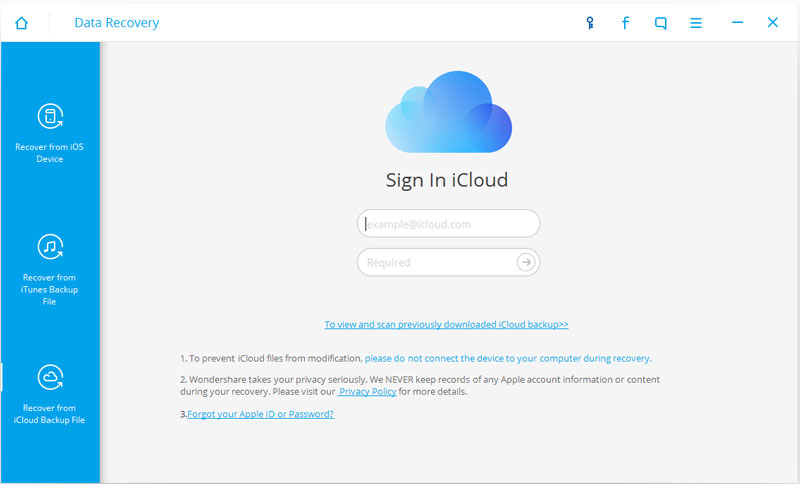
3. After successfully logging to your iCloud account, it will automatically extract the saved backup files. View the provided info and choose to download the file of your choice.
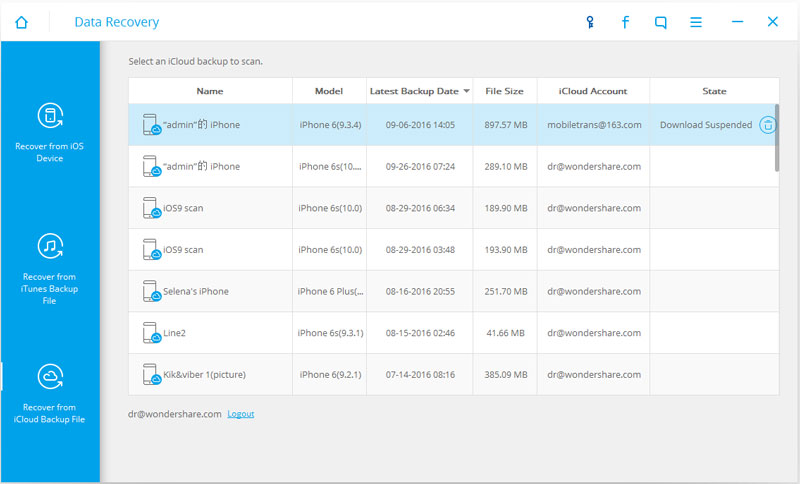
4. Once the file would be downloaded, the interface will ask you to select the kind of data files you wish to retrieve. Make your selection and click on the “Next” button.
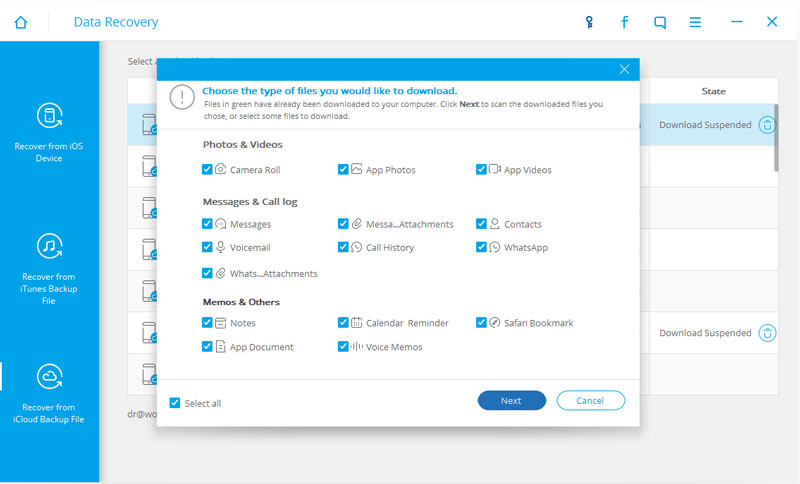
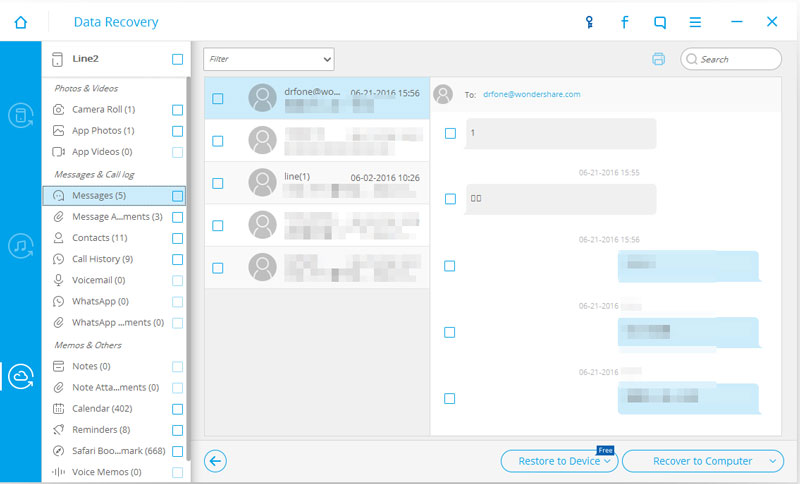
5. Wait for a while as the application will retrieve the selected files and list your content in different categories. From here, you can simply select the data you wish to retrieve and recover it on your computer or directly on your device.
By using Dr.Fone iOS Data Recovery, you can simply retrieve the lost data files from your device, even if you haven’t taken a prior backup. Furthermore, it can also be used to perform a selective iOS data recovery from iTunes or iCloud backup. Feel free to use the application as per your requirements and never lose your important data files again.
iOS 11
- iOS 11 Tips
- iOS 11 Troubleshootings
- Software Update Failed
- iPhone Verifying Update
- Software Update Server Couldn't Be Contacted
- iOS Data Recovery
- App Store Not Working on iOS 11
- iPhone Apps Stuck on Waiting
- iOS 11 Notes Crashing
- iPhone Won't Make Calls
- Notes Disappeard After iOS 11 Update
- iOS 11 HEIF


Selena Lee
chief Editor