How to Import Photo Albums From iPhone To Mac?
Apr 27, 2022 • Filed to: Backup Data between Phone & PC • Proven solutions
Through this article, we will deal with various methods to help you to import albums from iPhone to Mac.
Whether you want to transfer albums from iPhone to Mac selectively or transfer all the photo albums at the same time, this article is definitely for you.
The first method will teach you how to import albums from iPhone to Mac at once using Dr.Fone-Phone Manager. In the second method, you will get to know how to transfer albums from iPhone to Mac with iTunes. Finally, the third method is on how to import albums from iPhone to Mac through iCloud.
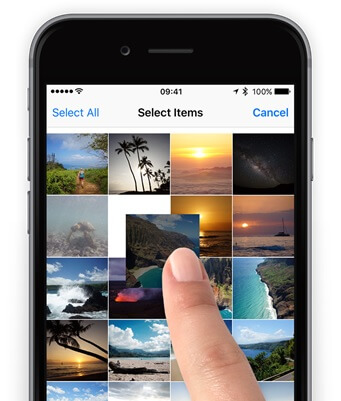
Part 1: Import Albums from iPhone to Mac at once Using Dr.Fone-Phone Manager
Dr.Fone is a popularly used software. Wondershare developed it. The biggest advantage of using Dr.Fone-Phone Manager is that it is compatible with both Android as well as iOS devices. With this tool, you can not only recover and transfer data, but you can also erase and backup your files. It is a very user-friendly and reliable tool.
Dr.Fone-Phone Manger (iOS) is a smart and secure tool or software that helps to manage your data. Using Dr.Fone-Phone Manager, you can transfer photo albums, songs, contacts, videos, SMS, etc. from your iPhone to PC or your Mac.
The best part is that if you are looking for a method that does not involve using iTunes, then you should go through the procedure given below to learn in detail how to transfer an album from iPhone to Mac using a file transfer tool. Another benefit of using this tool is that it can even help you recover the lost data of your iPhone. It is very easy-to-use software.

Dr.Fone - Phone Manager (iOS)
Your must-have iOS phone transfer, between iPhone, iPad and computers
- Transfer, manage, export/import your music, photos, videos, contacts, SMS, Apps etc.
- Backup your music, photos, videos, contacts, SMS, Apps etc. to computer and restore them easily.
- Transfer music, photos, videos, contacts, messages, etc from one smartphone to another.
- Transfer media files between iOS devices and iTunes.
- Fully compatible with iOS 7, iOS 8, iOS 9, iOS 10, iOS 11, iOS12 and iPod.
Step 1: Firstly, download the Dr.Fone software for your Mac. After installation, you have to launch it on your system. Select "Phone Manager" from the central interface.

Step 2: Then, connect your iPhone to the Mac with the help of a USB cable. After connecting the iPhone, choose the "Transfer Device Photos to Mac" option. This single step is enough to import albums from iPhone to Mac at just one click.
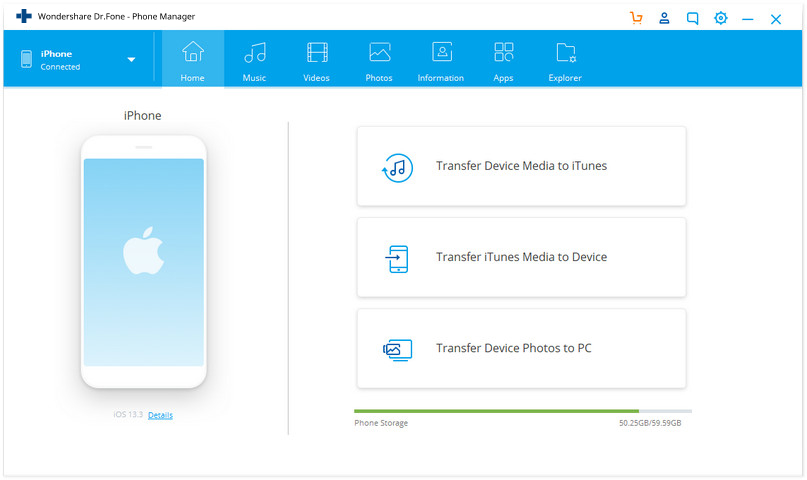
Step 3: Now, this step is for those of you who want to transfer albums from iPhone to Mac selectively by using Dr.Fone. You will see a "Photos" section at the top, click on that.
All of your iPhone's images will be shown arranged categorically in different folders. Then, you can easily choose the photos you want to import in your Mac. Click on the "Export" button.
Step 4: Then, choose a location where you want to store or save your iPhone Photos.
Part 2: Transfer Album From iPhone to Mac with iTunes
iTunes is a top-rated media player which was developed by Apple Inc, with iTunes on Mac, you can watch movies, download songs, TV shows, etc.
On the iTunes store, which is an online digital store, you can find music, audiobooks, films, podcasts, etc. It is used to manage multimedia files on PCs with Mac as well as Windows operating systems. iTunes was released in the year 2001. It helps us to conveniently sync the digital media collection on your computer to a portable device.
Perhaps the most compelling reason you'd need to utilize the iTunes software is if you effectively own one of Apple's gadgets or expect to get one. As you would expect, gadgets, for example, the iPhone, iPad, and iPod Touch have many features that work consistently with iTunes and at least the iTunes Store.
With the help of iTunes, you can transfer albums from iPhone to Mac.
Step 1: Firstly, download the news version of iTunes on the Mac. To import albums from iPhone to Mac, you require iTunes 12.5.1 or later.
Step 2: Connect your iPhone to the Mac through a USB cable.
In case you are making use of an SD card, place it into the special sort provided in your Mac for SD cards.
Step 3: In case you see any prompt asking you to Trust This Computer, click on Trust to continue.
Step 4: The Photos app may open automatically, or you can open it if it does not open automatically.
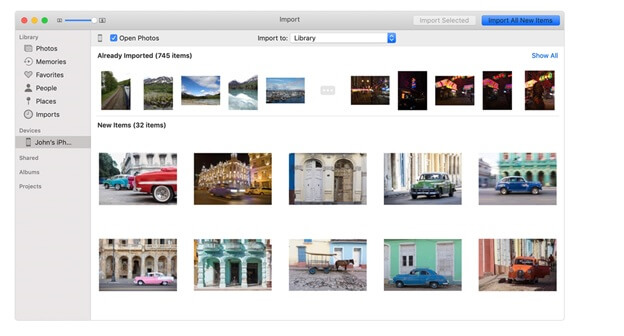
Step 5: You will see an Input screen, along with that all your iPhone's photos will be visible. Select the Import tab on the top of the Photos app, in case the Import screen does not appear automatically.
Step 6: Choose the “Import All New Photos” option if you want to import all the new photos. To import only some photos selectively, click on the ones you wish to import in your Mac. Choose the Import Selected option.
Step 7: Now you can disconnect your iPhone from the Mac.
How to Transfer Photos Albums from iPhone to Mac through iCloud?
Apple has a cloud-based platform called iCloud, that you can use to store and sync photographs, archives, motion pictures, music, and a mess more. You can discover the entirety of your iCloud content on any of your Apple gadgets utilizing a similar Apple ID, from re-downloading applications and games to sitting in front of the TV shows and motion pictures. Here's all that you have to think about iCloud on iPhone, iPad, and Mac.
iCloud is a handy tool that is used to store photos, documents, videos, music, apps, and much more.
You can even share photos, locations, etc. with your family members and friends. Here, we list out the steps in detail on how to import albums from iPhone to Mac using iCloud.
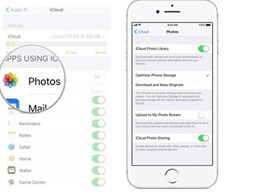
Step 1: Firstly, open the "Settings" app, click on "Apple ID", then select "iCloud", then click on "Photos" and finally click on "iCloud Photos Library" to sync iPhone albums to iCloud. Make sure that the iPhone is connected to a stable WiFi network.
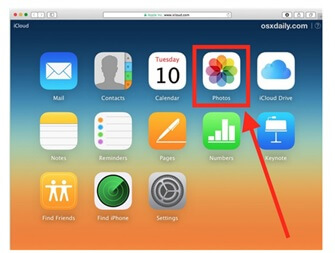
Step 2: Go to iCloud.com with the help of any web browser on your Mac. After signing in with your Apple Id, go to "Photos" and then "Albums". Now you can choose any album and select the photos. By clicking the download button, you can save all the photos to a location in the Mac.
Part 3: Import Album From iPhone to PC Through iCloud
Another method to transfer the photo albums to your Mac is by using iCloud Drive.
The iCloud Drive is a cloud storage service developed by Apple Inc, where you can store all your files. iCloud Drive was launched in 2011, and it is a part of iCloud. With iCloud Drive, you can store all your files or data in one place. Also, you can access these files from other devices such as your Mac, iOS device, etc.
Step 1: Firstly, open the "Settings" app, click on "Apple ID", then select "iCloud". After that, click on "iCloud Drive" to activate it to import albums from iPhone to Mac.
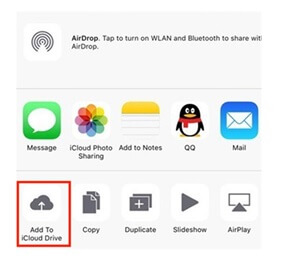
Step 2: Open the Photo album on the iPhone. Then, select the photos in the Photo album. To initiate the next panel, hit the Share button. To add the photos in the Photo album to the iCloud Drive space, select "Add to iCloud Drive".
Step 3: Visit "Apple Icon" on the Mac machine. Then, select "System Preferences".
Step 4: After that, choose "iCloud" and then choose "iCloud Drive". Now, in the bottom right of the interface, click on the "Manage" button.
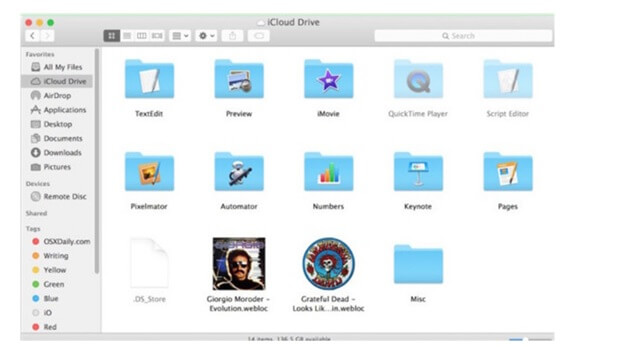
Step 5: In "Finder", go to the iCloud Drive Folder. Look for the iPhone album you just uploaded to the iCloud Drive space. Click on the photo album, hit the download button to save it to the Mac folder.
Comparison of These Three Methods
| Dr.Fone | iTunes | iCloud |
|---|---|---|
|
Pros-
|
Pros-
|
Pros-
|
|
Cons-
|
Cons-
One can’t transfer the entire folder. |
Cons-
|
Conclusion
In the end, after browsing through the entire article, where we discussed the different methods of importing albums from iPhone to Mac. Out of the many methods, it is pretty straightforward to say that Dr.Fone software is the preferred choice when you have to transfer albums from iPhone to Mac.
This free software does with great ease, all you’ve done is to download it on your Mac PC, then connect your iPhone to your system, and the transfer will be initiated right away. This software is compatible with most versions of iOS7 and beyond. The Dr.Fone is safe and reliable.
Have you tried any of these above-mentioned methods, we would love to hear from you, share in the comment section of this blog post!
iPhone Surat geçirmek
- Suratlary iPhone-a import ediň
- Suratlary Mac-dan iPhone-a geçiriň
- Suratlary iPhone-dan iPhone-a geçiriň
- Suratlary iCloud-dan iPhone-dan iPhone-a geçiriň
- Suratlary noutbukdan iPhone-a geçiriň
- Suratlary Kameradan iPhone-a geçiriň
- Suratlary kompýuterden iPhone-a geçiriň
- IPhone suratlaryny eksport ediň
- Suratlary iPhone-dan kompýutere geçirmek
- Suratlary “iPhone” -dan “iPad” -a geçiriň
- Suratlary iPhone-dan Windows-a import ediň
- Suratlary iTunes bolmasa kompýutere geçiriň
- Suratlary iPhone-dan noutbuga geçiriň
- Suratlary iPhone-dan iMac-a geçiriň
- Suratlary iPhone-dan alyň
- Suratlary iPhone-dan göçürip alyň
- Suratlary iPhone-dan Windows 10-a import ediň
- Has köp iPhone surat geçiriş maslahatlary


Elisa MJ
işgär redaktory