How to Sync iPad to New Computer
Apr 27, 2022 • Filed to: Backup Data between Phone & PC • Proven solutions
"I bought a new computer instead of my old one. Currently, I want to sync my iPad 2 with iTunes on the new computer. How can I accomplish this easily?"
Many times when you update your computer to a new version, you would need to sync your iPad to the new computer as well, as the iPad was synced with your previous system. Sometimes it is confusing and troublesome to do this task, especially when you have an enormous amount of data and you are afraid to lose them. To help you to complete the process easier, we will give you the best ways to sync your iPad to a new computer without the worry of losing any data. We will discuss the solution either with iTunes or without iTunes. So even you don’t have iTunes or are not enjoyable with the function of iTunes, you can try other solutions below.
2nd Option: Syncing iPad to New Computer Using Without iTunes
Besides iTunes, you can sync your iPad by using some third-party tools to the new computer. Here we take Dr.Fone - Phone Manager (iOS) as an example, which is a highly recommended phone manager program that makes the process of syncing easy to be done. While users are syncing iPad to a new computer with iTunes, there is always a risk of losing the data as we mentioned above. However, with Dr.Fone - Phone Manager (iOS), you can sync photos, music, movies, playlists, iTunes U, podcasts, audiobooks, TV shows to new iTunes without the worry of data loss. You can also transfer or backup the varieties of data, like photos, contacts, and SMS to your new computer from any apple devices including iPad.

Dr.Fone - Phone Manager (iOS)
Transfer MP3 to iPhone/iPad/iPod without iTunes
- Transfer, manage, export/import your music, photos, videos, contacts, SMS, Apps etc.
- Backup your music, photos, videos, contacts, SMS, Apps, etc. to computer and restore them easily.
- Transfer music, photos, videos, contacts, messages, etc from one smartphone to another.
- Transfer media files between iOS devices and iTunes.
- Fully compatible with iOS 7, iOS 8, iOS 9, iOS 10, iOS 11, iOS 12, iOS 13 and iPod.
Note: Both Windows and Mac versions of Dr.Fone are helpful for transferring files between iOS devices and computers. You need to choose the right version in accordance with your operating system.
Dr.Fone - Phone Manager (iOS) is an amazing program that enables you to transfer the playlist, music, videos, TV shows, podcasts, images, music videos, audiobooks, and iTunes U between iDevices, PC, and iTunes. Some of the striking features of Dr.Fone - Phone Manager (iOS) are given below:
Supported Devices and iOS System
Below given is the list of the devices and iOS supported by Dr.Fone - Phone Manager (iOS)
iPhone: iPhone X, iPhone 8, iPhone 8 Plus, iPhone 7 Plus, iPhone 7, iPhone 6s, iPhone 6s Plus, iPhone 6, iPhone 6 Plus,iPhone 5s, iPhone 5c, iPhone 5, iPhone 4s, iPhone 4, iPhone 3GS
iPad: iPad 3, iPad Pro, iPad Air 2, iPad mini with Retina display, iPad Air, iPad mini, iPad with Retina display, The New iPad, iPad 2, iPad
iPod: iPod touch 6, iPod touch 5, iPod touch 4, iPod touch 3, iPod classic 3, iPod classic 2, iPod classic, iPod shuffle 4, iPod shuffle 3, iPod shuffle 2, iPod shuffle 1, iPod nano 7, iPod nano 6, iPod nano 5, iPod nano 4, iPod nano 3, iPod nano 2, iPod nano
Supported iOS: iOS 5, iOS 6, iOS 7, iOS 8, iOS 9, iOS 10, iOS 11, iOS 12, iOS 13

Sync iPad to the New Computer with Dr.Fone - Phone Manager (iOS)
The following guide will outline how to sync the iPad to a new computer with Dr.Fone - Phone Manager (iOS). Check it out.
Step 1. Install and Open Dr.Fone
First of all, download and install Dr.Fone on your computer. Run it and select "Phone Manager". The software will ask you to connect your iOS device.

Step 2. Connect iPad with PC Using the USB cable
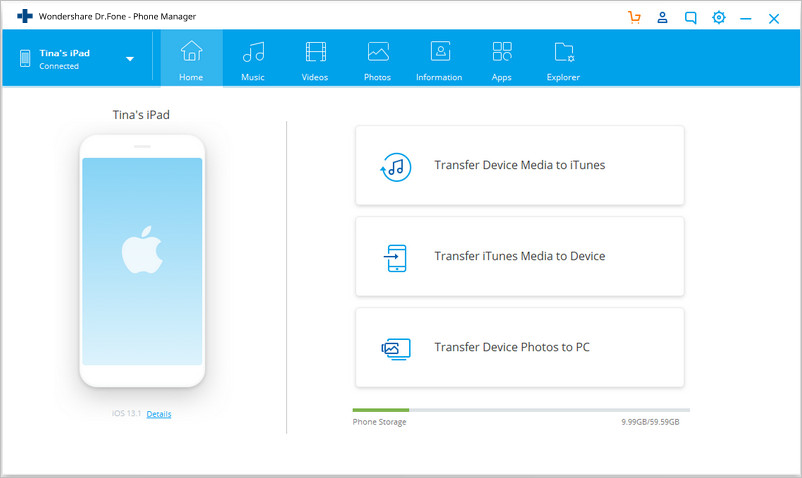
Connect the iPad to the computer with a USB cable, and the program will automatically recognize your device. Then you'll see the different categories of the files in the main interface.
Step 3. Select the targeted iPad Files
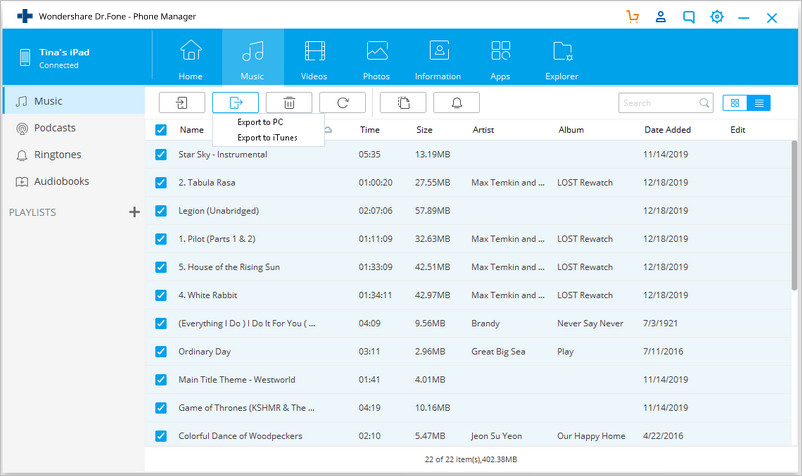
Choose one category from the options and the files will show up in the right part of the window. Check the files you want to transfer and click the "Export" button at the top middle of the software window. For the multimedia files, Dr.Fone allows you to select "Export to PC" or "Export to iTunes" in the drop-down menu after clicking the "Export" button.
Export Music to New iTunes Library with One Click
In addition, Dr.Fone - Phone Manager (iOS) provides you a chance to sync iPad files to the iTunes Library with one click. The following steps are showing you how to do that.
Step 1. Rebuild iTunes Library
Start Dr.Fone on your computer and connect iPad to computer with the USB cable. The software will detect your iPad automatically. You can choose "Transfer Device Music to iTunes" in the main interface, and a pop-up window will show up and ask you whether you want to copy media files to iTunes Library. Click the "Start" button to transfer music and other media files to the iTunes library.

2nd Option: Syncing iPad to New Computer Using iTunes
Syncing iPad or any iOS devices to a new computer basically means that you are making the iTunes ready to accept the new device. When the iPad is connected to a new computer for syncing, iTunes will offer the option of "erase and replace" to the content which is present on your iPad with the content of the iTunes library of a new computer. Losing all the data from your previous iTunes library may definitely sound frightening, but there are ways in which you can sync iPad to a new computer using iTunes without losing any data like our suggestion tool above.
Before syncing your iPad to a new computer, firstly you need to make a backup of all the data present on your device. For transferring the data which you purchased from iTunes, you can simply transfer the items from the device. But for other data, you should back up the iPad with iTunes. While the backup data is finished, you can sync the iPad by following the given steps below.
Note: Please note that iTunes won't back up all data on your iPad. For more information about iTunes backup, please take a look at the Apple Support page.
Step 1. Install and Open iTunes on New Computer
Download and install the latest version of iTunes on your computer. Then you can start operating it.
Step 2. Connect iPad to the New Computer
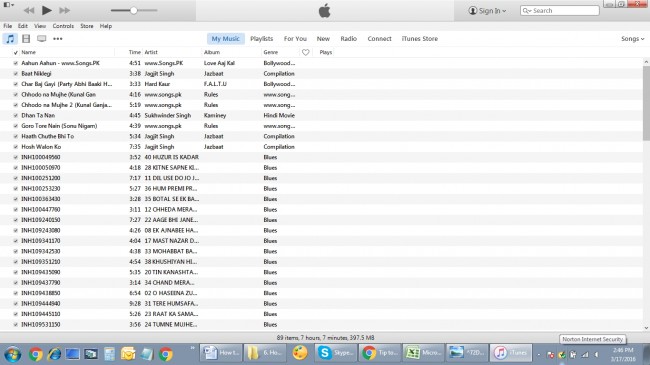
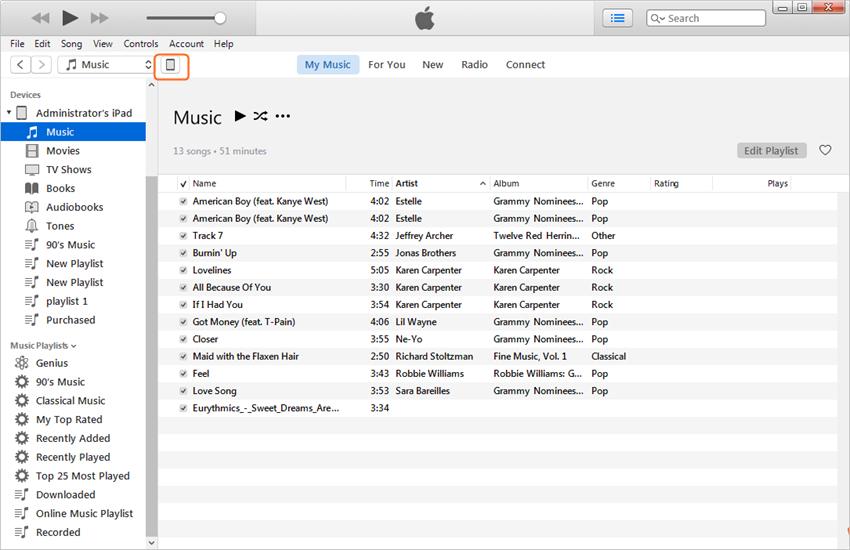
Now you should connect iPad to the computer with the USB cable. Then iTunes will automatically detect your iPad.
Step 3. Authorize the Computer to iTunes
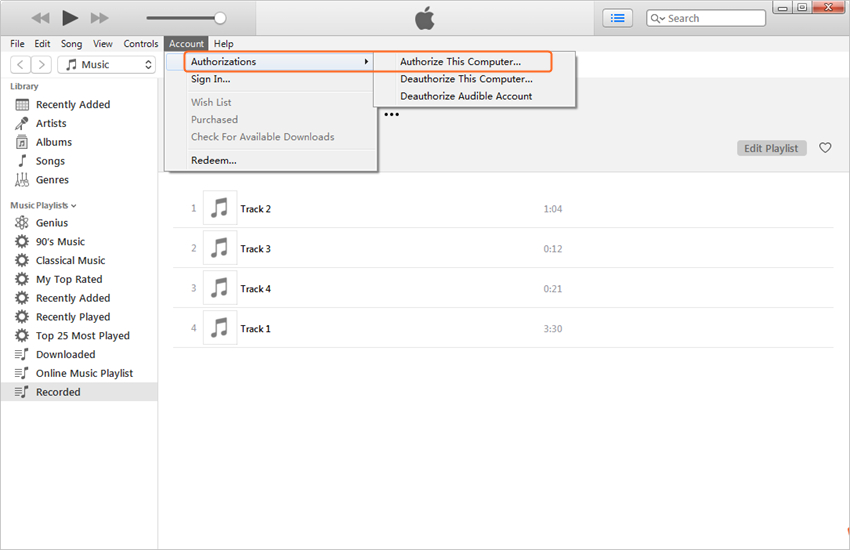
Now click on the "Account" and "Authorization" to authorize this computer at the upper left corner of the iTunes window.
Step 4. Log in with Your Apple ID
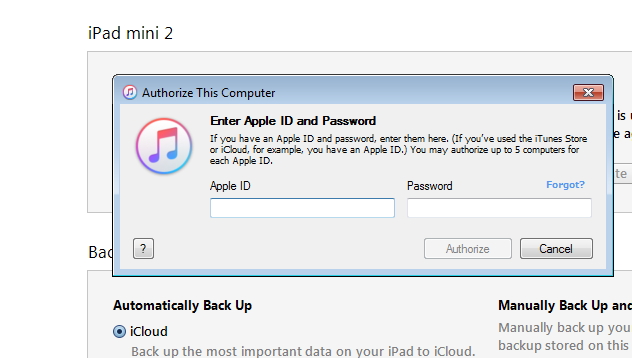
If this is the first time you authorize this computer, you need to log in with your Apple ID to accomplish the task. If not, you can skip to step 5.
Step 5. Back up iPad with iTunes
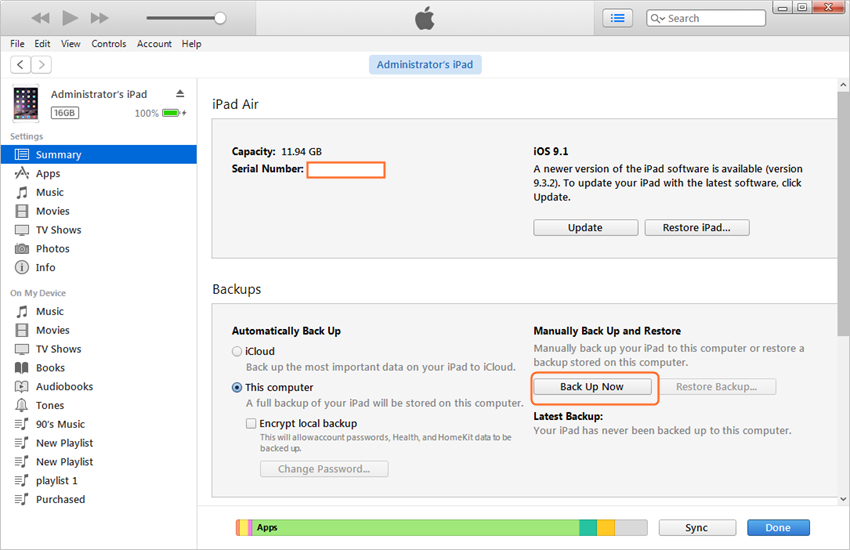
Now choose the summary panel of iPad in the left sidebar, and click "Back up Now". Then iTunes will make a backup for iPad on your computer.
When the backup is created on your computer, you can free safe to manage the files on your iPad. But unfortunately, Apple doesn't provide a way for the users to view the files in the backup. To fix this issue, let's have a look on another better way without iTunes.
So these are the difference how iTunes and Dr.Fone - Phone Manager (iOS) help you to sync iPad to a new computer. This tool will support you to finish the task for syncing iPad with ease. In comparison to iTunes, Dr.Fone - Phone Manager (iOS) provides a more convenient and direct solution to manage iPad files. If you are interested in this iPad manager, just free download the software to have a try.
“iPad” maslahatlary
- “IPad” -dan peýdalanyň
- “iPad” surat geçirişi
- Sazy “iPad” -dan “iTunes” -a geçiriň
- Satyn alnan zatlary “iPad” -dan “iTunes” -a geçiriň
- “IPad” dublikat suratlaryny pozuň
- Sazy “iPad” -da göçürip alyň
- “IPad” -y daşarky disk hökmünde ulanyň
- Maglumatlary “iPad” -a geçiriň
- Suratlary kompýuterden “iPad” -a geçiriň
- MP4-i “iPad” -a geçiriň
- Faýllary kompýuterden “iPad” -a geçiriň
- Suratlary Mac-dan ipad-a geçiriň
- Programmalary “iPad” -dan “iPad” / “iPhone” -a geçiriň
- “ITunes” -dan wideolary “iPad” -a geçiriň
- Sazy “iPad” -dan “iPad” -a geçiriň
- Bellikleri “iPhone” -dan “iPad” -a geçiriň
- “IPad” maglumatlary PC / Mac-a geçiriň
- Suratlary “iPad” -dan “Mac” -a geçiriň
- Suratlary “iPad” -dan kompýutere geçiriň
- Kitaplary “iPad” -dan kompýutere geçirmek
- Programmalary “iPad” -dan kompýutere geçirmek
- Sazy “iPad” -dan kompýutere geçirmek
- “PDF” -ni “iPad” -dan kompýutere geçiriň
- Bellikleri “iPad” -dan kompýutere geçirmek
- Faýllary “iPad” -dan kompýutere geçirmek
- Transfer Videos from iPad to Mac
- Transfer Videos from iPad to PC
- Sync iPad to New Computer
- Transfer iPad Data to External Storage


Daýza ýagyş
işgär redaktory