
How to Transfer Photos from Phone to Laptop Without USB

Apr 27, 2022 • Filed to: Data Transfer Solutions • Proven solutions
There are certain times when you might want to transfer files from your phone to your laptop for saving them or editing them on a big screen. You can also have storage problems with your phone and want to secure your important data on your laptop. It is common for people to use a USB cable for these needs. But what if your USB cable is damaged? Or simply you can't find it?
If this is the case, you should think of smarter ways to transfer photos from phone to laptop without USB. To enlighten more on this topic, the article will teach you the following different ways to carry out the transfer process.
Part 1: Transfer Photos from Phone to Laptop without USB via Bluetooth
Several methods can teach you how to transfer photos from phone to laptop without a USB which would save your time and hassle. Technology has evolved rapidly, and Bluetooth is the earliest way to transfer data between two devices without any USB. Therefore, this part will guide you the procedure of transferring files without USB with Bluetooth:
Step 1: The very first step requires you to go to the “Settings” menu from the laptop. Turn the “Bluetooth” on. You can also turn it on by clicking the Windows logo from the lower-left corner of the desktop and typing "Bluetooth" on the search bar.
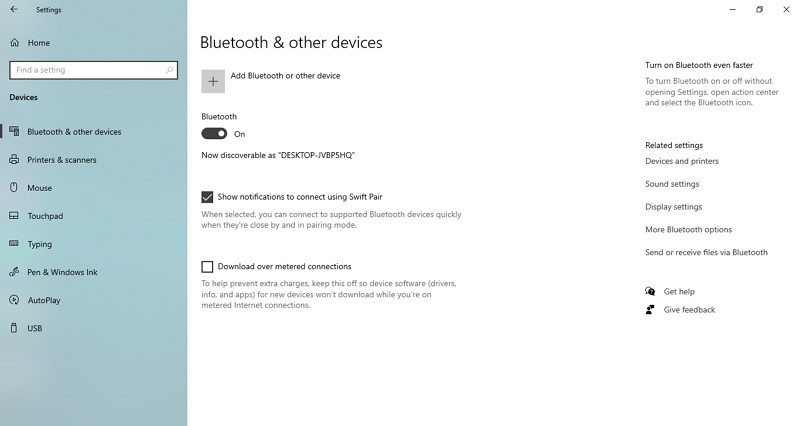
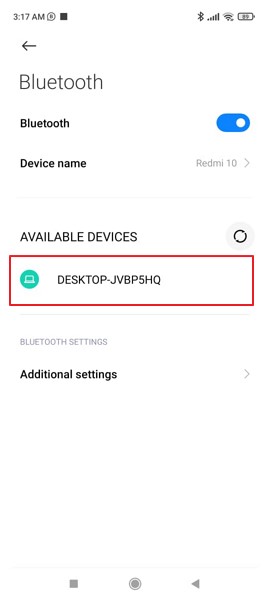
Step 2: Now, open the “Bluetooth” settings on your phone, and search for the name of your laptop from “Available Devices." Pair your laptop and Phone together via a verification code.
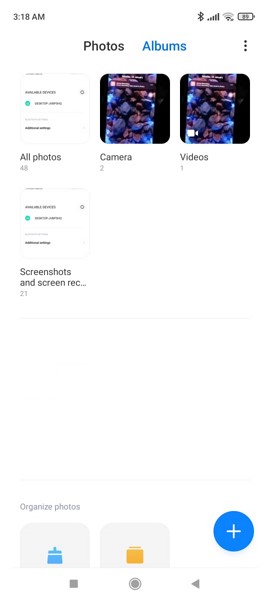
Step 3: When they are connected successfully, hold your phone and head over to the "Gallery." Select the photos you want to transfer from your phone to your laptop.
Step 4: After you select the photos, click the “Share” icon. Now, tap “Bluetooth” and select the name of your laptop. Now, click on “Receive the File” on your laptop to accept the file transfer offer. Make sure that the connection between both the devices, to finish the photos transfer procedure.

Part 2: Transfer Photos from Phone to Laptop without USB via Email
Email is a common source of communication between representatives and spokespersons of companies. However, this mode can also be utilized to transfer data among your family, friends, or your other device. This convenient method would not require you to use a USB for the connection. However, there is a limited size available for attachments in email.
Now, we will recognize the steps required in transferring photos from phone to laptop without USB via email methodology.
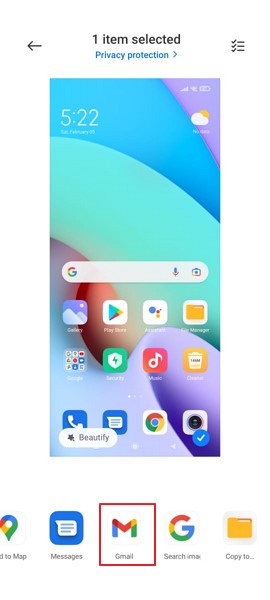
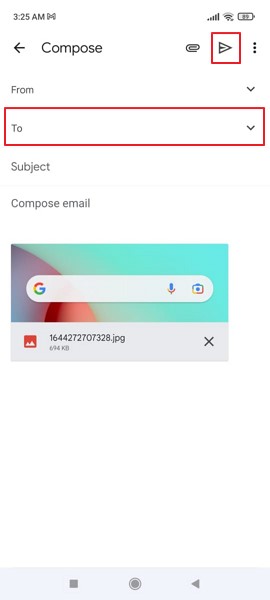
Step 1: Hold your phone and open the “Gallery” app. Choose all the photos that you need to transfer to your laptop. After selecting the pictures, tap on the "Share" icon, and further, choose the "Mail" option. Now, a "Recipient" section will appear.
Step 2: Type the email address where you want to send the pictures, and click the “Send” button. Photos will be sent as an email attachment.
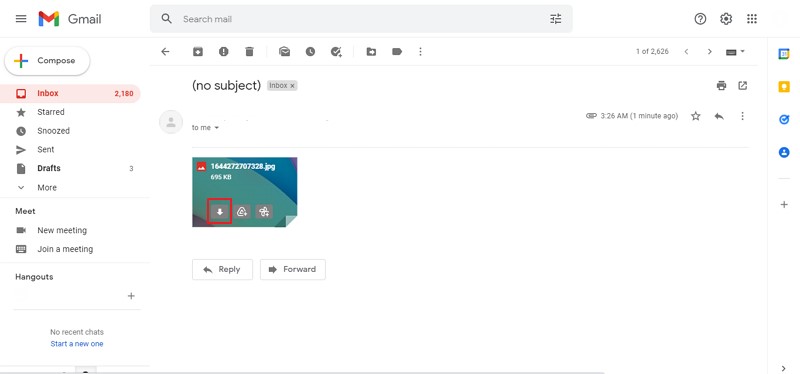
Step 3: Now, open the mailbox on your laptop and log in to the account where you sent the attachments. Open the mail with attachments and download the attached photos on your laptop.
Part 3: Transfer Photos from Phone to Laptop without USB via Cloud Drive
Cloud storage services are excellent services for the sake of sharing videos and photos. It makes the task super easy as well as saves your files in a secure position. Now, let's understand the transfer process of how to transfer photos from phone to laptop without USB cable via Google Drive.
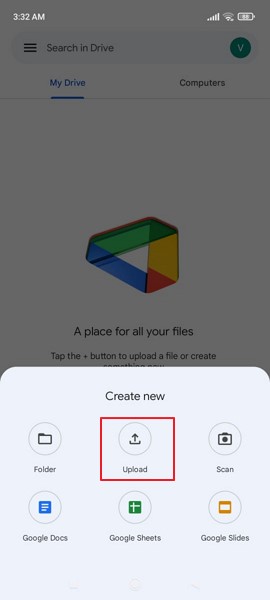
Step 1: You need to download and install the “Google Drive” app on your phone and launch it. Login with a Google account. If you don’t own a Google account, register yourself on Google and continue the process.

Step 2: After you log in, tap the "+" or the "Upload" button from the main page of Google Drive. It will allow you to upload the photos you want to allocate to Google Drive.
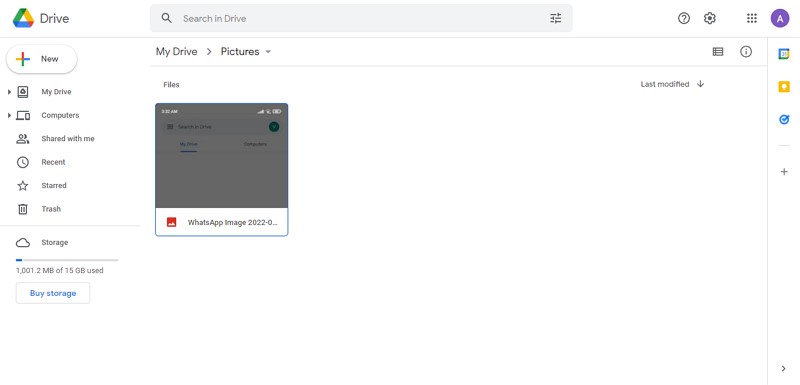
Step 3: After successfully uploading the photos to Google Drive, open the Google Drive website on your laptop. Log in to the same Gmail account on which you uploaded the photos. Move to the folder where the target photos are present. Select the photos you want to, and download them on the laptop.
Part 4: Transfer Photos from Phone to Laptop without USB via Using Apps
The above parts have discussed the ways of transferring pictures from phone to laptop via USB, email, and cloud method. Now, let’s move on and learn the process of copying photos from phone to laptop with the help of Transfer applications:
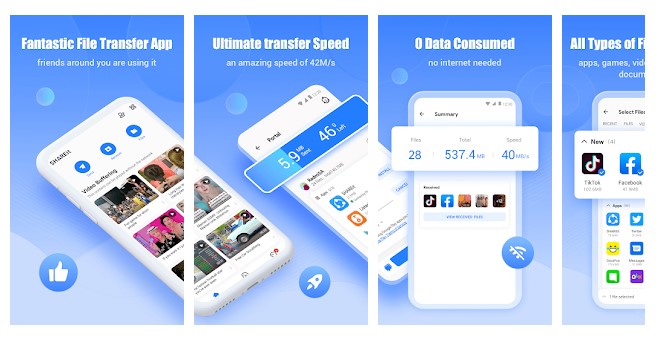
1. SHAREit (Android/iOS)
SHAREit is an advanced application that lets people transfer their photos, videos, documents, and large-sized applications. This application is 200 times faster than Bluetooth, as its highest speed is up to 42M/s. All the files are transferred without causing any damage to their quality. There is no requirement for mobile data or a Wi-Fi network to transfer the photos with SHAREit.
SHAREit supports all the operating systems, including OPPO, Samsung, Redmi, or iOS devices. With SHAREit, it is super easy-going to view, move, or delete photos to maintain your device's storage. This application also allows its best to secure the user data and provide security to its users.
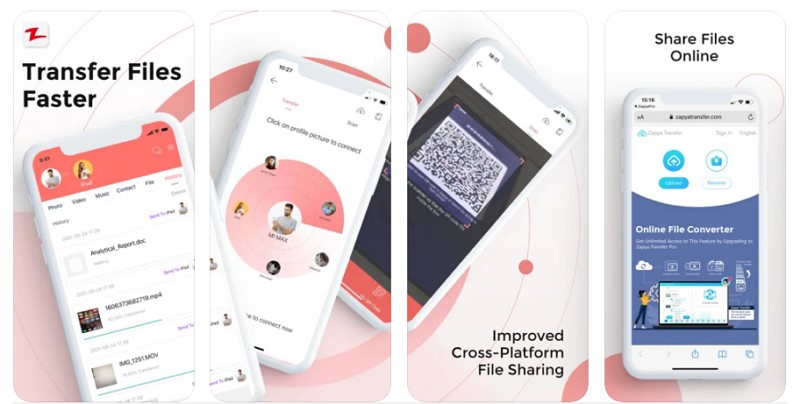
2. Zapya (Android/iOS)
Zapya is another application that lets users transfer files as well as applications. Whether you want to transfer from an android phone or iOS device, no matter if you are offline or online, Zapya offers amazing ways to transfer files. It allows people to create a group and invite others. It generates the personalized QR code that other scans, and then you can shake it to attach with another device.
Moreover, if you have to transfer files to a nearby device, you can simply send files to them via Zapya. This application allows people to share bulk files and complete folders at once. If you don't want others to access your photos, you are allowed to select the personal files and lock them in a hidden folder.
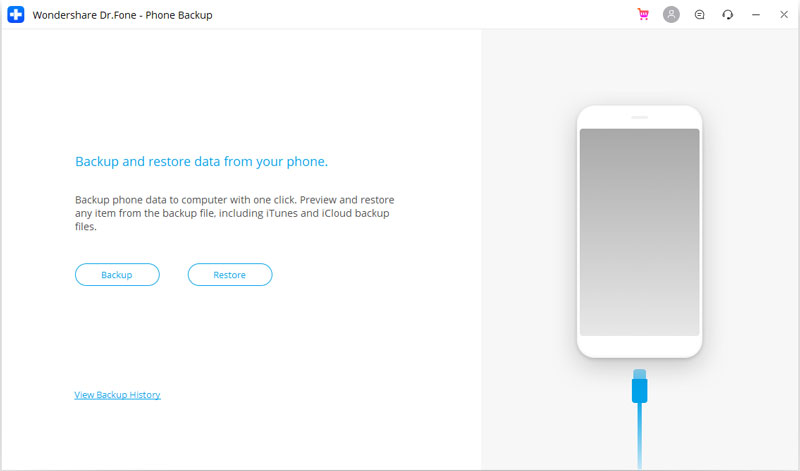
3. Dr.Fone - Phone Backup (iOS)
Dr.Fone - Phone Backup (iOS)
Selectively/wirelessly backup your iPhone photos in 3 minutes!
- One-click to backup the whole iOS device to your computer.
- Allow previewing and selectively export photos from iPhone to your computer.
- No data loss on devices during the restoration.
- Works for all iOS devices. Compatible with the latest iOS version.


Dr.Fone – Phone Backup (iOS) offers a flexible and convenient way to backup and restore iOS data wirelessly. Whether it is an iPhone, iPad, or iPod touch, Dr.Fone enables people to complete the whole backup process with one click. It allows you to backup and restore the data selectively, i.e., imports will not overwrite the existing data.
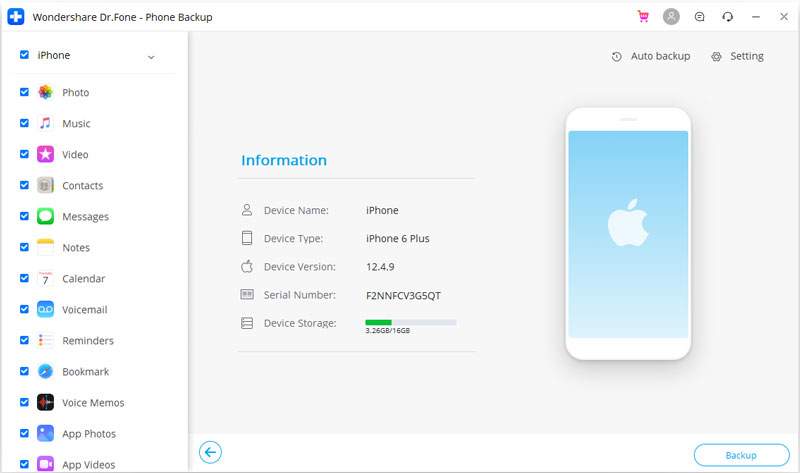
This application supports the backup of maximum data types, including music, videos, photos, notes, app documents, etc. Dr.Fone – Phone backup consists of many useful features for its user base as follows:
3.1. Expedient Features Accessible via Dr.Fone – Phone Backup (iOS)
Fix your problems with Dr.Fone, as this application possesses incredible features for users to carry the phone backup process effortlessly:
- User-friendly Interface: Many people complain that SHAREit and Airdroid have complicated interfaces. Dr.Fone is accessible to everyone as its interface doesn't require technical knowledge to operate the app.
- No Data Loss: Dr.Fone does not cause any data loss during transferring, backing up, and restoring the data on devices.
- Preview and Restore: With the Dr.Fone application, you can preview and then restore specific data files from the backup to your devices.
- Wireless Connection: You only need to connect your device to the laptop via a cable or Wi-Fi. The data will be automatically backup to the computer.
3.2. Step-by-Step Guide to Backup Data with Dr.Fone
Here, we will recognize the straightforward steps required to back up your iOS device with Dr.Fone:
Step 1: Launch Dr.Fone Application
Launch Dr.Fone on your laptop, and choose the “Phone Backup” option from the available tools in the tool list.

Step 2: Choose the Phone Backup Option
Now, connect your iOS device with the help of a lightning cable. Select the "Backup" button, and Dr.Fone will automatically detect the file types and create the backup on the device.
Step 3: Backup the Files
You can select the specific file types and tap on "Backup." Now, it will take a few minutes to back up the files. Now, Dr.Fone will show all the files type, including messages, videos, photos, and other data.
You may be interested in: How to Transfer Pics from iPhone to Laptop.
Complete Transfer!
Whether it be the simple transfer process or complicated backup, the user has to make sure that no data is lost or corrupted. For assisting with this topic, the article has taught how to transfer photos from phone to laptop without USB via Bluetooth, email, and cloud service.
Additionally, this article has also discussed the solution to backup data automatically and wirelessly without causing data loss. Dr.Fone backup solution will allow you to back up your important data without any prolonged procedure.


Phone Transfer
- Get Data from Android
- Transfer from Android to Android
- Transfer from Android to BlackBerry
- Import/Export Contacts to and from Android Phones
- Transfer Apps from Android
- Transfer from Andriod to Nokia
- Android to iOS Transfer
- Transfer from Samsung to iPhone
- Samsung to iPhone Transfer Tool
- Transfer from Sony to iPhone
- Transfer from Motorola to iPhone
- Transfer from Huawei to iPhone
- Transfer from Android to iPod
- Transfer Photos from Android to iPhone
- Transfer from Android to iPad
- Transfer videos from Android to iPad
- Get Data from Samsung
- Transfer Data to Samsung
- Transfer from Sony to Samsung
- Transfer from Motorola to Samsung
- Samsung Switch Alternative
- Samsung File Transfer Software
- LG Transfer
- Transfer from Samsung to LG
- Transfer from LG to Android
- Transfer from LG to iPhone
- Transfer Pictures From LG Phone to Computer
- Mac to Android Transfer
Daisy Raines
staff Editor