

How to Transfer Photos from Android to Lapto
Android Transfer
- Transfer From Android
- Transfer from Android to PC
- Transfer Pictures from Huawei to PC
- Transfer Pictures from LG to Computer
- Transfer Photos from Android to Computer
- Transfer Outlook Contacts from Android to computer
- Transfer from Android to Mac
- Transfer Photos from Android to Mac
- Transfer Data from Huawei to Mac
- Transfer Data from Sony to Mac
- Transfer Data from Motorola to Mac
- Sync Android with Mac OS X
- Apps for Android Transfer to Mac
- Data Transfer to Android
- Import CSV Contacts to Android
- Transfer Pictures from Computer to Android
- Transfer VCF to Android
- Transfer Music from Mac to Android
- Transfer Music to Android
- Transfer Data from Android to Android
- Transfer Files from PC to Android
- Transfer Files from Mac to Android
- Android File Transfer App
- Android File Transfer Alternative
- Android to Android Data Transfer Apps
- Android File Transfer Not Working
- Android File Transfer Mac Not Working
- Top Alternatives to Android File Transfer for Mac
- Android Manager
- Seldom-Known Android Tips

Mar 26, 2022 • Filed to: Data Transfer Solutions • Proven solutions
The multi-megapixel cameras on our phones have enabled us to take some amazing photos all the time. And then there are 1080p and even 4K videos that we shoot all the time. Storage on our phones is always at a premium and even if we have photos backed up in the cloud, we should still always have a local copy with us just in case. So, how do you transfer photos from Android phone to a laptop? How easy it is and what tools to use to transfer media from Android to laptop depends on the operating system your laptop is running. Is it macOS? Is it Windows?
For transferring files and media from Android to Mac, take a look at this article (insert link here to relevant article).
When you want to transfer photos from Android to laptop running Windows, things get easy. Just as a Mac and an iPhone pair well together, an Android phone and Windows does too, without need for specialized software out-of-the-box. When you want to achieve more, when your requirements begin transcending the native functionality, you can move to far better, more powerful third-party options.
Transfer Photos from Android to Laptop Directly Using USB
It is very easy to access photos directly on your Android from your laptop if you are an advanced user who knows where to look for the photos and how to navigate the Android file and folder structure to access the internal storage card.
Step 1: Unlock your phone and use a USB cable (ideally the one that is supported by your device manufacturer) to connect your Android phone to the laptop
Step 2: If your phone prompts you to allow access, allow the access
Step 3: If your phone does not prompt, or it seems Windows is not recognizing the phone, you need to enable File Transfer on Android
Step 4: Use the drop-down menu on your Android to get to the USB menu as shown
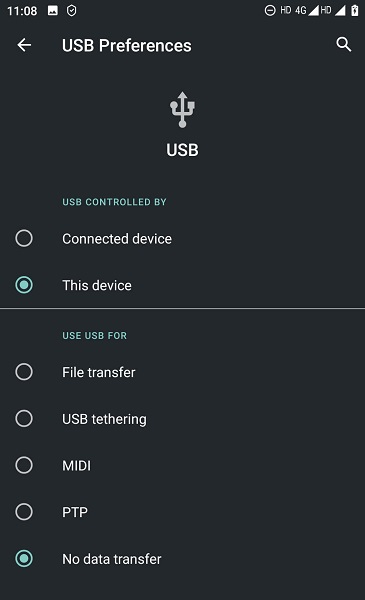
Step 5: After it gets detected and Windows is done setting it up, you will see a popup at the bottom right of your Windows desktop
Step 6: Click that popup for options to import photos, videos or to access the file system. Photos are almost always under the DCIM > Camera folder.
If you’d rather use an app, there is the other, simpler method wherein you can use Microsoft Photos to transfer photos from Android to laptop.
Step 1: If you do not have Microsoft Photos installed already, go to Microsoft Store on your Windows menu and find and download it.
Step 2: Enable File Transfer as shown above
Step 3: Open Microsoft Photos and click Import option in the top right corner
Step 4: From the dropdown menu, select From a USB device
Step 5: Photos will scan and show you all available USB devices. Select your phone
Step 6: At this point, Photos will scan the phone for all images and present you with a list
Step 7: Select the photos you want to transfer (or select all) and click Import Selected and you’re done!
Transfer Photos From Android To Laptop Using Dr.Fone - Phone Manager
If you are an advanced user, it is recommended that you stick to using Microsoft Explorer to get the job done for free, whenever you want. However, even advanced users can do with some love, and it comes in the form of Dr.Fone - Phone Manager for Android.
Advantages of Dr.Fone - Phone Manager
Dr.Fone - Phone Manager (Android)
Transfer Data Between Android and Mac Seamlessly.
- Transfer files between Android and computer, including contacts, photos, music, SMS, and more.
- Manage, export/import your music, photos, videos, contacts, SMS, Apps etc.
- Transfer iTunes to Android (vice versa).
- Manage your Android device on the computer.
- Fully compatible with Android 8.0.
Dr.Fone requires USB debugging to be enabled before it can run. When you first connect your phone to the laptop while Dr.Fone is open, the app will guide you to enable USB debugging. Here is how it goes.
Step 1: Open Settings in your Android and open About Phone
Step 2: Scroll down to the last item where build number is mentioned, and tap it consecutively until the phone prompts you that Developer Options is now enabled or that now you are a developer
Step 3: Go back to Settings the main list and scroll down to System and tap it
Step 4: If you don’t see Developer Options here, tap Advanced and look therein
Step 5: Under Developer Options, look for USB debugging and enable it.
Using Dr.Fone - Phone Manager
Step 1: Download and launch Dr.Fone on your laptop 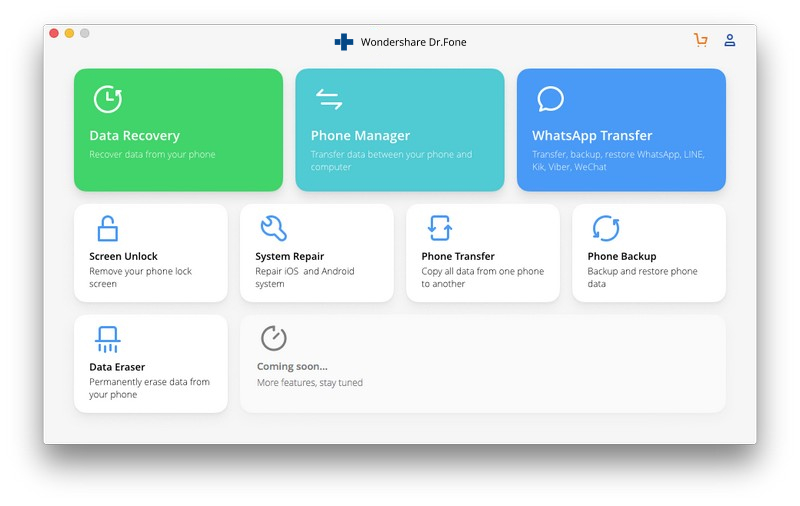
Step 2: Connect your Android device to the laptop 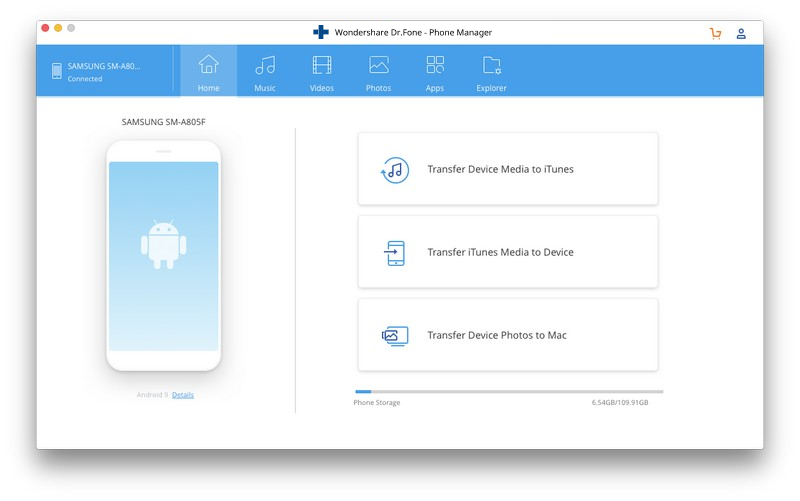
Step 3: If you did not enable USB debugging on your Android before launching Dr.Fone, the app will now prompt you to do so. Use the steps described above to enable USB debugging.
Step 4: If USB debugging was enabled previously, you will now be at the welcome screen
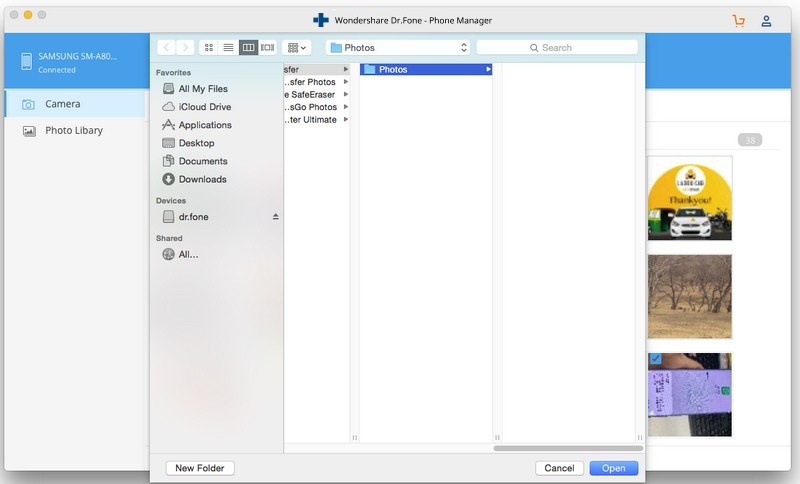
Step 5: Click on Photos from the tabs at the top 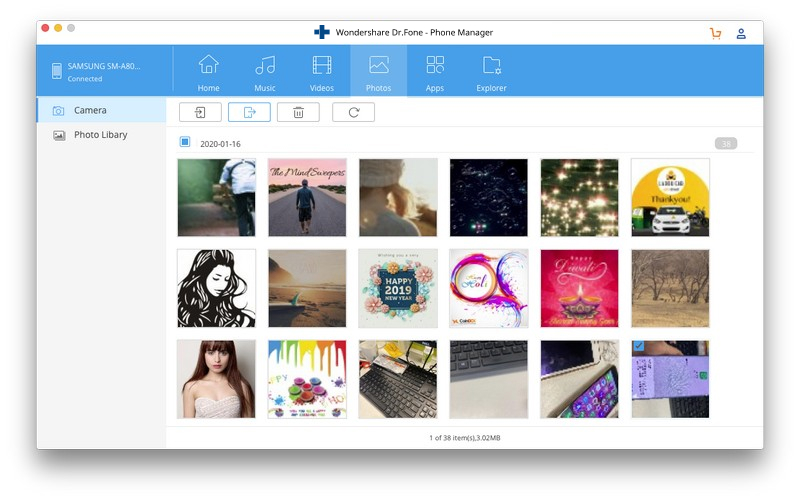
Step 6: Here, you can see all your albums listed on the left-hand side along with all the photos on the right-hand side in thumbnails. Choose what to send, you can choose multiple as well.
Step 7: After selecting, the button to Export will be active. This button has an icon with an arrow pointing outward. Click that button and save where desired. That’s it!
Downloading Photos From Android To Laptop Through Cloud Services
Android is a Google product. It requires a Gmail address, and Gmail comes with Google Drive. Furthermore, the Android operating system has a system app called Photos, which is just another word for Google Photos. If you have unlimited bandwidth available on your internet connection, you might just want to download photos from Android to laptop using cloud services such as Google Photos and Google Drive. As always, there are other third-party apps available that take the experience forward.
Using Google Photos
Part 1: Sync Photos on Android
To download photos from Android to laptop using Google Photos, you will first need to start syncing your photos with Google Photos.
Step 1: Open Google Photos on your Android
Step 2: Tap the hamburger menu at the top, find and tap Settings
Step 3: Tap Backup & Sync
Step 4: Enable Backup & Sync
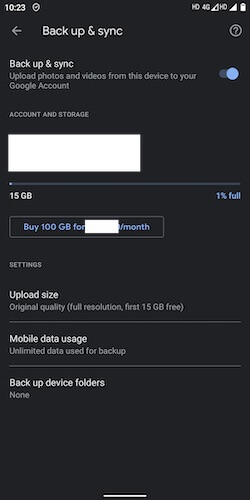
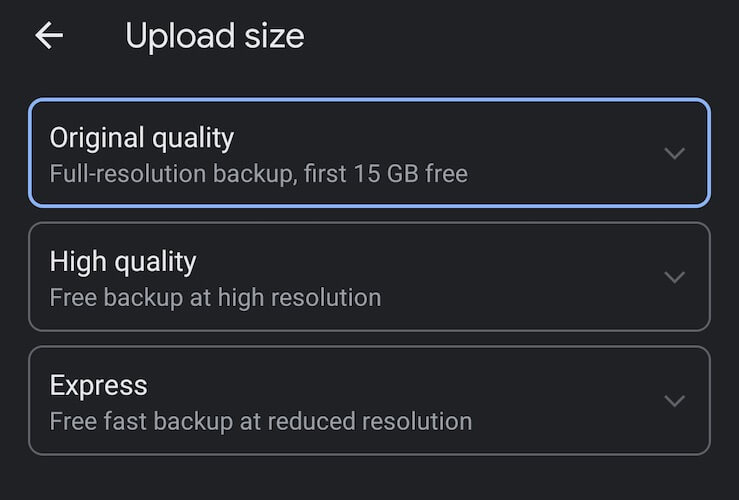
Step 5: Choose you’re preferred Upload Size if you want
Google Photos will now sync your photos to the cloud.
Part 2: Download Photos On Laptop Using Google Photos
Downloading photos from Google Photos on the laptop is as simple as browsing a website.
Step 1: Open your web browser of choice and visit https://photos.google.com. Alternatively, just open your Gmail in your web browser, and from the Google apps menu at the top right beside your account display picture, select Photos.
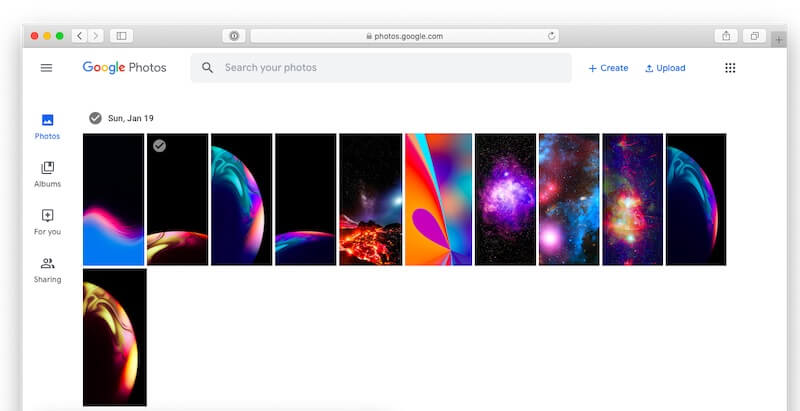
Step 2: To download individual files, just select the files, and from the 3-dot menu on the right, select Download. To download multiple files, select one file, press and hold Shift key and click the last file you want to download to create a selection of photos and download them.
Using Google Drive
People often get confused between Google Drive and Google Photos when they want to download photos from Android to laptop. Google Drive is Google’s storage solution for your files, folders, documents, and any other items that you might want to store. This is not an ideal solution for photos, the Photos app is the best deal for that. You can, however, do this if you so desire.
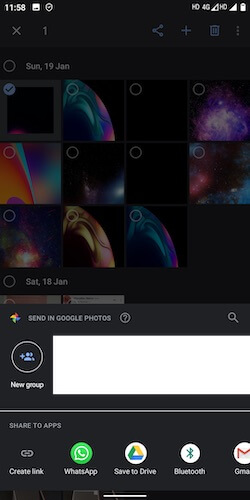
Step 1: Open Photos and select the files you want to transfer
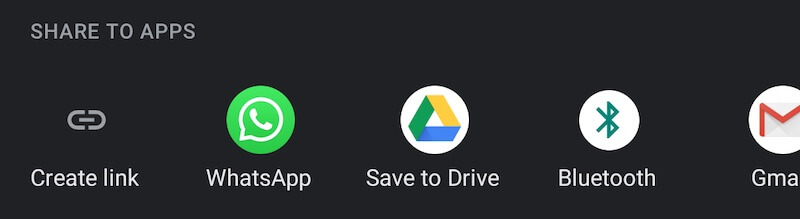
Step 2: Tap the Share button and select Save To Drive. Choose destination and tap Save. The file(s) will now begin uploading to Google Drive.
Step 3: On your laptop, visit https://drive.google.com or use the Google apps menu in Gmail to access your Google Drive
Step 4: Go to the folder where you saved your photos, or if you saved them in the default location, your photos will be here
Step 5: Select your photo(s) and download using the 3-dot menu at the top-right.
Using Dropbox
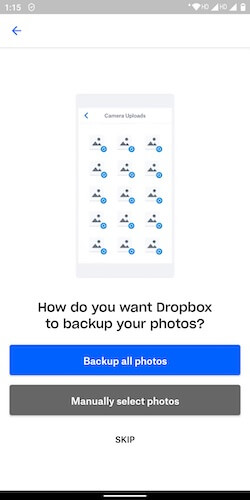
Dropbox is a famous, highly (and heavily) used cross-platform file sharing app. It is natural for most people to use this app to sync and share photos from Android to laptops. While this app is a great way to sync your photos, it is not recommended you do it unless you have large storage available to you. The default that Dropbox offers is 2 GB which, today, is meager. It is great for text documents, medium-sized PDFs and such other office purposes where access to business documents is required everywhere, but for Photos, it is best to use Google Photos if you want a cloud-based solution, since you get 15 GB by default in Google. Still, if you must, then this is how it is done.
Part 1: Dropbox On Android
When you first install Dropbox, Dropbox asks you to enable syncing photos. If you did that, Dropbox automatically keeps your photos in sync between your Android and the web app, Windows app, everywhere. However, if you skipped that process then and want to just send photos when needed, this is how it is done.
Step 1: Go to Google Photos on Android and select photos you want to send
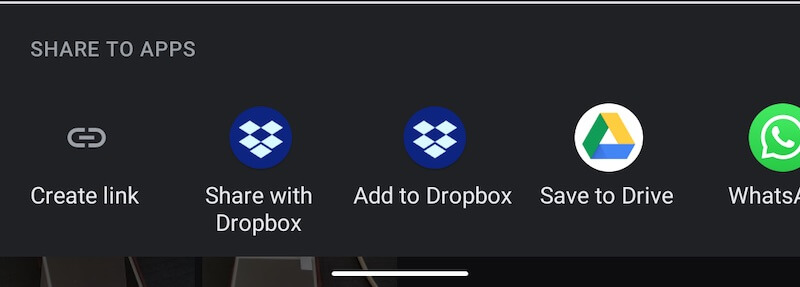
Step 2: Tap Share icon and select Add to Dropbox. Dropbox will now upload the photo(s) to the cloud.
Part 2: Dropbox On Laptop
Step 1: Go to Dropbox in your web browser on a laptop or the Dropbox app if you have downloaded it
Step 2: The photos will be available to download and you can download as you download any other file(s) from Dropbox.
Using WeTransfer
WeTransfer is a great way to share files up to 2 GB in size if you are in a collaborative environment. For personal use, there are better ways to send photos from Android to laptop such as Dr.Fone - Phone Manager for Android, or other cloud services already integrated into Android such as Google Photos and Google Drive, as WeTransfer seems cumbersome to use for a simple task of transferring photos.
Sending Files Using WeTransfer On Android
To send photos and files using WeTransfer from Android to laptop, you need to follow these steps.
Step 1: Open Play Store on your Android and download Collect app by WeTransfer
Step 2: Open Collect app
Step 3: Look for All Items at the bottom and tap it, then tap Share Files at the top-right
Step 4: Select Photos from the options
Step 5: Once done with selecting photos to share, a share sheet will pop up with a link and other options
Step 6: At this point, you can finish the action using Collect, or save to Drive, or copy the link and share it in an email, etc.
This is not a very user-friendly way to use just for the simple task of sending photos from your Android device to your laptop.
Conclusion
The best way to transfer photos from Android to laptop is using the third-party tool called Dr.Fone for Android. Not only does it help you transfer photos from Android to laptop, it also helps you transfer videos, apps and music and you can explore the file system too. This is the perfect tool for beginners and advanced users alike and uses zero internet bandwidth. The next-best way to transfer photos is using the sync feature built into Android’s Google Photos app, so it keeps an original (or the size you set) copy in the cloud and you can download to your laptop anytime, anywhere. No other cloud service comes close. Using Windows Explorer to download photos from Android to laptop directly using the USB cable is a primitive and crude way that offers no organisation whatsoever, and is not recommended.


Alice MJ
staff Editor