[Solved] iTunes Backup Session Failed Problem
Mar 07, 2022 • Filed to: Backup Data between Phone & PC • Proven solutions
When it comes to creating a backup on an iPhone, many people tend to choose iTunes for the job. The most common reason behind this is the ease of use. You can back up all your data from an iPhone with one click using iTunes and restore it any time you want. With iTunes, moreover, you can store the backup on your PC as well as iCloud, ensuring double safety.
But, like everything else, even iTunes backup is prone to unexpected errors. One such error is the “iTunes backup session failed”. It’s a common iTunes error that usually occurs when an iTunes backup session expires due to an external factor. If you have encountered the same error with your iTunes account, we can understand your frustration. But, the good news is you can easily fix the issue on your own.
In this article, we’re going to address a few effective techniques that’ll help you troubleshoot the “iTunes backup session failed” error.
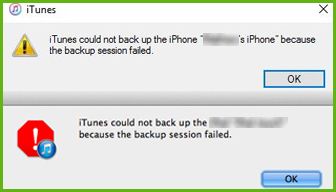
Why does iTunes Backup Session fail in the First Place?
The truth is different factors, ranging from hardware-related issues to malware attack, can interrupt the iTunes backup session and prompt the said error instead. While there’s no definite answer on what causes the error, we have identified a few reasons that might be responsible for triggering the “iTunes backup session failed” issue. These reasons include:
- iTunes is corrupt: This is probably the most common reason for a failed backup session on iTunes. If a configuration file is missing on your PC, it’ll automatically corrupt the iTunes app and it won’t back up your data at all.
- Large Backup File: It’s important to understand that you can only back up limited data to iCloud, even if you’re using iTunes backup. In general, iCloud provides 5GB of free storage space. So, if your backup file is larger than 5GB, you’ll either have to buy additional cloud storage or delete a few items from the backup.
- Computer Error: As we mentioned earlier, even a hardware-related issue can cause an “iTunes backup session failed” error. This usually happens when your PC has run into an unexpected error or crash while iTunes was backing up the data.
- Antivirus: Even though it’s a pretty rare situation, there are many Antivirus programs that are configured to automatically interrupt backup/restore processes.
- Outdated iTunes Version: Finally, if you are running an outdated version of iTunes, you are most likely to run into the failed backup session issue.
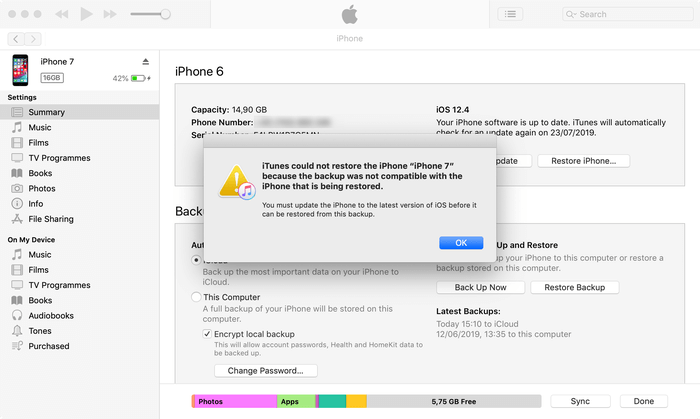
Irrespective of the reason that caused the error, here are a few solutions that’ll help you troubleshoot it and continue backing up your data using iTunes without any interruption.
How to Deal With iTunes Backup Session Failed
First, we’re going to talk about a few quick fixes to instantly fix the error. In case these solutions don't work, we’ll also take a look at an alternative method to back up your data that works all the time with a 100% success rate. So, without any further ado, let’s start with our first solution.
1. Update iTunes
Let’s start with something simple! If you haven’t updated the iTunes app on your laptop, make sure to update it to the latest version. You can easily update iTunes through the “App Store” on your Macbook.
Step 1 - Go to the App Store on your Macbook.
Step 2 - Tap the “Updates” option at the top of your screen.
Step 3 - If you see any iTunes updates, simply click “Install” to install them on your laptop.
Once iTunes is successfully updated, try creating a backup again and see if you encounter the “iTunes could not back up the iPhone because the backup session failed” error or not.
2. Restart Your Macbook and iPhone
If you are already using the latest iTunes version, the error may be caused due to a hardware related issue. In this case, you can simply reboot both the iPhone and the Macbook separately and check if it fixes the issue. Before rebooting the devices, however, make sure to disconnect your iPhone from the laptop.
3. Delete Files from the Backup
If you are trying to back up the data to your iCloud account, it’ll be imperative to keep the backup file size up to 5GB (maximum), unless you've bought additional cloud storage space. So, delete unnecessary files from the backup and try backing up data once again.
In case you still encounter the same “backup file too large” error, you can create the backup on your Macbook as well. In this case, however, make sure that your laptop has enough storage space to accommodate the backup file. You can easily free up some storage space on the Macbook by deleting a few unnecessary files.
4. Disable Antivirus Program
Since, Antivirus software can also interrupt the iTunes backup process, it’s always a wise strategy to disable it before you start taking backup with iTunes. You can directly turn-off the Antivirus from the taskbar on a Windows PC.
However, in a few situations, you’ll have to follow a different approach to get the job done. Check the official website of your Antivirus provider and follow the mentioned guidelines to turn it off for a few minutes. Once the backup process completes, you can again resume the Antivirus.
5. Reset the Lockdown Folder
Every time you connect your iPhone to the PC, dedicated records are maintained in the “Lockdown” folder. These records help the iPhone interact with the PC and exchange files. But, in case there’s an issue with the lockdown folder, it can also cause a backup session failed on iTunes. In this case, all you have to do is reset the Lockdown folder to fix the error. However, keep in mind that you’ll have to follow a different approach to find the “Lockdown Folder” in Windows and macOS.
For Windows:
Step 1 - First of all, close the iTunes app and disconnect your iPhone from the PC as well.
Step 2 - Open File Explorer and enter “C:\ProgramData\Apple\Lockdown” in the search bar.
Step 3 - At this point, delete all the files from the “Lockdown” folder.

Again, restart iTunes, connect your iPhone to the PC, and try creating a backup for your files.
For macOS:
Step 1 - On your Macbook, close iTunes and disconnect the iPhone too.
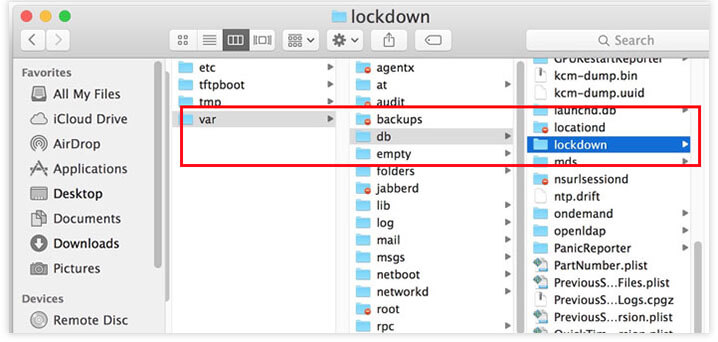
Step 2 - Open Finder and select “Go To Folder”. Type “/private/var/db/lockdown/” and press enter.
Step 3 - Simply delete all the files from the Lockdown folder and try backing up data through iTunes again.
Are There Any Alternatives to iTunes for Backup?
If none of the above solutions fix the “iTunes backup session failed” issue, it would be better to use an iTunes alternative to backup your data. But since Apple is extremely serious about user’s privacy, there are very few tools that can be used to create a backup for your files from an iPhone.
After going through several solutions, we’ve found Dr.Fone Phone Backup (iOS) to be the most reliable backup tool for iPhone. The software is specifically tailored to back up your data from an iPhone/iPad and save it securely on your PC. Dr.Fone works with both Windows and macOS, which means you’ll be able to back up your data on any laptop/PC.
What makes Dr.Fone more reliable than iTunes or iCloud is that it supports “selective backup”. To put it in simple words, you’ll have full control over what types of files should be included in the backup. Unlike iTunes, Dr.Fone doesn’t add everything to the backup file, even if the majority of data is irrelevant. You have the complete control on what to add and what not.
Dr.Fone supports a wide variety of data types that you can include in the backup. A few of these files include pictures, videos, contacts, messages, Whatsapp data, etc. Another benefit of using Dr.Fone is its intuitive user-interface and ease-of-use. You can create a backup file for your iPhone with three easy steps.
Features of Dr.Fone - Phone Backup (iOS)
Let’s check out a few additional features of Dr.Fone - Phone Backup a reliable tool to back up data from an iPhone.
- Cross-Platform Compatibility - Dr.Fone works with both Windows and macOS. It doesn’t matter if you’re running the traditional Windows XP or the latest Windows 10, Dr.Fone will help you backup data on every Windows PC. Similarly, it works for all macOS versions.
- Supports All iOS Devices - Dr.Fone will help you backup data from every iPhone, even if it’s running the latest iOS 14.
- Backup Different Types of Data - With Dr.Fone - Phone Backup, you can choose different types of data to be included in the backup. Also, it lets you pick selective data, making the entire process less complicated.
- Restore Backup - Once you have successfully created an iPhone backup, you’ll be able to restore it to a different iPhone using the Dr.Fone itself. When you’ll restore the data, Dr.Fone won’t overwrite the existing data on your second iPhone.
How to Backup Your Data from an iPhone Using Dr.Fone - Phone Backup
So, now that you’re ready to use Dr.Fone - Phone Backup, here’s how to use it to backup data from an iPhone to your PC.
Step 1 - Install and launch Dr.Fone on your PC and select “Phone Backup” on its home screen.

Step 2 - Make sure to connect your iPhone to the PC via USB and click “Backup” in the next window.
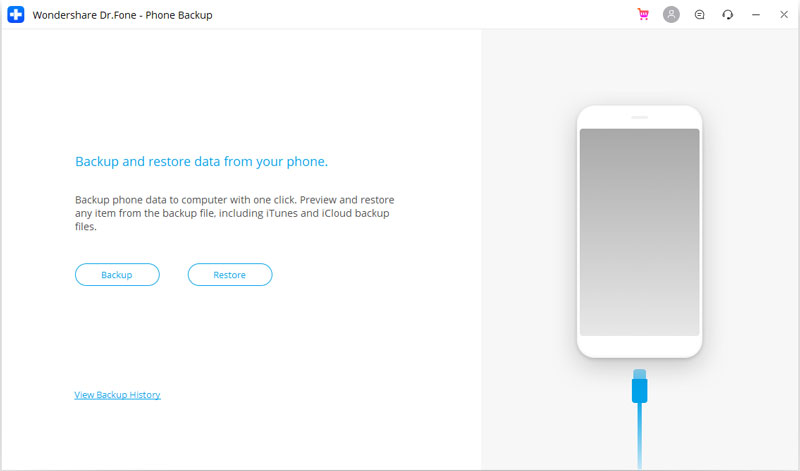
Step 3 - In the next window, select the file types that you want to include in the backup. Also, choose the destination folder where you want to store the backup file and click “Backup”.
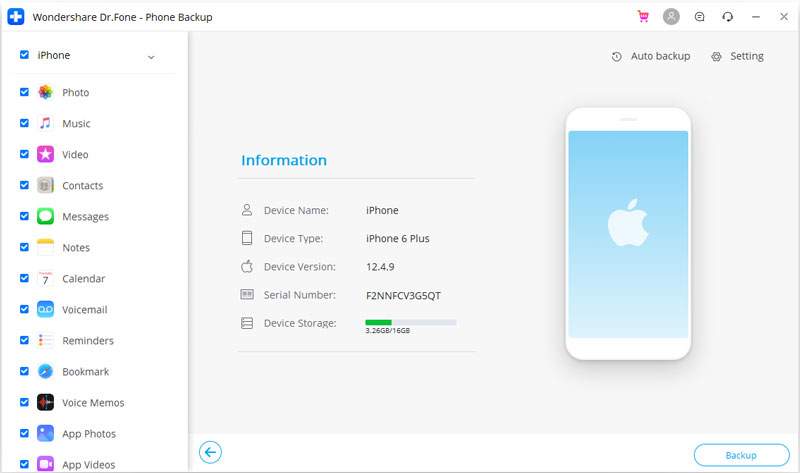
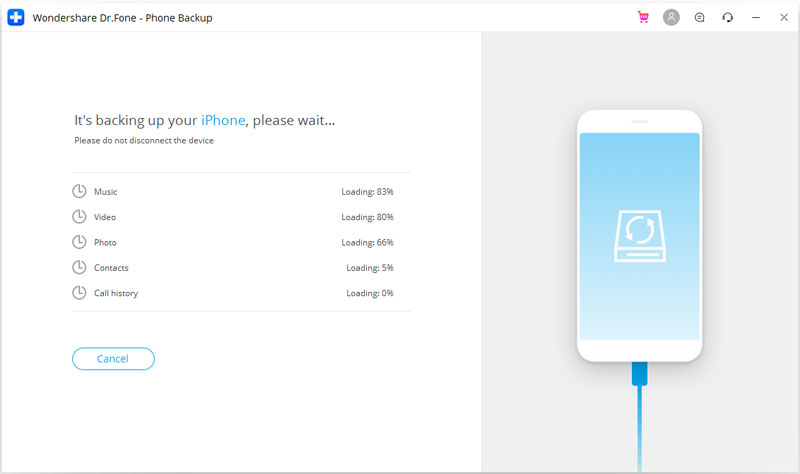
Step 4 - Dr.Fone will automatically start creating the backup and it may take a few minutes for the process to complete.
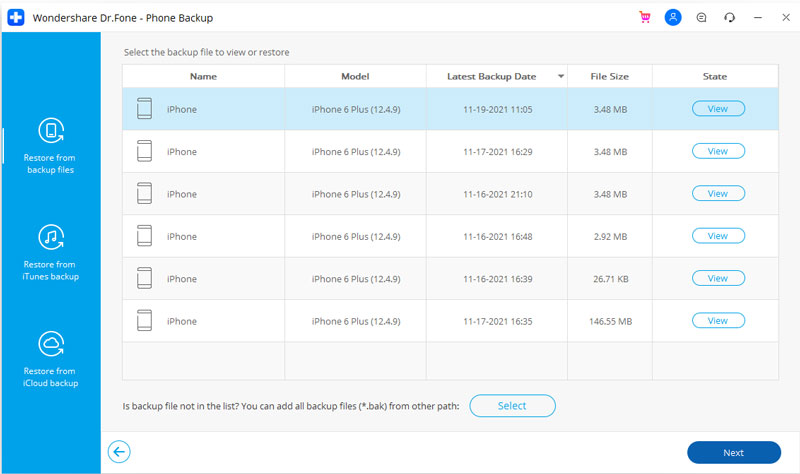
Step 5 - Once the backup is successfully created, simply click “View Backup History” to check all your backup files. You can further click the “View” button next to each backup file to check what’s been included in it.
Conclusion
Backup session failed on iTunes is a pretty common error that many users encounter while trying to back up their iPhone using iTunes. If you’re stuck in a similar situation, you can either use one of the troubleshooting methods to fix the issue or switch to Dr.Fone to backup your iPhone on your laptop.
iPhone Backup & Restore
- Backup iPhone Data
- Backup iPhone Contacts
- Backup iPhone Text Messages
- Backup iPhone Photos
- Backup iPhone apps
- Backup iPhone Password
- Backup Jailbreak iPhone Apps
- iPhone Backup Solutions
- Best iPhone Backup Software
- Backup iPhone to iTunes
- Backup Locked iPhone Data
- Backup iPhone to Mac
- Backup iPhone Location
- How to Backup iPhone
- Backup iPhone to Computer
- iPhone Backup Tips


Alice MJ
staff Editor