

5 Solutions on How to Backup iPhone Photos

Mar 07, 2022 • Filed to: Backup Data between Phone & PC • Proven solutions
It’s impossible to know just how much the photos in your iPhone mean to you until they are gone. It can be a devastating experience knowing that the photos you cherished so much have been lost, and probably you will never see them gain. Many things can happen to your iPhone. Your phone could be stolen, lost, or you could end up with a cracked screen making it impossible for you to access your iPhone. Sometimes, a software update can erase your photos or you could even delete them accidentally. These things happen.
Regrettably, many people don’t backup their iPhone because they don’t know how simple it is to backup iPhone photos.Fortunately, it is easy to prevent yourself from permanently losing your photos by backing up your iPhone data. If any of the above unfortunate things happen, you will find it very easy to retrieve your data once your iPhone has been swept clean. This article outlines 5 methods you can use to backup iPhone photos.
- Solution 1: How to backup iPhone photos to PC or Mac
- Solution 2: How to backup iPhone photos with iCloud
- Solution 3: How to backup iPhone photos with iTunes
- Solution 4: How to backup iPhone photos with Google Drive
- Solution 5: How to backup iPhone photos with Dropbox
Solution 1: How to backup iPhone photos to PC or Mac
The truth is, it is common to accidentally lose important data from your iPhone. Whether it is an email, a message, contact information or a picture you stand at a risk of pe rmanently losing your data forever if you fail to do iPhone backup photos. Luckily, Dr.Fone - Phone Backup (iOS) supports both Mac and Windows versions can help you to backup and restore your iPhone photos.
Dr.Fone - Phone Backup (iOS)
Backup & Restore iOS Data Turns Flexible.
- One click to backup the whole iOS device to your computer.
- Allow to preview, restore and export any item from the backup to a device.
- No data loss on devices during the restore.
- Supported iPhone 11/SE/6/6 Plus/6s/6s Plus/5s/5c/5/4/4s that run iOS 13/12/11/10/9.3/8/7/6/5/4
- Fully compatible with Windows 10 or Mac 10.15.
Steps to backup and restore your photos with Dr.Fone
Step 1:Connect your iPhone device to the computer
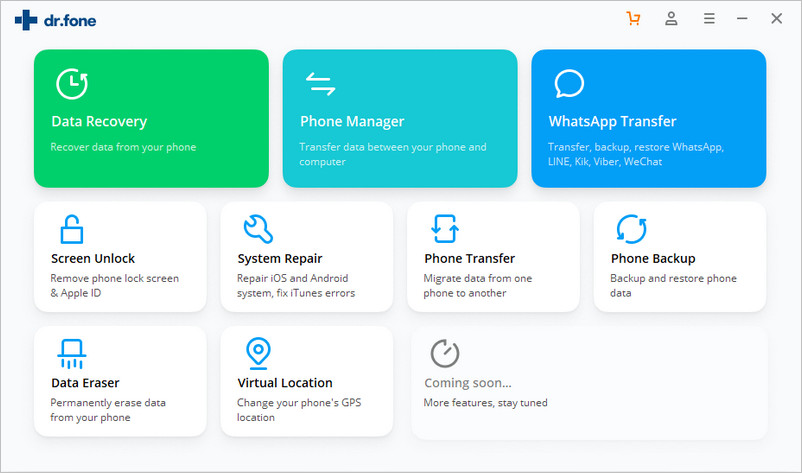
Install Dr.Fone Dr.Fone - Dr.Fone - Phone Backup (iOS) program in your computer then launch it. Next, click "Phone Backup".
Once you have done that, connect your iPhone to your Mac or Windows PC using a USB cable and wait for the program to detect your iPhone device automatically.
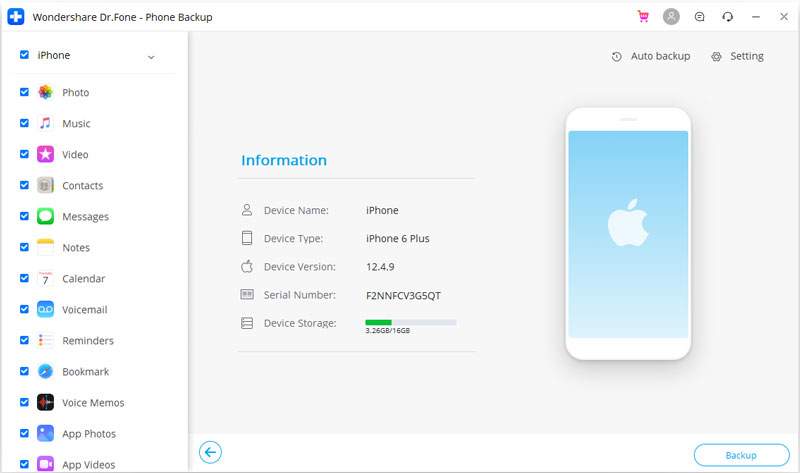
Step 2: Select Type of Files You want to Backup
Once your iPhone has successfully been connected to the computer, Dr.Fone Backup and Restore tool will detect files in your computer automatically according to their types. Choose the photos you want to backup and click the option that says ‘backup’.
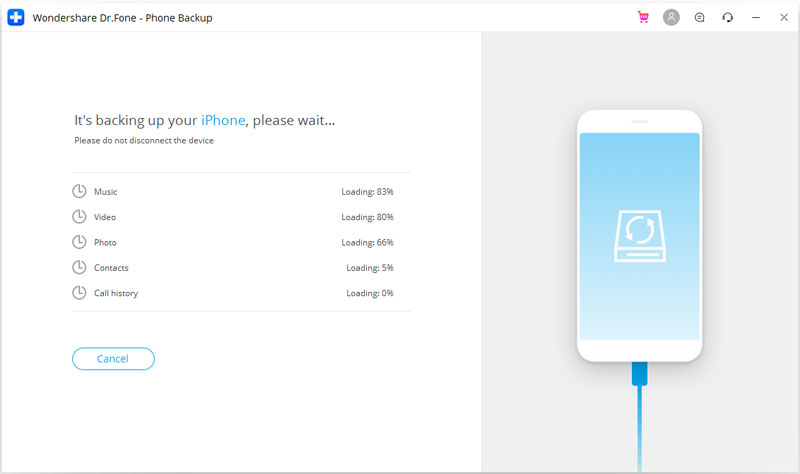
Please wait for a few minutes for the whole backup process to finish. All the photos in your iPhone will be displayed as shown below.
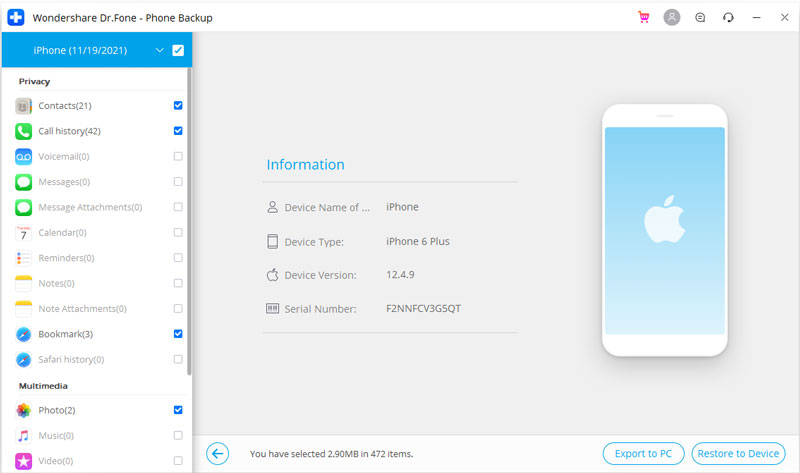
Step 3: Export or restore selected backup photos
Once the backup process has completed, you can individually view all the backup photos and any other files you wish to backup. Select everything you need and click "Restore to Device’ to restore selected files to your iPhone or export them to your computer by clicking “Export to PC.” It is up to you.
Solution 2: How to backup iPhone photos with iCloud
2.1 Basic introduction of this option
Are your iPhone photos protected against unexpected loss? One backup option available at your disposal is iCloud. iCloud has a photo backup feature known as Photo Stream where you can sync and backup your iPhone photos. The main weakness with iCloud as a backup option, however, is that you cannot completely rely on it to manage your important memories because it doesn’t perform long-term backup of photos.
2.2 Steps to backup iPhone Photos with iCloud
Step 1: Connect your iPhone to the internet
In order to access iCloud and backup your iPhone photos, you must be connected to the internet either via 4G (cellular connection) or via Wi-Fi.
Step 2: Go to the iCloud app in your iPhone
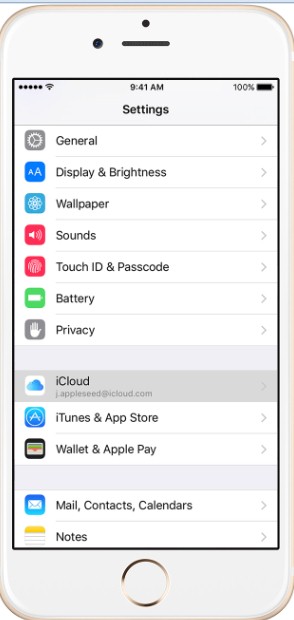
On your iPhone, tap "settings". Scroll down until you find the iCloud application as shown below.
Step 3: Turn iCloud backup on
Tap the iCloud app and scroll down. Select "backup" and choose "iCloud Backup". Make sure that "iCloud Backup" is turned on
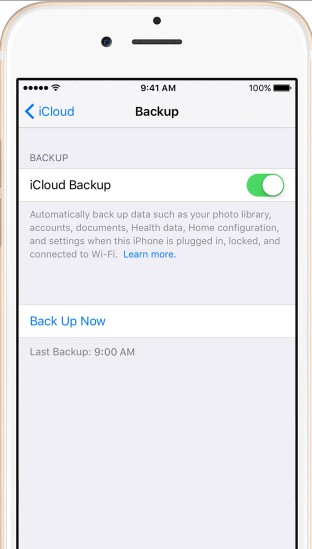
Stay connected until the process is complete. iCloud will automatically backup your Photos everyday that you stay connected to the Internet and the iCloud backup option is turned on.
To verify that you have backed up your iPhone, tap "Settings" then tap "iCloud" app icon, then go to "Storage" and then tap "Manage storage"button. Select your device and view your backup details.
2.3 Pros and cons of iCloud backup
Pros
- iCloud as a backup option is easy to use. There are no complicated software to install and use. The only thing you need to do is to stay connected to the internet and you can start backing up your photos within seconds.
- Another advantage of iCloud is that it is free. There is no need to buy any software to backup your photos.
Cons
As we have already mentioned, one limitation with this backup option is that is time-bound. According to Apple, your photos will automatically be deleted after 30 days. You can only backup up to 1000 latest photos. so if you have more than 1000 photos that you want to backup, you might not be able. Also, iCloud can only give you 5 GB of storage space free. This can be very limiting for those who have a lot of data to backup. iCloud cannot preview files before you back them up, unlike Dr.Fone - iOS Backup & Recovery tool that gives you the option of previewing files before you begin backing them. And you can also selectively backup these iPhone photos according to the introduction in the above part.
Solution 3: How to backup iPhone photos with iTunes
3.1 Basic weakness of this option
You can also backup your iPhone photos with iTunes. However, for many people, this option is extremely tricky and difficult to understand. Among the Apple's options of backing up data, it is the most difficult.
3.2 Steps tobackup iPhone photos with iTunes
Here are the instructions on how to backup your iPhone using iTunes.
Step 1:Launch iTunes from your dock
Step 2: Connect your iPhone to the computer
Connect your iOS device to the PC via a USB cable. Once the connection is complete, select iPhone at the top right section of the screen as shown below. Please ensure that you have installed the latest version of iTunes.

Once you have selected the iPhone device, you can Right-click the device and select "Back Up"
Step 3: Go to the summary tap
Make sure you go to the Summary tab and click the large Back Up Now button as shown below. Next, Click the Sync button at the bottom of the screen.

Step 4:Notice the progress bar
You backup progress will begin immediately and you can notice the progress bar as shown below

Once completed, your backup will be completed and the time you last updated indicated. If you want to see the list of your backups, you can go to the "Preferences" and select "devices"

3.3 Pros and cons
Pros
iTunes backup is easy and straightforward. Everything that is backed is automatically backed up to iCloud which makes it easy for you to restore the backed up data. In addition to that, iTunes enables encryption of data to protect your privacy. Also, all your passwords are backed up.
Cons
As with iCloud, iTunes also has space limitations. Also, there is no option to preview your files so you don't have a choice which files to backup and which ones you should leave out. Considering the space constrain, this is a big limitation. And you can't view your backup files on your computer because of the format problem. If you can't stand these weakness of iTunes backup, you can back to "Solution 1", Dr.Fone can perfectly solve these problems.
Solution 4: How to backup iPhone photos with Google Drive
4.1 Basic knowledge of this method
Google drive is Google's crowd storage service that one can use to store important documents including photos. With the 5 GB free space, that is enough to store your iPhone photos in order to protect yourself against losing them. However, you can upgrade your free 5GB to a paid subscription for more space. The good thing about Google Drive is that it works with any platform including iOS. Let's learn how to backup photos on iPhone.
4.2 Steps to iPhone backup photos
Backing up your iPhone photos to Google Drive only takes a couple of steps to complete
Step 1: Sign in Google Drive
Download Google Drive and install in your phone. Next, sign in with your Gmail. Ensure your iPhone is connected to the Internet.

Step 2: Go to your iPhones Google Drive settings and select photos
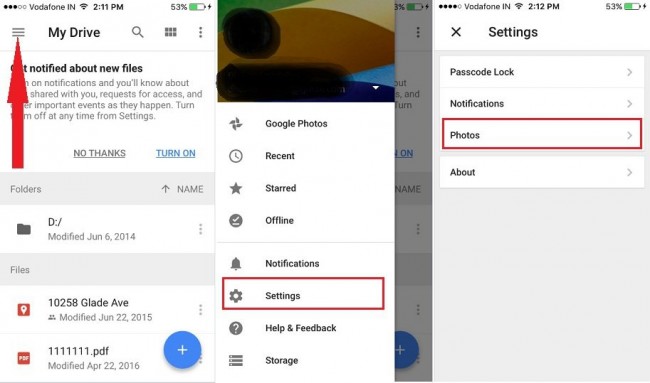
Step 3: Go auto backup
Next, select photos and go to "Auto backup" and turn it on.
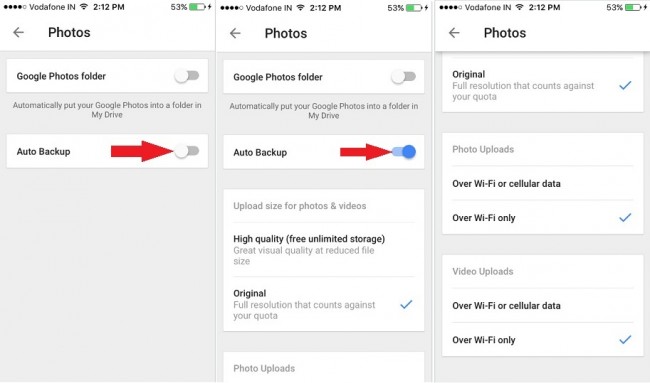
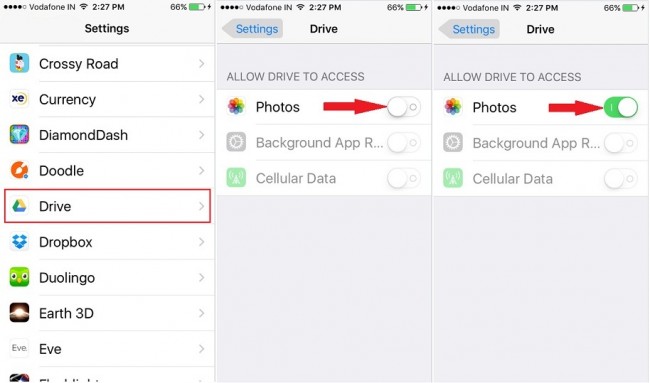
Step 4:: Give permission to Google Drive to automatically backup your photos
The next thing is to give permission to Google Drive to automatically backup your photos. Go to settings, select "Drive" app then click "Photos" and turn it on as shown below
Now return to the Google Drive and refresh the app so that it can automatically upload your photos.
4.3 Pros and Cons
Pros
As you can see, Google Drive is free and you don't need to have your iPhone with you to access your photos once you have backed them up. It is free and convenient.
Cons
Google Drive has a free space limit of 5 GB. So if you have a lot of photos to backup,youwill have to expand the space by subscribing. The process of downloading, installing andsigning upand eventually backing up photos is a bit complicated.
Solution 5: How to backup iPhone photos with Dropbox
5.1 Basic knowledge of iPhone photos backup with Dropbox
Dropbox is a popular cloud backup option loved by many. The basic free storage space is 2GB, but you can get more space by opting for a monthly subscription which gives you 1 TB of space. If you want to backup your photos with your Dropbox, there is a Dropbox app for iOS which is very straightforward.
5.2 How to backup photos on iPhone with Dropbox
Step 1:Download and install Dropbox app
Go to Dropbox official website and signup for a Dropbox account if you don't have one. Download an iOS version of dropbox and install in your iPhone.
Step 2: Launch Dropbox
Next, you need to Launch Dropbox on the iPhone and login to your account
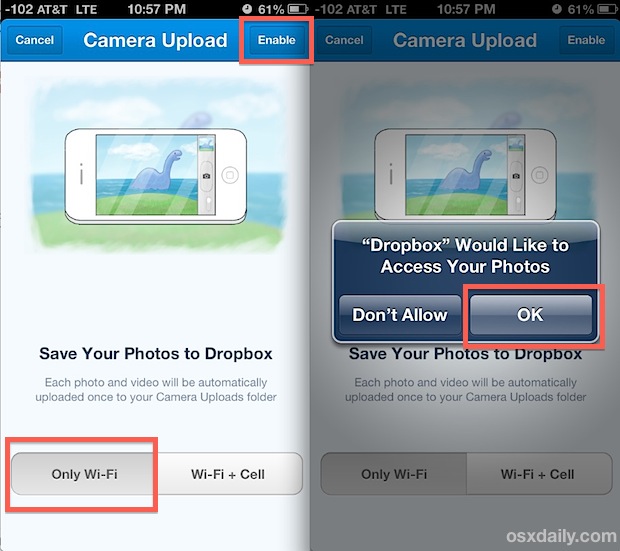
Step 3: Begin uploading
To to "Camera Upload" and select “Only Wi-Fi” and then tap “Enable”. This provides your Dropbox with access to your iPhone and it will start uploading photos for storage in your Dropbox. If you are using mobile data, select "Wi-Fi + Cell"
Depending on your internet speed and size of your photos, the process should take between few minutes and several minutes.
5.3 Pros and Cons
Pros
Dropbox is very easy and straightforward. If you don't have many photos to backup, it is free. You can also access your backed up data from any computer by logging in using the same login details.
Cons
Backing up iPhone photos with Dropbox can be expensive if you have many photos to backup. This may not be affordable to many people
Not all backup options are created equal. The type of backup option you choose depends on your needs, budget and size of your photos. Choose the best of option that you are comfortable with. Most people would go for free options, but if you are looking for a stable backup option with no time or space limits, then Dr.Fone - iOS Backup and Recovery might be the best option. Another important thing to note is that Dr.Fone backup and recovery tool gives you the opportunity to preview and select the particular files you need to backup, unlike iCloud, Dropbox and iTunes where you have no option of previewing the files you want to backup.


iPhone Backup & Restore
- Backup iPhone Data
- Backup iPhone Contacts
- Backup iPhone Text Messages
- Backup iPhone Photos
- Backup iPhone apps
- Backup iPhone Password
- Backup Jailbreak iPhone Apps
- iPhone Backup Solutions
- Best iPhone Backup Software
- Backup iPhone to iTunes
- Backup Locked iPhone Data
- Backup iPhone to Mac
- Backup iPhone Location
- How to Backup iPhone
- Backup iPhone to Computer
- iPhone Backup Tips
Alice MJ
staff Editor