How to import your passwords to Chrome and the Google Password Manager
Apr 27, 2022 • Filed to: Password Solutions • Proven solutions
Most of us use several Google services daily, such as Gmail, Google Search, Google Maps. And we also sign into these using our Google accounts. Hence it sounds reasonable to let Google itself manage our passwords to make the process easier.

To sign in easily, you use Google Chrome as your primary password manager, which lets you securely store your different passwords. However, like most other browsers, Chrome doesn't allow you to export passwords in a spreadsheet format.
And importing using CSV is a different ball game because Chrome's CSV feature is in a very early stage. Hence you will have to enable it manually.
This article will discuss how you can import passwords into Google Chrome with a CSV file.
Method 1: Enable Password Import Flag
So the easiest way to import your saved passwords into Google Chrome using a backup CSV is by basically altering your browser's Autofill settings which lets you enable or disable the experimental features.
-
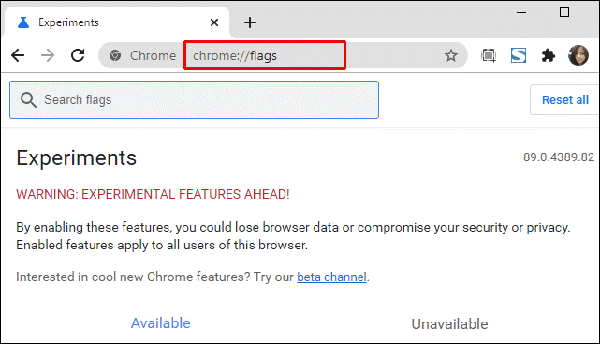
Step 1: First of all, you need to open your Chrome browser and write chrome://flags/#password-import-export in the address bar. Click the "Enter" key, and Chrome's flags page will appear. Follow the below-given steps to enable the feature:
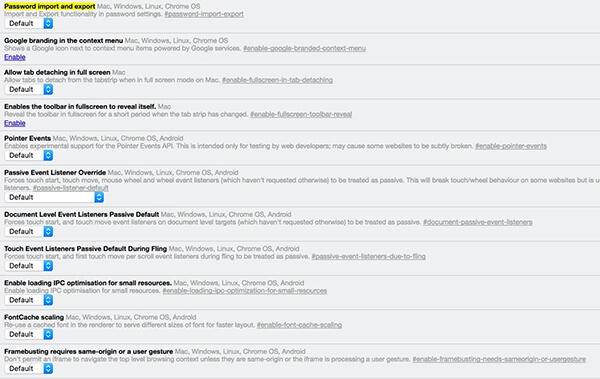
Step 2: Now, from the drop-down menu, you will select the "Enable" option. Then the Chrome will ask you to relaunch the browser. Select the "Relaunch Now" option to restart the browser.
Step 3: Next, head over to Chrome's password manager by typing
chrome://settings/passwords or go to its "Settings" menu and select the "Manage Passwords" option from the Advanced Settings.
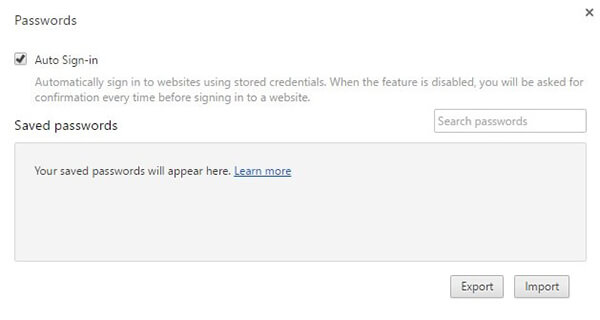
Step 4: Here, you are required to click on the "Export" option to export your passwords list. Then you will be asked to type your user account password through a popup. After entering your password, a "Save" window will popup.
Step 5: Your list of passwords will be saved on the browser as a plain “Text Csv” file from where you can import all the passwords to your password manager which support “Csv” imports.
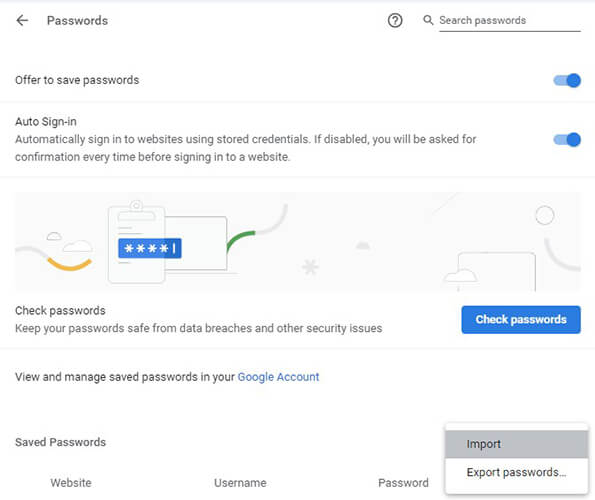
Step 6: If you want to import the passwords, simply select the "Import" option. This is different from exporting your passwords, as Chrome here would not ask you to provide the account password. You just need to open the "Csv" file with your password and Chrome will do the job ahead.
Method 2: Enable CSV Password Importing Via Command Prompt (Cmd) Or Terminal
Using a command that enables the import option on Chrome lets you import the list of passwords.
Now the method works differently on the Windows and Mac operating systems. Let's discuss both of them.
Importing passwords on Windows with Command prompt
Step 1: Go to the “Start” menu and search for Command Prompt (or type “cmd”) and click on it.
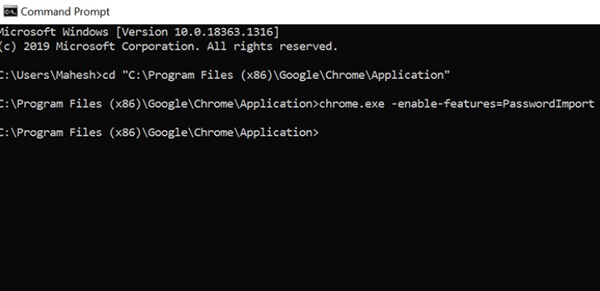
Step 2: Now, enter the command given below in the Command Prompt window and click Enter to proceed. Next, Chrome's executable file will open on your computer.
cd "C:\Program Files (x86)\Google\Chrome\Application"
Step 3: Next, type another command given below and click Enter. The hidden password import feature will be enabled in Chrome. Now Chrome will automatically launch.
chrome.exe -enable-features=PasswordImport
Step 4: Then, you will have to go to the “Setting” by clicking the three dots on the top-right corner. Next, click on the “Passwords” option.
Step 5: Under the “Saved Passwords” option, please click on the three vertical dots to get the “Import” option. Click on that option in order to import your passwords into Chrome.
Import Passwords Into Chrome on macOS
Step 1: Select “Launchpad” from the Dock and type “Terminal,” and click on it (Alternatively go to the. “Finder>Go>Utilities>Terminal).
Step 2: Type the below-given command in the Terminal and click on “Enter”. Next, Chrome will open automatically.
/Applications/Google\ Chrome.app/Contents/MacOS/Google\ Chrome -enable-features=PasswordImport
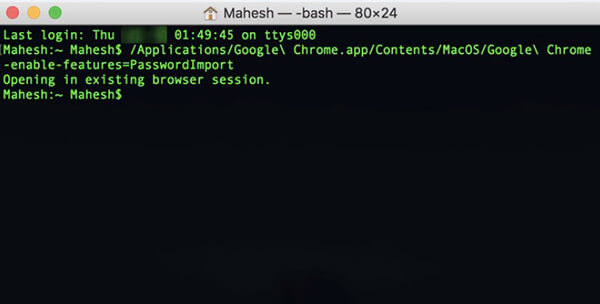
Step 3: Next, select the three vertical dots from the top-right corner on Chrome. Click on the “Settings” and then the “Passwords” option.
Step 4: On the right of the “Saved Passwords” option, select the three vertical dots icon followed by selecting the CSV file and import.
Method 3: Use DevTools To Unhide Import Option
Generally, web developers prefer going with this method instead of Command Prompt or Terminal. Let's find out how it works:
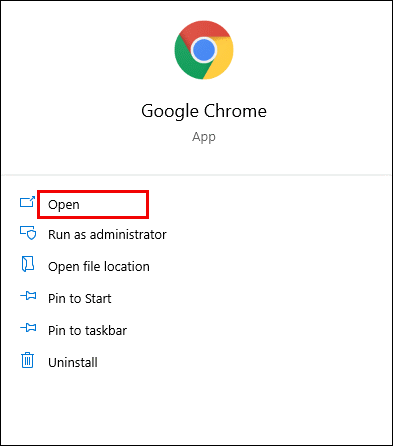
Step 1: Go to Google Chrome browser and select the “Settings” option from the three vertical dots option on the top right corner.
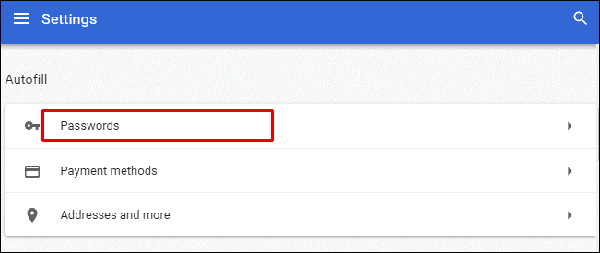
Step 2: Next, under the “Auto-Fill” section, click on the “Passwords” option.
Step 3: Click on the three vertical dot icons on the right side of the “Saved Passwords” section.
Step 4: Now, right-click on the “Export Passwords” option in the drop-down menu, click on “Inspect”. You will see a panel on the right side of the browser window.

Step 5: Here, you need to double click on the word “hidden,” which is just above the automatically highlighted portion.
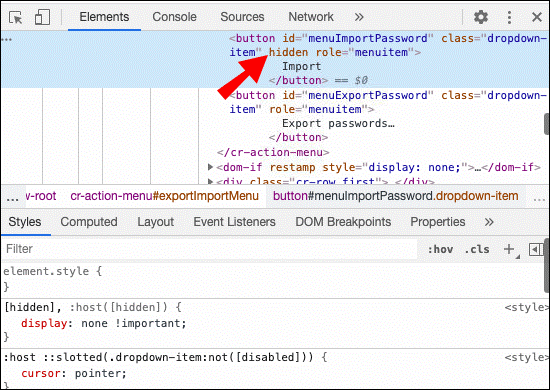
Step 6: Then click on “Delete” from your keyboard and press “Enter”.
Step 7: Now, look at the Google Chrome interface for a while. Select the three vertical dots icon on the far right of the “Saved Passwords” section.
Step 8: You will find an “Import” option. Select it, and then choose the CSV file that you would want to upload.
Step 9: Select the “Open” option to confirm.
Note: The word “hidden,” which you deleted, is a temporary change, and if in the future you repeat the same method, the term “hidden” will reappear again. So you will have to delete that whenever you wish to import the passwords through a CSV file.
Method 4: Recover your password with Dr.Fone - Password Manager
From a few years down the line, managing your password will get tougher. And if you are someone who cannot sit on the internet all the time searching for methods to recover your passwords, you need a single-sign-on password manager that lets you create hard-to-break passwords and manage them easily.
Wondershare's Dr.Fone is a comprehensive software that offers a sheer range of solutions to your devices whether it runs on Android, iOS, Mac OS or Windows.
Dr.Fone toolkit lets you backup transfers to data recovery, WhatsApp transfer, and much more. However, it only lets you manage your passwords on an iOS device. So if your device runs on any other operating system, please follow the methods mentioned above.
Now let's discuss step-by-step how Dr.Fone - Password Manager (iOS) can help you import your forgotten passwords in few clicks on your iOS device.
Step 1: Begin with connecting your iOS device using a lightening cable to a computer which already has Dr.Fone downloaded and installed on it. Run Dr.Fone on your computer and choose the “Screen Unlock” option on screen.

Note: While connecting your iOS device to computer for the first time, you will have to select the "Trust" button on your iDevice. If you are prompted to enter a passcode to unlock, please type the correct passcode to connect successfully.
Step 2: Now, select the “Start Scan” option on the screen, and let Dr.Fone detect your account password on the device.
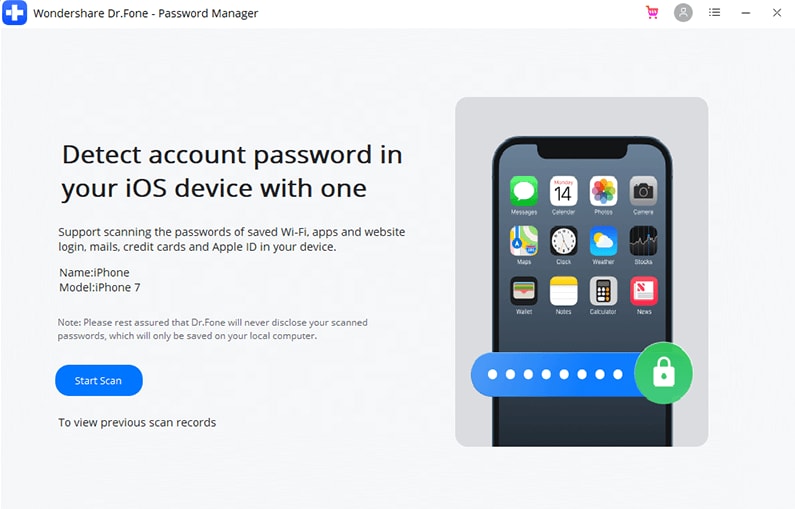
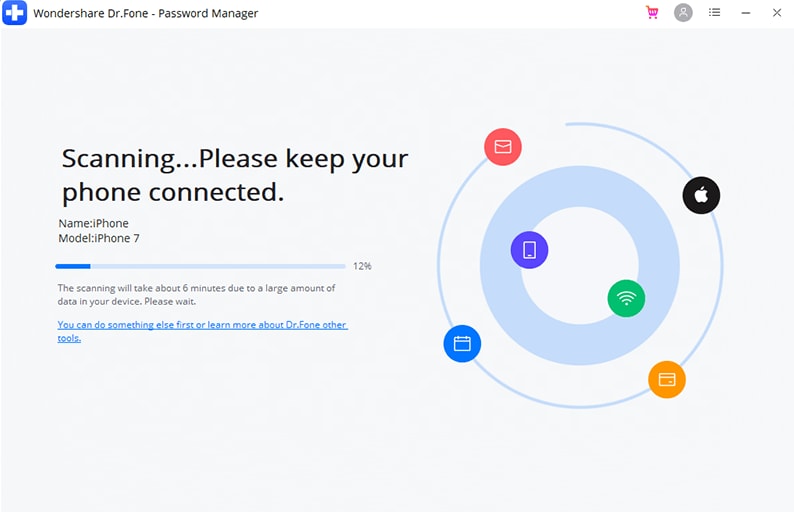
Sit back and wait until Dr.Fone is done with analyzing your iDevice. Please do not disconnect while the scanning process is running.
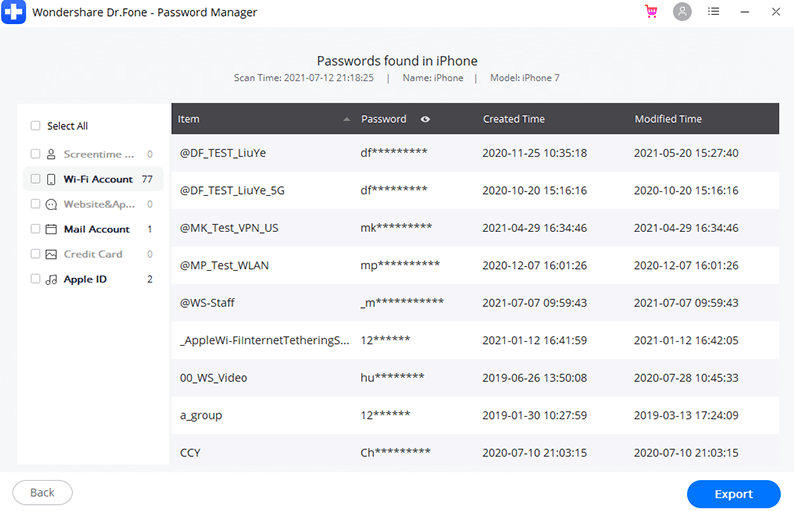
Step 3: Once your iDevice has been scanned thoroughly, all the password information will be displayed on your screen, which include a Wi-Fi password, mail account password, screen time passcode, Apple ID password.
Step 4: Next, select the "Export" option at the bottom right corner and choose the CSV format to export the password for 1Password, Chrome, Dashlane, LastPass, Keeper, etc.
Conclusion:
To import login information to any browser is an outdated method, however, you do not have any other options with Google Chrome. But even if you have a very basic understanding of the coding procedures mentioned in this article, you can easily import the passwords in a few minutes.
And when you have the CSV file possessing all your saved passwords, you can easily import them to your Chrome browser and smoothly access all your accounts and websites.
I hope this article helped you understand how to transfer your saved passwords on Chrome. Also, with Dr.Fone's help, you could easily do the same and use it for recovering your lost data as well.
If you think I have missed any method added to this list, please tell us about it in the comment section below.

James Davis
staff Editor
Generally rated4.5(105participated)