How to Recover Data from iPhone in DFU Mode?
Apr 27, 2022 • Filed to: Fix iOS Mobile Device Issues • Proven solutions
iPhone users often complain about their device entering DFU Mode involuntarily. Well, if that ever happens to you, remember that it is very imported to fix DFU Mode before you start to restore data saved on the iPhone.
If you do not backup your iPhone frequently, learning how to recover data in DFU Mode or how to fix DFU Mode is something you must know as sometimes, exiting DFU Mode could cause data loss.
In this article, we bring to you ways to fix DFU Mode before recovering your data to keep it safe and prevent data loss.
Part 1: Exit DFU Mode before recovering data
First and foremost, we have for you two ways to fix DFU Mode. These techniques are of utmost importance as they restore the normal functioning of your iPhone.
Method 1. Get iPhone out of DFU Mode without losing data
To fix DFU Mode on iPhone without data loss, we bring to dr. fone - System Repair (iOS). This software repairs any iOS device suffering from system failure such as iPhone stuck at Apple logo or boot loop, black screen of death, iPhone won't unlock, frozen screen, etc. This software prevents data loss and you don’t have to restore data after system recovery.

dr. fone - System Repair (iOS)
Fix iPhone stuck in DFU mode without losing data!
- Fix with various iOS system issues like recovery mode, white Apple logo, black screen, looping on start, etc.
- Get your iOS device out of DFU mode easily, no data loss at all.
- Work for all models of iPhone, iPad and iPod touch.
- Fully compatible with Windows 10 or Mac 10.14, iOS 13.
Given below are steps to understand how to fix DFU Mode via dr. fone - System Repair (iOS):
Once the product is downloaded on your PC, launch it to select “System Repair” at its homepage.

Now connect iPhone which is in the DFU Mode and let the software detect it. Then, click on “Standard Mode”.
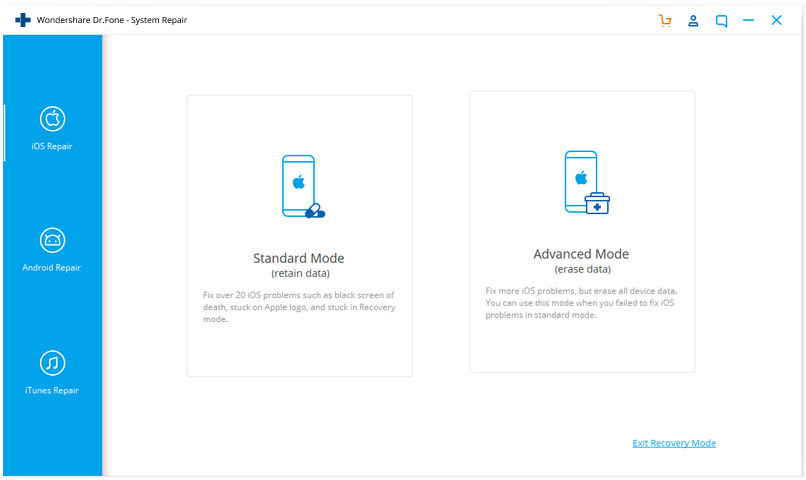
On the next screen, select the device name and suitable firmware for your iPhone and click “Start”.
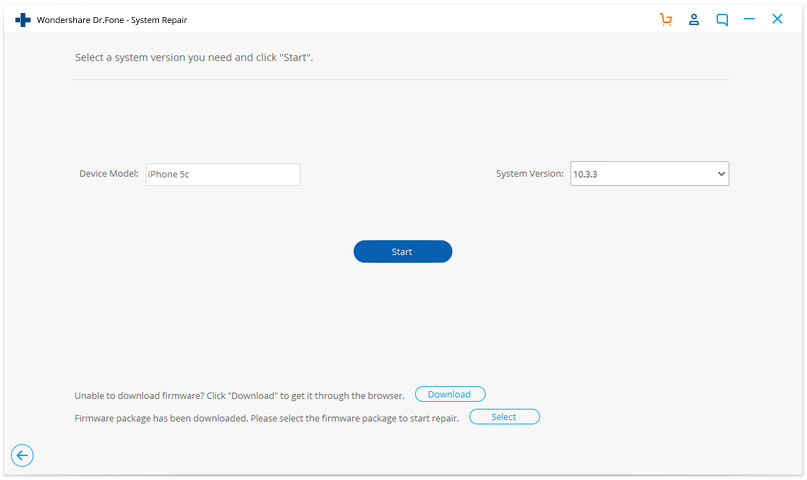
The firmware update will start downloading now.
After the download, Dr.Fone - System Repair will start repairing your iPhone to fix DFU Mode.
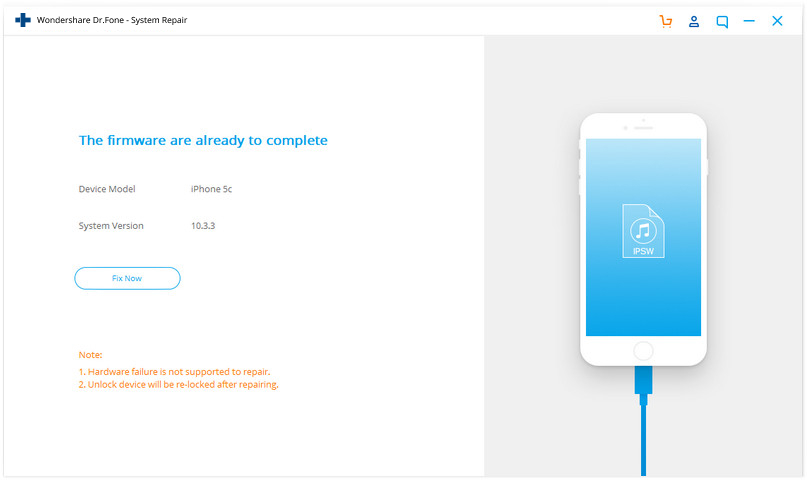
Once the software finishes its work to fix iPhone stuck at DFU, iPhone will restart normally.
Method 2. Exit iPhone DFU Mode with data loss
Another way to fix DFU Mode is by using iTunes since it is regarded as the best software to fix DFU Mode. However, using iTunes can wipe off your device and erase all its data.
Follow the steps given below to fix DFU Mode on an iPhone using iTunes:
Launch iTunes on your Mac/Windows PC and connect the iPhone stuck in DFU Mode.
As soon as iTunes recognizes your device, press Home (or Volume down key for iPhone 7 and 7Plus) and Power button for about ten seconds.
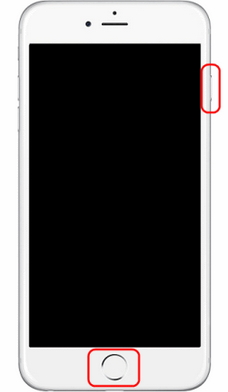
Now leave the keys and immediately press the Power button again for 2 seconds.
iPhone will automatically restart and exit the DFU Screen, but all your data will be wiped off.
Part 2: Selectively Recover data from your iPhone in DFU Mode with Dr.Fone iOS Data Recovery
Moving on, in this segment, we introduce to you how we can restore data in DFU Mode using Dr.Fone - iPhone Data Recovery. This software helps to restore data such as contacts, messages, call logs, WhatsApp, App data, photos, etc, from damaged/stolen/virus infected iPhones by scanning the device, iTunes backup or iCloud backup files. It is easy to use and also allows users to preview and then restore data selectively.

Dr.Fone - iPhone Data Recovery
Dünýädäki 1-nji iPhone we iPad maglumatlary dikeltmek programma üpjünçiligi
- IPhone maglumatlaryny dikeltmegiň üç usuly bilen üpjün ediň.
- Suratlar, wideo, aragatnaşyklar, habarlar, bellikler we ş.m. dikeltmek üçin iOS enjamlaryny skanirläň.
- ICloud / iTunes ätiýaçlyk faýllaryndaky ähli mazmuny çykaryň we gözden geçiriň.
- ICloud / iTunes ätiýaçlyk nusgasyndan enjamyňyza ýa-da kompýuteriňize isleýän zadyňyzy saýlap alyň.
- Iň soňky “iPhone” modellerine laýyk gelýär.
Method 1. Dr.Fone - iPhone Data Recovery : Scan the iPhone to recover data
First up, let us learn to recover data in DFU Mode from the iPhone itself. To do so:
Launch the Dr.Fone toolkit software on your PC, connect iPhone to it, select “Recover” from the homepage and choose “Recover from iOS Device”.

On the next screen, click “Start Scan” to retrieve all the saved, lost and deleted data. If the data you want to recover is retrieved, hit the pause icon.
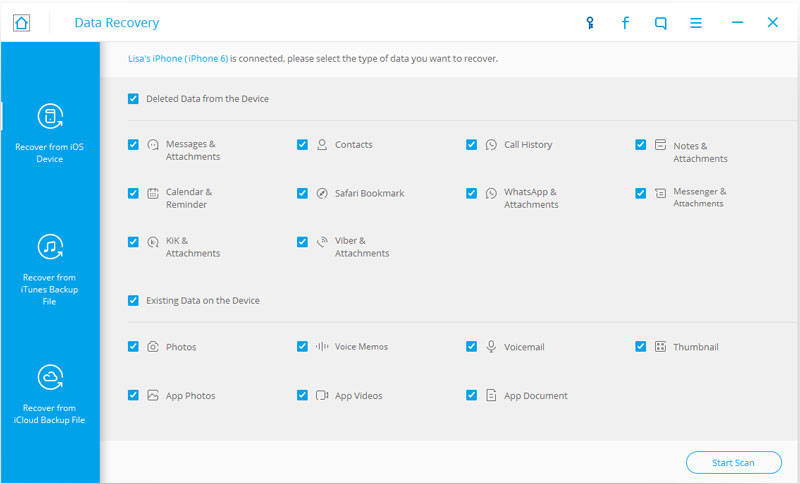
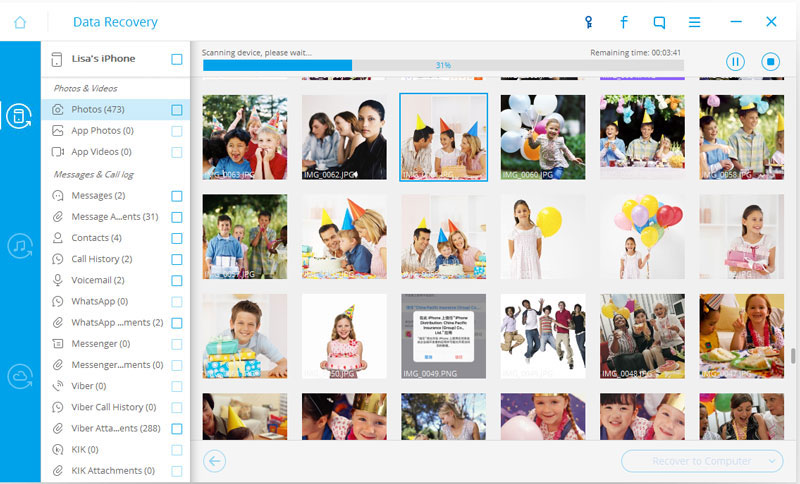
Now simply preview the retrieved data, select the items to be recovered and hit “Recover to Device”
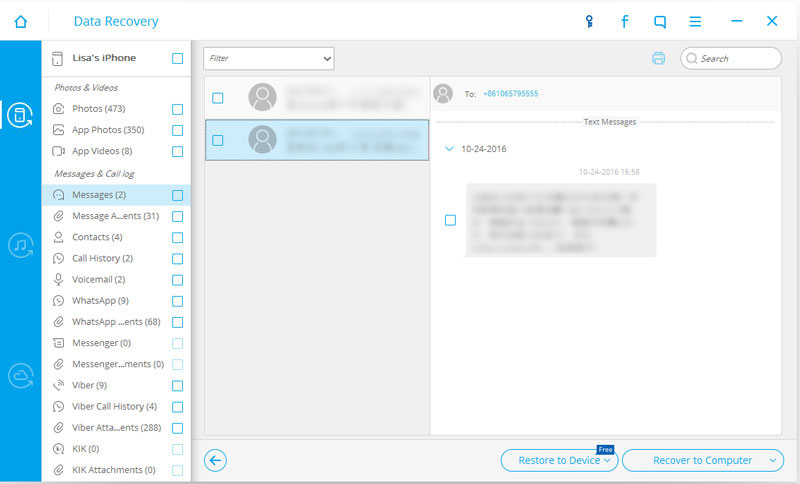
Method 2. iTunes Data Recovery: Extract the iTunes backup data file to recover data
Next up, if you want to retrieve data in DFU Mode from a previously existing iTunes backup file using iOS Data Recovery toolkit, here is what you should do:
Once you’re at the iOS Data Recovery homepage, select “Data Recovery” >“Recover Backup from iTunes”. The files will be displayed before you. Chose the most appropriate file and click on “Start Scan”.
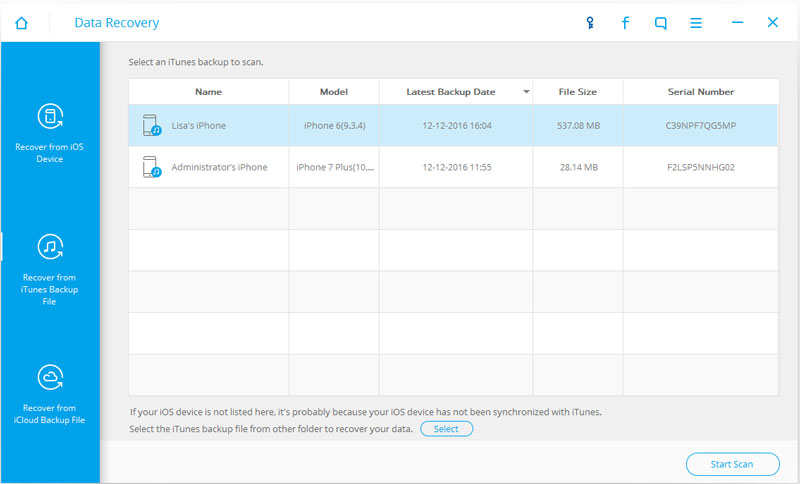
The backed up data in the file will be displayed in front of you. Preview it carefully, select the items to be recovered to your iPhone and hit “Recover to device”.
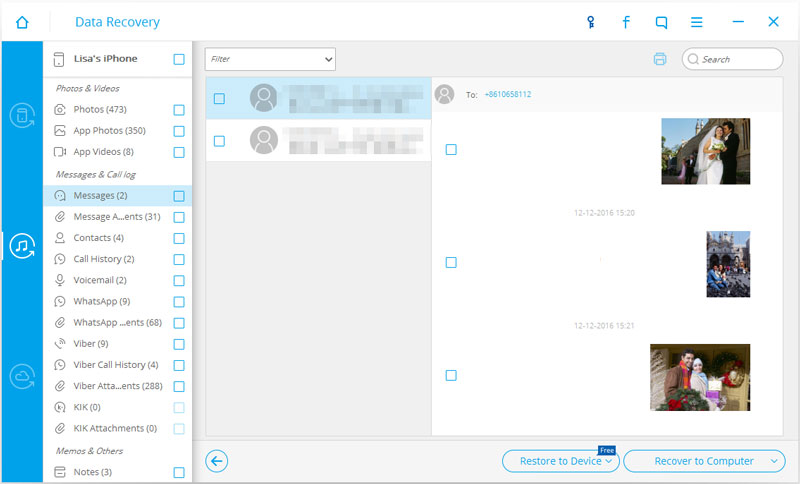
Method 3. iCloud Data Recovery: Scan iCloud to recover data
Lastly, iOS Data Recovery toolkit also allows users to restore data from an iCloud file backed up previously. To do so, follow the instructions listed below:
Run Dr.Fone toolkit on your PC and select “Data Recovery” >“Recover from backup files in iCloud”. You will be directed to a new screen. Here, sign in using Apple account details and don’t worry about keeping your details safe with this software.
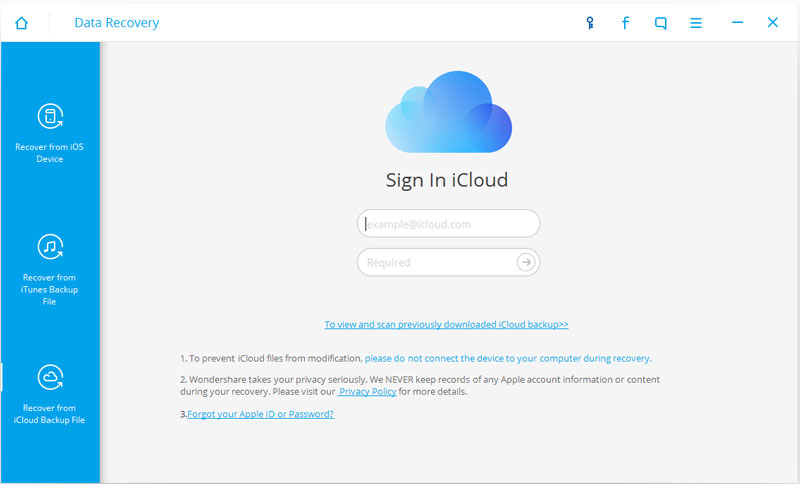
Now select the appropriate file and hit “Download”.
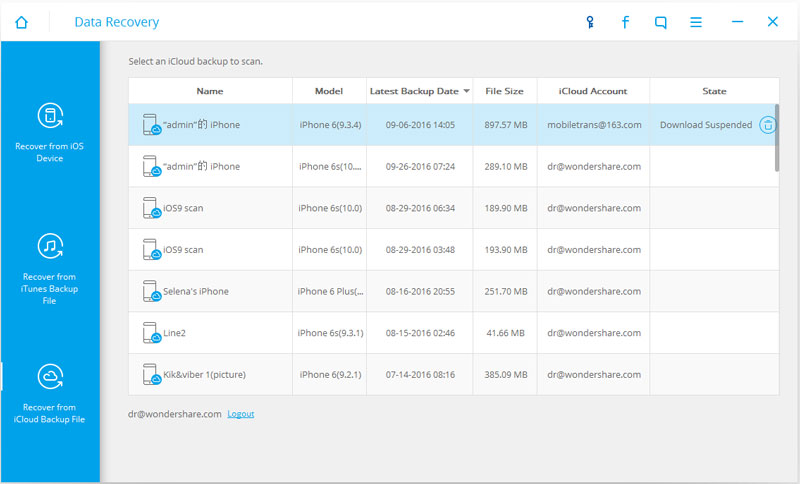
On the pop-up window, choose the files to be recovered and hit “Scan.
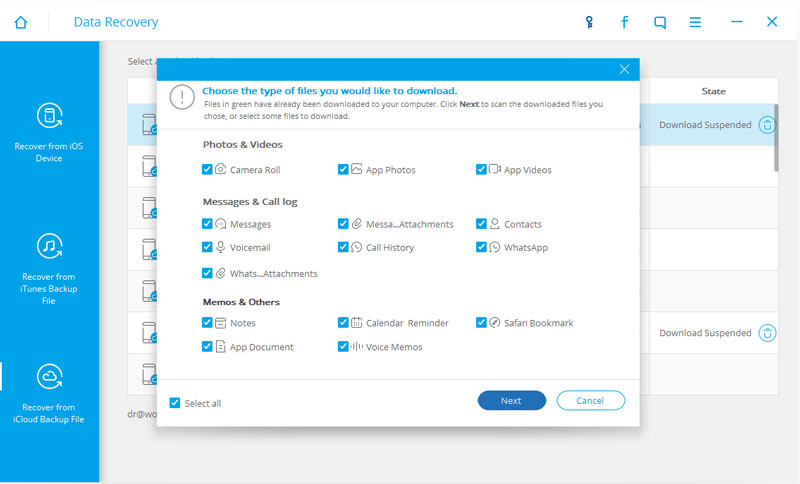
Finally, all the recovered files will be in front of you. Select them to restore data and hit “Recover to Device”
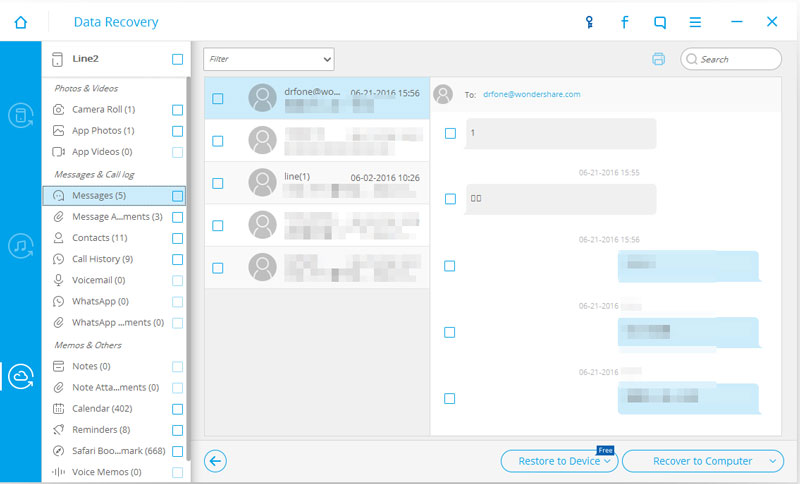
Simple yet effective! Dr.Fone toolkit- iOS Data Recovery helps in speedy data recovery to your iPhone in DFU Mode using three different techniques.
Part 3: Restore data from an iTunes backup directly
Lost all our data after fixing DFU Mode using iTunes? Don’t fret. Here is how you can restore a backup file via iTunes to your device:
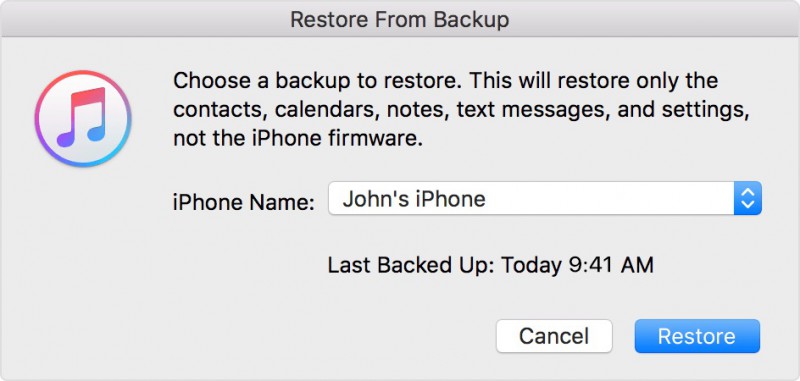
Launch iTunes on PC and connect the iPhone. iTunes will detect it or you can select your iPhone under “Device”.
Now select “Restore backup” and chose the most recent backup file.
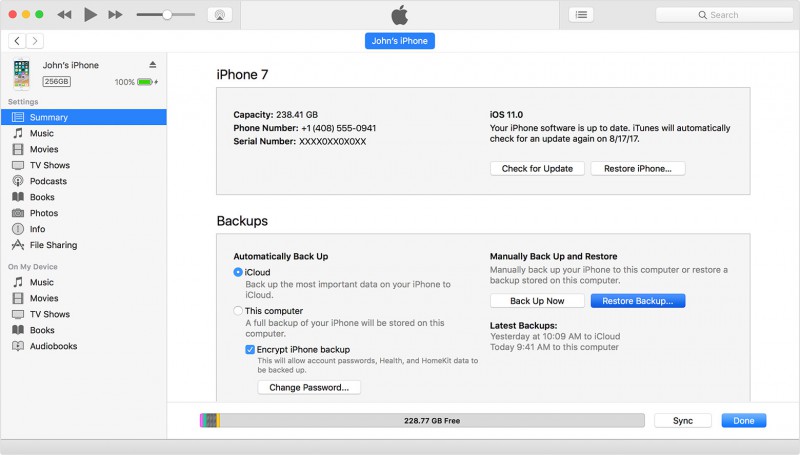
Click on “Restore” and do not disconnect your iPhone till the entire iTunes backup file is restored to it, iPhone restarts and syncs with PC.
Part 4: Restore Data from iCloud backup directly
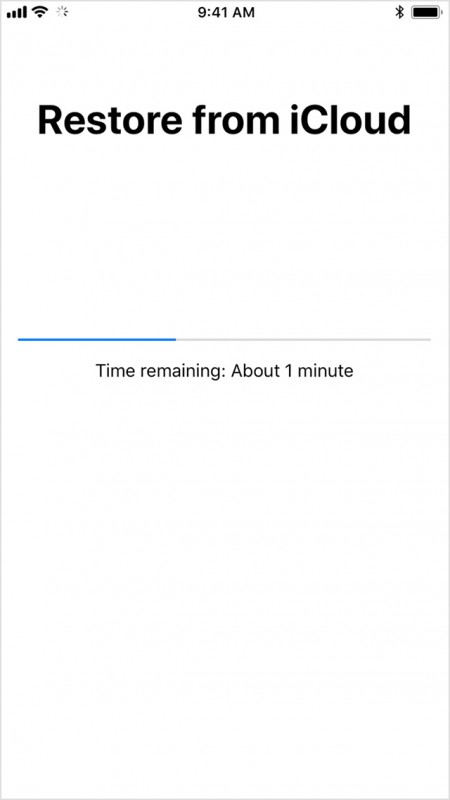
If you already have an iCloud backup file, you can restore data directly to your iPhone, but first you need to visit “Settings” > General” >“Reset” >“Erase all contents and data”. Then follow the steps given below:
Start setting up your iPhone and at the “App & Data Screen”, select “Restore from iCloud Backup”.

Now log in with your credentials and choose a backup file. It will start restoring on your iPhone.
iOS System Recovery and iOS Data Recovery by Dr.Fone toolkit help in fixing iPhone stuck at DFU and subsequently recovering data to your iOS Device. Go ahead and use Dr.Fone toolkit now as it is World’s No. 1 iPhone manager with multiple features and a very powerful interface.
iPhone Frozen
- 1 iOS Frozen
- 1 Fix Frozen iPhone
- 2 Force Quit Frozen Apps
- 5 iPad Keeps Freezing
- 6 iPhone Keeps Freezing
- 7 iPhone Froze During Update
- 2 Recovery Mode
- 1 iPad iPad Stuck in Recovery Mode
- 2 iPhone Stuck in Recovery Mode
- 3 iPhone in Recovery Mode
- 4 Recover Data From Recovery Mode
- 5 iPhone Recovery Mode
- 6 iPod Stuck in Recovery Mode
- 7 Exit iPhone Recovery Mode
- 8 Out of Recovery Mode
- 3 DFU Mode


Alice MJ
staff Editor
Generally rated4.5(105participated)