Apr 27, 2022 • Filed to: Fix Android Mobile Problems • Proven solutions
'Unable to use your Android phone due to encryption unsuccessful error?
Well, encryption unsuccessful error is a serious problem and should not be taken lightly. Android encryption unsuccessful error screen prevents Android smartphone owners from using their phones and accessing any data stored on it. It is a strange error and occurs randomly. You will notice that while you are using your phone normally, it suddenly freezes. When you switch it on again, an encryption unsuccessful error message displays on the screen. This message appears, on the whole, go the main screen with only one option, i.e., "Reset Phone".
The entire error message reads as follows:
"Encryption was interrupted and can't be completed. As a result, the data on your phone is no longer accessible.
To resume using your phone, you must perform a factory reset. When you set up your phone after the reset, you'll have an opportunity to restore any data that was backed up to your Google Account".
Read ahead to find out why Android encryption unsuccessful error occurs and the ways to get rid of it.
Part 1: Why encryption unsuccessful error happens?
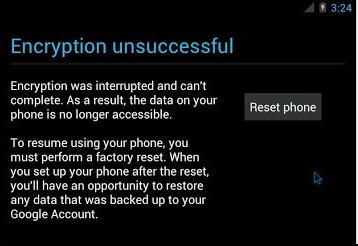
Android encryption unsuccessful error can show up due to various issues in your device or its software, but we cannot pinpoint a single reason. Many Android users are of the opinion that encryption unsuccessful error happens when your phone is unable to recognize its internal memory. Corrupted and clogged cache is also one of the main reasons for Android encryption unsuccessful error. Such an error cannot get phone encrypt state, which means that encryption unsuccessful error forces your device not to encrypt normally and, thus, causes an obstruction in using it. Even when you reboot your phone several times, the encryption unsuccessful message shows up every time.
Encryption unsuccessful error screen is very scary as it leaves with only one option, namely, "Reset Phone" which, if selected, will wipe off and delete all data and content stored on the phone. Many users end up using this option and then manually format their system, flowed by flashing a new ROM of their choice. However, this is easier said than done, and affected users are always on a lookout for guides and detailed explanation to overcome the Android encryption unsuccessful error.
In the following two segments, we will discuss how to combat the encryption unsuccessful error in the most reliable way.
Part 2: One click to fix encryption unsuccessful error
Accounting to the severity of Android encryption error, we know how stressful you might be feeling. But don't worry! Dr.Fone - System Repair (Android) is a sleek tool for fixing all your Android issues along with encryption unsuccessful problems within one-click.
Moreover, you can use the tool for getting rid of the device stuck on a blue screen of death, unresponsive or bricked Android device, apps crashing issue, etc. in a jiffy.

Dr.Fone - System Repair (Android)
A quick fix to the error "cannot get phone encrypt state"
- The error 'cannot get phone encrypt state' can easily be tackled with this single-click solution.
- Samsung devices are compatible with this tool.
- All Android system issues are fixable with this software.
- It's an incredible tool available first time in the industry to repair Android systems.
- Intuitive for even the non-technical users.
Resolving the Android encryption error may erase the device data at once. So, prior to fixing any Android system with Dr.Fone - System Repair (Android), it's paramount to take a device backup and be on the safe side.
Phase 1: Connect the device after preparing
Step 1: Launch Dr.Fone - System Repair (Android) and tap the 'System Repair' tab over the software interface on your computer. Now, connect the Android device using a USB cord.

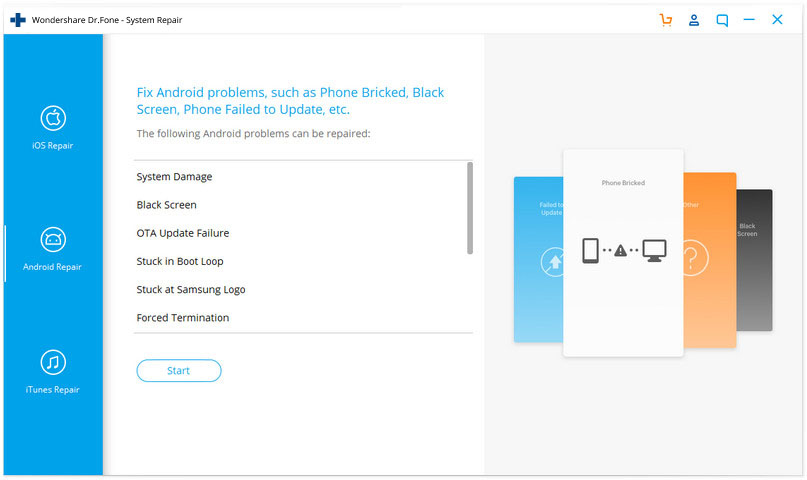
Step 2: 'Android Repair' needs to be selected on the following window, followed by the 'Start' button.
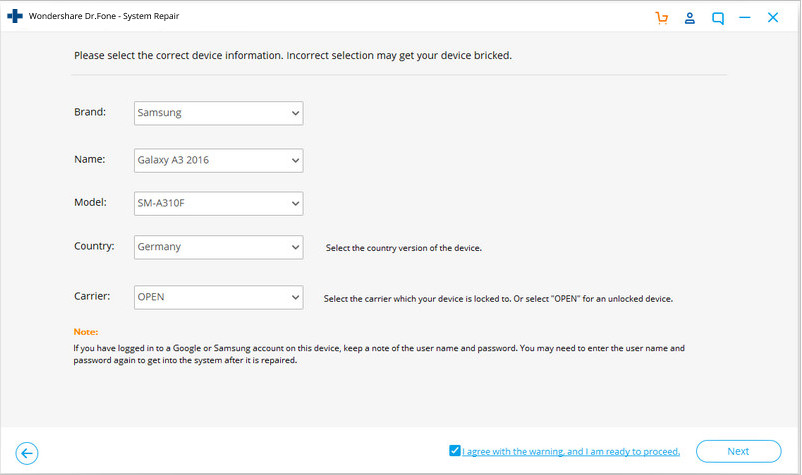
Step 3: Now, feed your Android device on the device information screen. Hit 'Next' thereafter.
Phase 2: Get into 'Download' mode and repair
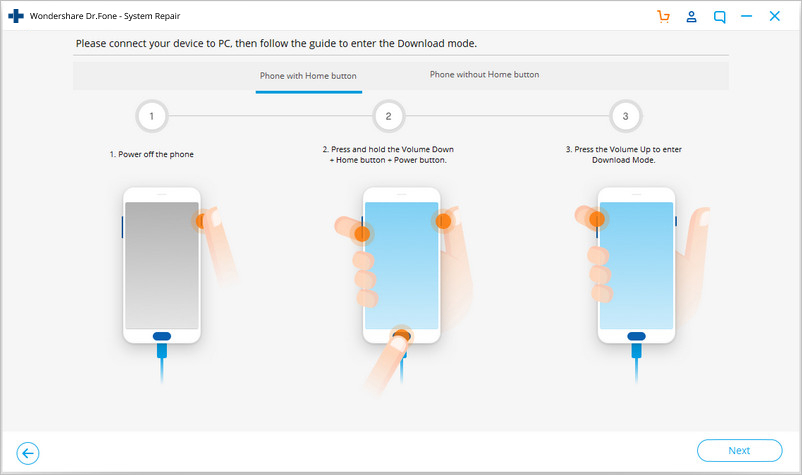
Step 1: In order to fix the encryption unsuccessful issue, get your Android under 'Download' mode. Here comes the process –
- Get your 'Home' button-less device and power off. Hit the keys trio 'Volume Down', 'Power', and 'Bixby' for about 10 seconds. Let them go before tapping the 'Volume Up' key for entering the 'Download' mode.
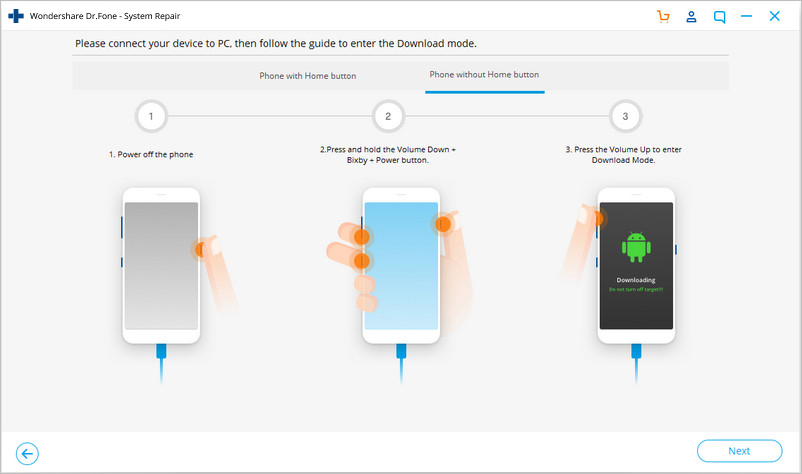
- Having the 'Home' button device, you need to power it down as well. Press the 'Power', 'Volume Down' and 'Home' keys and hold them for 5-10 seconds. Leave those keys prior to hitting the 'Volume Up' key and enter the 'Download' mode.
Step 2: clicking over the 'Next' button will start the firmware download.
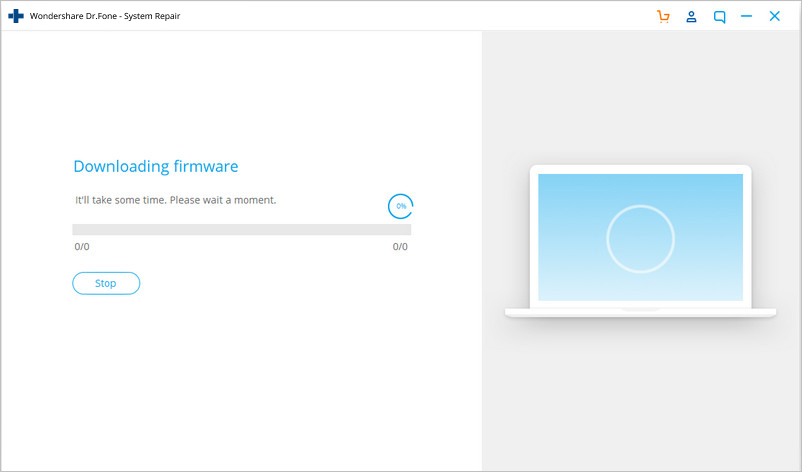
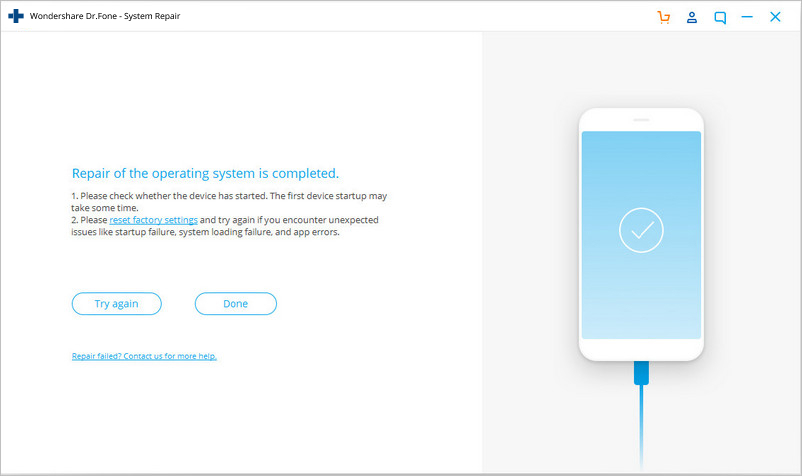
Step 3: Once the download and verification are over, Dr.Fone - System Repair (Android) starts auto repairing the Android system. All Android issues, along with unsuccessful Android encryption, get resolved now.
Part 3: How to fix encryption unsuccessful error by factory reset?
Android Encryption error is very common these days, and thus, it is important for us to learn ways to fix it. When the Encryption unsuccessful message appears on your phone's screen, the only option you immediately have before you is to factory reset your phone by tapping on "Reset Phone". If you choose to go ahead with this method, be prepared to lose all your data. Of course, backed-up data can be recovered whenever you want after the reset process is complete, but the data which is not backed up on the cloud or your Google Account will be deleted permanently. It is, however, advised to backup all your data using a reliable third-party software like the Dr.Fone - Phone Backup (Android).

Dr.Fone - Phone Backup (Android)
Flexibly Backup and Restore Android Data
- Selectively backup Android data to the computer with one click.
- Preview and restore the backup to any Android devices.
- Supports 8000+ Android devices.
- There is no data lost during backup, export, or restoration.
Now moving on, to "Reset Phone", follow the steps given below carefully:
• On the Encryption unsuccessful message screen, click on "Reset phone" as shown hereunder.
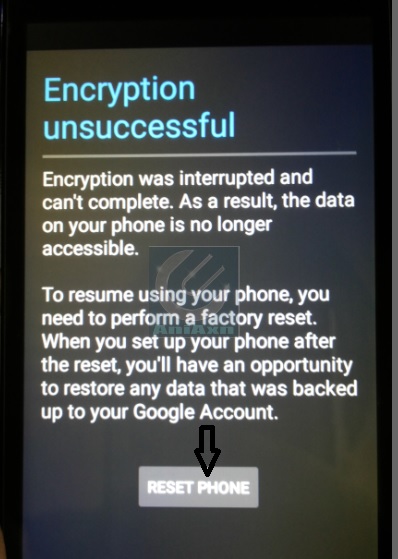
• You will now see a screen similar to the one shown below.

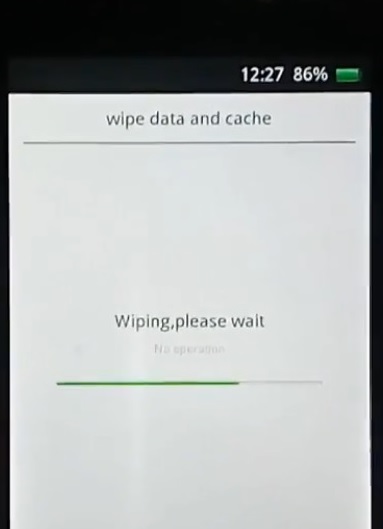
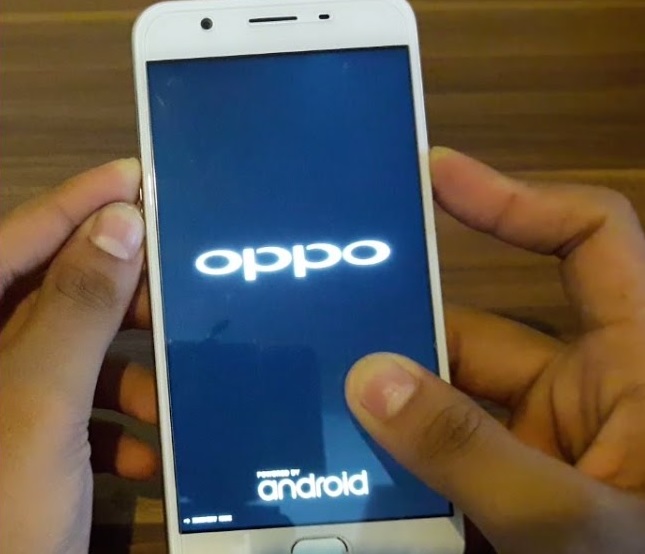
• Your phone will restart after a couple of minutes. Be patient and wait for the phone manufacturer logo to appear after the restart, as shown in the image below.
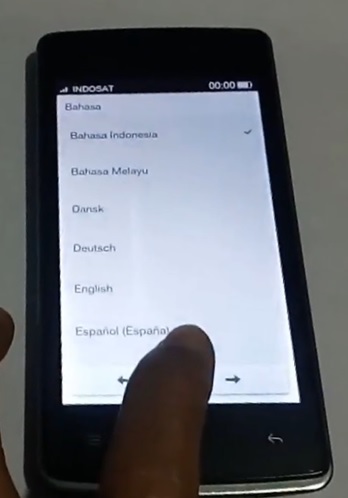
• In this last and final step, you will be required to set up your device fresh and new, starting from selecting language options, to time and the usual new phone set up features.
Note: All your data, cache, partitions, and stored content will be wiped off and can only be restored if it was backed up once you finish setting up your phone again.
If you feel this remedy to fix Android encryption unsuccessful error is too risky and time-consuming, we have another method which enables you to use your phone normally. So, what are we waiting for? Let us proceed to the next segment to know more.
Part 4: How to fix encryption unsuccessful error by flashing a new ROM?
This is yet another uncommon and unique way of fixing the encryption unsuccessful error issue.
Now, we all are very well aware of the fact that Android is a very open platform and allows its users to modify and change its versions by downloading and installing new and customized ROM's.
And hence, Android's open platform plays a very significant part in getting rid of this error. It is because flashing a new ROM is very helpful in fixing the Android encryption unsuccessful problem.
Changing the ROM is simple; let us learn all that you need to do:
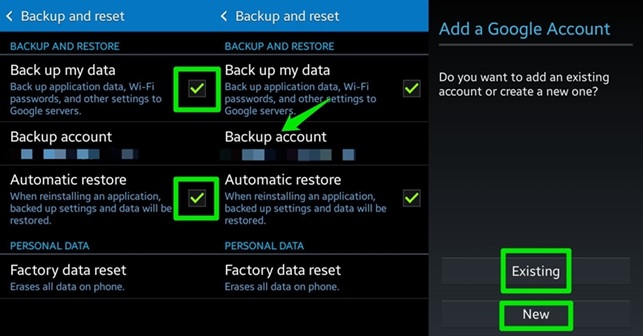
Firstly, take a backup of all your data, settings, and Apps on the cloud or your Google Account. Just see the image below to know how and where.
Next, you have to unlock the bootloader on your device after referring to your phone's rooting guide and select custom recovery.
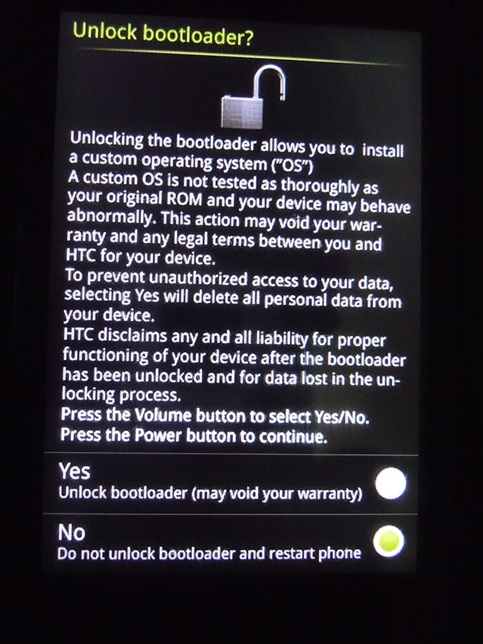
Once you have unlocked the bootloader, the next step is to download a new ROM, whichever best suits you.
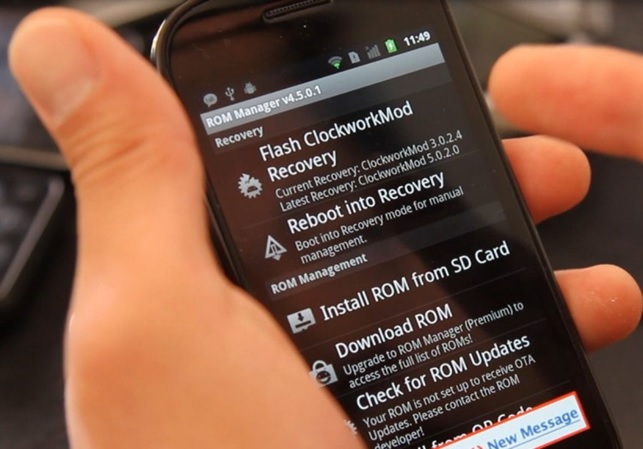
Now to use your new ROM, you should restart your phone in recovery mode and then select "Install" and search for the ROM Zip file you downloaded. This may take a few minutes. Wait patiently and make sure to delete all cache and data.
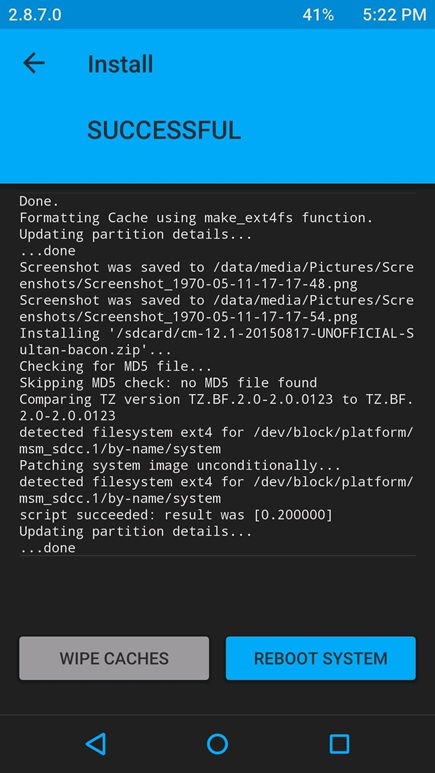
Once this is done, you will have to check whether or not your new ROM is recognized by your Android phone.
In order to do so:
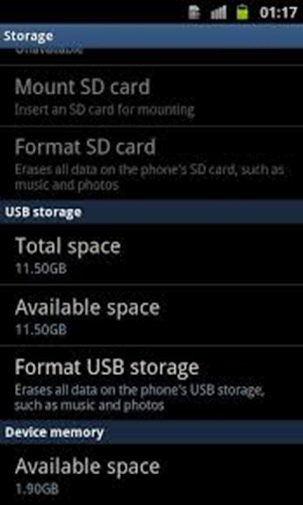
• Visit "Settings" and then select "Storage".
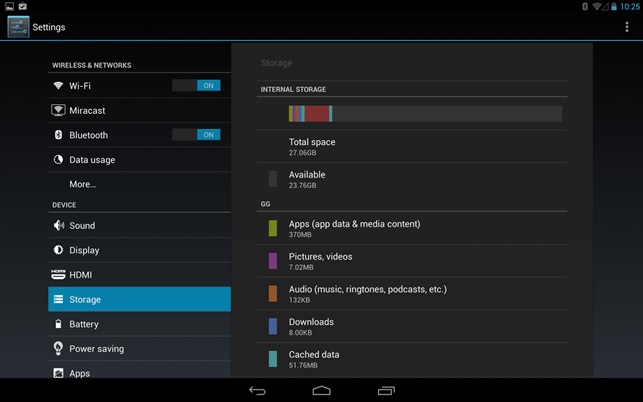
• If your new ROM appears as "USB Storage", then you have successfully installed it.
Encryption unsuccessful error cannot get phone encrypt state, which basically means that such an Android encryption unsuccessful error completely blocks you from using the phone and accessing its data. It is not much you can do in such a situation. If you face a similar problem or know someone who is experiencing it, do not hesitate to use and recommend the remedies given above. They have been tried and tested by many users who vouch that these methods are safe and trustworthy. So go ahead and try them out now, and we hope to hear from you on your experience in resolving the Android encryption error.
Android sistem kurtarma
- Android Cihaz Sorunları
- İşlem Sistemi Yanıt Vermiyor
- Telefonum Şarj Olmayacak
- Play Store Çalışmıyor
- Android Sistem Kullanıcı Arayüzü Durduruldu
- Paket Ayrıştırma Sorunu
- Android Şifreleme Başarısız
- Uygulama Açılmıyor
- Maalesef Uygulama Durduruldu
- Doğrulama hatası
- Google Play Hizmetini Kaldır
- Android'de Kilitlenme
- Android Telefon Yavaş
- Android Uygulamaları Çökmeye Devam Ediyor
- HTC Beyaz Ekran
- Android Uygulaması Yüklenmedi
- Kamera Başarısız
- Samsung Tablet Sorunları
- Android Onarım Yazılımı
- Android Yeniden Başlatma Uygulamaları
- Maalesef com.android.phone işlemi durdu
- Android.Process.Media Durduruldu
- Android.Process.Acore Durduruldu
- Android Sistem Kurtarma'da Takılıp Kalma
- Huawei Sorunları
- Huawei Pil Sorunları
- Android Hata Kodları
- Android Tips


Alice MJ
staff Editor
Genel olarak puan 4,5 ( 105 katıldı)