Cep telefonunuzdaki sorunları kolayca çözmek için en eksiksiz Dr.Fone kılavuzlarını buradan öğrenin. Windows ve Mac platformlarında çeşitli iOS ve Android çözümleri mevcuttur. Şimdi indirin ve deneyin.
Dr.Fone - Ekran Kilidi Açma (iOS):
“If you active an unlocked phone on your carrier and want to give that phone to someone else on a different carrier, is the phone still unlocked or is it now locked on your carrier?"
If you are a contract iPhone user or you bought a second-hand iPhone with pay monthly contracts & SIM Only plans, maybe you are confused how to SIM unlock your iPhone to switch to a different carrier. When you try to do it, you must have encountered one of the following four situations. This SIM lock is because Apple permits the network provider to lock your iPhone so it can only be used under certain countries or a specific SIM carrier.

Don't worry. Dr.Fone provides useful and convenient SIM unlock services for iPhone. This guide will show you completed operation process to help solve the problem.
How to Remove SIM Lock?
Step 1: Open Dr.Fone-Screen Unlock and click on “Remove SIM Locked”.
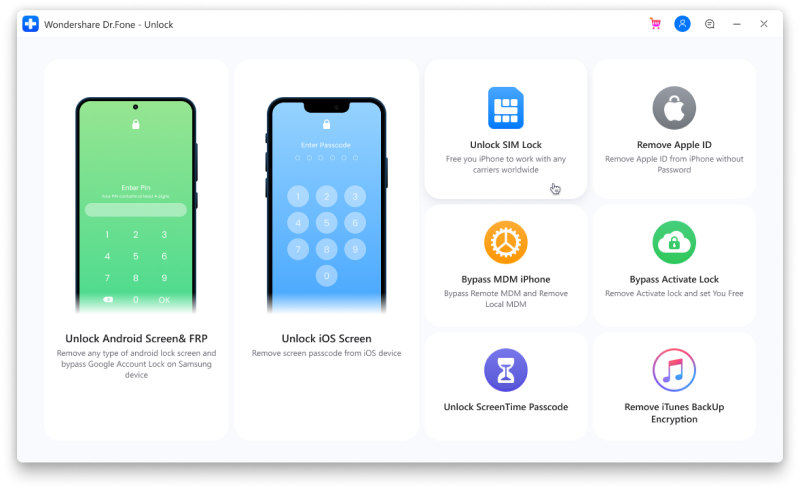
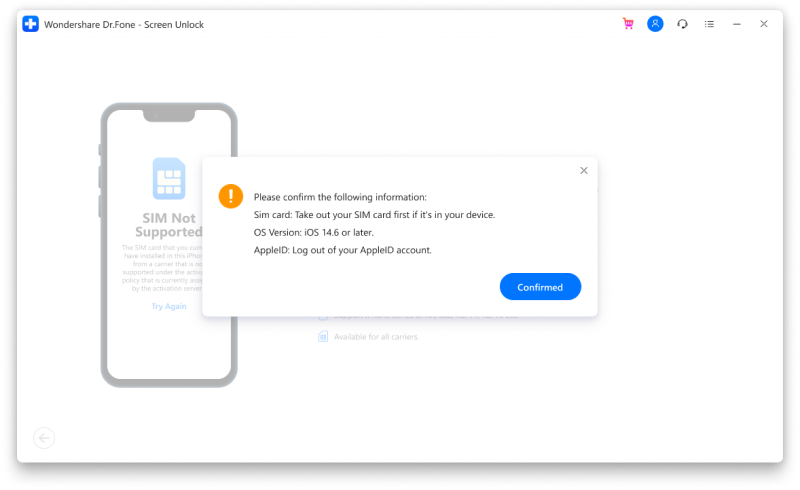
Step 2: Tap on “Start” to enter the process of authorization verification. Make sure your iPhone has connected to the computer. Click on “Confirmed” to continue.
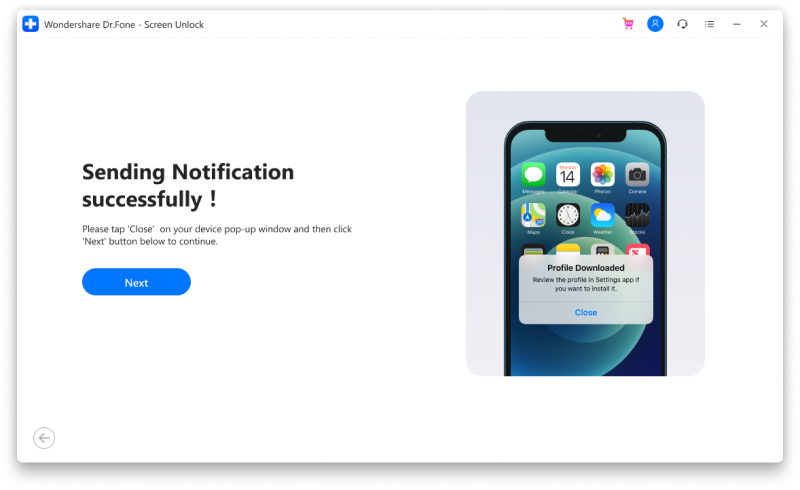
Step 3: Dr.Fone will send configuration profile to your device. Do remember to follow the instructions to unlock screen. Select “Next” to continue.
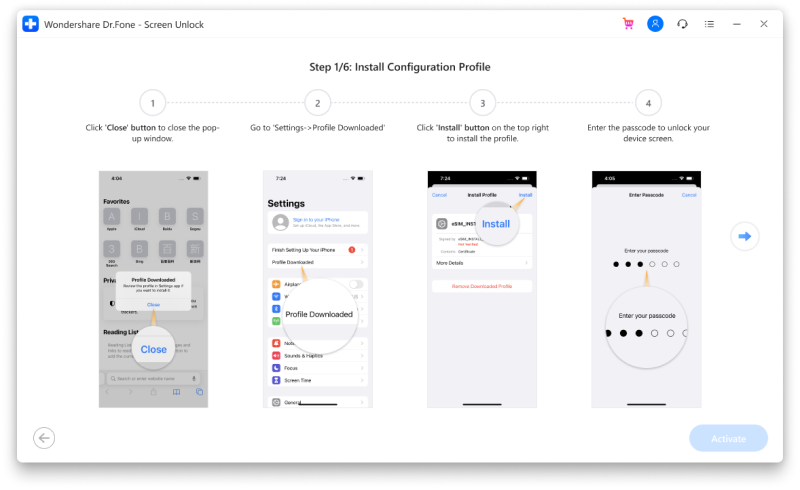
Step 4: Install Configuration Profile
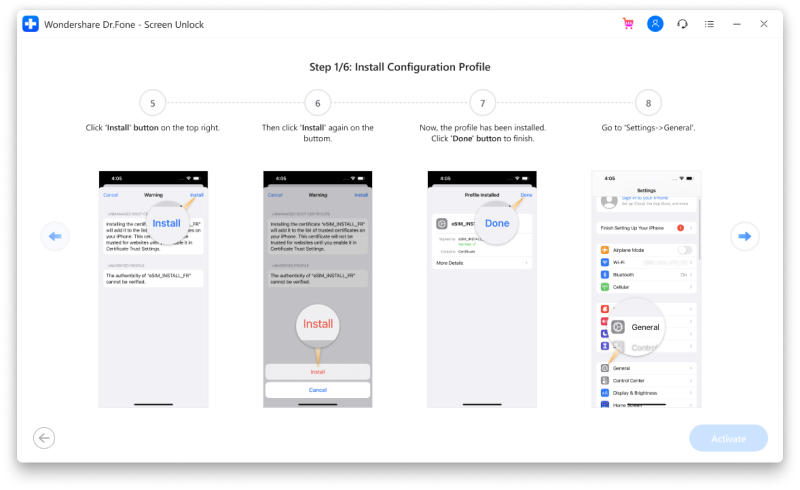
- Close the popup window and turn to “SettingsProfile Downloaded”. Then click “Install” and enter your screen passcode.
- Select “Install” on the top right and then click the button again at the bottom. After finishing the install, turn to “SettingsGeneral”.
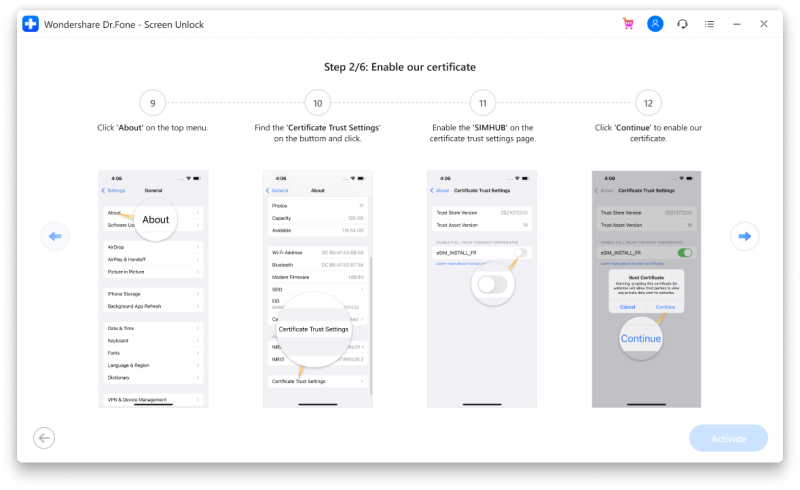
Step 5: Choose “About” and the click “Certificate Trust Settings”. Then enable the “SIMHUB” and tap on “Continue” to trust our certificate.
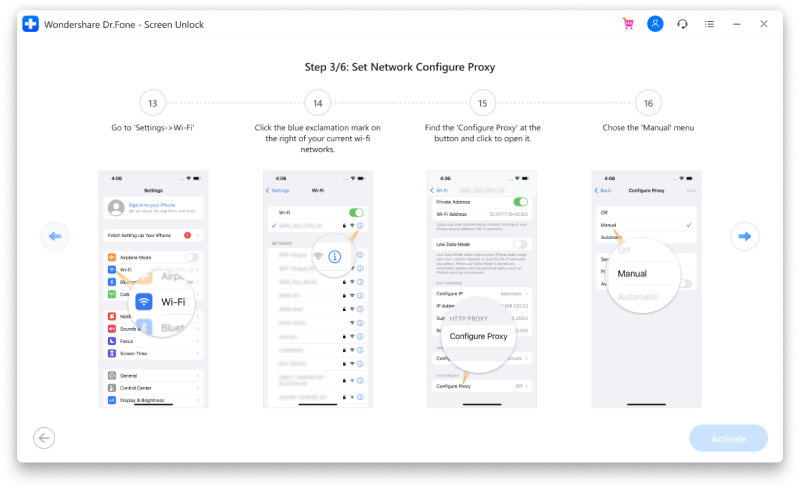
Step 6: Go to “SettingsWi-Fi” and then choose the blue exclamation mark on your current network. Next, click on the “Configure Proxy” button and choose “Manual”.
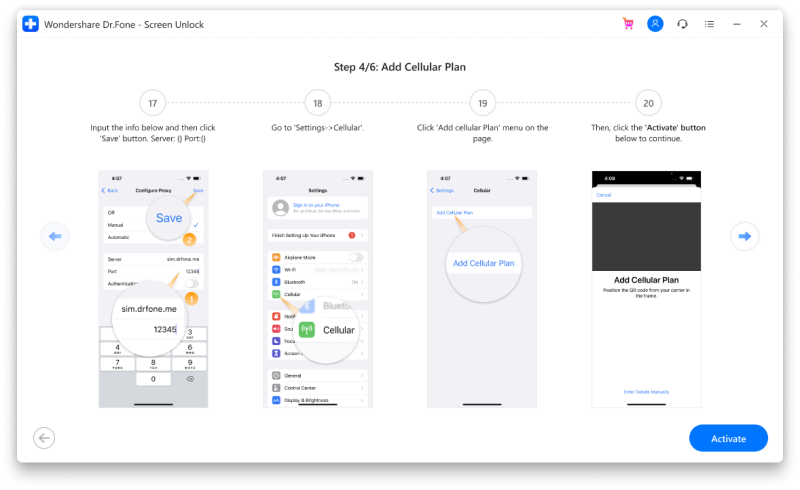
Step 7: Enter the info below and choose “Save”. Then go to “SettingsCellular and choose “Add Cellular Plan”. Next, tap on “Activate” to continue.
Step 8: Unlock SIM
- Scan the QR code which appears on your screen.
- Click on the blue text in the middle of the image above, and then choose “Enter Details Manually to input the SM-DP+Address and Activation Code below.
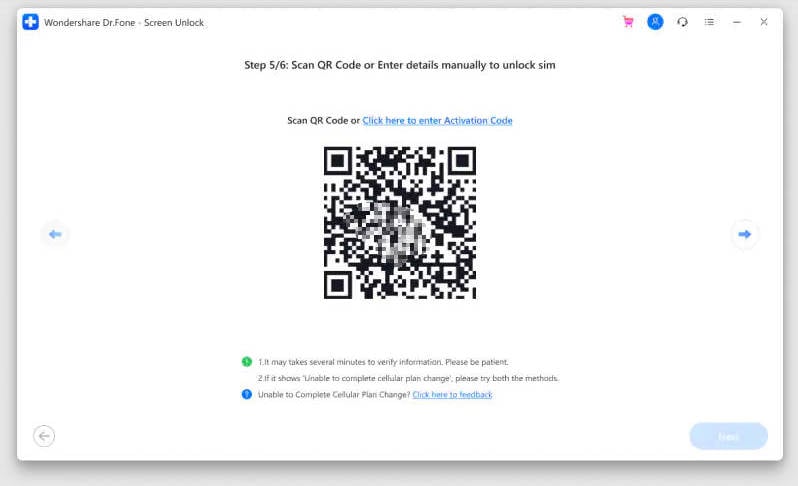
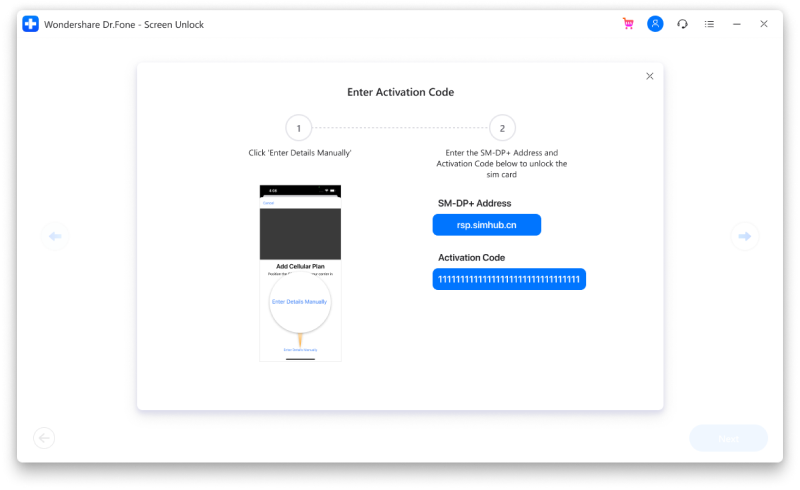
Step 9: Active Cellular Plan
- Select “Add Cellular Plan” and wait for it to finish. Then click “Dismiss” and follow the guides to enter the tool.
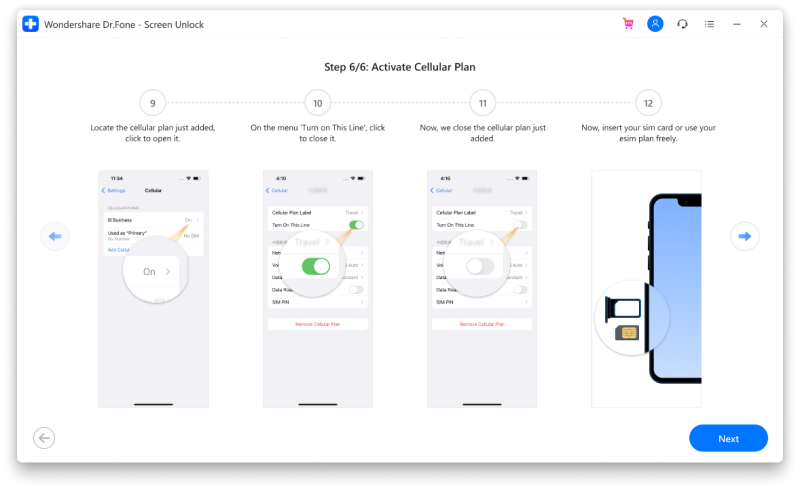
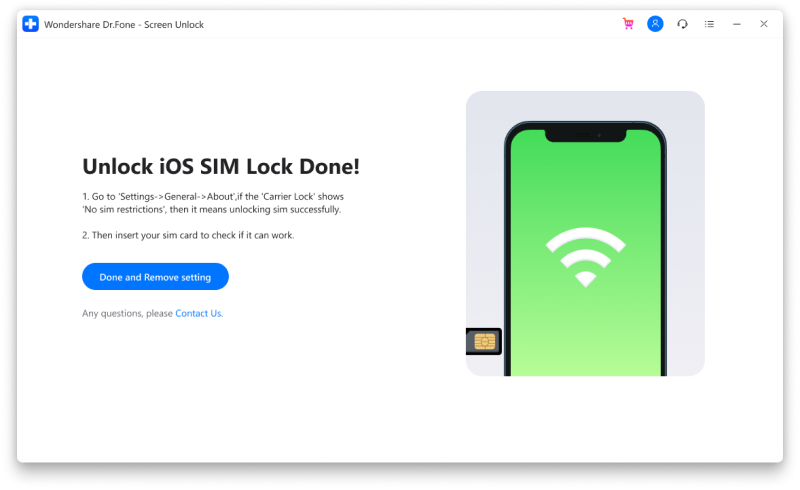
- When your iPhone is activated, turn to “SettingsGeneralAbout”, find the “Carrier Lock”. However, if you see “SIM locked”, please restart your device. If it shows “No SIM restrictions”, please go to “Settings”, open the “Cellular” menu.
- Open the cellular plan you added just now and close “Turn on This Line”. Then, you can use any SIM card now! Please click on “Next” to complete the last process.
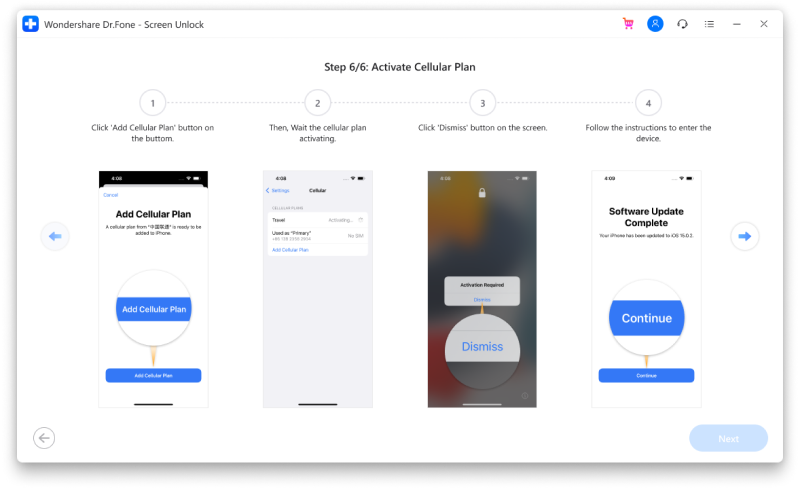
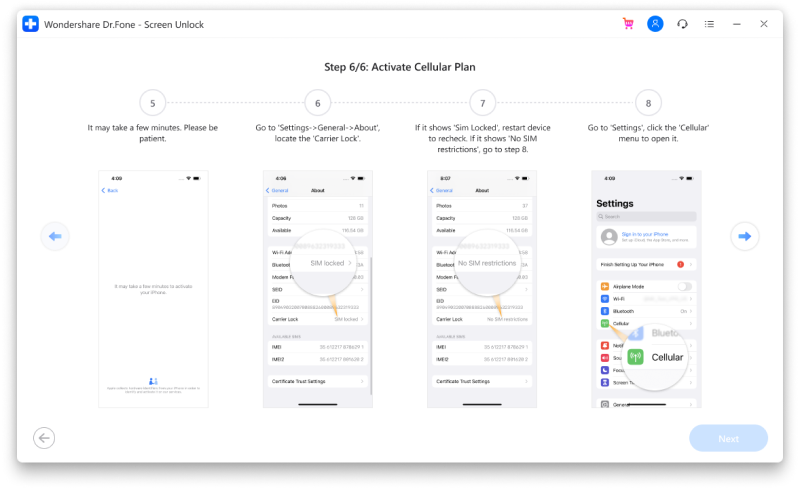
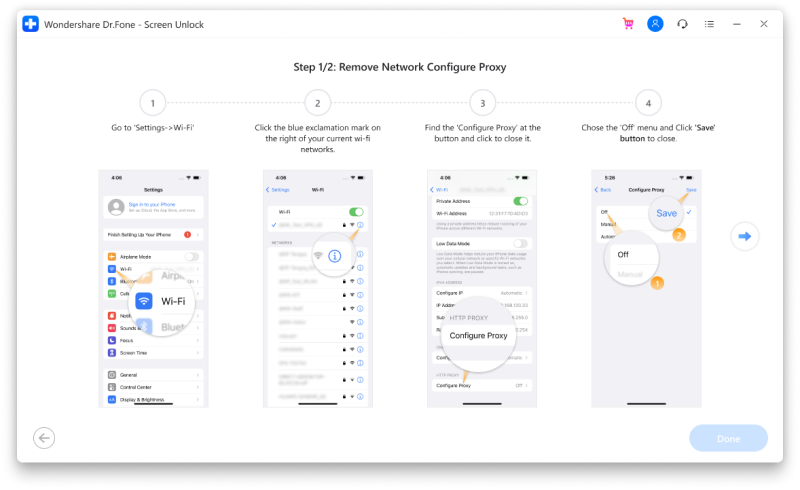
In step 6, we set network configure proxy which may make users not be able to access the Internet. Therefore, remove setting could help close the Wi-Fi configure proxy.:
Step 10: Choose “Done and Remove setting”. Even if you click to close this page, there will still be a reminder of remove setting.
Step 11: Go to “SettingsWi-Fi” and click the blue exclamation mark on your current Wi-Fi. Then close “Configure Proxy”, choose “Off” menu and save it.
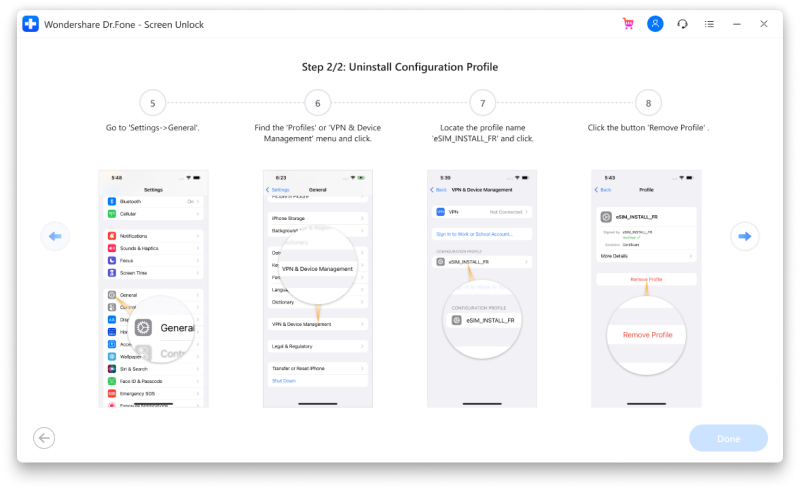
Step 12: Turn to “SettingsGeneral”, choose the “Profiles” or “VPN & Device Management” menu. Then click on the profile name and select “Remove Profile”.
Step 13:Unlock your iPhone and click “Remove".
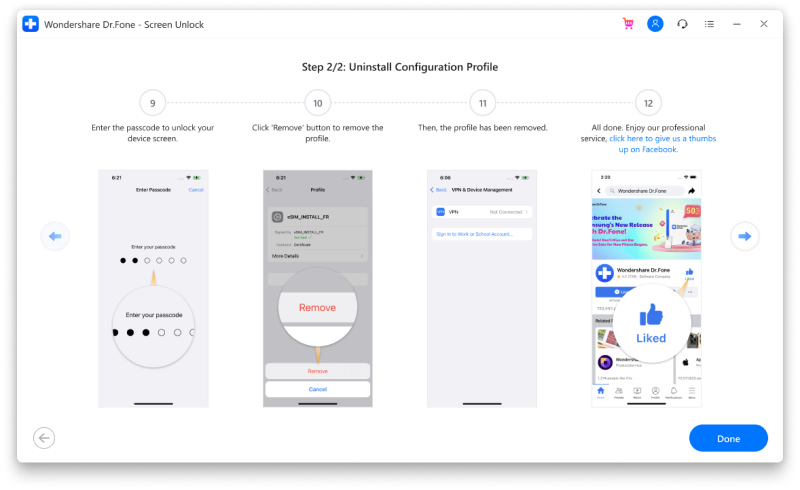
Congratulations! You can use any network carriers and SIM plan now! If you find our service useful, please click to give us a thumbs up on Facebook, it will be a precious encouragement!
Note: If your phone is factory reset or flashed, it needs to be reactivated the SIM unlock function.


