Fotoğrafları iPod touch'tan PC'ye Kolayca Aktarın
27 Nis 2022 • Dosya: Telefon ve PC Arasında Veri Yedekleme • Kanıtlanmış çözümler
Do you need to transfer your photos from your iPod to your PC, iPhone, iPad, or another iPod? This helps you keep a backup of your photos at all times and also allows for easy accessibility. You can create a backup of all your data in one device. It helps you to form a combined library of all your photo collections, allowing you to sort them out more comprehensively. So if you need to transfer your photos from your iPod to either your PC or iPhone or iPad, how do you go about it? There are easy ways you can do this. At times, such software tools can make the job easier and faster. You can transfer photos from iPod to computer easily.
The instructions for transfer from iPod to the computer, iPod Touch to iPhone, and iPod to iMac/ Mac Book Pro (Air) are explained below, step by step, for each kind of transfer. The first shows how to transfer photos from an iPad to a PC without using any additional software. The second one shows how to transfer photos from iPod Touch to iPhone with Dr.Fone - Phone Transfer (iOS). Important features of Dr.Fone - Phone Transfer (iOS) are also enumerated. Finally, steps for how to transfer photos from iPod to Mac are shown with Dr.Fone - Phone Manager (iOS). It's easy to learn how to transfer photos from iPod to computer from this article.
- Part 1. How to Transfer Photos from iPod to Computer with AutoPlay
- Part 2. Transfer Photos from iPod Touch to iPhone with Dr.Fone - Phone Transfer (iOS)
- Part 3. How to Transfer Photos from iPod to iMac/ Mac Book Pro (Air)
Part 1. How to Transfer Photos from iPod to Computer with AutoPlay
This method uses the inbuilt Autoplay functionality within the PC system. Here are the steps, and you need to follow to import photos from iPod.
Step 1 Connect iPod with PC
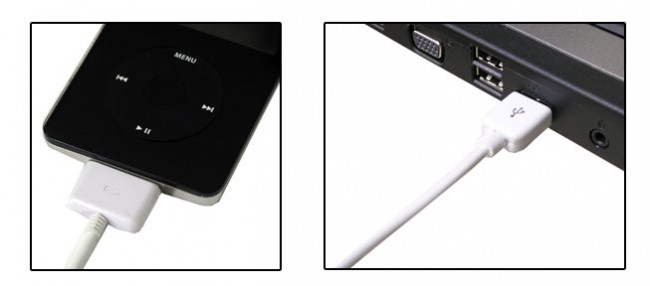
First, connect your iPod to your PC by using the iPod dock connector cable.

Step 2 Using AutoPlay
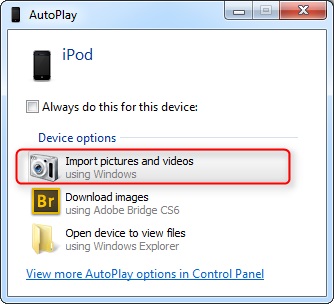
Now, an AutoPlay window will open on your PC. There will be three options - "Import pictures and videos", "Download images" and "Open device to view new files". Choose the first option: "Import pictures and videos".
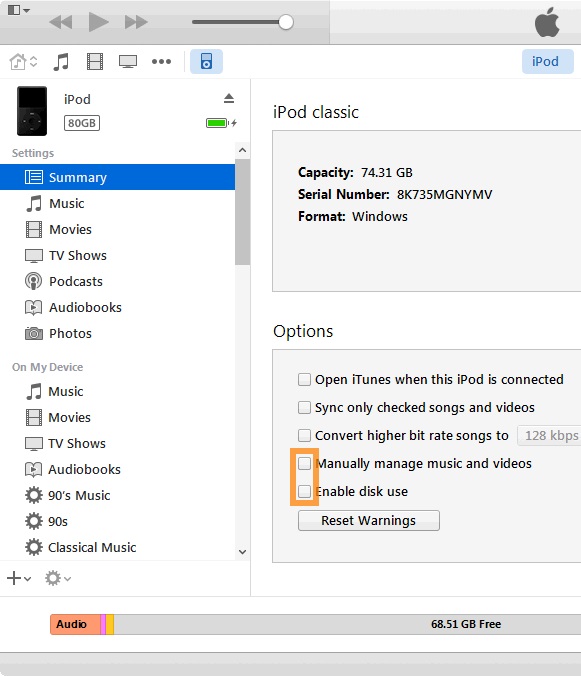
If the Autoplay option doesn't pop up, you need to make sure that the disk mode has been enabled on your iPod. To do this, you need to open iTunes. In portable devices, you will see your iPod. In the summary window, choose the "Enable disk use" option. Now, AutoPlay will detect it as a disk and it will be detected as well as displayed. iPod touch photos are easy to copy.
Step 3 Import photos from iPod to PC
Next, select the 'Import pictures and videos' option. Your transfer will soon be complete.
Part 2. Transfer Photos from iPod Touch to iPhone with Dr.Fone - Phone Transfer (iOS)
Dr.Fone - Phone Transfer (iOS) is a tool that allows you to transfer files from iPhone, iPad, and iPod to another. It is available in pro as well as a free version. Here are a few key features:

Dr.Fone - Phone Transfer (iOS)
Transfer Notes from iPod Touch to iPhone in 1 Click!
- Easily transfer photos, videos, calendars, contacts, messages, and music from iPhone to Android.
- Enable to transfer from HTC, Samsung, Nokia, Motorola, and more to iPhone X/8/7S/7/6S/6 (Plus)/5s/5c/5/4S/4/3GS.
- Works perfectly with Apple, Samsung, HTC, LG, Sony, Google, HUAWEI, Motorola, ZTE, Nokia, and more smartphones and tablets.
- Fully compatible with major providers like AT&T, Verizon, Sprint, and T-Mobile.
- Fully compatible with the latest iOS version and Android 10.0
- Fully compatible with Windows 10 and Mac 10.8 to 10.15.
Following are the steps to transfer photos from iPod touch to iPhone:
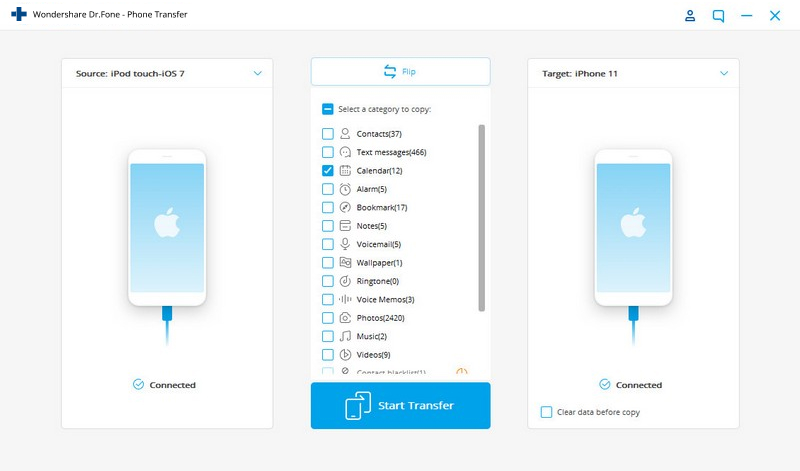
Step 1 Download and install Dr.Fone - Phone Transfer (iOS) on your PC. Connect your iPod Touch and iPhone, select "Phone Transfer" among the modules. respectively, to the PC.

Step 2 Export photos from iPod touch to iPhone. After you have finished selecting the photos on the iPod touch you wish to transfer, click on the triangle under the 'Start Transfer' option. Choose to export to your iPhone. The transfer will soon be completed.
Step 3 Check the "Photos" and export photos from iPod Touch to iPhone
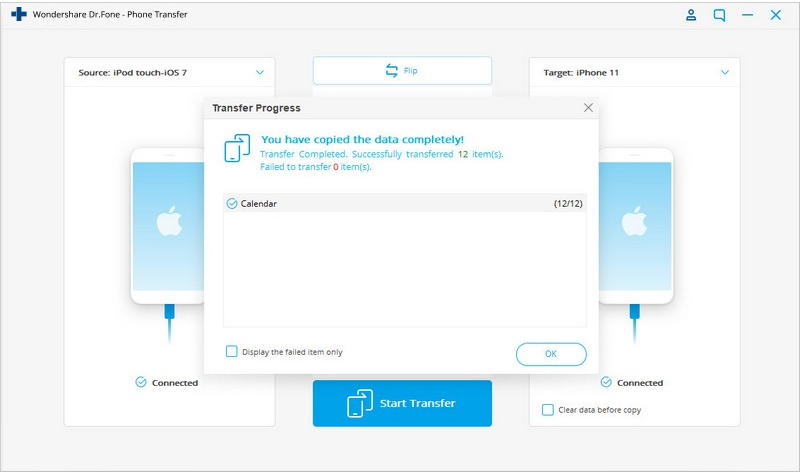
You can find the photos on the iPhone which are from the iPod.
Video Tutorial: How to transfer photos from iPod touch to iPhone
Note: With Dr.Fone - Phone Transfer (iOS), You can also similarly transfer files from your iPod touch to iPad, iPad to iPhone, and vice versa. Meanwhile, It's easy to learn how to transfer photos from iPod touch to computer with Dr.Fone - Phone Manager (iOS).

Dr.Fone - Phone Manager (iOS)
Transfer Music from Computer to iPod/iPhone/iPad without iTunes
- Transfer, manage, export/import your music, photos, videos, contacts, SMS, Apps etc.
- Backup your music, photos, videos, contacts, SMS, Apps etc. to computer and restore them easily.
- Transfer music, photos, videos, contacts, messages, etc from one smartphone to another.
- Transfer media files between iOS devices and iTunes.
- Support all iPhone, iPad, and iPod touch models with any iOS versions.
Part 3: How to Transfer Photos from iPod to iMac/ Mac Book Pro (Air)
You can use your iPod in the disk mode as well. The disk mode is one of the easiest modes to operate on. You can transfer your music and photos easily from iPod to iMac/Mac Book Pro (Air).
Step 1 Enable Disk Mode
First, you need to set your original iPod to be disk mode. To do this, you need to connect your iPod with your Mac. Then, open your iTunes and select your iPod from devices menu. Then select the Summary tab. Then go to the options section and click on Enable Disk Use.

Step 2 Open iPod on Mac
You will be able to locate the iPod on the desktop. Open it on your Mac and all your files will be displayed there.
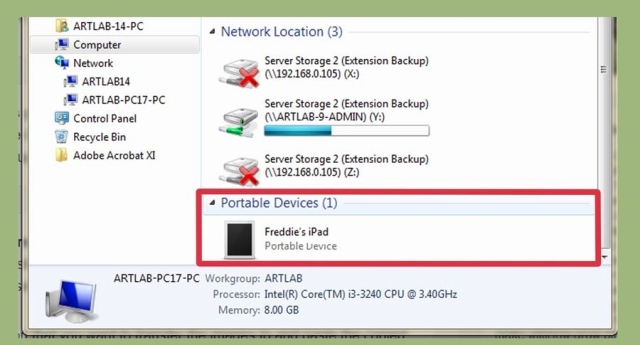
Step 3 Select the photos
Select the photos that you want to copy from your iPod to your Mac. The images will be in the folder call Photos, but can also be stored elsewhere. Find them and select them.
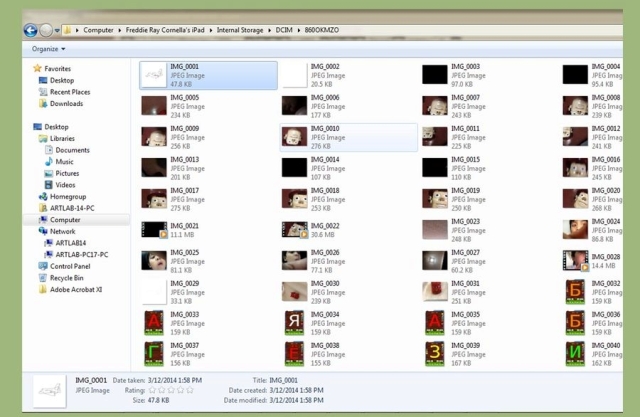
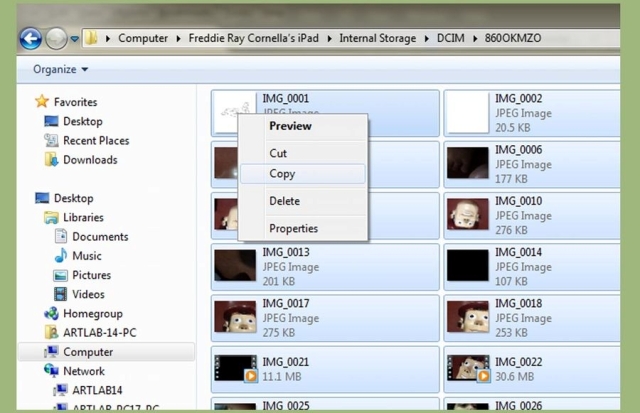
Step 4 Copy the pictures
Click on the image files and then press Command and C to copy the pictures. The find a place or folder to store the images and then press Command and V on your keyboard. You can use Command and X key if you want to remove the images from the iPod.
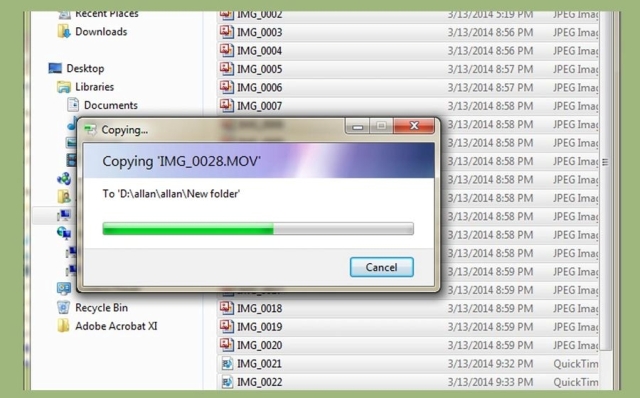
Step 5 Transfer begins
The copying will begin and will take a bit of time if you are transferring many images together. You can track the estimated time left by looking at the progress bar.
Step 6 Eject your device
Now you need to eject your iPod to keep your data safe before unplugging it from your Mac. To do this press right click button on your iPod icon on desktop and click on Eject. Now you can take out the USB cable.
The transfer is now successful.
It is extremely easy to transfer files between various devices. Tools like Wondershare Dr.Fone - Phone Transfer (iOS) make this process easy and convenient. You can use this to transfer files - whether photos, videos, TV shows, playlists - from one device to another. You can also transfer from an Apple device to a PC with Dr.Fone - Phone Manager (iOS) and vice versa. All latest versions are supported, so compatibility won't be an issue, you can copy photos from iPod to PC easily.
iPod Aktarımı
- iPod'a aktarma
- Bilgisayardan iPod'a Müzik Aktarın
- iPod Classic'e Müzik Ekle
- MP3'ü iPod'a aktarın
- Mac'ten iPod'a Müzik Aktarın
- iTunes'dan iPod Touch/Nano/shuffle'a Müzik Aktarın
- Podcast'leri iPod'a koyun
- iPod Nano'dan Bilgisayara Müzik Aktarın
- iPod touch'tan iTunes Mac'e Müzik Aktarın
- iPod'dan Müziği Alın
- iPod'dan Mac'e Müzik Aktarın
- iPod'dan aktarma
- iPod Classic'ten Bilgisayara Müzik Aktarın
- iPod Nano'dan iTunes'a Müzik Aktarın
- Windows Media Player ve iPod Arasında Müzik Aktarın
- Müziği iPod'dan Flash Sürücüye Aktarın
- Satın Alınmayan Müziği iPod'dan iTunes'a Aktarın
- Mac Formatlı iPod'dan Windows'a Müzik Aktarın
- iPod Müziğini Başka Bir MP3 Oynatıcıya Aktarın
- iPod shuffle'dan iTunes'a Müzik Aktarın
- Transfer Music from iPod Classic to iTunes
- Transfer Photos from iPod touch to PC
- Put music on iPod shuffle
- Transfer Photos from PC to iPod touch
- Transfer Audiobooks to iPod
- Add Videos to iPod Nano
- Put Music on iPod
- Manage iPod


Bhavya Kaushik
katkıda bulunan Editör