Android Telefonları ve Tabletleri Fabrika Ayarlarına Sıfırlama
07 Mart 2022 • Dosya: Android Mobil Sorunlarını Düzeltme • Kanıtlanmış çözümler
For those who treasure their Android devices, it's common knowledge that each one of them wishes their Android device would run smoothly, without any glitches. However, this is not the case for most Android users.
As a matter of fact, a good deal of Android device users have issues with their devices constantly hanging, and running considerably slow. In the most acute of incidences, users often have to shut down their phones to start afresh.
With the booming of Android phones and tablets in the market, all sorts of players in the mobile phone manufacturing industry are expected. This is bad news for Android users, now that the fake Android devices have also started infiltrating the market.
These substandard devices are notorious for being extremely low on memory and really slow. To avert this, users must be ready to constantly factory reset their phones in order to free up the device’s memory and restore performance.
- Part 1: When do we need to reset Android Phones and Tablets
- Part 2: Backup your Android data before resetting it
- Part 3: How to reset Android Phones and Tablets using PC
- Part 4: What does the Android backup service back up and restore
Part 1: When do we need to reset Android Phones and Tablets
Here are the five most common situations that would necessitate you to factory reset your Android device:
Part 2: Backup your Android data before resetting it
However, before factory resetting your Android phone, it is paramount that you back up all your important data. This may include all the media files such as the photos and music stored in your Android device’s internal storage, and also phone messages and your browser history. This is where having a tool like Dr.Fone - Backup & Resotre (Android) comes real handy.

Dr.Fone - Backup & Restore (Android)
Flexibly Backup and Restore Android Data
- Selectively backup Android data to computer with one click.
- Preview and restore backup to any Android devices.
- Supports 8000+ Android devices.
- There is no data lost during backup, export or restore.
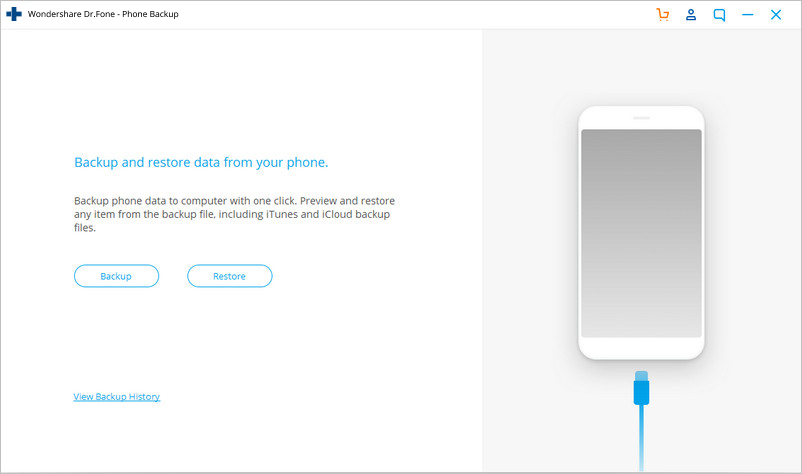
Step 1. Launch the program and choose "Backup & Restore"
Before doing anything, launch the program on your computer and choose "Backup & Restore" from its primary window.

Step 2. Connect your Android phone
Connect your Android phone to the computer. Make sure you have enabled USB debugging mode on the phone. After the phone is connected, click on Backup.
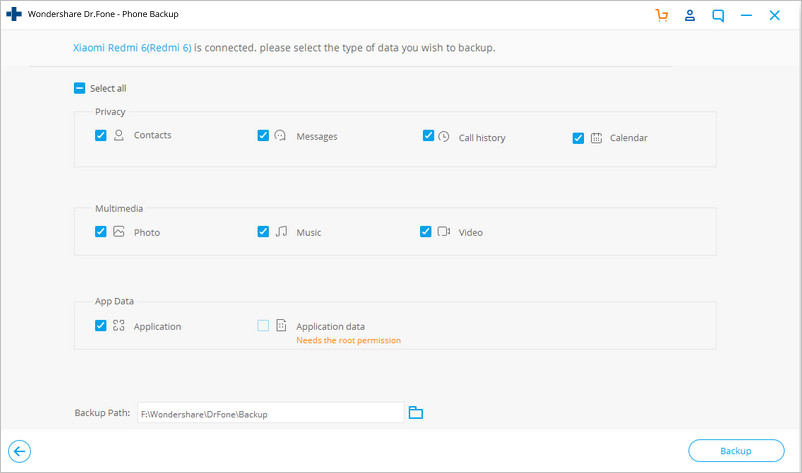
Step 3. Choose the file types to backup
Before backing up, you can choose any file type that you want to backup from your Android device. Just check the box in front of it.
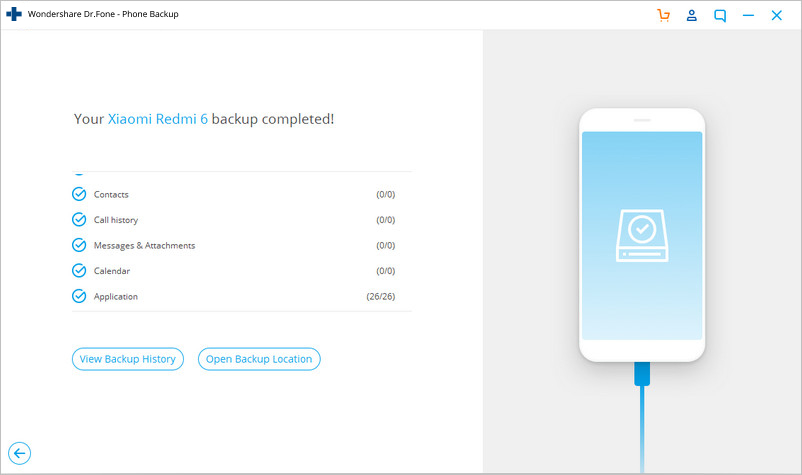
Step 4. Start to backup your device
After checking the file type, you can click "Backup" to start backing your Android device. During the whole process, keep your device connected all the time.
Part 3: How to reset Android Phones and Tablets using PC
Apart from the most common ways of resetting Android phones, using multiple buttons on the phone or tablet, you might as well hard reset your phone using your PC.
There are two methods of doing this. Firstly, you can use a PC reset tool for Android, or you can easily use the Android debug bridge commanding utility, to boot the recovery image on your phone.
Method 1
In the first method, follow the below given steps.
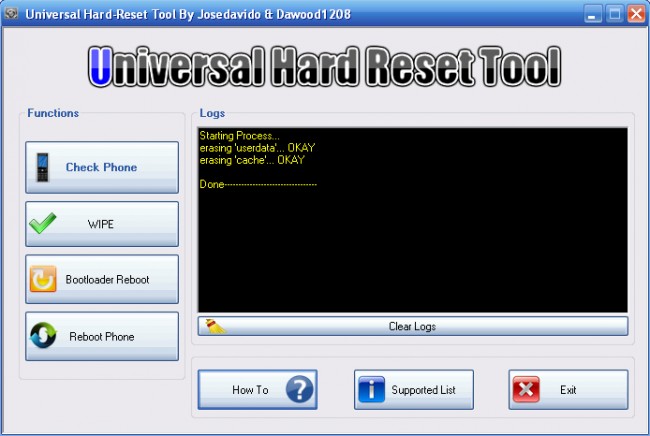
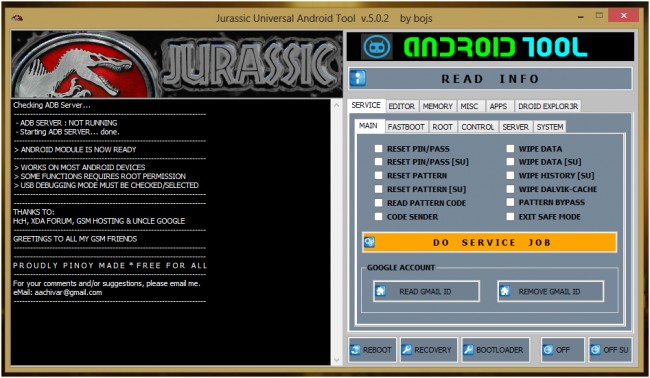
Step 1 - Download the latest version of a Universal hard reset tool.
Step 2 - Now navigate through the application and click on the option that you want to use. Preferably, click on 'wipe to reset the phone'.
Method 2
This method is a bit technical, although there’s nothing difficult in it.
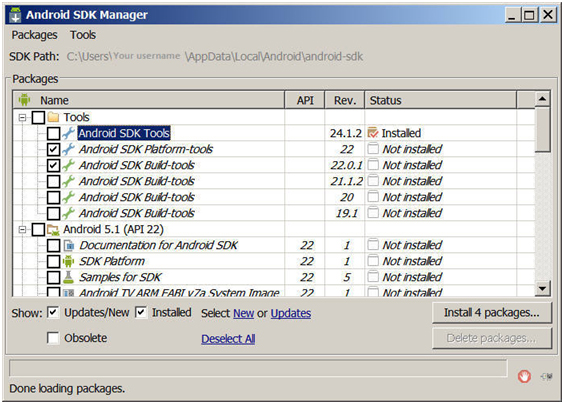
Step 1 - Firstly, download the Android development kit from the Android developers’ website, and extract the folder. Now, rename the extracted folder; you can name it as ADT.
Step 2 - Afterwards, click computer in your file browser, choose properties and select advanced system settings, and from the window named system properties, click on environmental variables.
Step 3 - Open the path and click on edit in the system variables window, and move the cursor to the end of the selection.
Step 4 - Type "C:Program FilesAndroidADTsdkplatform-tools*" without quotes. Launch command prompt and connect your phone through a USB cable to your computer.
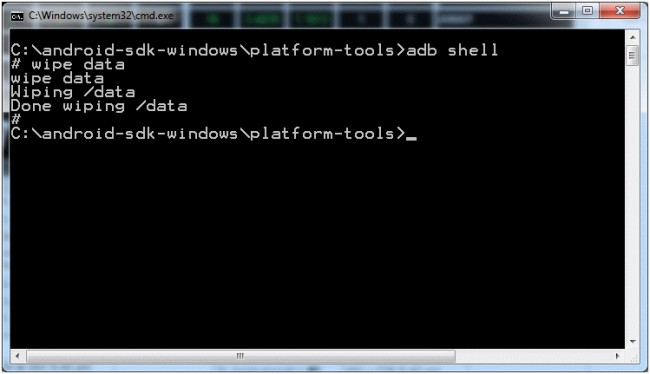
Step 5 - Make sure your tablet or phone is switched on. Type 'adb shell' and press enter. When ADB is fully configured in your device, type 'wipe data' and click enter. Your phone will restart in recovery mode and you will have restored your phone's factory settings.
It is to be noted that these factory restoration processes require you to back up all your files before erasing everything.
Part 4: What does the Android backup service back up and restore
Android yedekleme hizmeti, fotoğraflar, müzik ve videolar gibi medya dosyalarınızı güvenli bir şekilde yedekler ve ayrıca arama günlüklerini, kişileri ve mesajları yedekleyebilir. Hizmet, yedeklenen tüm dosyaları geri yüklemek için kullanılabilecek şekilde tasarlanmıştır.
Peki, neden Android? için Wondershare Dr.Fone'u kullanmak isteyesiniz veya daha doğrusu kullanmanız gerekiyor? İşte, dikkate almanız gereken ana nedenler.
So, there you have it, with the best tool i.e., Wondershare Dr.Fone by your side, to create backups for your Android device, you can now go ahead and reset your Android phones and tablets, whenever and wherever you need to, without worrying at all about going wrong with it.
Reset Android
- Reset Android
- 1.1 Android Password Reset
- 1.2 Reset Gmail Password on Android
- 1.3 Hard Reset Huawei
- 1.4 Android Data Erase Software
- 1.5 Android Data Erase Apps
- 1.6 Android'i Yeniden Başlatın
- 1.7 Yumuşak Sıfırlama Android
- 1.8 Fabrika Ayarlarına Sıfırlama Android
- 1.9 LG Telefonu Sıfırla
- 1.10 Formatlı Android Telefon
- 1.11 Verileri Sil/Fabrika Ayarlarına Sıfırla
- 1.12 Android'i Veri Kaybı Olmadan Sıfırla
- 1.13 Tableti Sıfırla
- 1.14 Güç Düğmesi Olmadan Android'i Yeniden Başlatın
- 1.15 Ses Düğmeleri Olmadan Sert Sıfırlama Android
- 1.16 PC Kullanarak Android Telefonu Sert Sıfırlama
- 1.17 Sert Sıfırlama Android Tabletler
- 1.18 Ana Sayfa Düğmesi Olmadan Android'i Sıfırla
- Samsung'u Sıfırla
- 2.1 Samsung Sıfırlama Kodu
- 2.2 Samsung Hesabı Parolasını Sıfırla
- 2.3 Samsung Hesabı Parolasını Sıfırla
- 2.4 Samsung Galaxy S3'ü Sıfırla
- 2.5 Samsung Galaxy S4'ü Sıfırla
- 2.6 Samsung Tableti Sıfırla
- 2.7 Samsung'u Sert Sıfırlama
- 2.8 Samsung'u Yeniden Başlatın
- 2.9 Samsung S6'yı Sıfırla
- 2.10 Fabrika Ayarlarına Sıfırlama Galaxy S5


James Davis
staff Editor