

Transfer Photos from iPhone 13 to Mac

Apr 27, 2022 • Filed to: Manage Device Data • Proven solutions
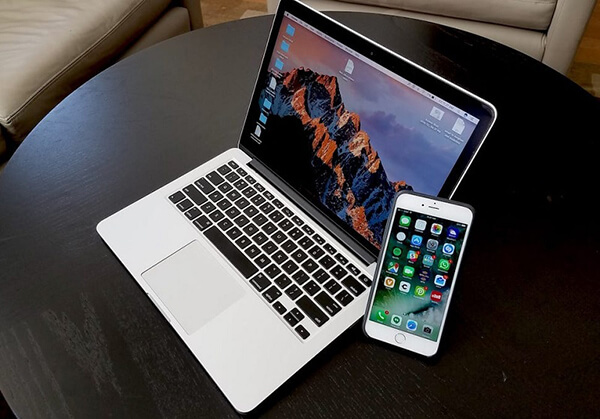
There is a need to store your memorable clicks at the safest storage space for further processing in future. You would have come across many methods to accomplish this task. Transferring surplus photos to your computer is quite challenging and you require an efficient technique to transfer photos from iPhone 13 to Mac. A comfortable approach assists you to complete the process quickly despite external issues. While transferring the multimedia files, keep an eye on data loss. Moreover, the transfer procedure must complete quickly irrespective of file sizes. Adopt such a transfer technique to move the photos from your iPhone to Mac systems. Choose the perfect tool to accompany this task precisely. In this article, you will learn about the official way of carrying out the transfer tasks and an alternative tool that aids in performing them. You can scroll down for more information in detail.
Part 1: Official way to transfer photos from iPhone 13 to Mac – Synchronize method
It is a good practice to move the photos from iPhone to the Mac system for future use. It helps to manage the storage space in your phone. Most of you must have experienced a shortage of memory space when you make your important clicks on memorable occasions. To overcome such circumstances, you must learn to transfer the multimedia files into your computer at regular intervals. This helps to manage your phone storage and you can organize them for future access. Here, you will discover the perfect way to transfer the photos from iPhone to Mac using the standards method. You can follow the below instructions and successfully transfer the photos without any issues.
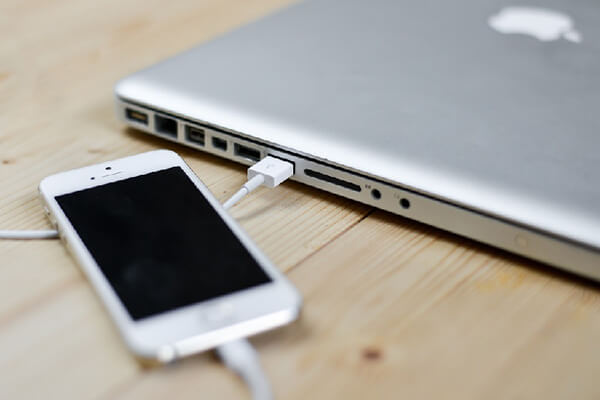
Step 1: First, connect your iPhone 13 with your Mac system using a USB cable. You must look for a reliable cable. Any interruption in this connection may lead to data loss. Take some effective measures to ensure the best connectivity between the system and iPhone.
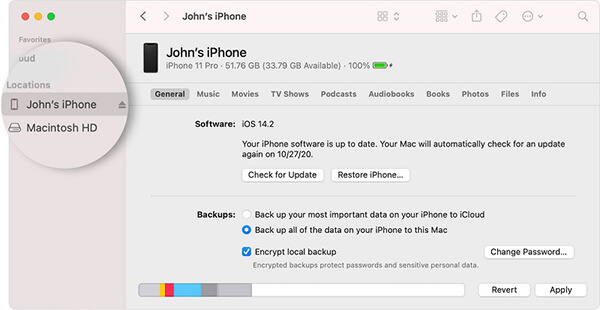
Step 2: On your Mac system, open the New Finder Window. Choose your iPhone from the listed devices available at the sidebar of the screen.
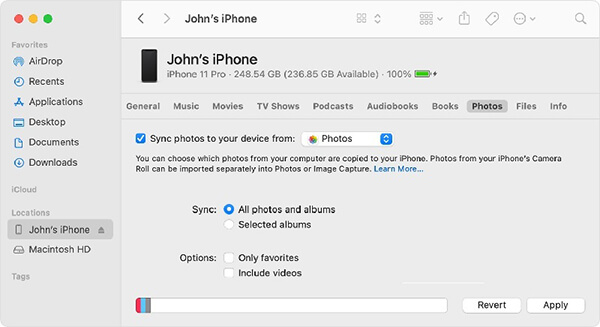
Step 3: Next, select the Photos from the top menu and enable the ‘Sync Photos’ box. Navigate the folders in your system drive and spot the storage folder to sync the photos between the iPhone and PC. You can either select specific albums or all the photos and albums during the synchronization process.
Step 4: Finally, press the ‘Apply’ button to carry out the photos transfer process between the iPhone and Mac systems.
Thus ends the regular method of transferring the multimedia files from iPhone 13 to Mac system. The drawback of this process is that you may face data loss and the transfer procedure takes more time if the files are bigger. There is a need to switch over alternative ways to move the photos from iPhone to Mac system. In the following section, you will explore the perfect tool to carry out the transfer process effectively.
Part 2: Transfer photos from iPhone 13 to Mac using iTunes
In this section, you will learn how to transfer the photos from iPhone to Mac system using the iTunes platform. Before commencing this process, you must ensure that you have the latest version of iTunes in your system. If you do not have the latest update of iTunes, then try upgrading them before this procedure to avoid unwanted failure issues.
First, you must launch iTunes on your Mac system and then connect your iPhone using a USB cable. The Photo app discloses automatically else you can open them manually too. Next, select the photos from the listed items or choose Import All New Photos at the right top of the screen. Finally, hit the import option to transfer the chosen photos from iPhone to Mac systems.
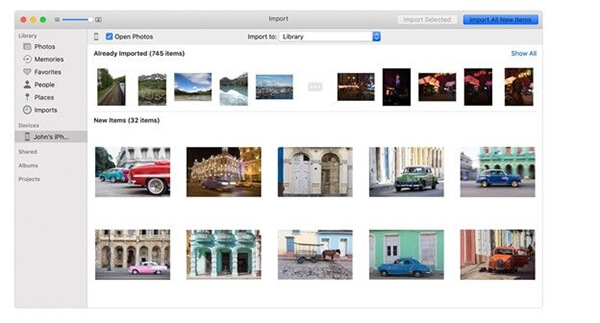
After the successful transfer process, disconnect your iPhone and find the transferred images on your Mac system. You can organize and manage those photos for future use.
Part 3: Using iCloud to Transfer the Photos from iPhone 13 to Mac Systems
You can use the iCloud platform to move the photos from iPhone to Mac. It is enough if you follow the below instructions to carry out the transfer process precisely.
Initially, you must ensure that both the iPhone and Mac systems are updated before commencing the process. Then, sign in to your iCloud environment on both devices using your Apple ID credentials. Connect the device and system with the internet and in your iPhone 13 choose Settings Your Apple ID iCloud. Open the iCloud Drive on your iPhone and store all the multimedia files from local storage space to the iCloud platform. In your Mac systems, launch the Finder window and access the iCloud drive to witness the saved photos from your iPhone.
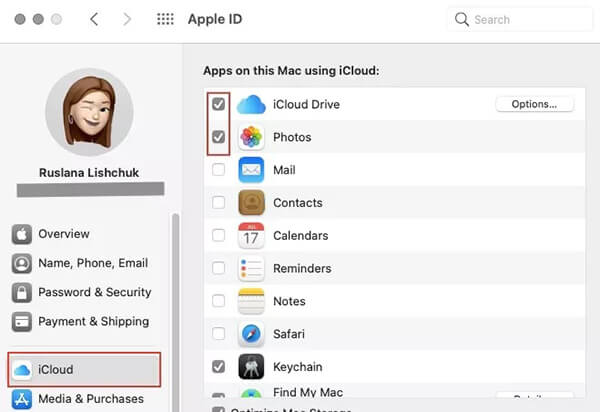
All the multimedia files are well-organized at the iCloud drive for better access. You can access those files from any Apple device effortlessly. It is enough if you sign in to your Apple ID using your Apple gadgets to reach out for the photos that are transferred from iPhone to iCloud Drive. According to your needs copy those Photos to the Mac system or any other iPhone gadgets for future reference. You can use this method to store many photos from your iPhone gadget to this virtual space and access them from the Mac system when required.
Part 4: Effective transfer method using third-party software
To overcome the data loss and quick transfer process, Dr Fone – Phone Manager application seems to be the perfect fit. The Dr Fone serves as a complete solution to fix the gadget issues in no time. You can perform many activities using this innovative tool. The user-friendly interface is the key factor and brings you great results within a short span. You need not be a technical expert to handle this software. Few clicks are sufficient to perform the photos transfer process between the iPhone 13 to Mac system. This app permits you to transfer, manage the phone data precisely according to your needs.
The Dr Fone – Phone Manager application is sufficient to transfer the desired data between your iOS devices and PC. There is no need for iTunes installation on your system to carry out this process. It serves as the best alternative to iTunes and you can work with any type of file flawlessly because the Dr Fone app is compatible with all file formats. The overall transfer procedure completes quickly and you do not have to spare more time in witnessing the successful transfer process.
The Remarkable Features of Dr Fone – Phone Manager tool
- Quick file transfer between PC and iPhone
- No data loss and gives you precise results
- It is possible to carry out specific file transfers by choosing the desired ones
- Despite file size, the transfer process takes only a few minutes
- It has a simple interface and you can work on it comfortably.
These are the awesome functionalities of the Dr Fone app that provides sufficient solutions to fix the iPhone data transfer issues.
The stepwise process to transfer photos from iPhone 13 to Mac using Dr Fone application.
Step 1: Install the Dr Fone app
Go to the official website of Dr Fone and download the correct version of the tool. You can opt for Windows or Mac versions based on your system OS. Then, install the app by following the instruction wizard and launch it by double-tapping the tool icon.
Step 2: Choose Phone Manager
On the home screen, select the Phone Manager module and proceed with the next step.

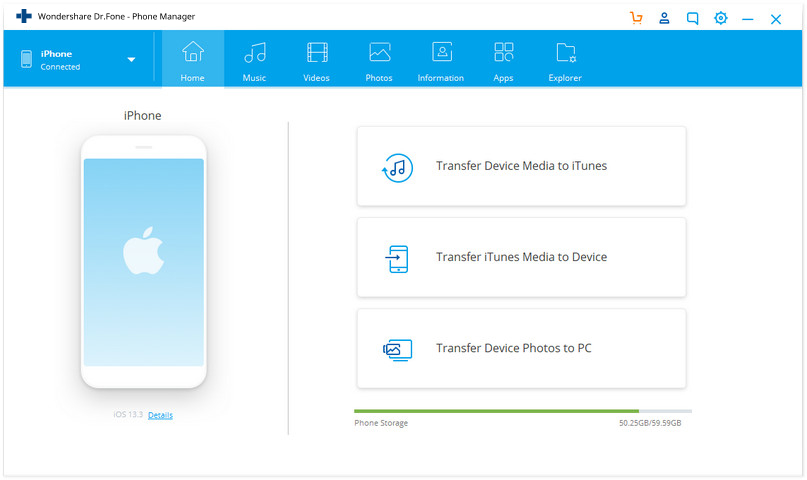
Step 3: Connect your iPhone
Using a reliable USB cable connect your iPhone with the Mac system to carry out this transfer process. The Dr Fone app senses your iPhone, choose the ‘Transfer Device Photos to PC’ option on the screen.
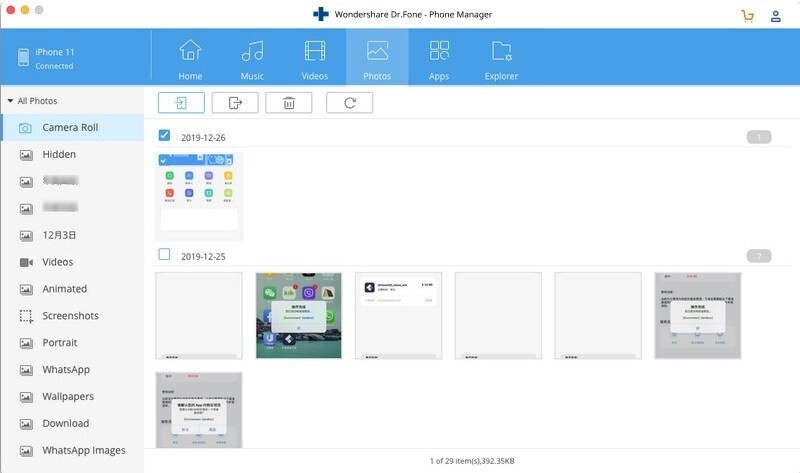
Tap the Photos option on the Menu bar to select the desired photos from your device. Navigate the system folders and drives to locate the perfect space for storage during this transfer process. Finally, click the Export button to trigger the transfer process.
Thus, you had effortlessly transferred the photos from iPhone 13 to Mac using Dr Fone- Phone Manager tool. Use the above steps to complete the procedure successfully. Disconnect the gadget safely from the PC and check whether the transferred images are available on your Mac system.
Conclusion
Therefore, this article had given you insights on how to transfer photos from iPhone 13 to the Mac system flawlessly. You can choose the Dr Fone application method to transfer the multimedia files from gadgets to PC. It is an effective method and you can perform the transfer process at a faster rate despite file sizes. The user-friendly interface encourages you to carry out the desired tasks easily. Choose this app to offer a precise solution for your iOS gadgets. Few clicks are enough to fulfil your needs without any issues. Follow the wizard and tap the perfect options to complete the desired process successfully. Stay connected with this tool to discover efficient methods to transfer files between iOS gadgets and PC.
You Might Also Like

iPhone Tips & Tricks
- iPhone Managing Tips
- iPhone Contacts Tips
- iCloud Tips
- iPhone Message Tips
- Activate iPhone without SIM card
- Activate New iPhone AT&T
- Activate New iPhone Verizon
- How to Use iPhone Tips
- Other iPhone Tips
- Best iPhone Photo Printers
- Call Forwarding Apps for iPhone
- Security Apps for iPhone
- Things You Can Do with Your iPhone on the Plane
- Internet Explorer Alternatives for iPhone
- Find iPhone Wi-Fi Password
- Get Free Unlimited Data on Your Verizon iPhone
- Free iPhone Data Recovery Software
- Find Blocked Numbers on iPhone
- Sync Thunderbird with iPhone
- Update iPhone with/without iTunes
- Turn off find my iPhone when phone is broken
James Davis
staff Editor