How to Set a Voice Memo a Ringtone on iPhone
Apr 27, 2022 • Filed to: Frequently Used Phone Tips • Proven solutions
Sometimes, we set a particular song over the phone ringtone, and in that condition, when it rings, we can recognize the phone quickly. Some people also look for how to record their own ringtone to make it more unique.
But with iPhone users, the scenario is entirely different. They have a single iPhone ringtone that they can try out. Of course, ringtone options are many, but as we know, the famous iPhone ringtone is the way to recognize one’s own iPhone. When so many people have iPhones around, a person gets confused and cannot recognize their device. In that case, there is a need to look out for how to record their ringtone and change it.
If you are also tired of the iPhone ringtone and have no clue how you will be able to change it, don't worry and customize it now. You will be able to customize the ringtones as per your choice without any problem. For better understanding, keep reading till the last because we discuss it in detail.
Part 1: Record Ringtone with Voice Memos
In this section, we discuss how to record ringtones with voice memos. This is the first step people can adopt to customize their iPhone ringtone. The steps are as follows: -
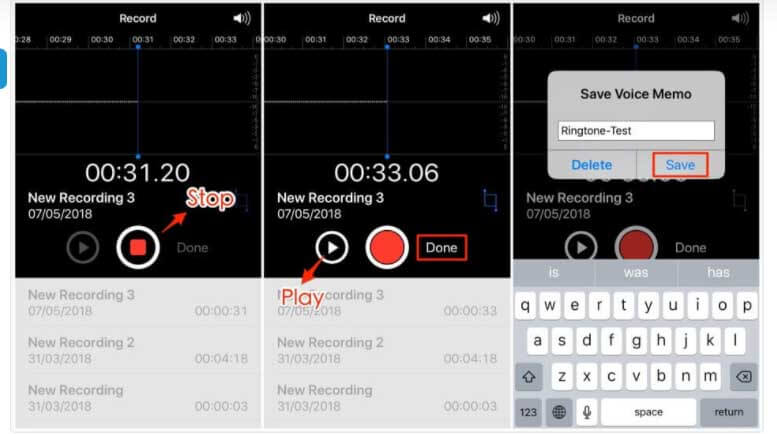
Step 1: Tap the "Voice Memos app" first.
Step 2: Click on the "Record button" and start recording.
Step 3: When the recording is done, click on the "stop" button and tap on the "play" button to preview it.
Step 4: Click on the "Done" button to save the file.
Note: Be sure to record the ringtone for 40 seconds only. If you recorded the ringtone for more than 40 seconds, you need to trim it.
Part 2: Record Your Own Ringtone with Computer
Now that you have a voice memo that you want as a ringtone, it’s time to create one. For this, we recommend you Dr.Fone – Phone Manager. This tool will help you turn your recording into the ringtone you want. This tool has a “Ringtone Maker” feature that lets you customize the ringtone as you want. Just keep the recording with you and use this tool. Here are the steps to be followed.
Step 1: Launch the program after installing it on your PC. On the main page, click on the “Phone Manager” module. Connect your iPhone after that.

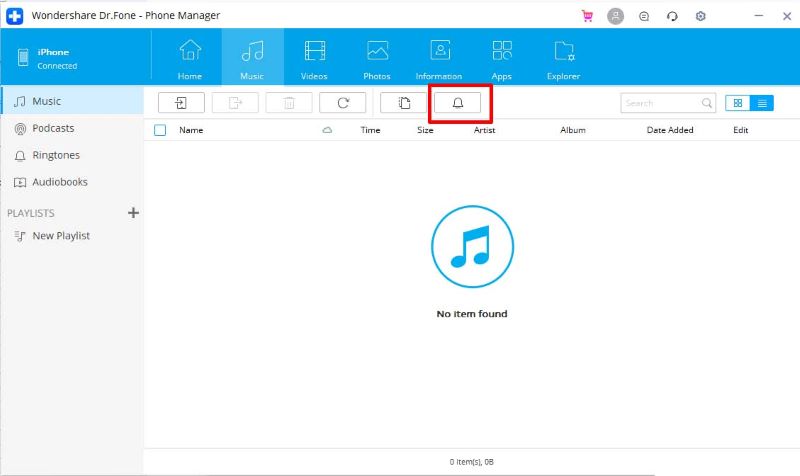
Step 2: Go to the “Music” tab on the top menu and notice a bell icon. This is Ringtone Maker by Dr.Fone. So click on it to proceed.
Step 3: Now, the program will ask you to import the music. You can choose to add music either from your PC or device. Choose the desired option.
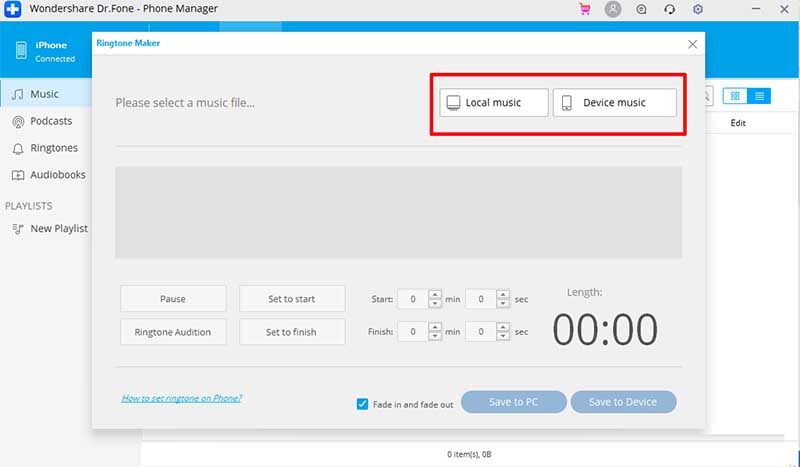
Step 4: Adjust the settings according to your choices when the music or the recorded voice memo is imported.
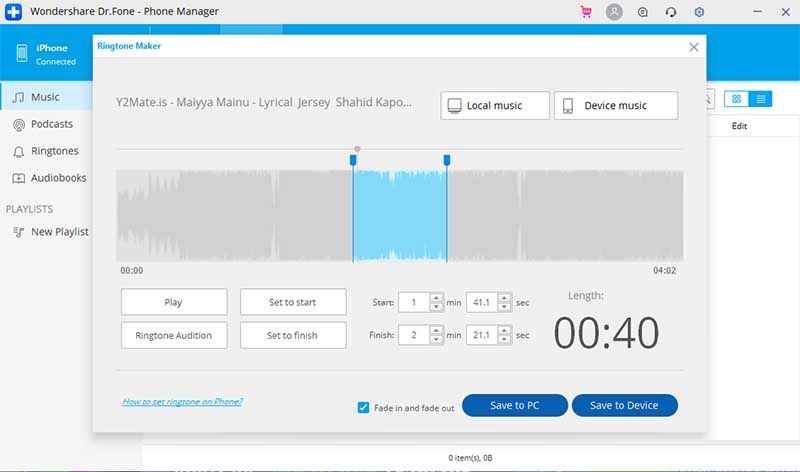
Once you are satisfied with the ringtone, click on “Save to Device,” and the program will verify the results.
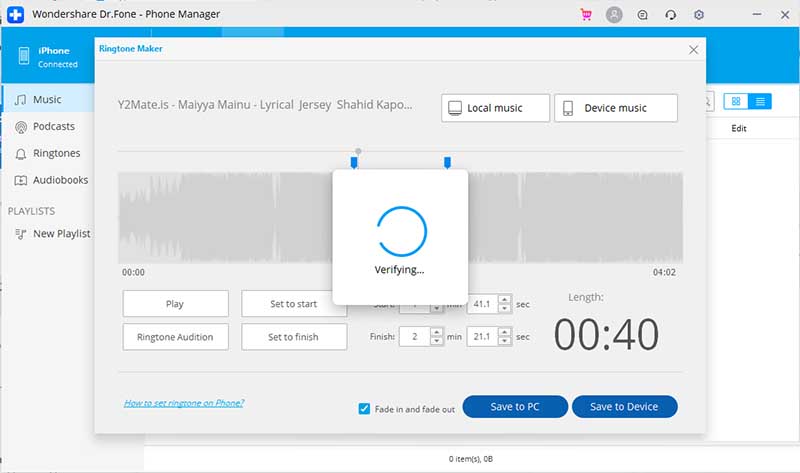
You will notice that the ringtone is saved successfully in a short time.
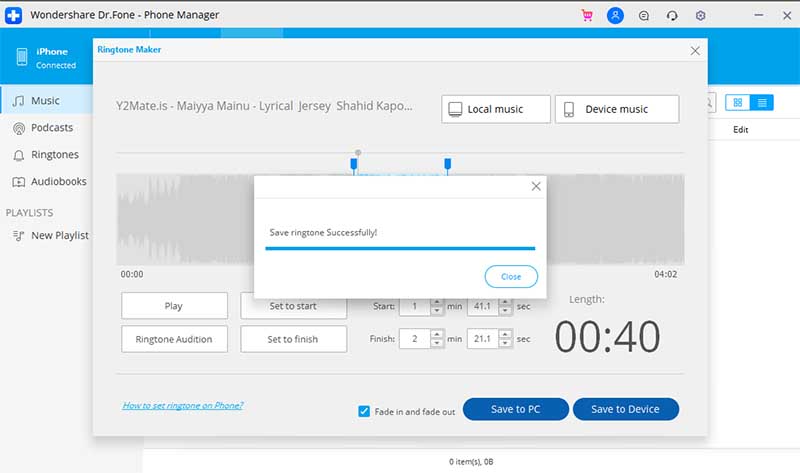
Step 5: You can now disconnect your iPhone and open “Settings” on it. Here, tap “Sound & Haptics.” Now select the ringtone that you have just saved. It will be set as an iPhone ringtone from now.
Part 3: Customize Your Ringtone without Computer
When you are done with recording the ringtone through the voice memo app, this is the time for you to apply the ringtone. Well, for it, the GarageBand application is required. To use it, the steps are as follows:
Step 1: First, you need to be sure that you have recorded the ringtone and saved it on your device.
Step 2: Get the GarageBand app.
Step 3: Now, move to the GarageBand app and choose the preferred instrument on your iPhone.
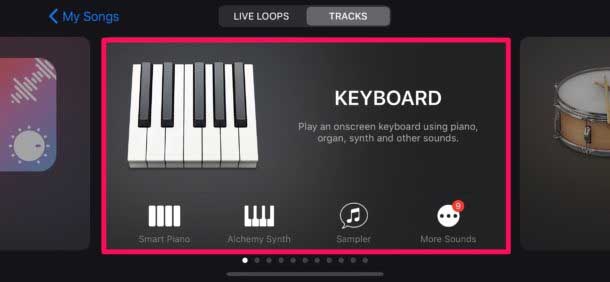
Step 4: From the top left, click on the project button.
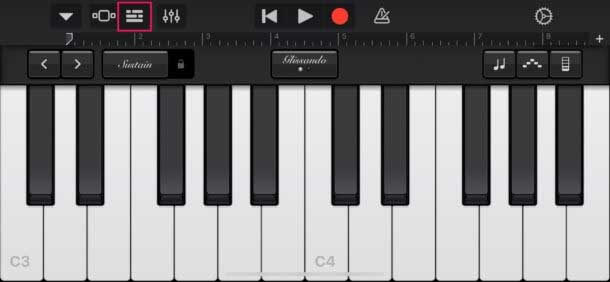
Step 5: Click on the loop button and select files.
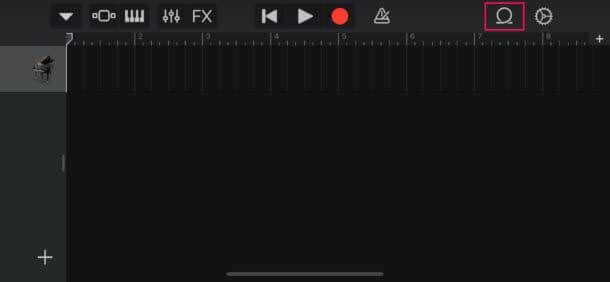
Step 6: Here, browse items from the Files app and select the previously saved recording.
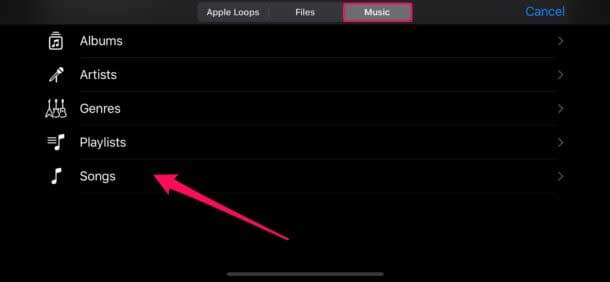
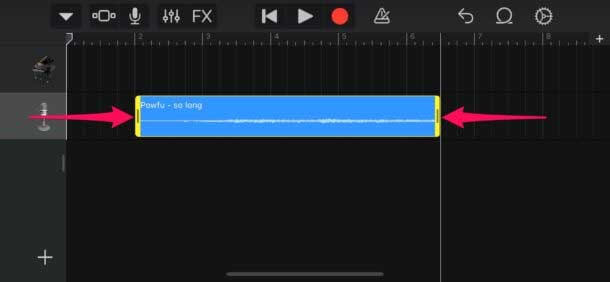
Step 7: Drag and drop the recording as a soundtrack and click on the metronome button at the right.
Step 8: Disable it and trim the recording if it is more than 40 seconds.
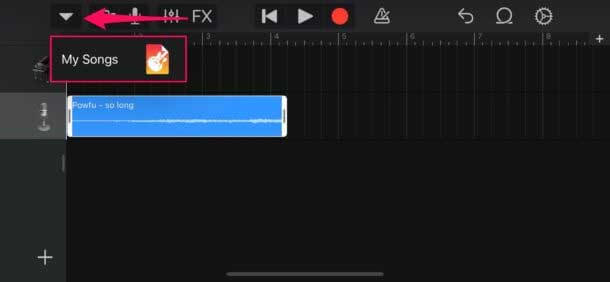
Step 9: Click on the downward Arrow and select “My song”.
Step 10: Do a long press on the selected is the soundtrack from the garage band app and click on the “Share” button.
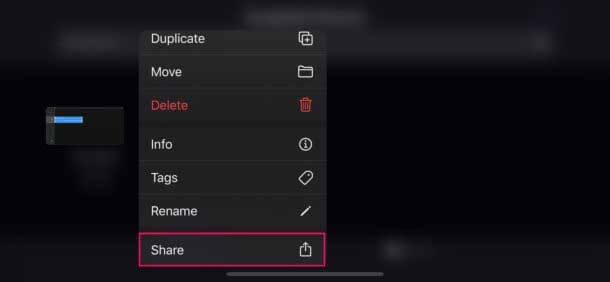
Step 11: Click on “Ringtone”, and tap “Export.”

Step 12: Here, click on “Use sound as” and click on “Standard Ringtone”.

Viola! The recording you have recorded is set up as the ringtone to your iPhone.
Pros:
- The drag and drop option is featured.
- Easy to install third-party plugins.
- Works on artificial intelligence.
- Time quantization and pitch correction feature are there.
Cons:
- Difficult to use.
- No mixing console view option.
- Exporting MIDI is limited.
Conclusion
Customizing ringtone on iPhone is easy. One can use voice memos to ringtone and set up their favorite recording as they want. But do know there is a need to follow a couple of steps to complete this process. If you are unaware of these steps setting the recorded audio as a ringtone will not be your thing!
You Might Also Like
iPhone Tips & Tricks
- iPhone Managing Tips
- iPhone Contacts Tips
- iCloud Tips
- iPhone Message Tips
- Activate iPhone without SIM card
- Activate New iPhone AT&T
- Activate New iPhone Verizon
- How to Use iPhone Tips
- Other iPhone Tips
- Best iPhone Photo Printers
- Call Forwarding Apps for iPhone
- Security Apps for iPhone
- Things You Can Do with Your iPhone on the Plane
- Internet Explorer Alternatives for iPhone
- Find iPhone Wi-Fi Password
- Get Free Unlimited Data on Your Verizon iPhone
- Free iPhone Data Recovery Software
- Find Blocked Numbers on iPhone
- Sync Thunderbird with iPhone
- Update iPhone with/without iTunes
- Turn off find my iPhone when phone is broken


Selena Lee
chief Editor