How to Recover Data After iOS 15 Update? - iOS 15 Data Recovery
Apr 28, 2022 • Filed to: Tips for Different iOS Versions & Models • Proven solutions
Apple is slowly but surely rolling out the new update for their operating system: iOS 15, and released its latest public beta for iOS 15 a few days ago. However, iOS 15 is not perfect because the new update came with a few errors as some users claimed they lost contacts or data after the iOS 15 update. Since this is a new problem, not many people have identified the solution.
Fortunately for you, we have discovered three ways to recover your lost information after the iOS 15 update. One of these methods is a third-party software called Dr.Fone – Recover (iOS), ideal for recovering data without a backup.
So, let us move on to know more about various methods that will help you retrieve your lost data due to the latest upgrade from Apple.
Part 1: How to recover deleted iPhone data on iOS 15 without backup?
If you backed up your contact information before the update, you would have no worries. But what if you didn’t do that? Well, do not worry; there is a solution for you in the form of Dr.Fone - Data Recovery (iOS). Dr.Fone is a software module to help users recover important data from their iOS devices. It was developed by Wondershare, a software company that specializes in creating software packages for all. This recovery software for iOS streamlines the process of recovering lost data after iOS 15 updates like contact information, videos, images, and so much more in just a few clicks.

Dr.Fone - Data Recovery (iOS)
Provides You with Three Ways to Recover Deleted iPhone Data After iOS 15 Upgrade
- Retrieve data directly from iPhone, iTunes backup, and iCloud backup.
- Download and extract the iCloud backup and iTunes backup to retrieve data from it.
- Supports the newest iPhone and iOS
- Preview and selectively recover data in original quality.
- Read-only and risk-free.
To use the data recovery software, you will need the following, a USB cable, an iOS device, and Dr.Fone software downloaded and installed onto your computer.
Now, let us go through the data recovery steps using Dr.Fone software step by step below:
Step 1. After you install and launch the Dr.Fone – Recover (iOS), plug in your device through a USB cable. The main menu in front of you will have several modules to choose from; select ‘Recover’.

Step 2. The software will take a few minutes to read your iOS device, so be patient. Once the process is complete, a window like the one below will appear.
Tips: Actually, no data recovery tool can recover media content files from iPhone 5 and later. If you want to recover text contents from your iPhone selectively, you can follow the steps below. And you can refer to the following difference between text content and media content.
Text Contents: Messages (SMS, iMessage & MMS), Contacts, Call history, Calendar, Notes, Reminder, Safari bookmark, App document (like Kindle, Keynote, WhatsApp history, etc.
Media Contents: Camera Roll (video & photo), Photo Stream, Photo Library, Message attachment, WhatsApp attachment, Voice memo, Voicemail, App photos/video (like iMovie, photos, Flickr, etc.)
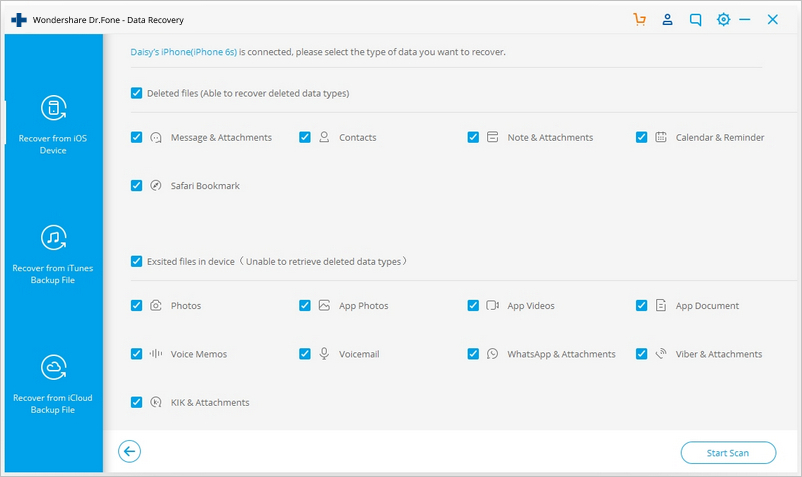
Step 3. Go ahead and click on the ‘Start Scan’ button. Dr.Fone will start scanning your iOS device to find any lost data. However, if you find your missing contact information before the scan is complete, click on the Pause menu to move onto the next step.
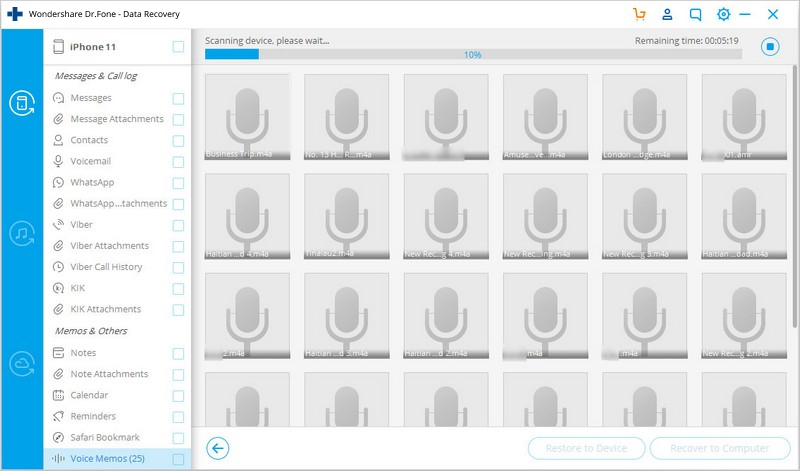
Step 4. You will now see all the content both stored and deleted displayed on the screen. The menu on the left-hand side of the screen will list out data like photos and videos. While the numbers in bracket will reveal how many have been recovered.
Here, to display deleted contact information, select the ‘Only display the deleted items’ option. Alternatively, you can also type out the name of files in the Filter box.

Step 5. Now, select everything you want to restore by clicking on the tick box on the top right-hand corner. Finally, once the process is complete select ‘Recover to Computer’.
There you go, you have all your lost data due to the iOS 15 update recovered.
Part 2: How to recover iPhone data on iOS 15 from iTunes backup?
If you want to recover data from iTunes backup, that can also be easily done using Dr.Fone - Data Recovery (iOS). The process with iTunes is also quite simple to follow. So, to know more about the process, follow the steps mentioned below.
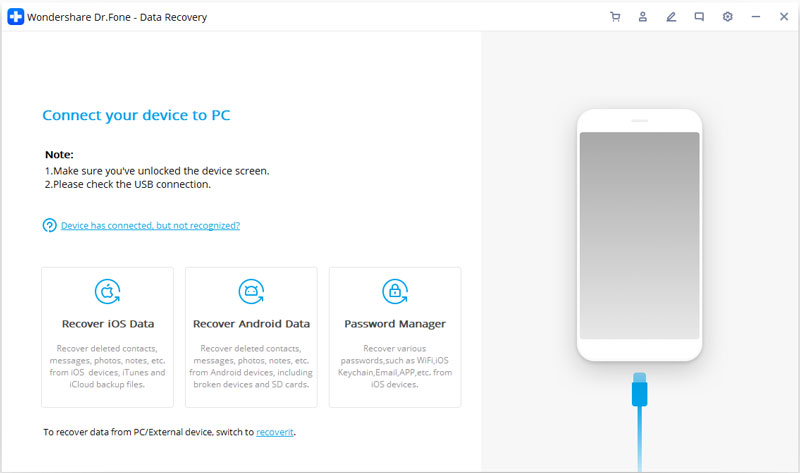
Step 1. First of all, launch Dr.Fone toolkit and select the ‘Recover’ module. Now, plug in your iOS device via USB cable.

Step 2. Select the ‘Recover iOS Data’ option on the next screen, select the iOS device on display, and click ‘Start Scan’.
Step 3. You need to select “Recovery from iTunes Backup”, which is available at the left side of the interface, and choose the “start scan” option.
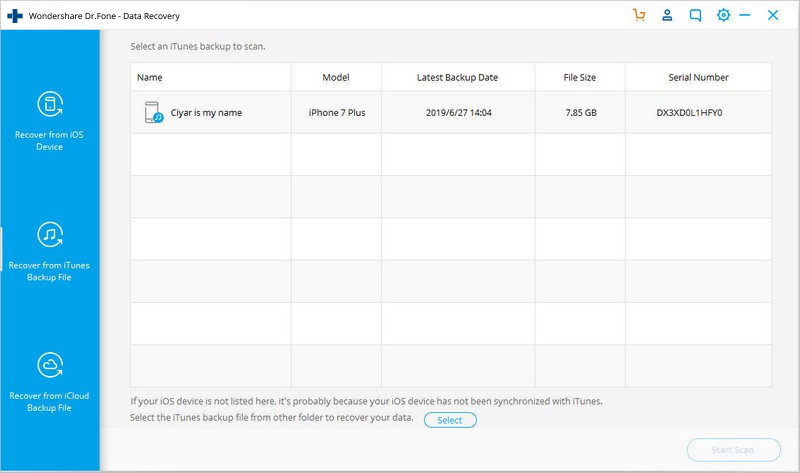
Dr.Fone will scan iTunes Backup to scan all the content.
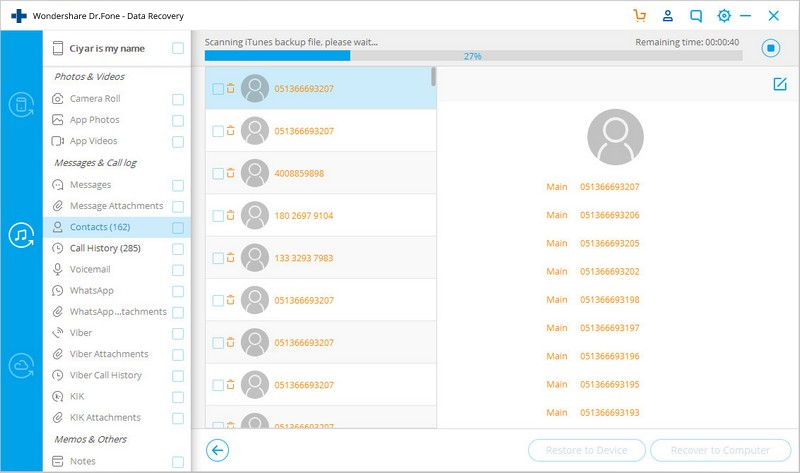
Step 4. Hold on for a few minutes as Dr.Fone will take some time to extract all the data from iTunes Backup.
Step 5. Once the entire data is extracted, you can preview and select each data type. Select the data type you want to recover and click on ‘Recover’.
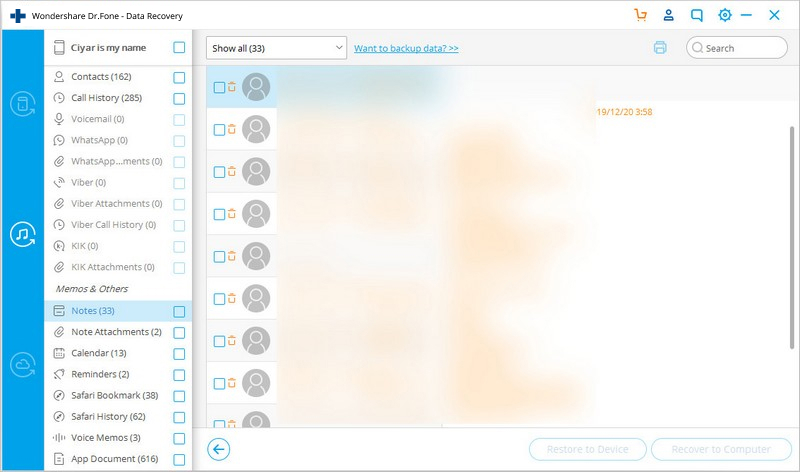
Dr.Fone Recover (iOS) is a great way to restore your old data after an iOS 15 update.
However, you can use iTunes Backup directly also to restore your computer without using a third-party program. But the biggest drawback of this way is we can’t choose what to restore to the device. We can only restore the whole iTunes backup.
Here are the steps to use iTunes Backup directly:
Step 1. To start with, you would need to launch iTunes and connect your iOS device via USB cable.
Step 2. Once the computer reads the device, right-click on the device and select ‘Restore Backup’.
Step 3. Here you should select the backup entry date before downloading the iOS 15 update and select ‘Restore’.
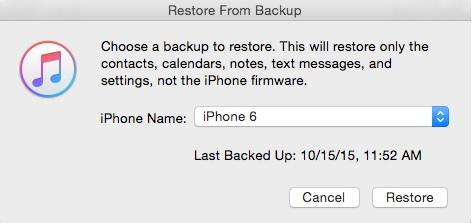
The advantage of using iTunes is its simplicity, especially if you have iTunes backup. However, it should be noted that iTunes is not the ideal method for iOS 15 data recovery because there are some shortcomings.
- iTunes Backup requires you to have a computer to connect the device physically. It is inconvenient for those who do not have immediate access to a computer.
- One shortcoming is the deletion of data. Once you restore old data with iTunes backup, all other get eliminated. You will lose songs, videos, podcasts, eBooks, and other content stored on the iOS device. This is because iTunes Backup will replace all the new content on your device with data stored on the Backup.
- Furthermore, unlike Dr.Fone- Recover (iOS), iTunes Backup does not let you restore data selectively.
- Also, iTunes Backup cannot backup all file types. Hence, there is a chance you won’t be able to get certain types of data back.
However, you will not find these problems with Dr.Fone- Recover (iOS). The software is designed to make the recovery of missing data a smooth and effortless process.
Part 3: How to recover iPhone data on iOS 15 from iCloud backup?
A third option for recovering lost data after iOS 15 update is using the iCloud backup. iCloud Backup is also a great way to recover lost contact information in the wake of an iOS 15 update, all that you need is your iOS device and an active Wi-Fi connection.
Step 1. To begin, take your iOS device, Go to Settings >General >Reset >Erase All Content and Settings. Here, enter your password and move to erase all content stored on the iOS device.
Note: If you do not want to lose any data, make sure you create a backup beforehand in a USB device before proceeding with this step.
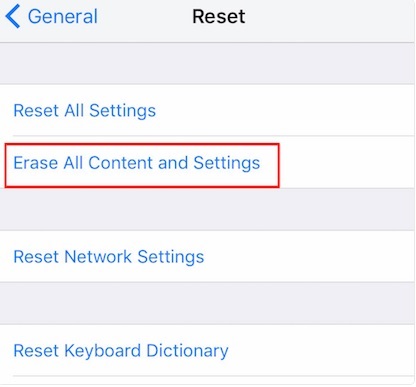
Step 2. Now, go to ‘Apps and Data’ and tap on ‘Restore from iCloud Backup’
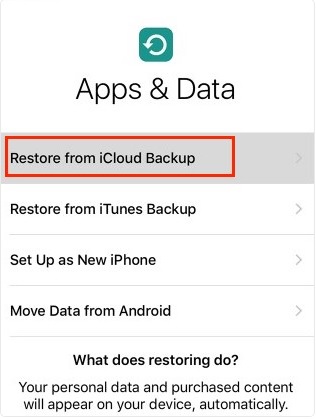
Step 3. You will now be taken to the iCloud page, go ahead and sign in to your account. Thereafter, tap on ‘Choose Backup’, and you will have a list of backup data. Select the one made before updating with iOS 15 and then select ‘Restore’.
That’s it, the restoration process will begin immediately.
iCloud might be suitable for some iOS users, but it is not the perfect method for restoring data since restoring old data is resetting the iPhone to its factory state. This means all your content will be deleted. Sadly, there is no workaround for this step with iCloud Backup. This is because you have to clear the iOS device’s hard drive to download your missing data from iCloud. Additionally, you cannot be selective about the data you want to restore all content on the device will have to be replaced. This can be incredibly inconvenient for people who only want to recover missing contact information.
Another disadvantage of iCloud Backup is its reliance on Wi-Fi. For this method, you must have a stable Wi-Fi connection. Hence, if you are in an area where Wi-Fi is weak or no Wi-Fi access, you cannot use iCloud to perform the transaction. Moreover, iCloud Backup is limited in what it can backup. Each iOS user gets a limited amount of space to store content. Also, if you have any media files which are not downloaded on iTunes, you cannot restore them on iTunes Backup. This means you have to take additional measures to make sure you do not lose all your data.
Hence, this could be a hassle for some people. However, Dr.Fone – Recover (iOS) does not have these problems because you restore your old data without deleting data files.
When it comes to software updates, errors are bound to happen. Some iPhone/iPad users lost contacts after the iOS 15 update, and some lost information after downloading iOS 15. However, there are plenty of options for these users to recover their missing data. One option available to them is Dr.Fone - Data Recovery (iOS). It is a flexible, easy-to-use option that streamlines the data recovery process. Users can also use iTunes Backup to restore all their old data. On the other hand, iCloud Backup is also available as a viable option. Out of all the three options, we feel that Dr.Fone Recover (iOS) is the best option as it promises you data recovery with zero data loss.


Selena Lee
chief Editor