Android Trash Folder: How to Access Trash on Android?
Apr 28, 2022 • Filed to: Data Recovery Solutions • Proven solutions
Hi, is there any Android trash folder on my Samsung S8? I accidentally deleted a folder on my device that has important snapshots and documents but I cannot locate any Samsung trash folder on my device. Is there any possibility to get the deleted files back? Any clue?
Hi user, we went through your query and do feel your pain of losing your data. Therefore, we have specifically drafted today’s post and are more than happy to help you restore your lost files! After going through this article you can certainly perform the recovery of your data effortlessly. What’s more? We have also discussed whether there is any Android trash folder and how to access trash on Android.
Part 1: Is there a Deleted Items folder on Android?
Unlike computers, be it Windows or Mac, there is no trash folder in Android devices. We understand it is astonishing and frustrating at the same time that there is no provision to restore the deleted files on Android. We as humans, delete the files now and then. And at times, we do screw up. Now, you may wish to know why there’s no Android trash folder on mobile devices?
Well, the most probable reason behind it is due to the limited storage available over an Android device. Unlike Mac or Windows computer which has huge storage potential, an Android device (on the other hand) is merely equipped with 16 GB - 256 GB of storage space which is quite very small, comparatively, to hold an Android trash folder. Perhaps, if there was a trash folder in Android, the storage space will soon be consumed by unnecessary files. If it happens, it’s may easily make the Android device crash.
Part 2: How to find trash on Android phone
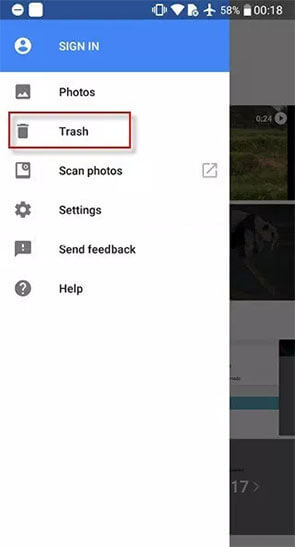
Though, there is no Android trash folder over mobile devices. However, you can now make use of such a feature in the Gallery App and Photos app from Google of recent Android devices. This means any deleted photo or video will be moved to this recycle bin or trash folder so you can go there and restore your deleted files. Here’s how to access trash on Android.
Via Google Photos App
- Grab your Android device and launch the “Photos” app. Hit on the “Menu” icon on the top left and opt for the “Trash” bin.
Via Stock Gallery App
- Launch the Android’s stock “Gallery” app and push the “Menu” icon on the top left corner and opt for the “Trash” bin from the side menu panel.
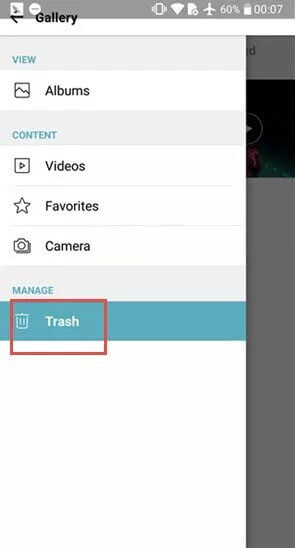
Note: In case, you’re not able to locate the Android trash folder with the above steps. You may have to try to find it yourself in the Gallery App, as the steps may differ depending upon the Android manufacturer and interface. We accessed trash on Android-based LG mobile devices.
Part 3: How to recover files in Android trash
It is a bitter fact now that there is no trash folder in Android. But how would you perform recovery of files that may have lost due to accidental deletion or any other data loss scenario? Now, here comes the Dr.Fone - Data Recovery (Android) for your rescue. Dr.Fone - Data Recovery (Android) has the highest success rate in recovering the lost data files and that too, without any quality loss. With this mighty tool, you can easily recover almost all sorts of data types available on your Android device. Be it photos, videos, call logs, contacts, or messages, this tool can recover them all in a hassle freeway. Being the 1st Android data recovery software in the world and is widely recommended and trusted across the globe.
Step by step tutorial: how to recover files from the trash of Android devices
Step 1. Establish connection b/w Android and PC
Install the software, after you’ve downloaded the Dr.Fone toolkit on your computer. Launch it and then select “Data Recovery” from the main interface of the software. Meanwhile, you can establish a firm connection between your Android device and your computer using an authentic USB cable.
Note: Ensure that the “USB debugging” has been enabled already on your Android device before plugging it into the computer. Enable it, if not already.

Step 2. Opt for desired file types
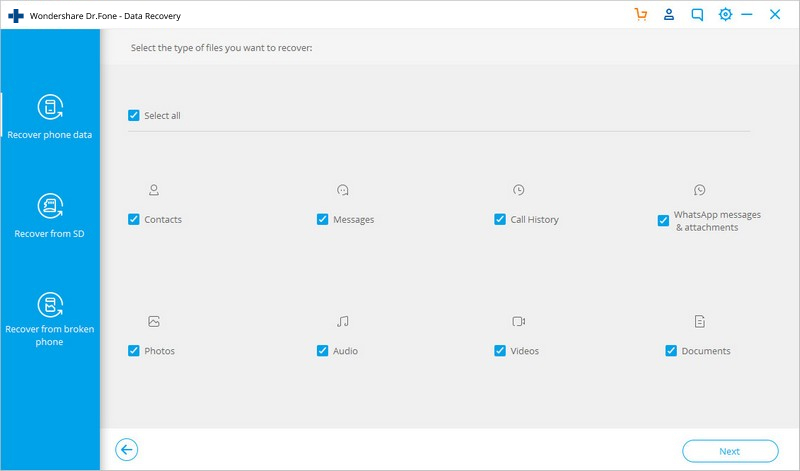
Once your device is detected by the software, Dr.Fone - Data Recovery (Android) will bring up a checklist of data types to perform recovery.
Note: By default, all the data types are checked. But if you wish to perform recovery of any specific data, you can just opt-in for that particular file type and uncheck all other.
Step 3. Opt for the Scan types
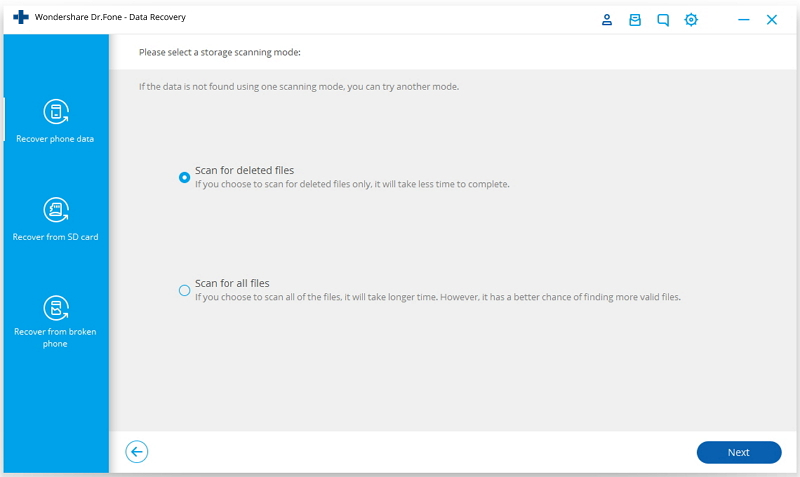
In case, your Android device is not a rooted one, you will be brought up to this screen where you need to either select “Scan for deleted files” or “Scan for all files” option depending upon your needs. The latter option will consume more time as it runs a thorough scan.
Step 4. Preview and recover deleted Android data
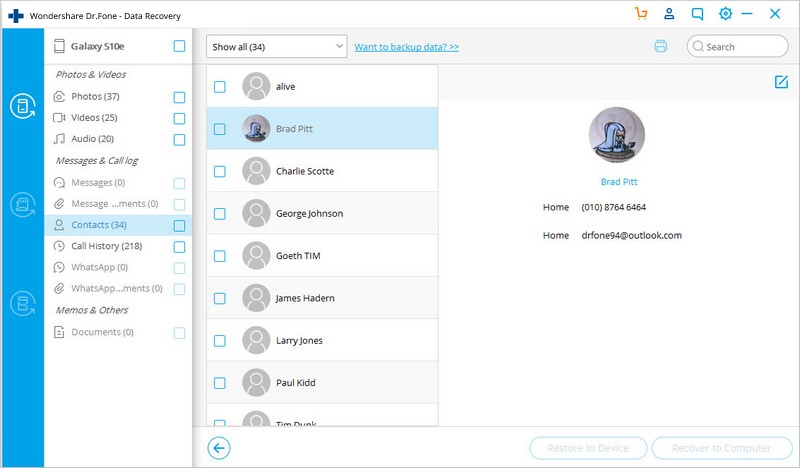
As soon as the scan completes, you will be able to preview the recoverable data. Select the files that you require and then push the “Recover” button to initiate the recovery of the selected items.
Note: When recovering deleted data, the tool supports only a device earlier than Android 8.0, or it must be rooted.
Part 4: How to permanently erase Android trash
In case, you’ve purposely erased some data from your device and wish to verify that it has been wiped out completely or not by locating the Android trash folder. But with the classified information mentioned above, there’s no recycle bin available where you can look for trash files on Android. There’s still scope of performing recovery of the deleted files as the deleted files don’t get erased from the device immediately. Now, if you wish to erase some data permanently from your Android device and make it irrecoverable, you can always look up to Dr.Fone - Data Eraser (Android) to serve the purpose. It actively erases all your data permanently and that too, in just a matter of a couple of clicks. Here’s how to do it.
Step by step tutorial: how to radically wipe out Android trash
Step 1. Launch Dr.Fone - Data Eraser (Android)
Launch the Dr.Fone toolkit on your computer and then opt for the “Erase” option from the main screen of the software. Then, plug your Android device into the computer via a genuine data cable. Ensure to keep “USB debugging” enabled in the first place.

Step 2. Initiate Erasing data
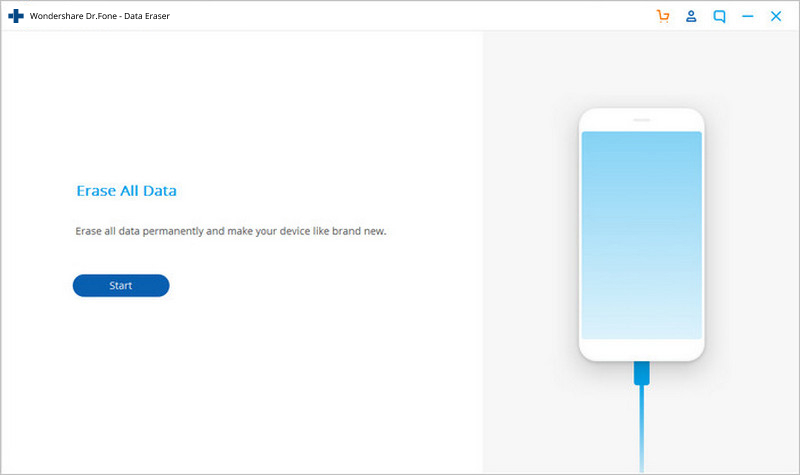
As soon as your device gets detected, you need to hit on the “Erase All Data” button to initiate the process of erasing all your data over the connected Android device.
Step 3. Give your consent
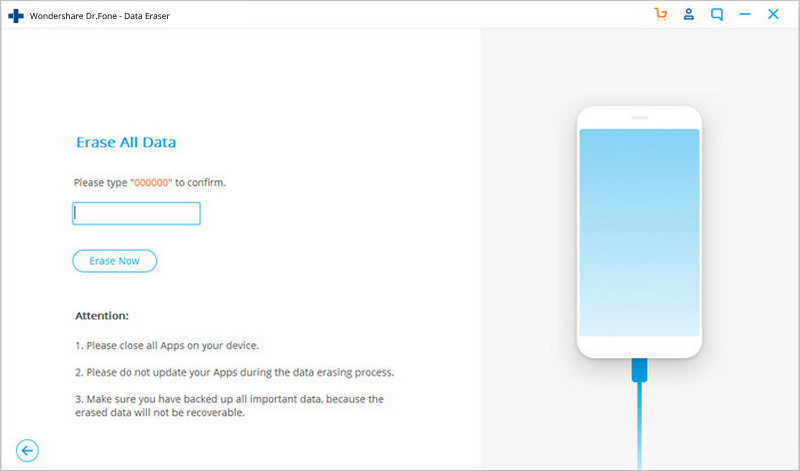
The data once erased with Dr.Fone - Data Eraser (Android) will no longer be recoverable, you need to give in your consent to operate by punching in the “delete” command in the text box available.
Note: Ensure to back up all your required data before proceeding further.
Step 4. Factory reset your Android
Once the personal data over your Android device is erased permanently, you will be asked to “Factory Data Reset” to wipe away all the settings as well.
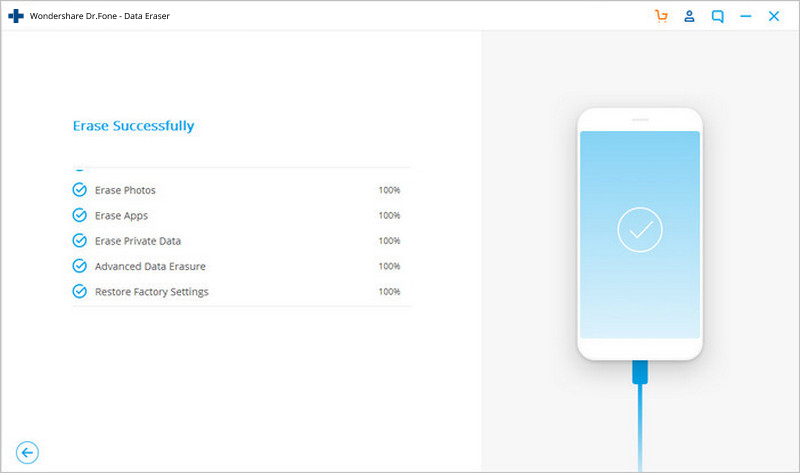
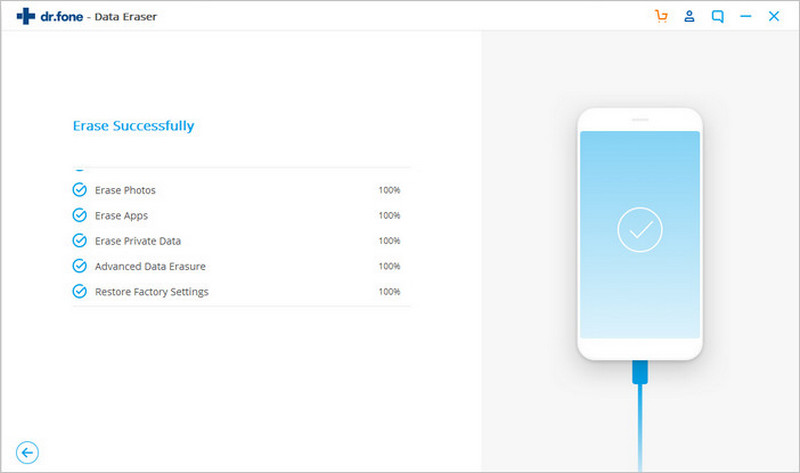
Once done, you'll now see a prompt over the screen reading as "Erase Completed". That's it, now your device is just like a brand new one.
Final Words
That was all about the Android trash folder and how you can recover deleted files from the Android device. With all of the comprehensive information, we now believe that you have proper knowledge that there is no such trash folder in Android and why there is no provision for it. Anyways, you no longer have to worry about the lost data as you have Dr.Fone - Data Recovery (Android) to seek the help of when you wish to perform recovery efficiently and effortlessly.
ნაგვის მონაცემები
- დაცარიელეთ ან აღადგინეთ ნაგავი
- დაცარიელეთ ნაგავი Mac-ზე
- დაცარიელეთ ნაგავი iPhone-ზე
- Android-ის ნაგვის გასუფთავება ან აღდგენა


ჯეიმს დევისი
პერსონალის რედაქტორი