

Here’s Everything You Should Know About Samsung Smart Switch Backup (and its Best Alternative)

Mar 07, 2022 • Filed to: Tips for Different Android Models • Proven solutions
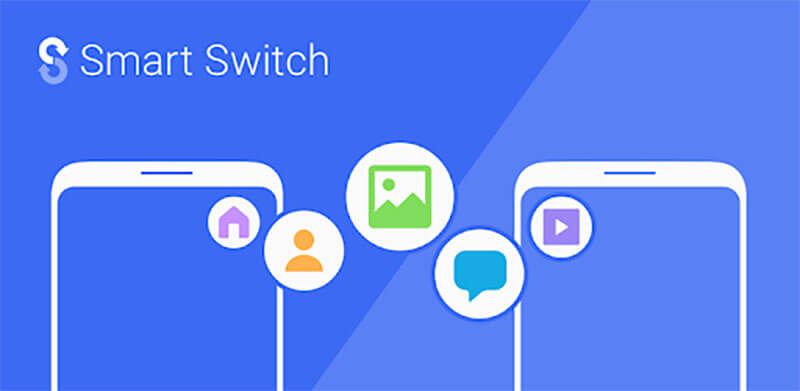
If you are a Samsung user, then you might already be familiar with Smart Switch. While the mobile app lets us transfer data from other smartphones to Samsung devices, it also has a desktop application. Using it, you can easily backup your Samsung phone and later restore your data. Though, taking the Samsung Smart Switch backup can sometimes be a bit complicated. To help you, I have come up with this detailed guide about the Smart Switch backup and restore process that anyone can implement easily.
Part 1: Samsung Smart Switch Backup Features at a Glance
Before I discuss how to backup data via Samsung Smart Switch, it is important to know how the application works. Try not to confuse the Samsung backup Smart Switch desktop application with its mobile app. The Android app is used to transfer data from other smartphones to a Samsung device while the desktop application can help us backup and restore our Samsung phone’s data.
- You can just connect your Galaxy device to the Samsung Switch backup application to save your data on your Mac or Windows PC.
- As of now, it can include all the common data types in the backup, such as your photos, videos, music, contacts, call logs, documents, and device settings.
- Later, you can restore the Samsung Switch backup to the same device (it can’t transfer the backup content to another smartphone).
- Furthermore, the application can also be used to sync your Microsoft Outlook account with your Samsung device.
Pros
- Freely available
- Can save almost every major data type
Cons
- Only supports Samsung Galaxy devices and no other smartphone model
- You can only restore your data to the same Samsung phone
- There is no provision to select what we wish to include in the backup
- You can’t preview your files to selectively restore them to your phone
- Limited features compared to other backup tools
Part 2: How to Backup Your Samsung Device with Smart Switch?
You can take the assistance of the Samsung Smart Backup application on your Windows or Mac to save your data. Apart from taking a backup of your Samsung phone, Smart Switch can also be used to restore your data or sync your account. To take a Samsung Smart Switch backup, you can simply follow these instructions.
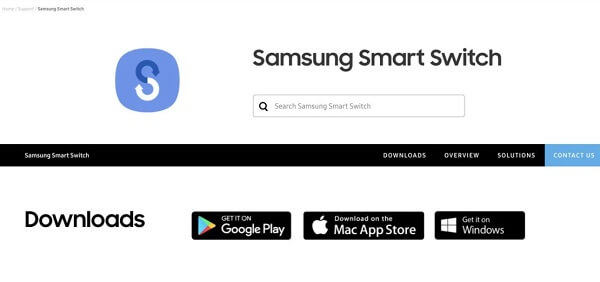
Step 1: Install Samsung Smart Switch
Needless to say, to take a Samsung backup via Smart Switch, you need to first go to its official website and visit the Downloads section. From here, you can choose to download Smart Switch on your Mac or Windows PC. Later, you can launch the installer and follow a click-through process to complete the installation.
Step 2: Connect your phone to Smart Switch
Afterward, you can just use a USB cable to connect your Samsung Galaxy device to the computer. Once the phone would detect a connection, you will get a prompt on your device. Here, you can choose to perform media transfer (MTP) to your system.

Also, you can launch the Smart Switch application on your Galaxy device and choose to connect it to the computer.
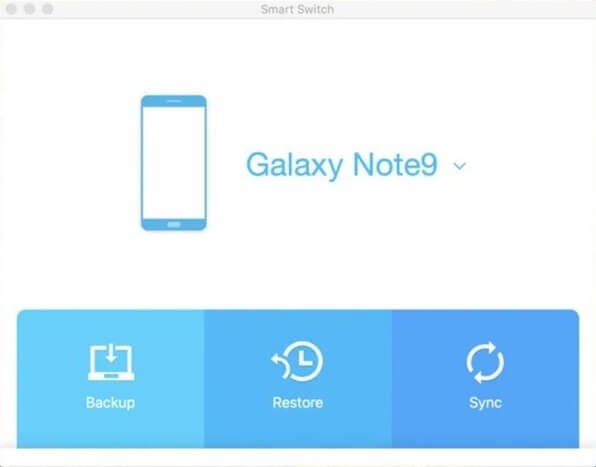
Step 3: Backup your Samsung phone via Smart Switch
Now, launch the Samsung Smart Switch application on your Mac or Windows PC, and from the available options on its home, select the “Backup” feature.
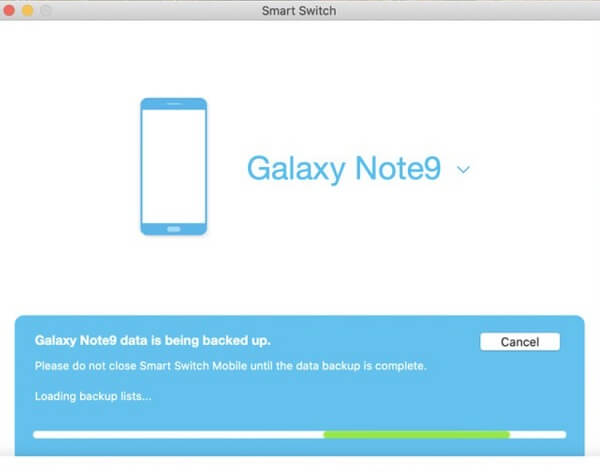
On your Samsung Galaxy device, the Smart Switch application would display a prompt regarding connection. Here, you need to let the application access your device’s data and take its backup. Make sure that you keep this screen intact as it would take the Smart Switch backup.
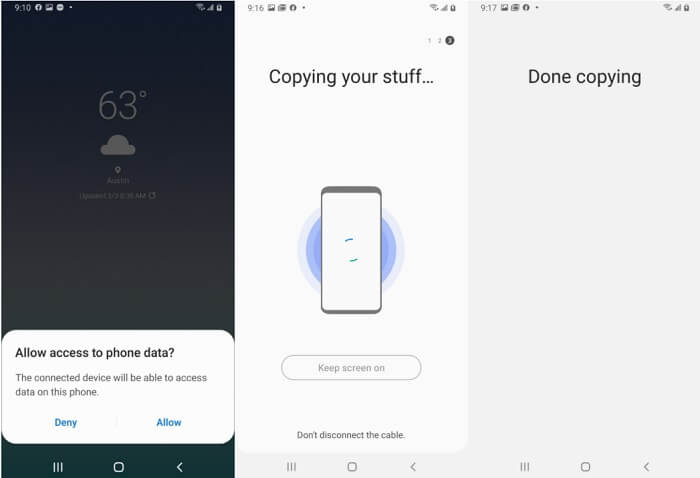
Similarly, on the desktop application of Smart Switch, you can view the progress of the backup process. You can view the progress from a status bar and simply wait for it to be completed successfully. Try not to close the Smart Switch application or disconnect your device during the process.
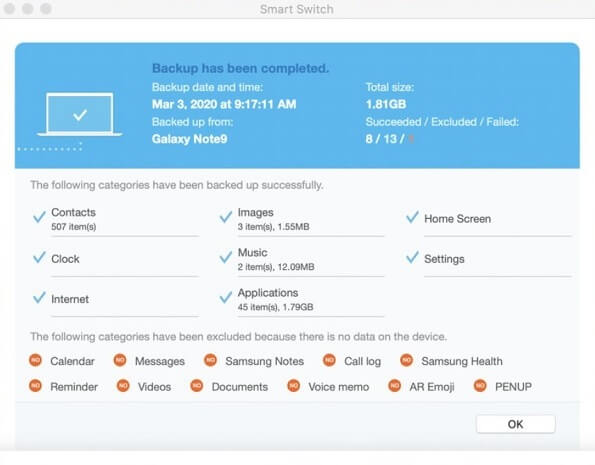
Step 4: Review the backup content
That’s it! After when the Samsung Smart Switch application would complete the process, it will let you know. Here, you can view the data that is included in the backup file and can also securely disconnect your device later on.
Tip: How to Restore a Samsung Smart Backup
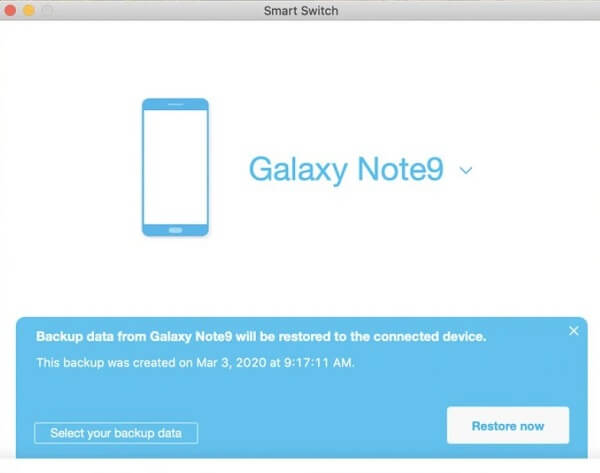
As stated above, you can also use Samsung Smart Switch to restore an existing backup to your device. To do that, you can just connect your Samsung Galaxy device to the computer and launch the Smart Switch application.
From its home, click on the “Restore” button instead to get its dedicated interface. Go to the bottom panel to check the list of all the saved backup files and select the option of your choice. After selecting a Smart Switch backup to extract, click on the “Restore Now” button.
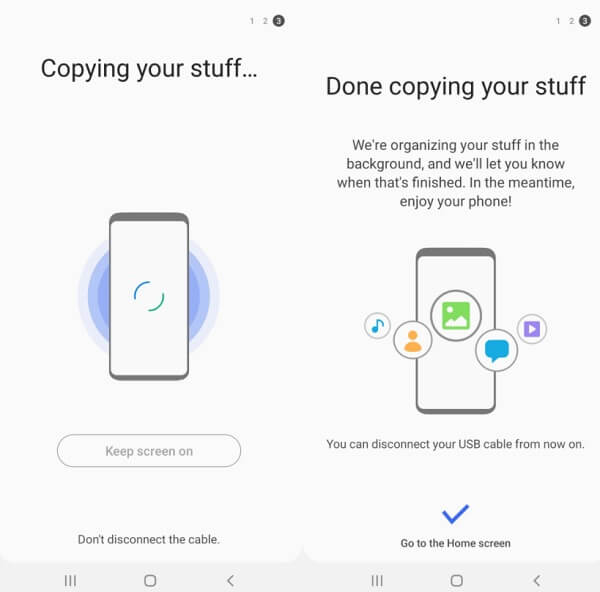
At the same time, you can also launch the Smart Switch app on your device and wait as it would copy the backup content to your phone. Once the Samsung Switch backup is successfully extracted, the application will let you know.
Part 3: Can’t Backup your Samsung Phone via Smart Switch? Try another Application
As you can see, the Samsung Smart Switch backup tool has several limitations and disadvantages that restrict us to restore our data. For instance, you can’t select what you wish to include in the backup and the process can be bit completed. That’s why you can consider using Dr.Fone – Phone Backup (Android) that provides a hassle-free solution to backup and restore our data on any device.
- Extensive compatibility
It supports 8000+ different Android phones and you can easily restore your data to the same or any other device with no compatibility issues.
- Selective or complete backup
As of now, Dr.Fone – Phone Backup (Android) can save all the important data types like photos, videos, music, messages, contacts, call logs, bookmarks, and so much more. You can take an extensive backup of the entire device or even select the types of data to be included in the backup.
- Preview available
You can easily load an existing backup to the Dr.Fone interface and preview your data (like photos, contacts, messages, and more). This will let you select what you wish to copy to the connected device.
- Restore iCloud and iTunes backup
Furthermore, you can also use the application to restore an existing iCloud or iTunes backup to your device. The existing data on your phone would not be deleted during the restoring process.
- Free and user-friendly
Dr.Fone – Phone Backup (Android) is an extremely user-friendly DIY tool that does not need any technical experience. Also, it is entirely free to use the application to backup your Samsung device to your computer.
If you want to backup your Samsung or any other Android device to your system as well, then you can follow these basic steps.
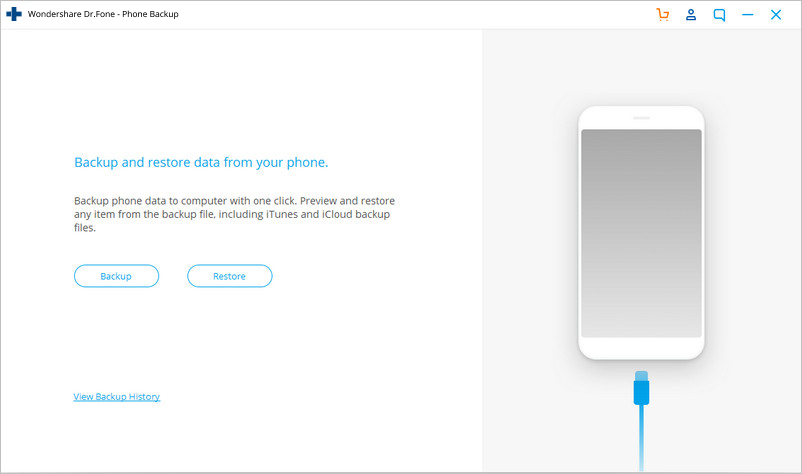
Step 1: Launch the Dr.Fone – Phone Backup application
Firstly, you can just connect your Samsung phone to your computer, launch the Dr.Fone toolkit, and open the “Phone Backup” feature from its home.

The application will present options to backup and restore your device. You can also wait as your phone would be detected by the tool and its snapshot will be displayed. To proceed, you can click on the “Backup” button here.
Step 2: Choose what to include in the backup
Afterward, the application would automatically detect various data types stored on your device and will display them. You can now choose what you wish to include in the backup file or can select all content types in one go.
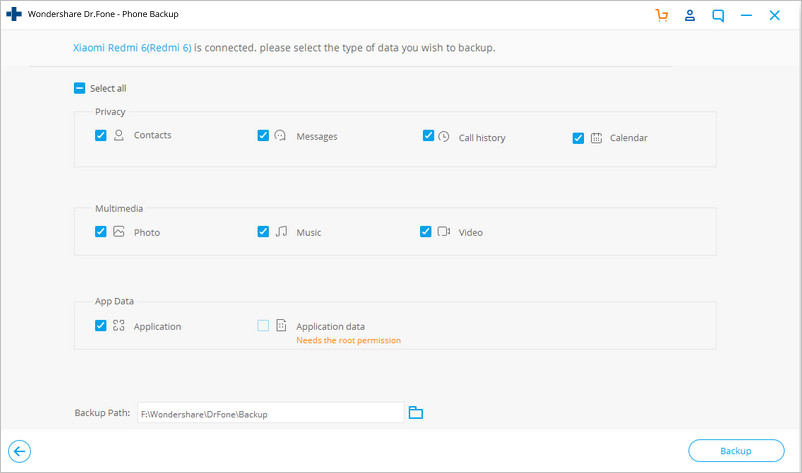
There is also an option at the bottom panel to select the location where your backup would be stored. Once you have selected the data types of your choice, click on the “Backup” button.
Step 3: Complete the backup process
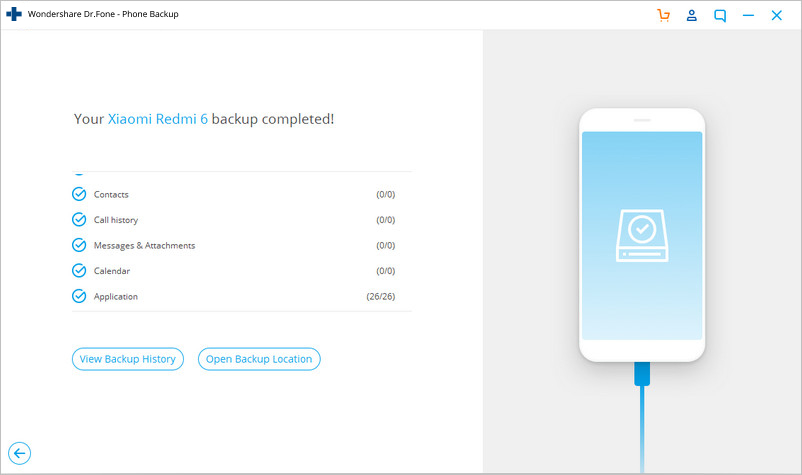
As you would click on the “Backup” button, the application would save the selected data types to the local computer. You can view the progress here and try not to disconnect your phone in between.

After successfully completing the backup process, Dr.Fone will let you know. You can safely remove your phone now and check the backup content if you want to.
Tip: Restore an Existing Backup
The application can also be used to restore Dr.Fone, iCloud, or iTunes backup to any device. For this, you can connect the target phone, launch the application, and select the “Restore” option instead. This will display a list of the available backup files that you can view and select.
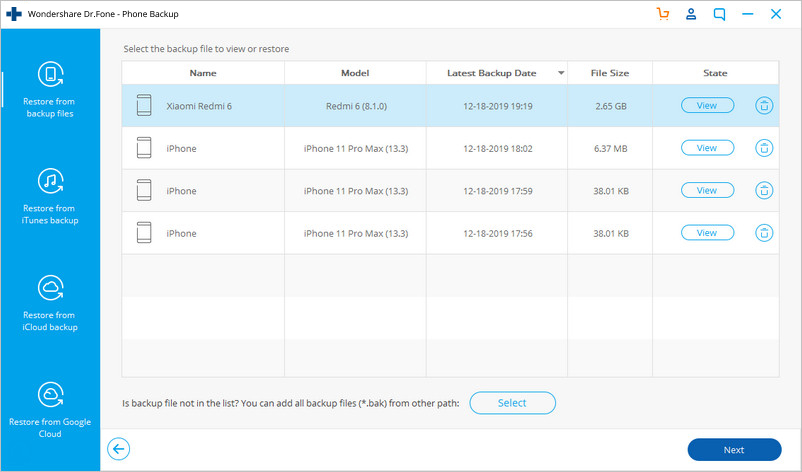
The application would automatically extract the data from the backup file and will let you preview it on its native interface. You can simply select what you wish to get back and directly restore your data to the connected device from here.

Now when you know how to take the Samsung Smart Switch backup, you can easily keep your important files safe. Since it can be tough to back up your phone via Smart Switch, you can consider using Dr.Fone – Phone Backup (Android) as well. With just a single click, it will let you back up your Android phone to your Windows/Mac for free. You can also preview your backup content and selectively restore it to any device of your choice.


Samsung Tips
- Samsung Tools
- Samsung Transfer Tools
- Samsung Kies Download
- Samsung Kies' Driver
- Samsung Kies for S5
- Samsung Kies 2
- Kies for Note 4
- Samsung Tool Issues
- Transfer Samsung to Mac
- Transfer Photos from Samsung to Mac
- Samsung Kies for Mac
- Samsung Smart Switch for Mac
- Samsung-Mac File Transfer
- Samsung Model Review
- Transfer from Samsung to Others
- Transfer Photos from Samsung Phone to Tablet
- Can Samsung S22 Beat iPhone This Time
- Transfer Photos from Samsung to iPhone
- Transfer Files from Samsung to PC
- Samsung Kies for PC
Alice MJ
staff Editor