Bricked Your Android Phone? Here’s A Full Solution
Apr 27, 2022 • Filed to: Data Recovery Solutions • Proven solutions
A bricked phone is a device that won’t turn on no matter what you do and everything you try to do to fix it doesn’t work. Most people will tell you that there is really nothing you can do to fix a bricked device. But with the right information, the right buttons to push and useful additional software you can actually try to fix a bricked device.
In this article we are going to look at how you can fix your device if you are sure it is bricked, how to rescue the data on your bricked device and even how you can avoid this situation in the future.
Part 1: Rescue the data on your Bricked Android Phone
Before we can learn how to fix a bricked device, it is important that you are able to save the data that is on the device. Having the data saved somewhere else will be the added insurance you need in case anything goes wrong during the process. There are very few software solutions in the market to help you get back data from a bricked device. One of these and the most reliable is Wondershare Dr.Fone - Data Recovery (Android).

Dr.Fone - Data Recovery (Android)
World's 1st Android smartphone and tablet recovery software.
- Recover data from broken Android in different situations.
- Scan and preview files before starting the retrieval process.
- SD card recovery on any Android devices.
- Recover contacts, messages, photos, call logs, etc.
- It works great with any Android devices.
- 100% safe to use.
How to Use Dr.Fone - Data Recovery (Android) to Rescue Data from a Bricked Android
If your device is completely unresponsive, don’t worry Dr.Fone can help you get all the data back. Simply follow these steps to gain access to the device and recover all your data.
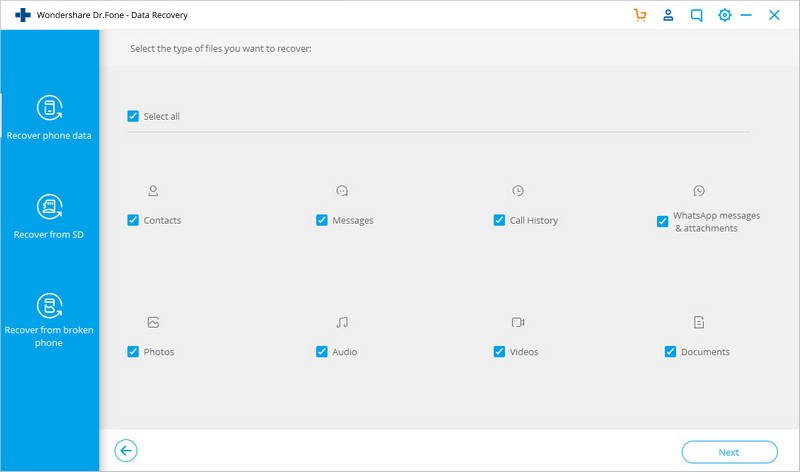
Step 1: Download and install Wondershare Dr.Fone to your PC. Launch the program and then click on Data Recovery. Select the data types you would like to recover and then click on Next.
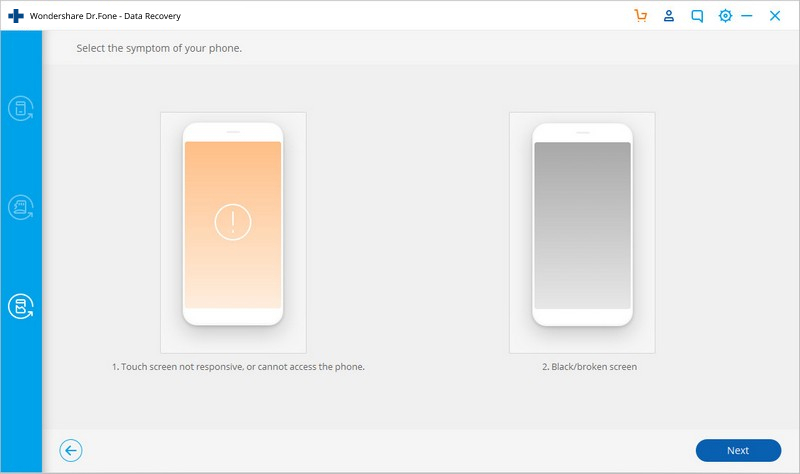
Step 2. Select the issue type for your phone. Choose from "Touch screen not responsive or cannot access the phone" or "Black/broken screen".
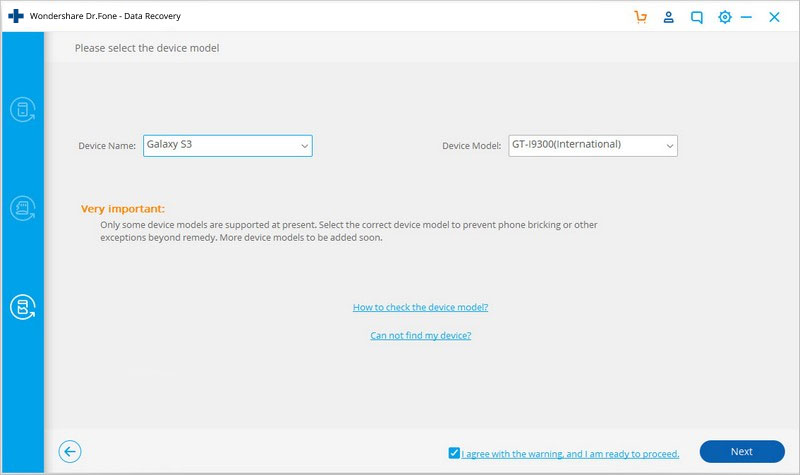
Step 3: In the next step, you need to select your device model. If you don’t know the model of your device click on “How to check the device model” to get help.
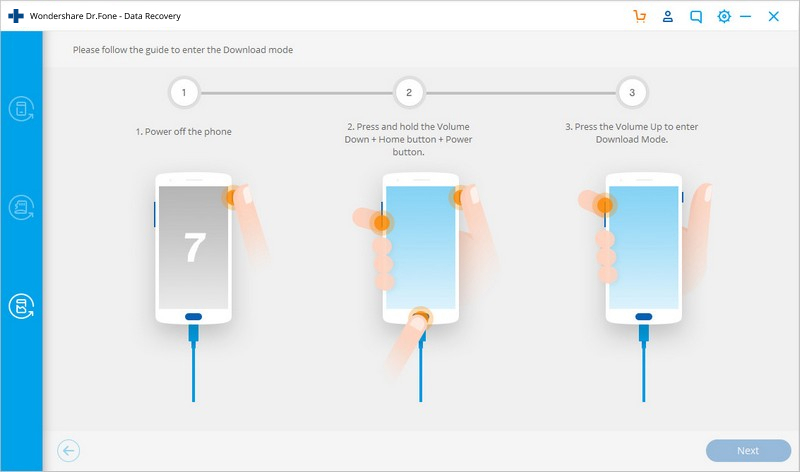
Step 4: The next screen will provide instructions on how to enter “Download mode.” Connect the device to your PC once it is in “Download Mode”
Step 5: The program will begin an analysis of your device and then download the recovery package.
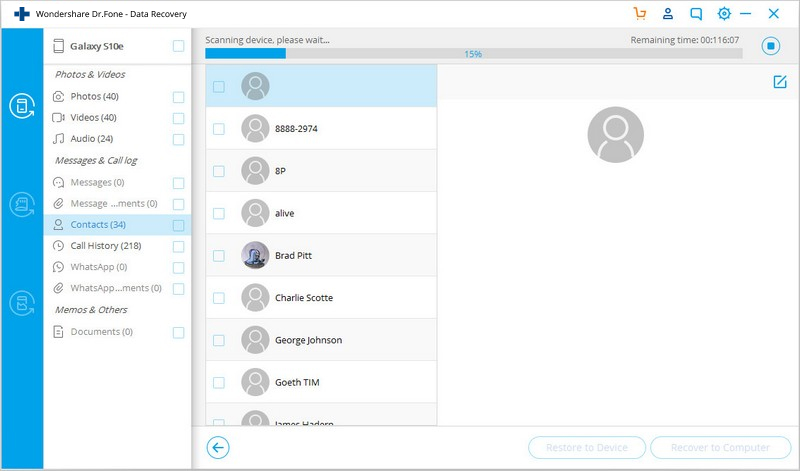
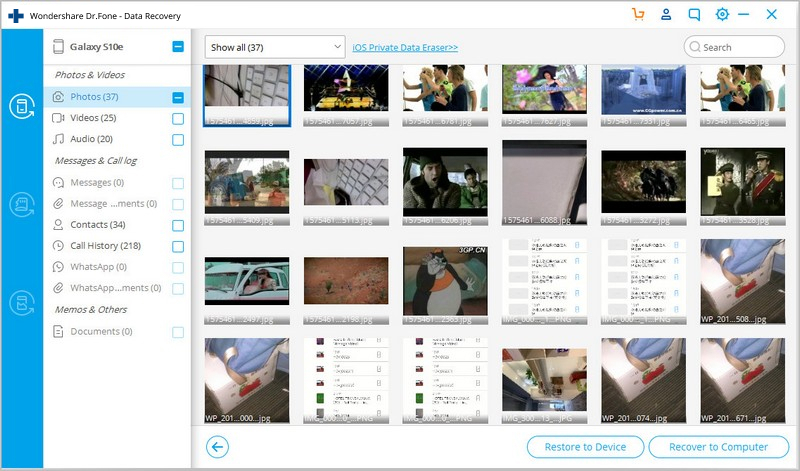
Step 6: Then Dr.Fone will display all the recoverable file types. You can click on the files to preview them. Select the ones you need and click on "Recover to Computer" to save them to your computer.
Part 2: How to Fix Your Bricked Android Phone
Android devices are usually very flexible in allowing users to flash ROM but sometimes an incorrect process can result in a bricked device. While there are few solutions to this problem, here are a few things you can do;
When the Device Boots Straight into Recovery
If the device can boot to the recovery screen, you can find an alternative ROM to install and copy it your device. Installation can then be done in the recovery menu. If the device is booting to recovery mode there is a chance that it can be fixed.
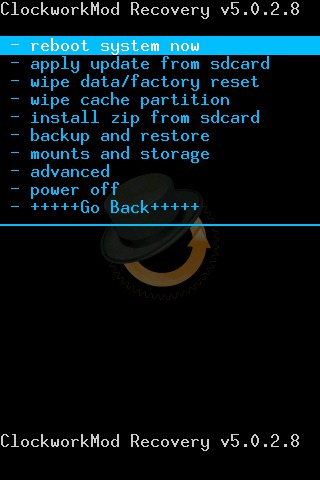
Step 1: Load up Clockworkmod or any other recovery tool that you have been using.
Step 2: Once you are in, navigate to the “Reboot system now.” If you are using Clockworkmod, this should be your first option. Hopefully everything will work just right if you do this, If it doesn’t you may need to download and re-flash the ROM again.
When the device won’t stop rebooting
Here’s what to do if the device wont stop rebooting.
Step 1: Turn off the device and then reboot in recovery mode.
Step 2: Go to “Advanced” which will bring up a number of options to choose from.
Step 3: One of the options should be “Wipe Dalvik cache” select this option and then follow the instructions. When finished select “Go Back” to return to the main menu.
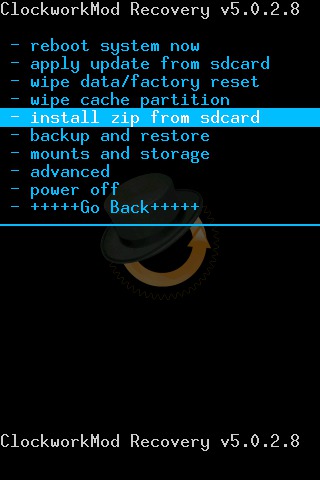
Step 4: Go to the “Wipe Cache Partition” and select it.
Step 5: Go to “Wipe data/ factory reset.”
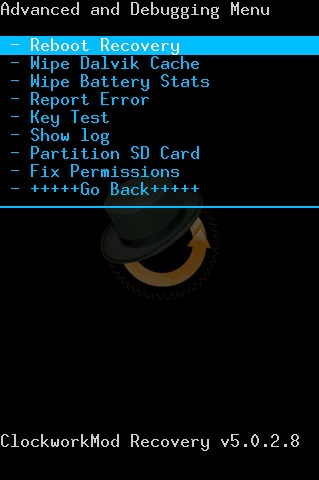
Step 6: Finally reboot the device by selecting “Reboot system now.” This should fix the problem. You may also want to flash the same ROM or try a new one.
If the above methods don’t work, try one of the following options.
You can return to resource where you found the flash tools and search or ask for advice
Sometimes these errors can be caused if the ROM installation was performed via SD card. In this case reformatting the SD card might help.
If all else fails, it is time to returning the device to the vendor if your warranty is still applicable.
Part 3: Useful Tips to avoid Bricking your Android Phone
If you are planning on installing custom ROM you need to install Custom Recovery. This will enable you restore the device to its original settings should anything go wrong and hopefully help you avoid bricking your device.
- Ensure that you are familiar with the Fastboot or ADB commands before doing anything. You should know how to recover your device by flashing a command line and also manually transfer important files to your device.
- Make a backup of your device. This is obvious but most people fail to adhere to it. At the very least you can get back all your files and settings to transfer to a new phone.
- Keep a full Nandroid backup on your phone
- Keep another backup on your PC which you can access should anything go wrong with the Custom ROM installation
- Know how to hard reset your device. It may come in handy when your device freezes on you.
- You should also consider enabling USB debugging. This is because many solutions for a Bricked device rely on USB debugging.
- Ensure the Custom ROM you choose can actually be used on your device model.
While installing Custom ROM can actually be a great way to customize your device, it is also the leading reason for bricked devices. Therefore ensure that you understand what you are doing when you decide to customize your device. Learn as much as you can about the process before attempting everything.


Selena Lee
chief Editor
Generally rated4.5(105participated)