Top 8 Viber Problems and Solutions
Mar 07, 2022 • Filed to: Manage Social Apps • Proven solutions
- Part 1: How to free download and install Viber for PC online
- Part 2: How can I use Viber without phone number
- Part 3: Why Viber doesn't ring on my iPhone
- Part 4: How to backup & restore Viber messages
- Part 5: Why does Viber disconnect
- Part 6: How to recover wrongly deleted Viber messages
- Part 7: Why does Viber always say online
- Part 8: Why Viber can't find contacts
Part 1: How to free download and install Viber for PC online
If you'd like to use Viber on desktop, you need to go to the official website and download Viber for PC from there.
Viber for PC: http://www.viber.com/en/products/windows
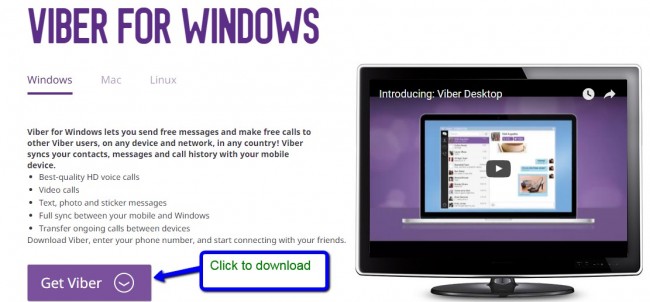
After you download Viber for PC, let us see how to install Viber for PC
Step 1: Double click the downloaded file and click "Accept & Instal"
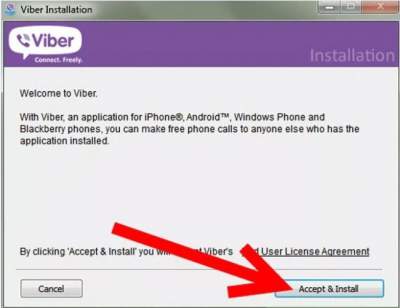
It will start to install on you PC as shown
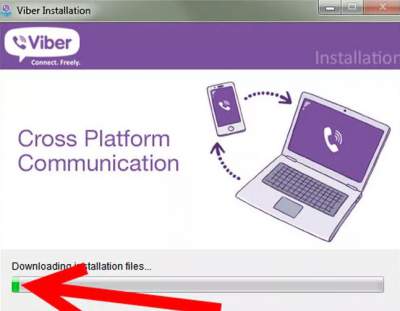
Next it will ask you whether you have Viber on Mobile, Just click yes and continue.
Step 2: Enter your mobile number
Fill in your mobile number (including) the international code. the mobile number should be the same one you used to sign up on your mobile.
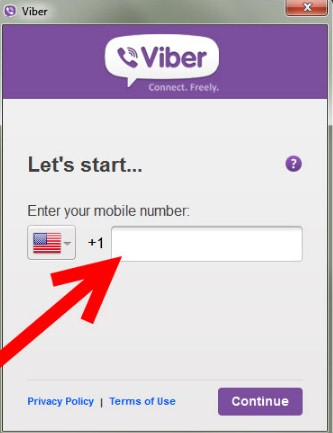
Click continue.
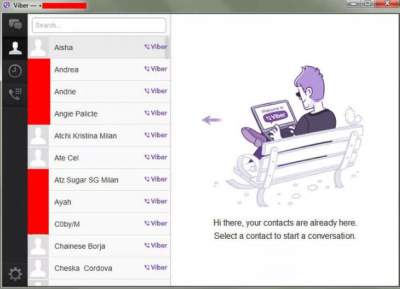
You have now setup Viber on your PC.
Part 2: How can I use Viber without phone number?
Did you know that you can technically use Viber without a Phone number or smartphone?
Viber is a great tool for communication through your smartphone. But now there is a way you can use Viber through your PC without a SIM card. The only obstacle that lies between using your Viber on PC is that you first need to have it installed on your smartphone. But since ost people still dont have smartphone, it is still possible to use Viber on PC without smartphone.
Step 1: Connect to WiFi or internet from your iPad/Tablet
Once you have connected your tablet or ipad to the internet you need download and install Viber app. If you are asked for your cellphone number, enter any cellphone number that you will receive the code and then confirm.
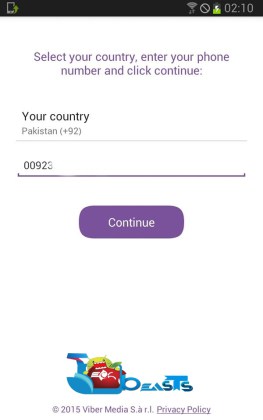
An SMS message with the code will be sent to your regular cellular phone. Copy that code and use it to activate your Tablet/iPad
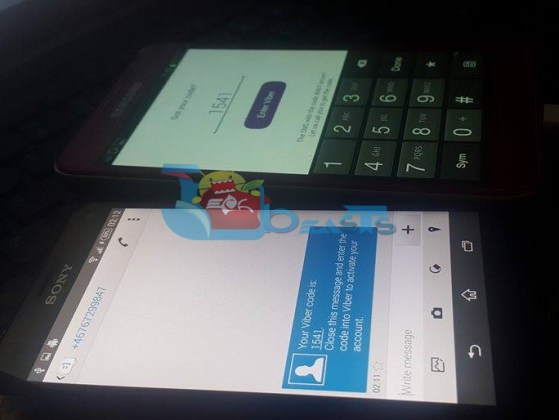
Once you have entered the verification code, you can be able to setup Viber on your iPad or Tablet. you can then add contact and start calling your friends and loved ones. If your Viber not ringing,check your sound settings.
That is all.
Part 3: Why Viber doesn't ring on my iPhone
Checked your iPhone and just discovered that there are several missed calls? If you didn't hear the calls, it means your Viber doesn't ring on your iPhone. To solve this Viber problem, follow the following steps:
Step 1: Check if iphone is not in silent mode
Step 2: Go to "Settings"
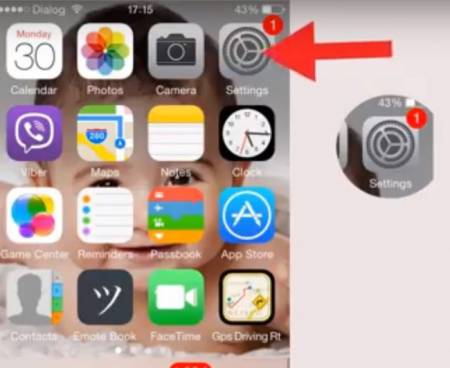
Step 3: Then scroll to "Notifications"
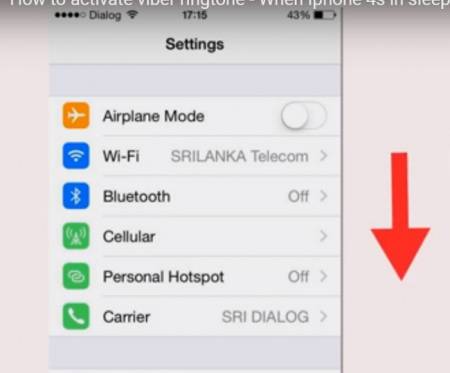
Step 3:Under Alert Style set it to "Banner" or "Alerts"
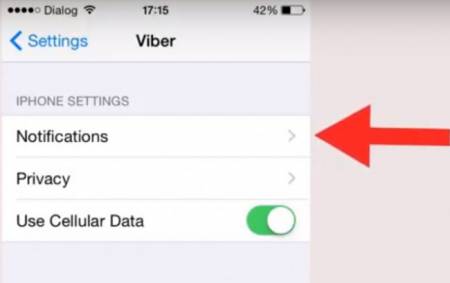
Step 4: Turn on alert sound
Part 4: How to backup & restore Viber messages
Dr.Fone - WhatsApp Transfer is a great tool when it comes to backing and restoring Viber messages. Sometimes we accidentally lose important messages and files without wishing or knowing and this can be very frustrating if you have no idea how to recover your messages. Moreover, the process of recovering your Viber messages once you lose the messages is time consuming. So the wisest thing to do is to prevent losing the messages in the first place by doing backup and restore.

Dr.Fone - WhatsApp Transfer
Protect Your Viber Chat History
- Backup your entire Viber chat history with one click.
- Restore only the chats you want.
- Export any item from the backup for printing.
- Easy to use and no risk to your data.
- Supported all iPhone and iPad models.
- Fully compatible with iOS 11.
Steps to backup Viber messages from iPhone/iPad
Step 1: Launch Dr.Fone
The first thing you need to do is to launch Dr.Fone on your PC. Next, select "Restore Social App" on the screen as shown below.

Connect your iPhone to computer using a lightening cable. Go to Social App Data Backup & Restore and select iOS Viber Backup & Restore.
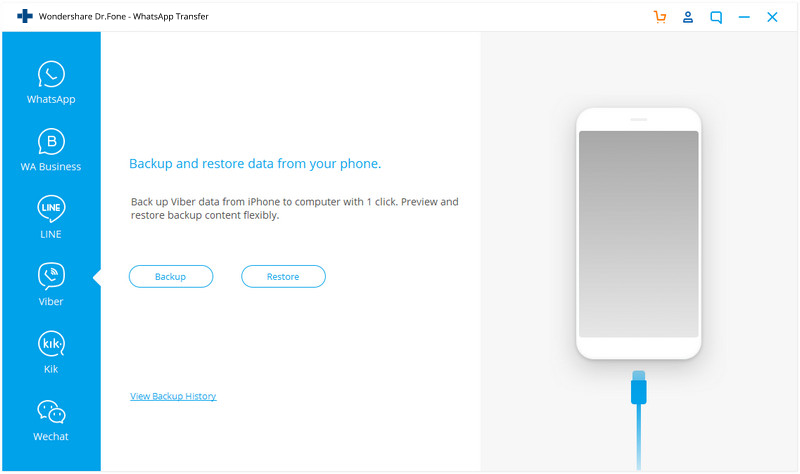
Step 2: Begin to backup Viber messages
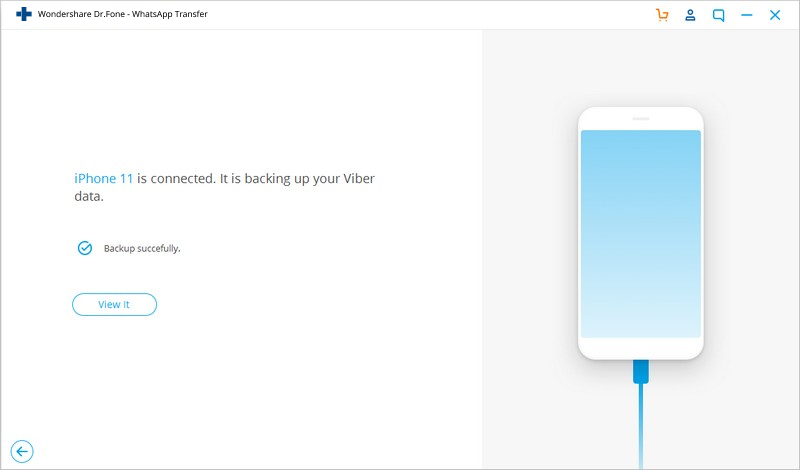
After your device is detected, click the "backup" button. The tool will start backing up your Viber messages and files automatically. Do not disconnect the device while the process is on as this will abort the process. In other words, your device should be connected all the time.
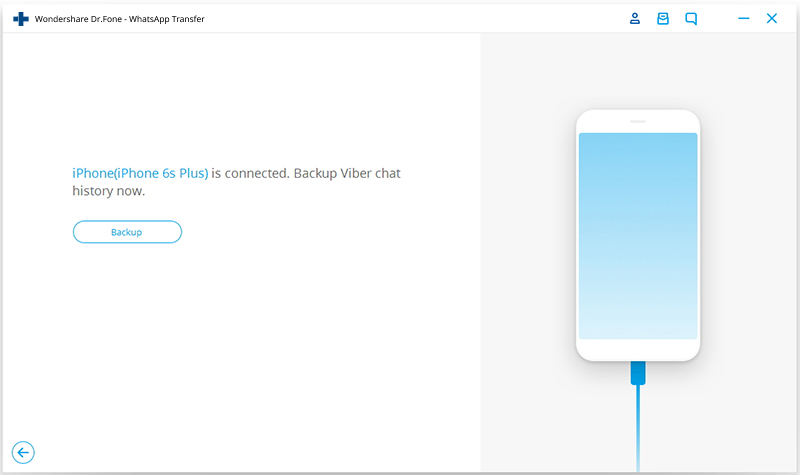
You will be notified when the process is complete and you will see the screen below.
Steps to restore Viber messages from iPhone/iPad
Now that you have backed your Viber messages, chats, photos or videos, you may want to view the backup data you have created and restore. The following process outlines how to restore your Viber backup data using Dr.Fone Backup & Restore too.
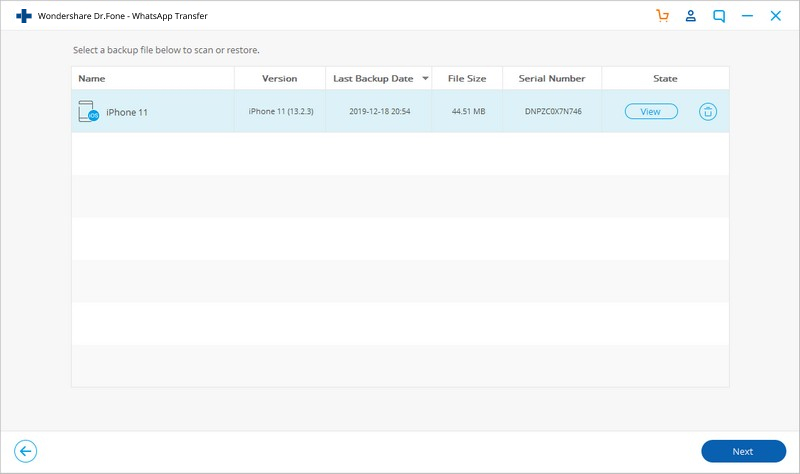
Step 1: View your Viber backup files
On your screen, click "To view the previous backup file >>" in order to check the backup history.
Step 2: Extract your Viber backup file
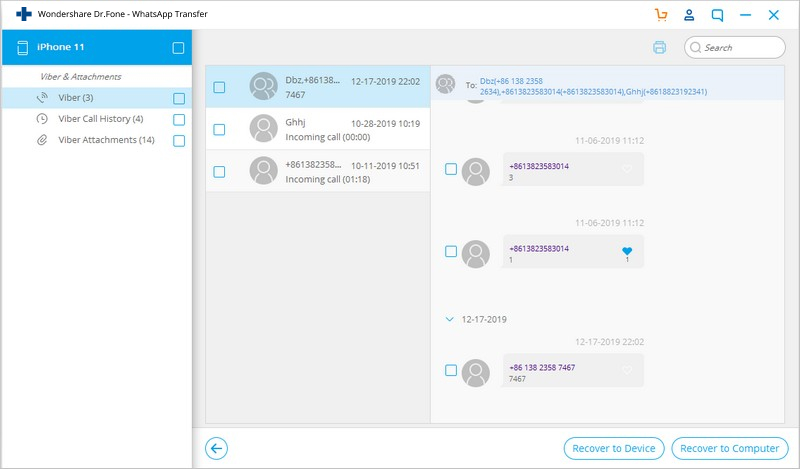
Click View next to the backup file and you will then be able to see all your Viber backup files.
Step 3: Restore your Viber messages.
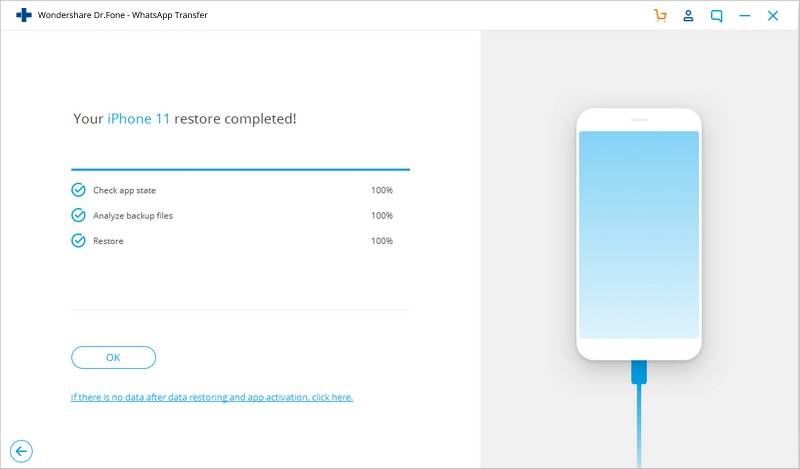
After that, you can click "Restore" to get your Viber contents to your device.
Part 5: Why does Viber disconnect
Are you having problems with your Viber disconnection. If you have just had an issue where you Viber disconnected, it is probably because there is a problem with your device or the WiFi.
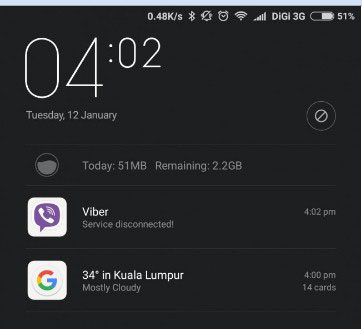
So, why does Viber disconnect? It could be as a result of a number of problems such as:
Viber Problem 1: 'Disconnected. Messages and call are unavailable.'
This Viber problem could probably result from technical issue with Viber. Perhaps there is nothing you can do about this except to wait for the app to be connected again. You may also encounter this message if Viber has been blocked in your area for some reason. By all means, if it is a technical issue, the problem should not last for long before it is up and running again.
Viber problem 2: 'Viber Service Disconnected'
Maybe the problem in this case is your power. Do the following to change Viber power options
Step 1: go to "settings">"additional settings"
Step 2: Then go to "battery and perfomance">"manage apps battery usage"
step 3: Click "Choose apps"
Step 4: Now select "Custom". Under BACKGROUND NETWORK, select "Stay connected".
This should solve your problem.
Part 6: How to recover wrongly deleted Viber messages
Dr.Fone - Data Recovery (iOS) is a Viber recovery tool that can be used to retrieve lost messages, images, videos, call history, audio and so on.
Maybe you accidentally deleted your messages or photos or a software update cleaned your iPhone, or your iPhone's iOS just crushed. There are actually many reasons why you could find yourself in a situation where you have lost your Viber data on iPhone.
Whatever the case, you need Dr.Fone - Data Recovery (iOS) to help you recover everything in your iPhone/iPad. The program is a Viber data recovery software that can effectively restore your files without losing your passwords.

Dr.Fone - Data Recovery (iOS)
World's 1st iPhone and iPad data recovery software.
- Highest recovery rate in the industry.
- Recover photos, videos, contacts, messages, notes, call logs, and more.
- Compatible with latest iOS 11.
- Preview and selectively recover what you want from iPhone/iPad, iTunes and iCloud backup.
- Export and print what you want from iOS devices, iTunes and iCloud backup .
Steps to retrieve deleted Viber by Dr.Fone - Data Recovery (iOS)
Step 1: Connect your iPhone to the computer using a data cable.
Launch Dr.Fone and select Recover. Connect your iPhone, then Dr.Fone software will automatically detect your iPhone and show you the recover window known as "Recover from iOS Devices"
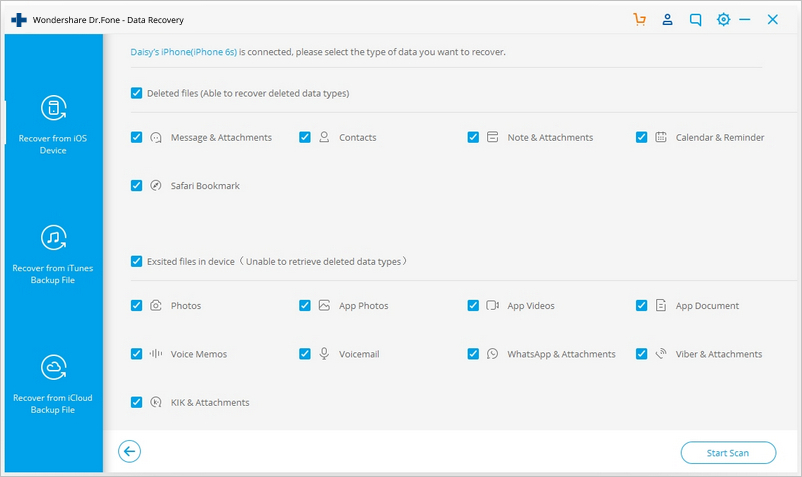
Step 2: Scan iPhone for Viber messages
Once your iPhone has been detected, select the data types and click "Start Scan". This allows the program to scan your iPhone for lost or deleted data. depending on the amount of data in the device, scanning may take a few hours. If you see data the data you have been looking for and you don't want more, you can click the "pause" button and the process will stop.
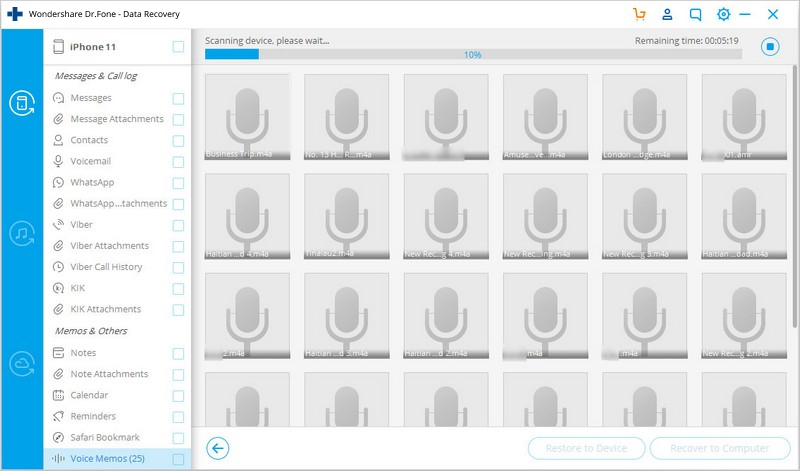
Step 3: Preview and perform selective recovery of Viber messages
Now that you have finished scanning the iPhone for lost or deleted Viber messages, the next thing you need to do is to preview them. Select all the files you would like to recover.
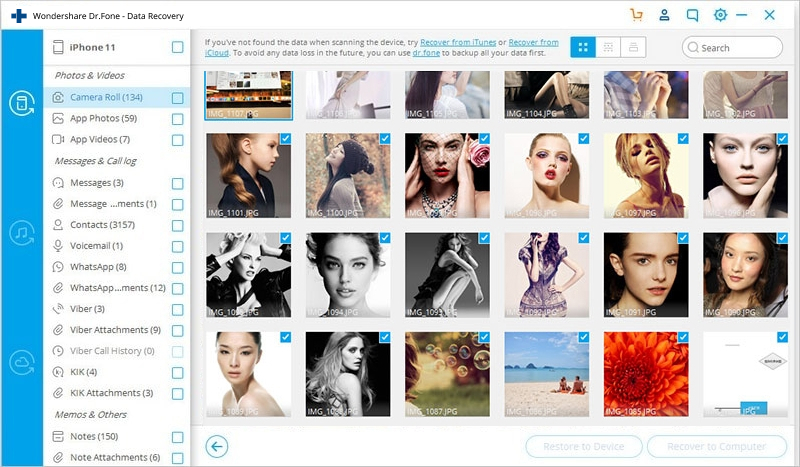
Step 4: Recover Viber messages from your iPhone
In order to do Viber restore in iPhone, you have to select all the data you want to restore and then click "Recover". This will recover all the selected deleted Viber data to your PC. In case of Viber messages, your tool will ask whether you want to "Recover to Computer" or whether you want to "Recover to Device".
Part 7: Why does Viber always say online
Before we look at why your Viber always say online, it is important to understand the terms Online and offline in the context of Viber.
Online simply means that your Viber is running in the background and you are available to receive messages or calls. However, this status changes to offline when you are not connected to the internet or WiFi or when you use the 'Exit' option that can be found inside the Viber.
A user may also use a power saving option thatswitchesthe software off after some idle time.
How to change your online Viber status
Step 1: Open your Viber app on your iPhone
Step 2: Click "more" on the bottom right corner of your iPhone and then go to "Privacy"
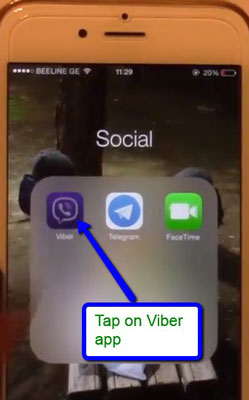
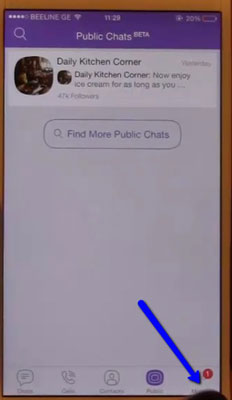
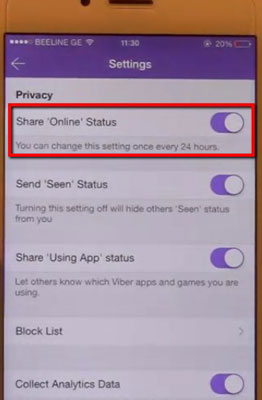
Step 3: Go to "Share 'Online' Status"
Please note that you can either turn your online status once in a span of 24 hours. or instance if you turn it on, you can only turn it off after 24 hours. Turning your online status will look like the screenshot below.
Part 8: Why Viber can't find contacts
Viber always syncs with your mobile phone'c contact list. In other words, if you want to add anyone in your Viber contact list and they are in your phone's contact list, then their names will always appear in your Viber contacts. However, sometimes Viber may be having issues with contacts displaying making it hard to find contacts. The reason for this is that the sync is either delayed or even disrupted. In these cases, you can solve this issue using the tips below:
Step 1: Make sure your device is connected to the internet
One of the common reason why your Viber cant find contacts could be due to connection problems. Make sure you are connected to a strong 4G or WiFi connection. You need to gave strong connection for Viber to sync.
Step 2:. Go to Settings>general and click "Sync contacts"
Actually, syncing your contacts after ensuring your connection is strong could solve pretty every problem with showing Viber contacts.
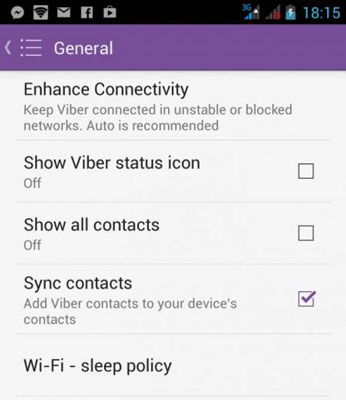
Step 3: Check the settings of your device
You should also check to see whether your device settings has been set to "All contacts". This will set Viber to recognize all of your contacts.
If you are using iPhone, go to "Settings" then click "Mail", then "Contacts", the tap "Import SIM contacts)". This imports viber contacts from your phone to your Viber.
Please note that only Viber users can have their contacts displayed on Viber.
Viber comes with a lot of issues if you are not familiar with it. The most important thing is to follow all the instructions while setting it up. Should you encounter Viber problems such as backup and restore, as well as data recovery problems, then this article provides the solutions for your problems.


James Davis
staff Editor