Aýdym-sazy iPod-dan USB Flash Drive-a nädip geçirmeli
27-nji aprel 2022 • Iberilen: iPhone maglumat geçiriş çözgütleri • Subut edilen çözgütler
Mende 5-nji nesil Nano bar. Mende iTunes-da ýok birnäçe aýdym bar. Bulary nädip fleş diskine geçirip bilerin? Sag boluň.
Have you ever find yourself in a situation where you need a track or an album you had and due to either computer crash, iTunes installation, buying a new PC, or phone loss; such a song or an album could no longer be found. What if it meant a great deal? It might be an evergreen track you love much or a song that lifts your heart when you feel down. Then transfer your music from iPod to a USB flash drive is an excellent idea.
Identifying that you need to transfer your music to a USB flash drive is excellent, however, it comes with a challenge; How do you transfer that music from your iPod to the USB flash drive? Here 2 solutions are provided for you to transfer music from iPod to USB flash drive. You get the step by step actions that will be of tremendous help but before we hit the nail of its head.
Bellik: Aýdym-sazlary iPhone / iPad / iPad mini-den USB fleş diskine geçirmek birmeňzeş ädimdir.
Çözgüt 1. Sazy iPod-dan USB Flash Drive-a Dr.Fone - Telefon dolandyryjysy (iOS) bilen göçüriň
Dr.Fone - Telefon dolandyryjysy (iOS) bilen diňe iPod-dan USB Flash Drive-a aýdym-saz göçürip bilmän, iPod-da we beýleki Apple enjamlarynda faýllary we mediany aňsatlyk bilen dolandyryp bilersiňiz. Sazy eksport edip we göçürip alyp bilersiňiz, şeýle hem iTunes zerurlygy bolmazdan dürli iOS enjamlarynyň arasynda sinhronlap bilersiňiz. “IPod” we “iPhone” -a aýdym-saz hem import edilip bilner we ätiýaçlyk nusgalaryny döredip, hatda ýitirilen faýllary we wideolary dikeldip bilersiňiz.
Üýtgeşik aýratynlyklar:
- Dr.Fone - Phone Manager (iOS) performs a thorough scan of your iPod to eliminate the chance of duplicated items in the music library. It matches up with existing songs so that only relevant songs are transferred from iPod to a USB drive.
- The process of transfer of music does not miss out on song details. Information like play counts, ratings, ID3 tags, and cover and album arts are synced and stored as they're along with your songs on the Flash drive. Apart from music, you can also copy entire playlists using Dr.Fone - Phone Manager (iOS). It retains the perfect audio quality as there is no loss during the copying.
- IPod-larymyza iOS bilen gabat gelmeýänligi sebäpli goşup bilmeýän aýdymlarymyza köp duş gelýäris. Programma bu meseläni çözýär, sebäbi faýllary “Apple” -iň goldaýan formatlaryna aňsat öwürýär. Şeýlelik bilen, olary islendik Apple enjamynda hiç hili kynçylyksyz oýnap bilersiňiz.
- “IPod” -dan dürli enjamlaryň arasynda Dr.Fone - Telefon dolandyryjysy (iOS) bilen geçirip bilersiňiz. Kompýuterden ýa-da Mac-dan iPod-a we tersine aýdym-saz, wideo we beýleki faýllary göçürip alyp bilersiňiz.
- Bir wagtyň özünde birnäçe iOS enjamyny birikdirip, faýllary ilki iş stolunda saklamazdan gönüden-göni geçirip bilersiňiz.
- Iň soňky iOS wersiýasy bilen doly gabat gelýär

Dr.Fone - Telefon dolandyryjysy (iOS)
Sazy iTunes-dan kompýuterden iPod / iPhone / iPad-a geçiriň
- Aýdym-sazyňyzy, suratlaryňyzy, wideolaryňyzy, aragatnaşyklaryňyzy, SMS, programmalaryňyzy we ş.m. geçiriň, dolandyryň, eksport / import ediň.
- Backup your music, photos, videos, contacts, SMS, Apps, etc. to computer and restore them easily.
- Transfer music, photos, videos, contacts, messages, etc from one smartphone to another.
- Transfer media files between iOS devices and iTunes.
- Support all iPhone, iPad, and iPod touch models with any iOS versions.
Now we will discuss the steps required to do the transfer. You have to download and install Dr.Fone - Phone Manager (iOS) on your desktop before you perform the steps below. There are two methods available to transfer music from iPod Shuffle, iPod Nano, iPod Classic and iPod Touch to
Step 1 Download Dr.Fone - Phone Manager (iOS) and install it on your desktop to begin.
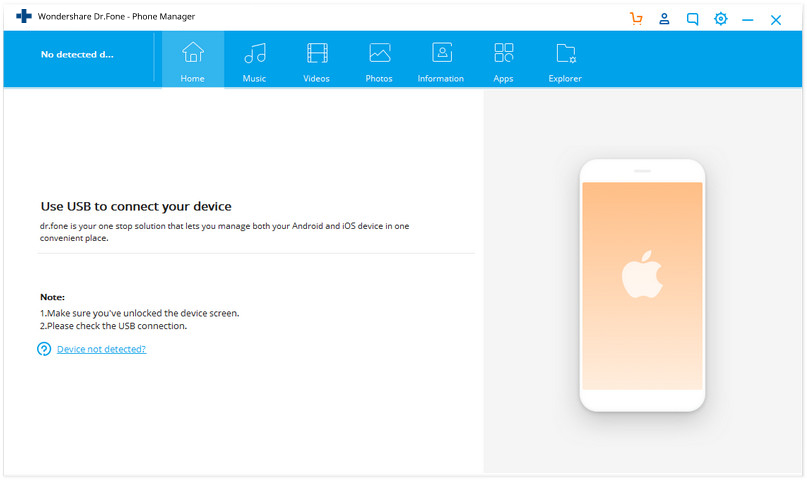
Step 2 Now access Dr.Fone - Phone Manager (iOS) by launching it. Then connect your iPod with a computer via the USB cord.
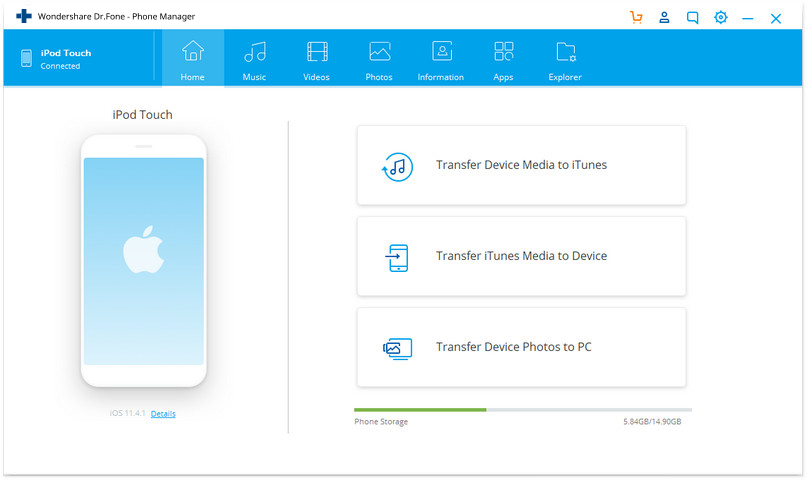
Step 3 Insert your USB drive into your desktop and wait for it to get detected under Removable Storage in MY Computer window.
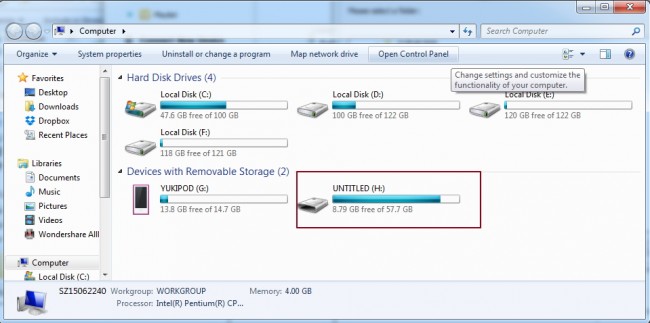
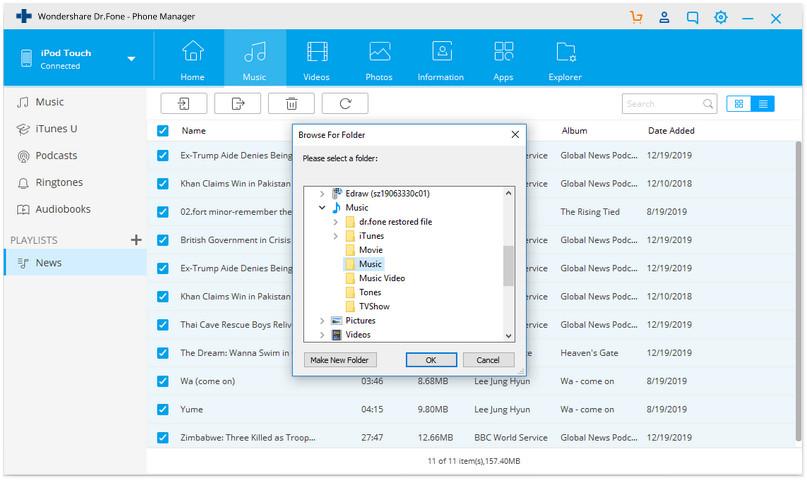
Step 4 Click Music on the top of the interface and select the music which you want to transfer to USB Flash Drive: "Export" > "Export to PC".
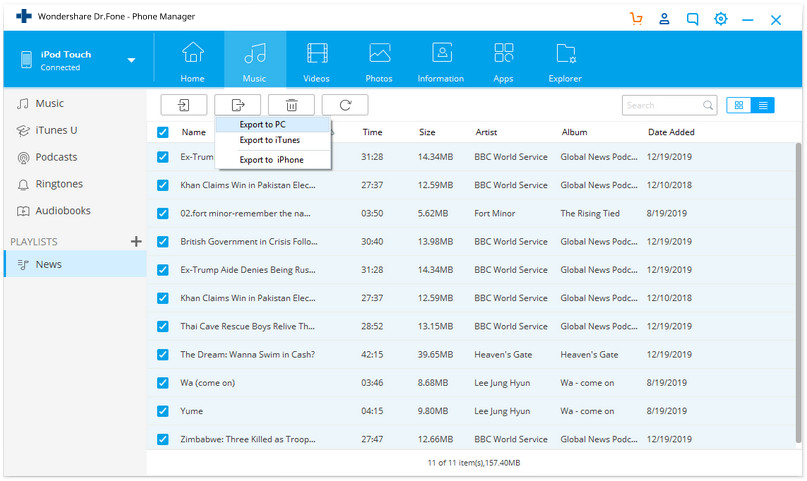
Step 5 Now browse for a destination folder or create a new one in your USB drive to save the songs. After that click on "OK". The music starts transferring and the export is completed within a few minutes.
Video Tutorial: How to Transfer Music from iPod to USB Flash Drive with Dr.Fone - Phone Manager (iOS)
Solution 2. Manually Transfer Music from iPod to USB Flash Drive
This is one of the methods that can help you to transfer your music from an iPod to a USB flash drive. It requires the iPod USB cable, your iPod, and your personal computer.
Step 1 Connect your iPod to your computer
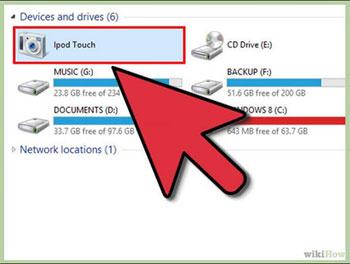
Using the cable that came with your iPod, connect your iPod to your computer. Your iPod should be able to show under the ‘My Computer’ window, as is shown below.
Step 2 Connect your USB flash drive to your computer
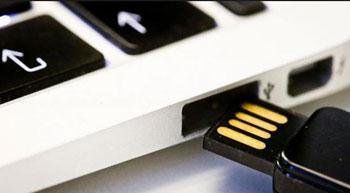
Connect your USB Flash Drive to your computer ensuring that the USB flash drive has enough space for the music you want to import.
Step 3 Display hidden files
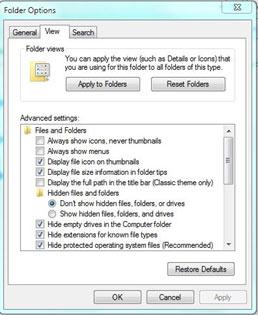
Under tools, on windows explorer, choose ‘Tools’, then ‘Folder Options’ and then select ‘view’ in the pop-up dialog. Check ‘Display hidden files and folders’ in the drop-down menu.
Step 4 Copy the music files
When you click to open your iPod from the ‘My Computer’ window, you should be able to find a folder called ‘iPod _ Control’.
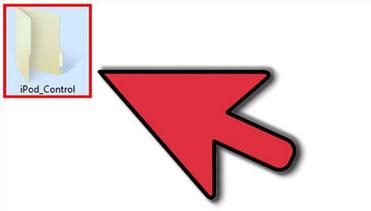
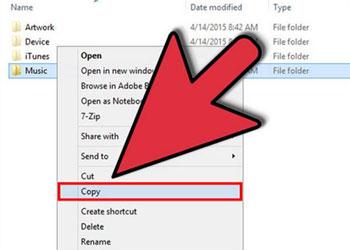
When you open the folder by double-clicking it, you will see all the music files that the iPod has. This is the folder that stores all the music that you sync to your iPod. It will also allow you to copy all the files through a simple copy and paste procedure. The music files are however randomly saved.
Step 5 Paste the music files to your USB flash drive
Open the disk of USB flash drive, create a new folder or open an existing folder, then paste the selected music. This will add all the selected music files to your USB flash drive.
iPod Transfer
- Transfer to iPod
- Sazy kompýuterden iPod-a geçirmek
- “IPod Classic” -e aýdym goşuň
- MP3-i iPod-a geçiriň
- Sazy Mac-dan iPod-a geçiriň
- Sazy iTunes-dan iPod Touch / Nano / çalşyga geçiriň
- Podkastlary iPod-a goýuň
- Aýdym-sazy iPod Nano-dan kompýutere geçirmek
- Aýdym-sazy iPod touch-dan iTunes Mac-a geçiriň
- “IPod” -dan aýdym-saz alyň
- Aýdym-sazy iPod-dan Mac-a geçiriň
- “IPod” -dan geçirmek
- Aýdym-sazy iPod Classic-den kompýutere geçirmek
- Aýdym-sazy iPod Nano-dan iTunes-a geçiriň
- Windows Media Player we iPod arasynda aýdym-saz geçiriň
- Aýdym-sazy iPod-dan Flash Drive-a geçiriň
- Satyn alynmadyk sazy iPod-dan iTunes-a geçiriň
- Aýdym-sazy Mac formatlanan iPod-dan Windows-a geçiriň
- “IPod Music” -i başga bir MP3 pleýere geçiriň
- Aýdym-sazy iPod çalşygyndan iTunes-a geçiriň
- Aýdym-sazy iPod Classic-den iTunes-a geçiriň
- Suratlary “iPod touch” -dan kompýutere geçiriň
- “IPod” çalşygyna aýdym-saz goýuň
- Suratlary kompýuterden iPod touch-a geçiriň
- Audio kitaplary iPod-a geçiriň
- “IPod Nano” -a wideo goşuň
- Aýdym-sazy iPod-a salyň
- “IPod” -y dolandyryň
- “IPod Classic” -den sazy pozuň
- “iPod” iTunes bilen sinhronlaşmaz
- IPod / iPhone / iPad-da dublikat aýdymlary pozuň
- “IPod” -da “Playlist” -i redaktirläň
- “IPod” -y täze kompýutere sinhronlaň
- Iň oňat 12 “iPod Transfer” - “iTunes” ýa-da “Computer” -e pod
- “IPod Nano” -dan aýdymlary pozuň
- “IPod Touch / Nano / Shuffle” üçin mugt aýdym-saz almak üçin maslahatlar


Bhavya Kaushik
contributor Editor