

ICloud-dan aýdymlary pozmagyň üç çözgüdi

2022-nji ýylyň 7-nji marty • Faýl: Enjam maglumatlaryny dolandyrmak • Barlanan çözgütler
Apple provides a smart solution for iOS users to keep their data safe and handy. By taking the assistance of iCloud, you can easily upload your songs to the cloud and access them as per your needs. Since Apple provides only 5 GB of free storage, users need to learn how to delete songs from iCloud as well. This allows them to make the most of their iCloud storage. If you also wish to learn how to delete music from iCloud then you have come to the right place. In this guide, we will teach you in three different ways how to remove songs from iCloud.
Part 1: Update iCloud Music Library from iTunes
If you are using iTunes, then you can easily manage your iCloud music library from it. To do this, you need to enable the option of Update iCloud Music library on iTunes. This will connect your iCloud music with your iTunes. After syncing your library, you can directly remove music from iCloud via iTunes. It is pretty easy and will help you manage your music right from iTunes. To learn how to delete songs from iCloud via iTunes, follow these steps.
- 1. Launch an updated version of iTunes on your system and go to iTunes > Preferences.
- 2. If you are using iTunes on Windows, you can access Preferences from the Edit menu.
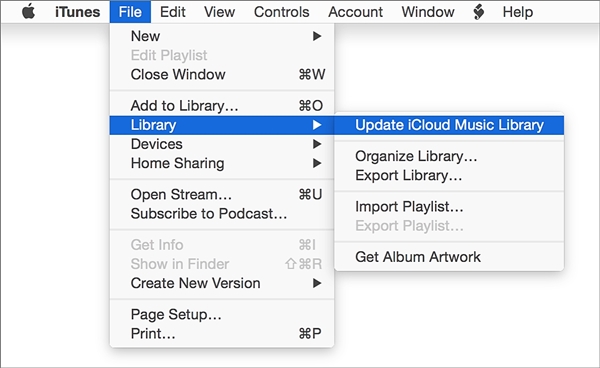
- 3. In some versions of iTunes, you can directly access this feature from File > Library > Update iCloud Music Library.
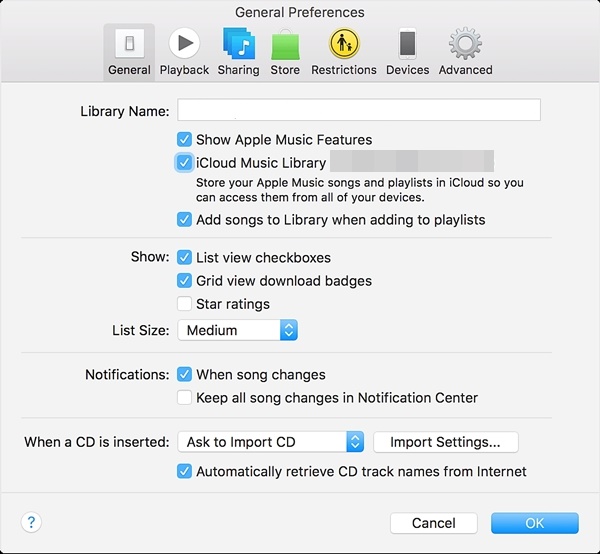
- 4. After opening the Preferences window, go to the General tab and enable the option of “Update iCloud Music Library”.
- 5. Click on the “Ok” button to save your changes and exit the windows.
Wait for a while as iTunes will rescan your iCloud music and make the necessary changes. Afterward, you can delete your iCloud music right from iTunes.
Part 2: Manually rescan your iCloud Music Library to delete music
Käwagt, käbir sazlary ýok etmek üçin iTunes bilen iCloud aýdym-saz kitaphanasyny el bilen aýyrmaly bolýarys. Wagt talap edýän hem bolsa, islenýän netijeleri berjekdigi şübhesiz. “ICloud” kitaphanasyndan aýdym-sazlary nädip pozmalydygyny şu ädimleri ýerine ýetirip bilersiňiz:
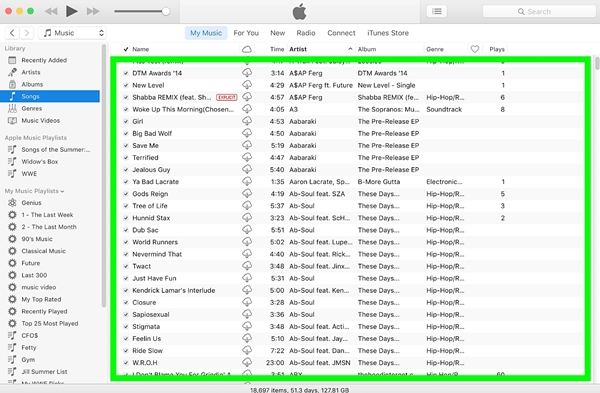
- 1. “iTunes” -y işe giriziň we onuň aýdym-saz bölümine baryp görüň.
- 2. Bu ýerden kitaphanany saýlap, kitaphana goşulan dürli aýdymlary görüp bilersiňiz.
- 3. Öçürmek isleýän aýdymlaryňyzy ýönekeý saýlaň. Songshli aýdymlary saýlamak üçin Command + A ýa-da Ctrl + A basyň (Windows üçin).
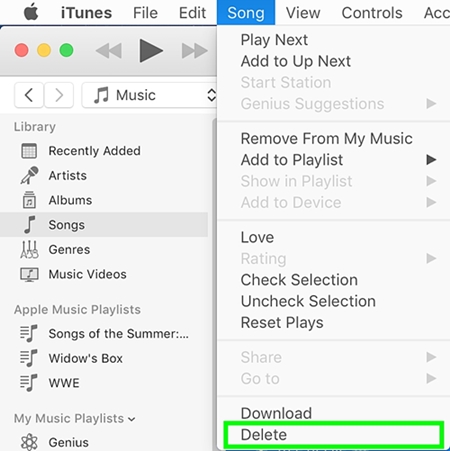
- 4. Now, press the Delete key or go to Song > Delete to remove the selected songs.
- 5. You will get a pop-up message like this. Just confirm your choice by clicking on the “Delete Items” option.
Rescan the iCloud library and wait for the changes to be saved. After following these simple steps, you can learn how to remove songs from iCloud. Since your iCloud library would be in-sync with iTunes, the changes you made in iTunes will be reflected on iCloud as well.
Part 3: How to delete songs on iPhone?
After learning how to delete songs from iCloud in two different ways, you can simply manage your iCloud music library. If you wish to get rid of unwanted content on your iOS device as well, then you can simply take the assistance of a third-party tool like Dr.Fone - Data Eraser. It is a 100% secure and reliable tool that can be used to wipe your phone’s storage entirely. Simply pick the kind of data you wish to remove and follow its easy click-through process.
Compatible with every leading iOS version, the desktop application is available for both Mac and Windows systems. Not just music, it can also be used to remove photos, videos, contacts, messages, and every other data type. Since your data would be permanently deleted, you don’t have to worry about identity theft while reselling your device. After learning how to delete music from iCloud, remove songs from your iOS device as well by following these steps:
Dr.Fone - Data Eraser
Easily Wipe Your Personal Data from Your Device
- Simple, click-through, process.
- You select which data you want to erase.
- Your data is permanently deleted.
- Nobody can ever recover and view your private data.
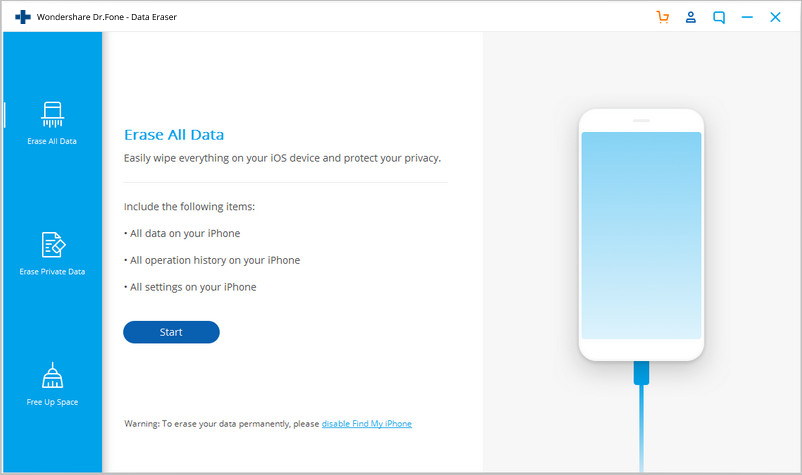
1. Install Dr.Fone - Data Eraser (iOS) on your computer. Launch it and click on the option of “Data Eraser” from the Dr.Fone toolkit home screen.

2. IOS enjamyňyzy USB ýa-da ýyldyrym kabeli bilen ulgama birikdiriň. Biraz garaşyň, sebäbi programma enjamyňyzy awtomatiki tapar. Amaly başlamak üçin "Şahsy maglumatlary pozuň"> "Başlangyç skaner" -e basyň.
3. Birneme garaşyň, sebäbi programma enjamyňyzy gözden geçirer. Skaner prosesi geçirilende sistema birikdirilendigine göz ýetiriň.
4. Gözden geçirilenden soň, dürli kategoriýalarda görkezilen ähli maglumatlary (suratlar, bellikler, habarlar we ş.m.) görüp bilersiňiz. Diňe maglumat görnüşine baryp, ýok etmek isleýän ses faýllaryňyzy saýlaň.
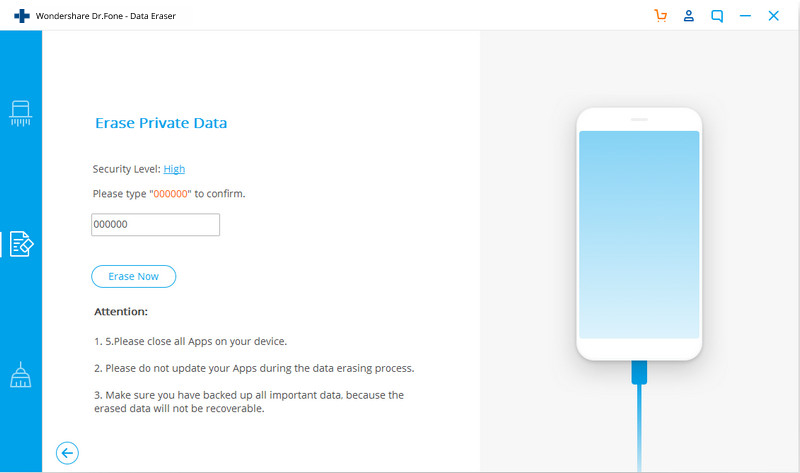
5. Faýllary saýlanyňyzdan soň, "Enjamdan öçürmek" düwmesine basyň.
6. Aşakdaky çykýan habar peýda bolar. Saýlawyňyzy tassyklamak üçin açar söz ýazyň ("ýok et") we "eteok et" düwmesine basyň.
7. eteok etmek düwmesine basanyňyzdan soň, programma saýlanan mazmunyňyzy hemişelik pozup başlar.
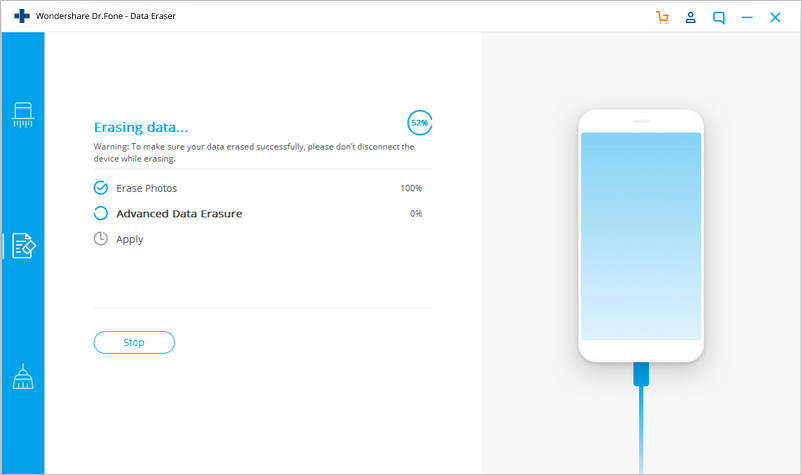
8. Amaly tamamlanyňyzdan soň "Öçürmek tamamlandy" habaryny alarsyňyz.
You can simply disconnect your iOS device from the system and use it the way you like. Since your files will be deleted permanently, there would be no way to recover them. Therefore, you should remove your data using this tool only when you have a backup or when you are sure you don’t want it back.
Bu çözgütleri ýerine ýetireniňizden soň, iCloud-dan aýdymlary hiç hili kynçylyksyz aýyrmagy öwrenip bilersiňiz. Köp sanly opsiýa bilen iTunes arkaly iCloud aýdym-saz kitaphanasyny aňsatlyk bilen dolandyryp bilersiňiz. Aýdym-sazyňyzdan enjamyňyzdan hemişelik dynmak isleseňiz, Dr.Fone iOS Private Data Eraser-iň kömegini hem alyp bilersiňiz. Ulanmak gaty aňsat, ýönekeý basmak prosesi bilen enjamyňyzy süpürmäge mümkinçilik berer we hiç hili zyýan bermezden. Ony ulanmaga arkaýyn boluň we aşakdaky teswirlerde haýsydyr bir kynçylyk bilen ýüzbe-ýüz bolsaňyz bize habar beriň.


iCloud
- “ICloud” -dan pozuň
- Fix iCloud Issues
- Repeated iCloud sign-in request
- Manage multiple idevices with one Apple ID
- Fix iPhone Stuck on Updating iCloud Settings
- iCloud Contacts Not Syncing
- iCloud Calendars Not Syncing
- iCloud Tricks
- iCloud Using Tips
- Cancel iCloud Storage Plan
- Reset iCloud Email
- iCloud Email Password Recovery
- Change iCloud Account
- Forgot Apple ID
- Upload Photos to iCloud
- iCloud Storage Full
- Best iCloud Alternatives
- Restore iCloud from Backup Without Reset
- Restore WhatsApp from iCloud
- Backup Restore Stuck
- Backup iPhone to iCloud
- iCloud Backup Messages
Elisa MJ
işgär redaktory