
4 Relaxing Ways to Transfer Photos from Samsung Galaxy to iPhone 11

Apr 27, 2022 • Filed to: Tips for Different iOS Versions & Models • Proven solutions
So, you’ve just treated yourself to a brand-new iPhone 11/11 Pro. You’re ready to start enjoying all the latest features that it has to offer, and you’re keen to start this new phase of your technology lifestyle. There’s no denying the iPhone 11/11 Pro is a fantastic phone loved by all.
However, one of the first things you’ll need to do is transfer everything over from your old Samsung Galaxy over to your new iPhone 11/11 Pro device. This includes contacts, messages, media, and, in some cases, more importantly, your photos.
It’s surprising how many photos can build up over the years, some of which hold our most treasured memories. Of course, moving from Android over to iPhone may not be the most straightforward task, so today we’re going to make things simple. Here are the four relaxing ways you need to know on how to transfer your photos effortlessly.
Part 1. Transfer photos from Samsung to iPhone 11/11 Pro with one click
By far the easiest way to transfer your photos from your Samsung Galaxy to your new iPhone is to use the software application called Dr.Fone - Phone Transfer. This is a dedicated piece of the software that is specifically designed to help you transfer everything, including photos, from one phone to another, regardless of which operating system each device is running.
The software is incredibly simple to use, affordable and works on both Mac and Windows computers. Once you’ve got the software, you’ll be able to use it on any devices, any time, so you’ll never have to worry about moving your photos or phone data again.
Here’s how you can get started with Dr.Fone - Phone Transfer yourself;
Step 1 – Download and install the Dr.Fone - Phone Transfer software to either your Mac or Windows computer. Simply sign up for an account and follow the onscreen instructions.
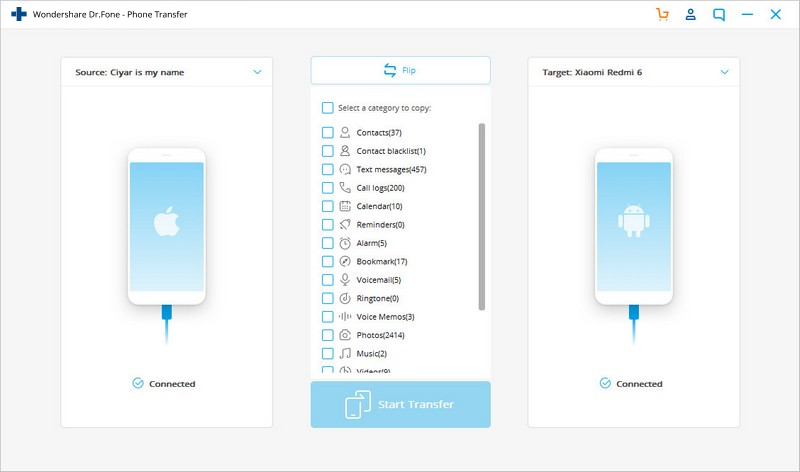
When you’re ready, connect both of your devices to your computer using the correct USB cables, and open the software, so you find yourself on the main menu. Now press the Phone Transfer option.

Step 1 – On the next screen, you’ll see both devices, as well as the connection status of each device, and a list of checkboxes that refer to the types of content you can transfer. You can select as many or as few as you want, but for this tutorial, make sure ‘Photos’ is selected.
When you’re ready, click the ‘Start Transfer’ button.
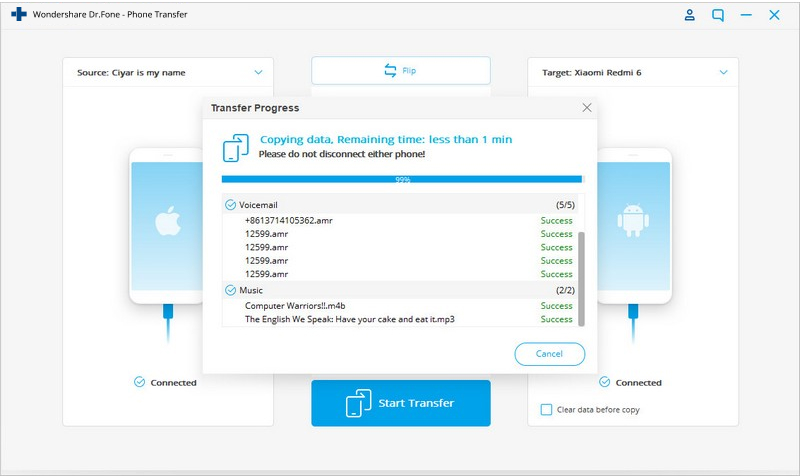
Step 3 – The software will now automatically start sending the files across. You can monitor the process on the screen, so make sure each device stays connected to avoid possible data corruption. Wait until this process is complete.
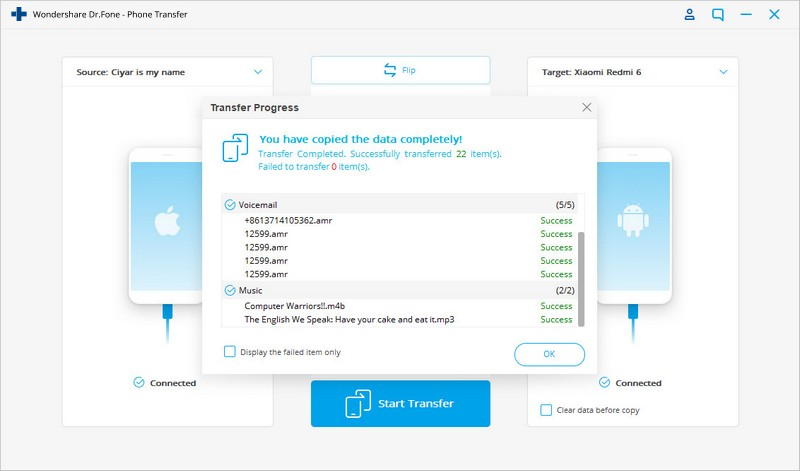
Step 4 – Once the process is complete, you’ll be displayed with the screen below. You can now disconnect both devices from your computer, and all your photos will have been successfully moved from your Android phone onto your new iPhone 11/11 Pro device.
Part 2. Move photos from Samsung to iPhone 11/11 Pro using Cloud Service
2.1 About Cloud Service Solution
The cloud service solution is a great way to transfer photos, and while time-consuming, it does mean you can move your files by uploading them to a cloud service, install the cloud service on your new iPhone 11/11 Pro, and then download the files, meaning you’ll have transferred them over.
This is a good solution in some respects because it’s pretty easy to do and set up, but it can be extremely long-winded, especially if you have a lot of pictures you need to upload. There’s also the issue that you don’t have enough space on your cloud service. This means you’ll either have to transfer your files in multiple parts or spend more money to increase your cloud service space allowance.
If you’ve got the time and the patience to follow this method, then it can be effective, but if you want to transfer your photos quickly and securely, it’s best to stick with a solution like Dr.Fone - Phone Transfer.
2.2 How to Transfer Photos Using Dropbox
One of the most popular cloud file services is Dropbox, which makes it one of the best ways to transfer your photos from your Samsung Galaxy device to your new iPhone 11/11 Pro. In the following section of our guide, we’ll show you how it works.
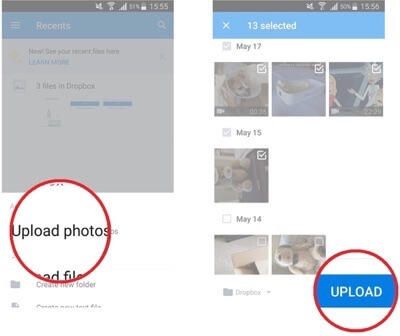
Step 1 – On your Samsung Galaxy app, download the Dropbox app from the Google Play Store and follow the onscreen instructions on how to use it. You will also need to sign in or create a free account to get started.
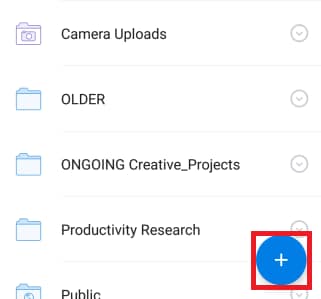
Step 2 – Once everything has been set up with the app, it’s time to start uploading. Create a new folder to upload your photos by clicking on the + button. Then tap the ‘Upload Photos’ option and select all the photos that you want to transfer across to your new device.
Alternatively, you can go through and mark your photos in your Gallery app, and then upload them to Dropbox using the correct shortcut.
Step 3 – Download and install the Dropbox app on your new iPhone 11/11 Pro device. Sign into the same account as you did on your Samsung Galaxy device, and all your photos will be visible in the folder you made. Now click and select all the photos in the folder, choose the download to device option, and all the photos will have been transferred to your iPhone 11/11 Pro.
Part 3. Transfer Samsung pictures to iPhone 11/11 Pro using an app
3.1 About the App-Based Method
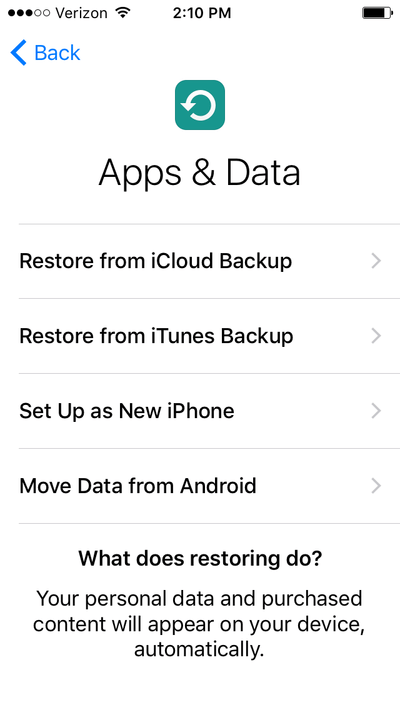
When you start setting up your new iPhone 11/11 Pro for the first time, part of the setup menu gives you access to an integrated service app known as Move Data from Android. This links with the Google Play app from Apple themselves called Move to iOS, which is basically Apple’s way for helping you transfer files from Android devices over to iOS ones.
This is an effective method if you’re setting up your iOS device for the first time, and you’re going through the main setup process to get your device started. However, if you’re already using your iOS device and it’s already set up, or you can’t physically use your Android device because of a bug or error, this can be a useless method, and you’re better off sticking with solutions like Dr.Fone - Phone Transfer.
3.2 How to Use Move to iOS to Transfer Your Photos from Samsung Galaxy to iPhone 11/11 Pro
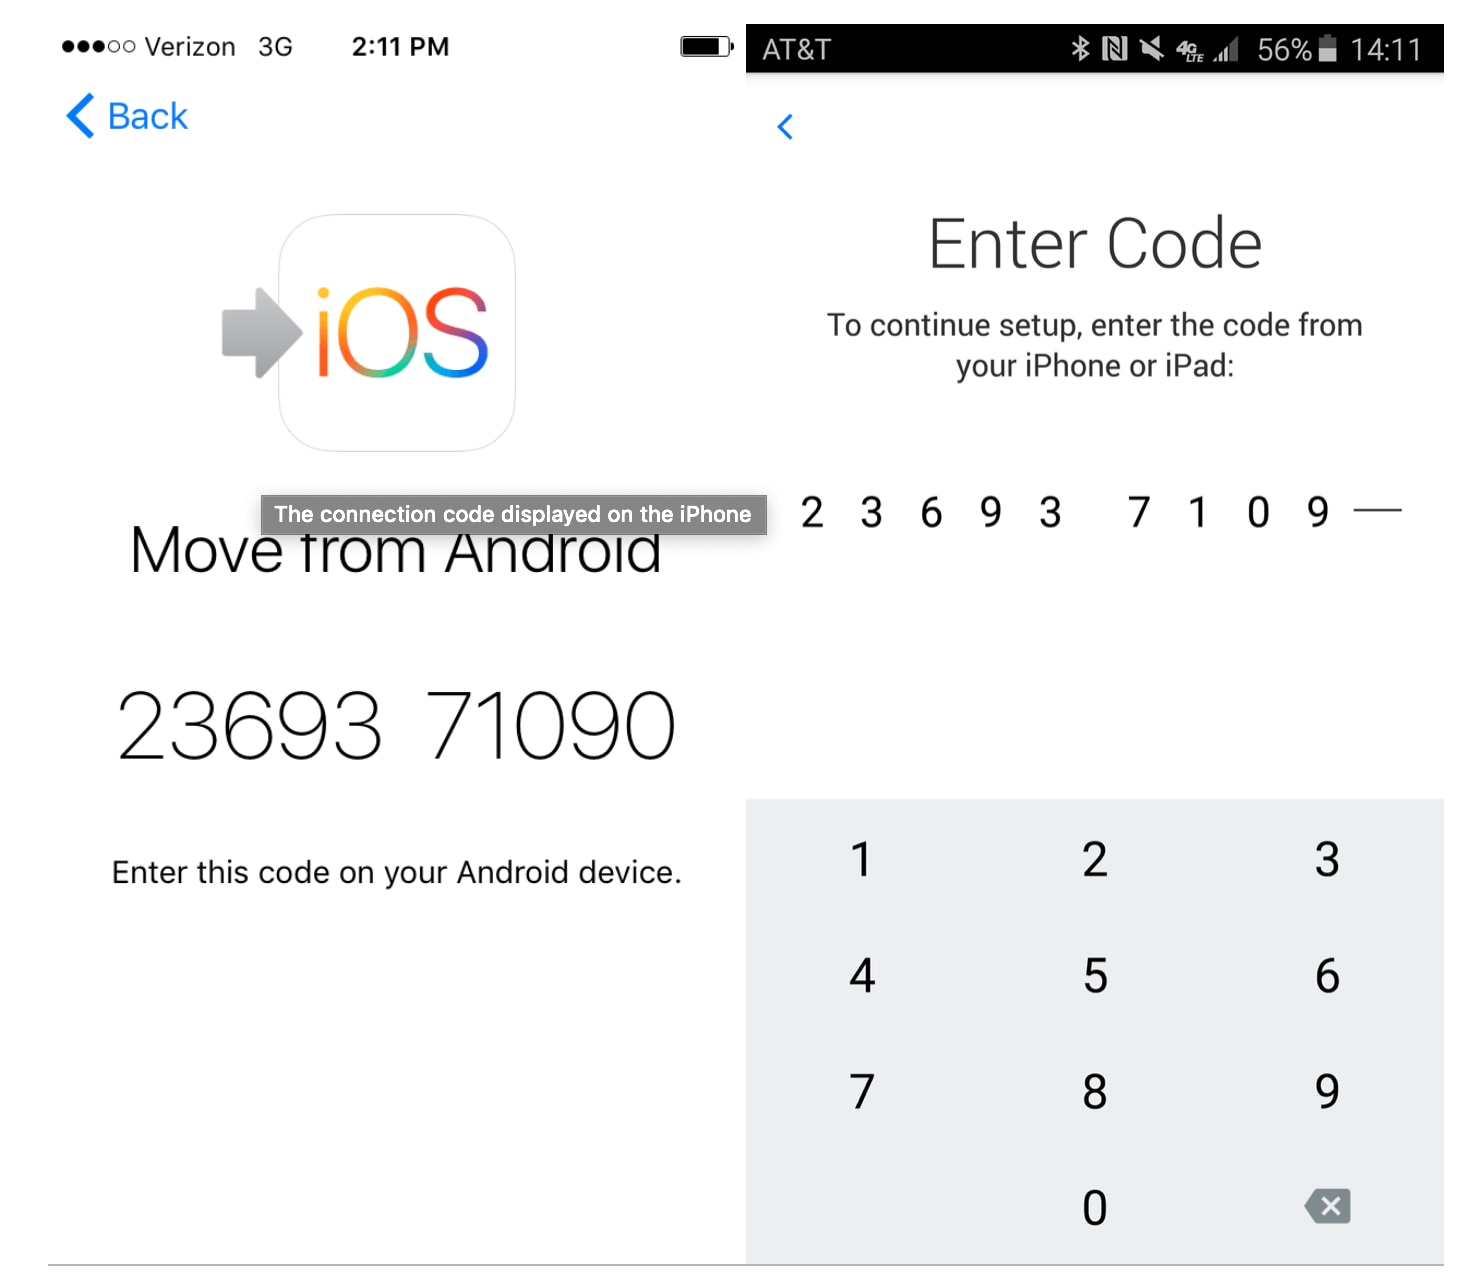
Step 1 – Go through the iOS setup process and install everything as normal until you reach the Apps & Data screen. Here, tap the ‘Move Data from Android’ option.
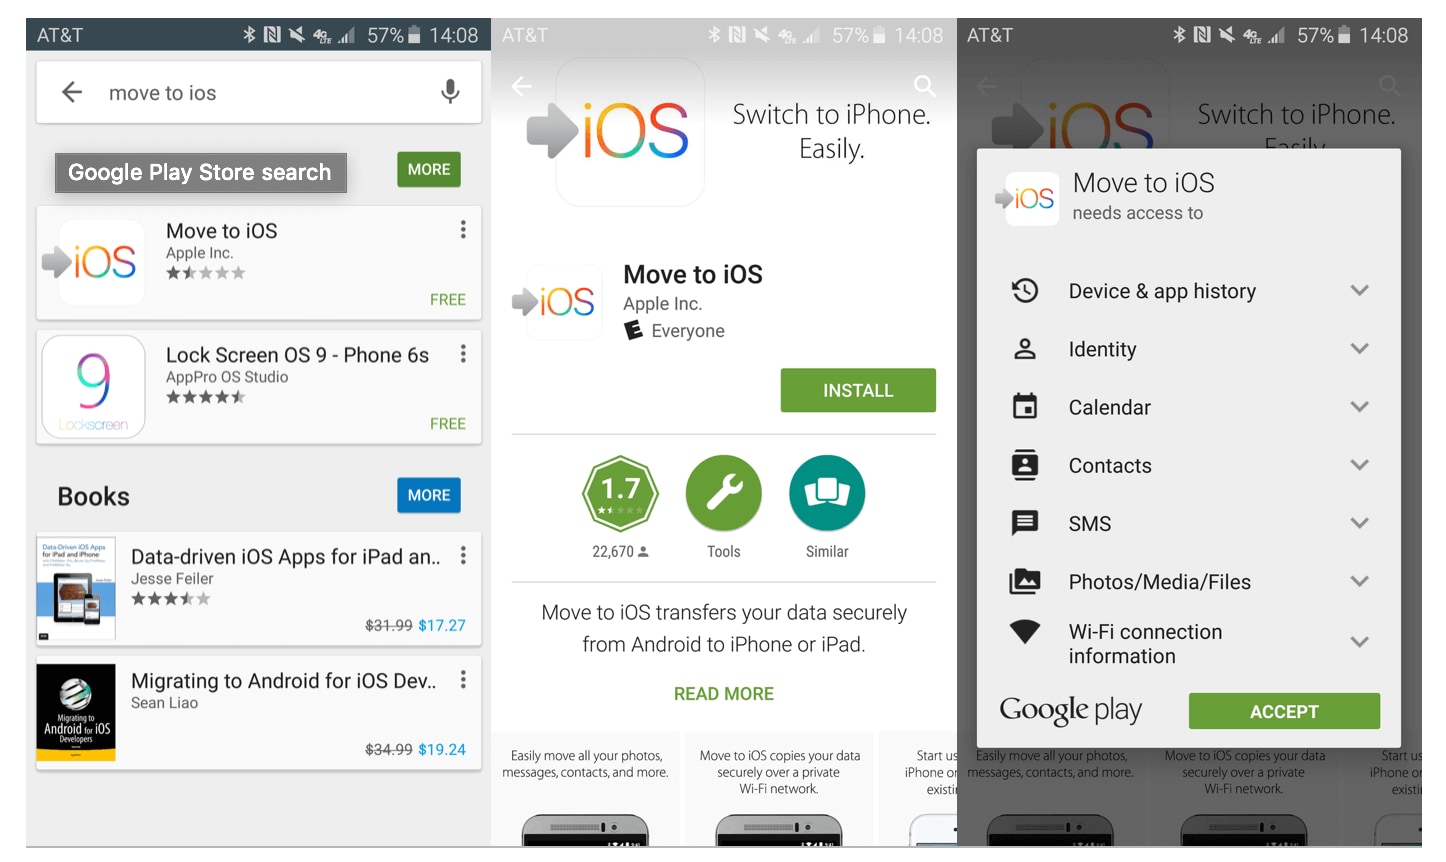
Step 2 – On your Samsung Galaxy device, or any Android device, go to the Google Play Store and download the ‘Move to iOS’ and download the app by following the on-screen instructions. Open the App when ready.
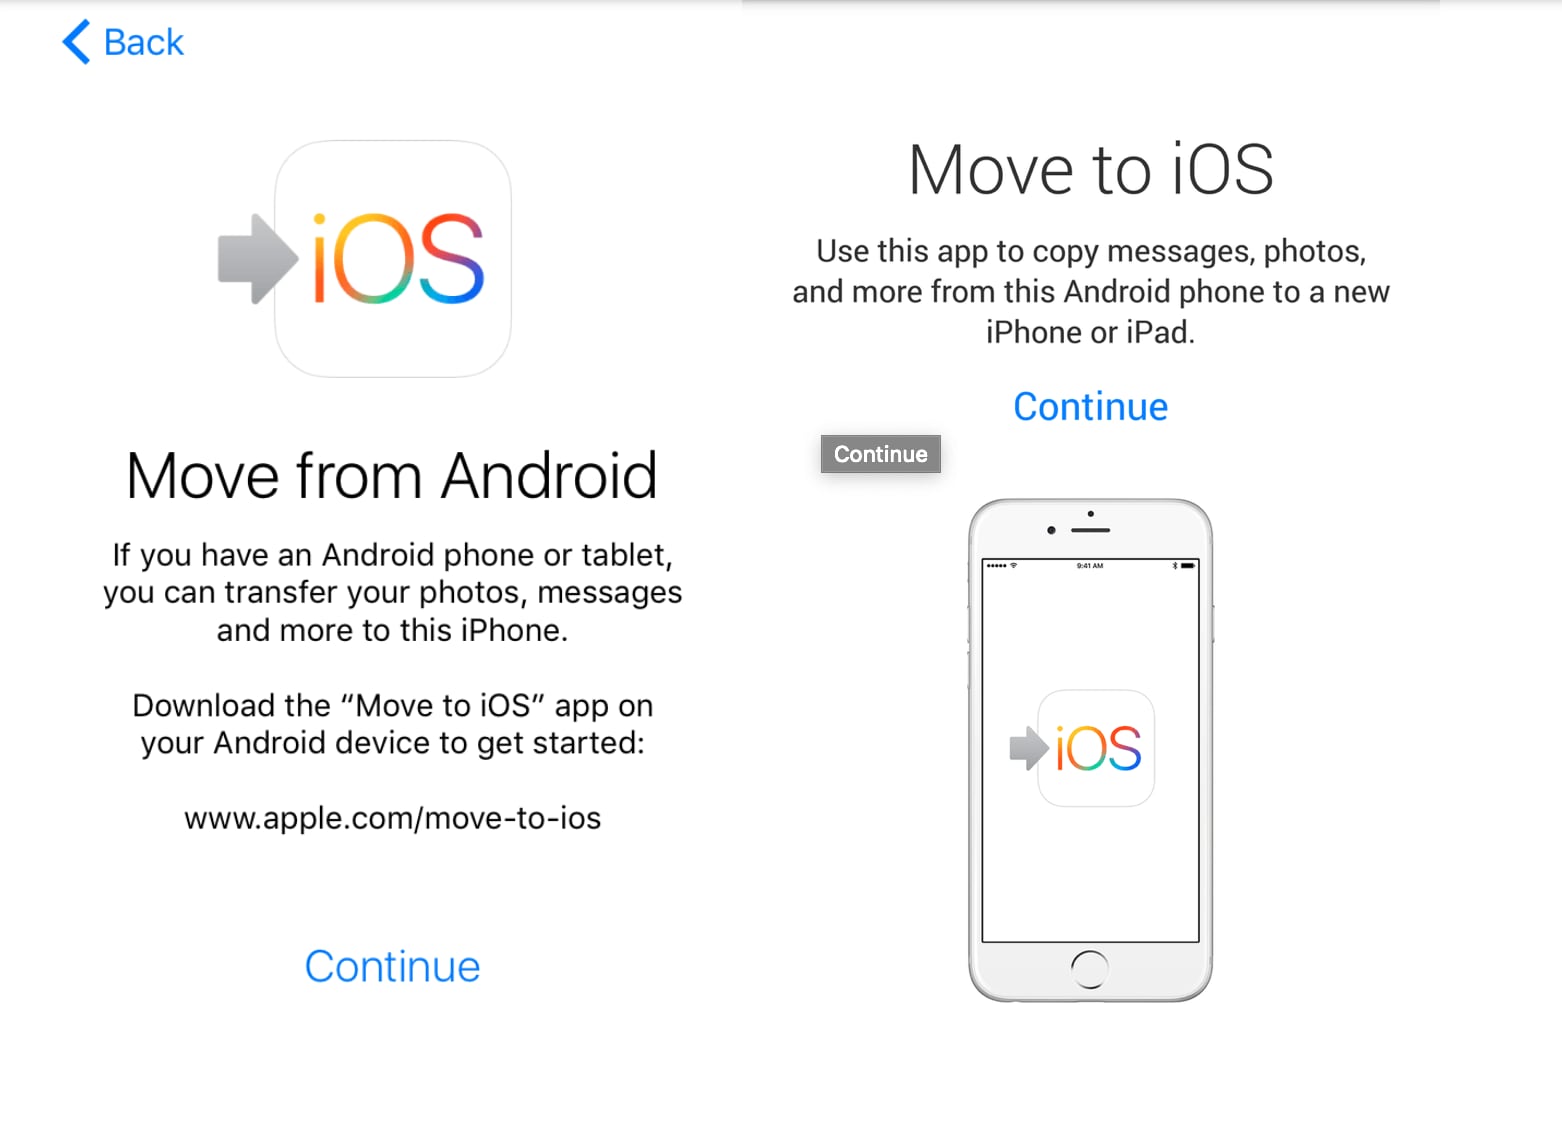
Step 3 – On both devices, click the Continue button to start the transfer process.
Step 4 – On your iOS device, you’ll be shown a code that you then need to copy and type in on your Android device.
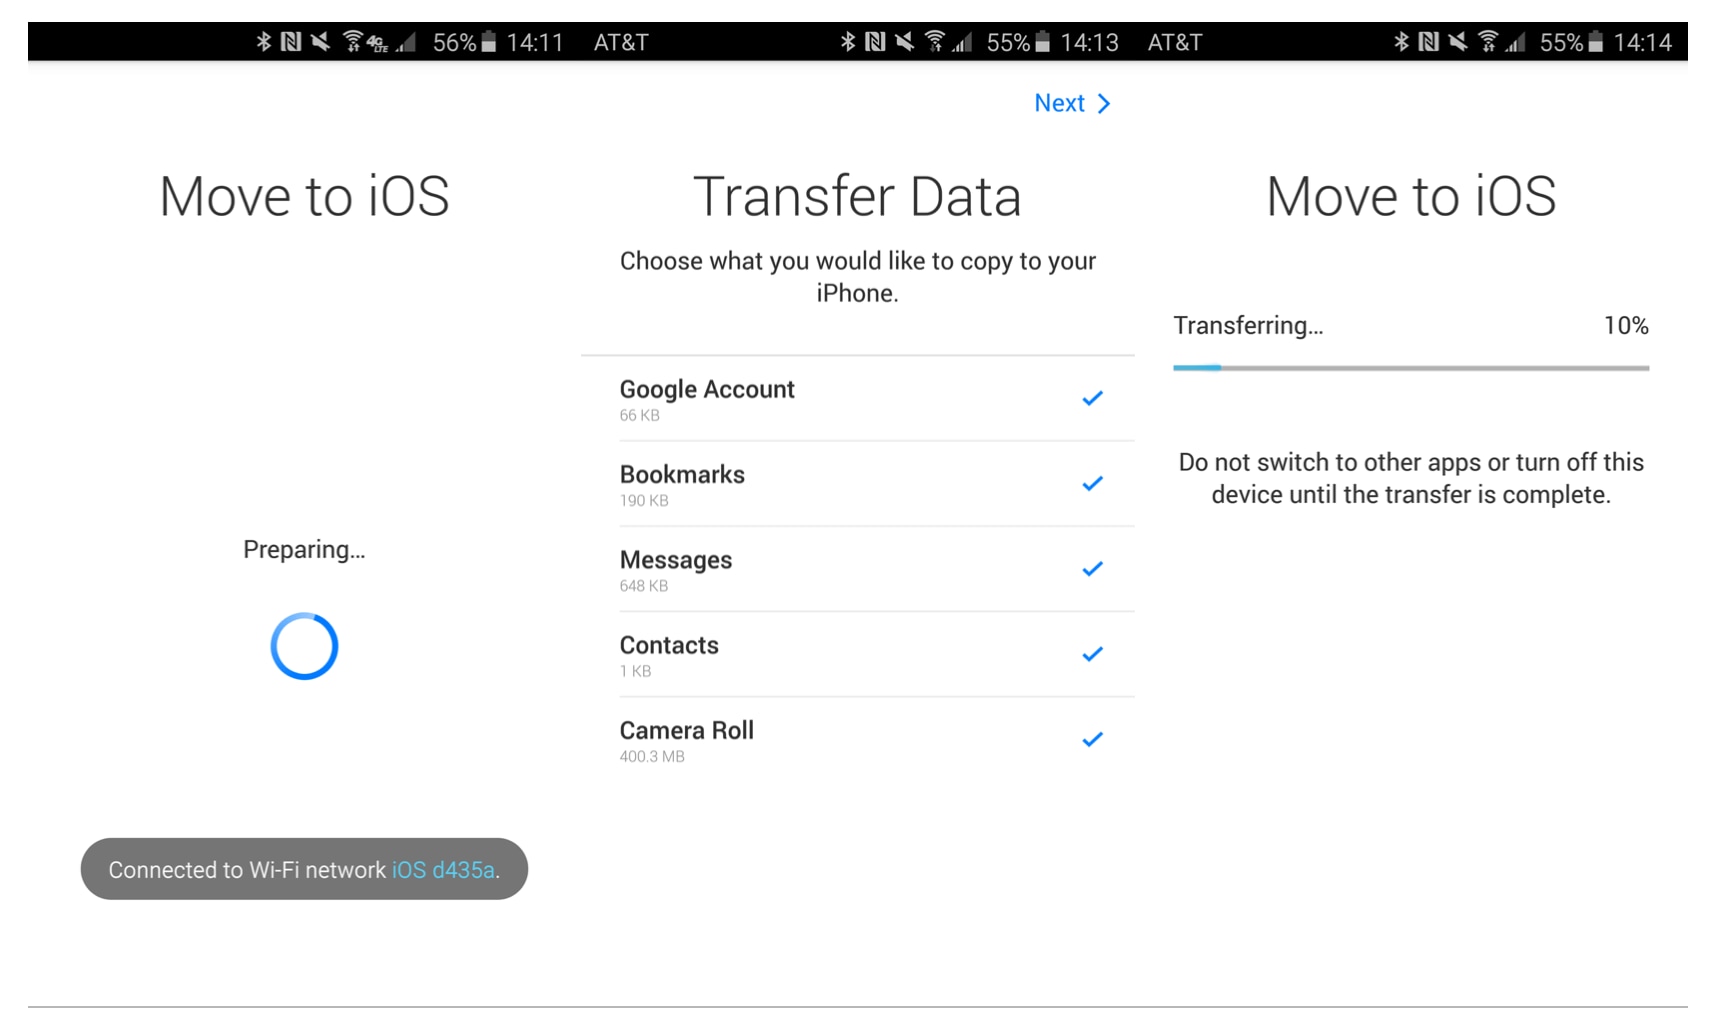
Step 5 – On the next screen, choose the types of data you want to transfer across, including the Camera Roll option that will allow you to transfer all your photos. Simply wait until the process is complete, and all your photos will have been transferred across.
Part 4. Transfer Samsung pictures to iPhone 11/11 Pro using your PC
4.1 About Transferring via PC
The final approach you can take to transferring your pictures from your Samsung Galaxy device over to your iPhone 11/11 Pro is using your PC or laptop. Of course, you need to make sure you have a personal computer with USB connections for this to happen, and you need the official cables, and enough space on your hard drive.
This is an easy method to follow and should work every time, but it’s recommended that you have at least a little bit of technical experience so you can easily find your files and transfer them between each device. Here’s how it will work;
4.2 How to Transfer Your Photos from Samsung to iPhone Using PC (iTunes)
Step 1 – Firstly, connect your Samsung device to your computer, and open File Explorer. Navigate through your Samsung files and select all the photos you want to transfer. You can go through and mark certain files by holding CTRL and clicking, or to select all your photos, click CTRL + A.
Step 2 – Once you’ve selected all your photos, press CTRL + C to copy them, all CTRL + X to cut them so they will be removed from your Samsung device forever. Now create a folder on your computer named photos and paste your images into this folder.
Step 3 – Once transferred, disconnect your Samsung device and connect your iPhone to your computer using the official USB. The iTunes software should open automatically or open it by double-clicking the desktop icon.
Step 4 – In the left-hand menu of the iTunes window, click Photos, and follow the onscreen instructions to import photos that you took off your Samsung device and put into your new photos folder.
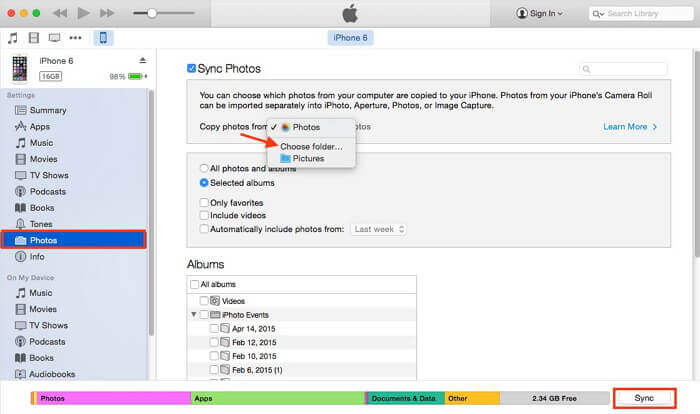
Step 5 – Once your photos have been imported into iTunes, navigate to your iPhone tab in iTunes and click Photos. Now sync your photos from your iTunes folder onto your iPhone device, and all your photos from your Samsung device will be transferred automatically, meaning you’ll have access to your photos on your new device!


Phone Transfer
- Get Data from Android
- Transfer from Android to Android
- Transfer from Android to BlackBerry
- Import/Export Contacts to and from Android Phones
- Transfer Apps from Android
- Transfer from Andriod to Nokia
- Android to iOS Transfer
- Transfer from Samsung to iPhone
- Samsung to iPhone Transfer Tool
- Transfer from Sony to iPhone
- Transfer from Motorola to iPhone
- Transfer from Huawei to iPhone
- Transfer from Android to iPod
- Transfer Photos from Android to iPhone
- Transfer from Android to iPad
- Transfer videos from Android to iPad
- Get Data from Samsung
- Transfer Data to Samsung
- Transfer from Sony to Samsung
- Transfer from Motorola to Samsung
- Samsung Switch Alternative
- Samsung File Transfer Software
- LG Transfer
- Transfer from Samsung to LG
- Transfer from LG to Android
- Transfer from LG to iPhone
- Transfer Pictures From LG Phone to Computer
- Mac to Android Transfer
James Davis
staff Editor