The Best Way to Recover Deleted Notes from iPad
Apr 28, 2022 • Filed to: Manage Device Data • Proven solutions
Did you accidentally delete Notes from your iPad? This is actually a very common situation to find yourself in. You may have been looking through your notes when you accidentally hit “delete.” How you got yourself in this situation is unimportant. What matters is whether or not you can get your Notes back.
If your iPad is synced with iCloud (which we assume it is), you can very easily get your Notes back as we shall see in Part 1 below. But as we shall also see, you can also easily recover the Notes from your iTunes backup (if they are there) and also if you don’t have a backup. Let’s begin with how you can recover the Notes directly from your device.
- Part 1: Restore Recently Deleted Notes
- Part 2: Recover Deleted notes from iPad Backups
- Part 3: Recover Notes from iPad without Backup
Part 1: Restore Recently Deleted Notes
To recover recently deleted notes inside the Notes app, follow these very simple steps. Before we proceed, we should mention that this solution is only available for iOS 9 users.
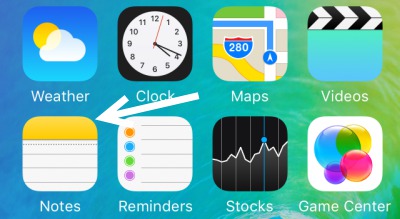
Step 1: Launch the Notes App from your Home screen.
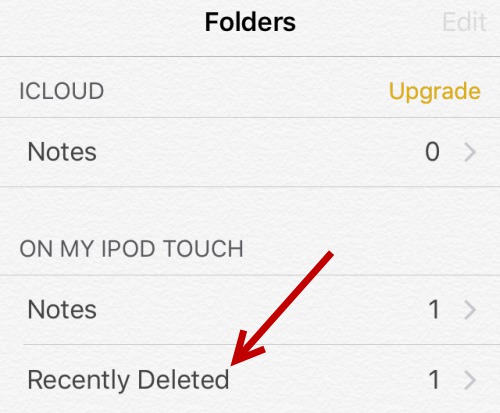
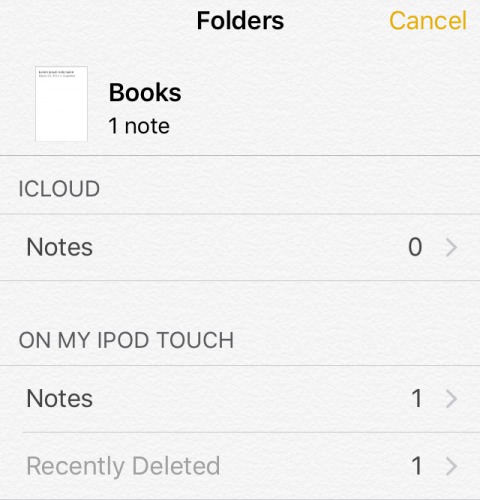
Step 2: In the next window, you will see “Recently Deleted” folder. Tap on it
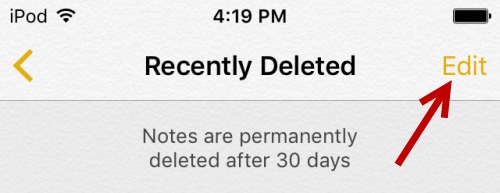
Step 3: You will then see all the Notes that you have deleted in the past 30 days. You can’t recover Notes that were deleted more than 30 days ago using this method. Tap on “edit” to continue.
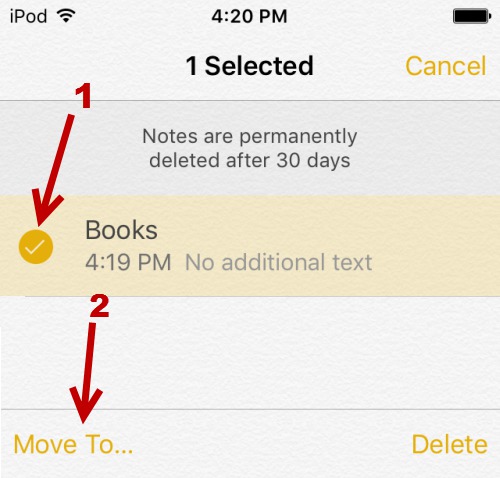
Step 4: Choose the Note or Notes that you want to recover and then tap on “Move To”
Step 5: Select the folder you want to move the Notes to
Part 2: Recover Deleted notes from iPad Backups
It would be awesome if you could just go into your iCloud and iTunes backup and select the particular notes you lost rather than restoring the entire device. With Dr Fone - iOS Data Recovery you can do this. This amazing software allows users to easily recover files from iOS devices.

Dr.Fone - iOS data recovery
World's 1st iPhone and iPad data recovery software
- Provide with three ways to recover iOS data.
- Scan iOS devices to recover photos, video, contacts, messages, notes, etc.
- Extract and preview all content in iCloud/iTunes backup files.
- Selectively restore what you want from iCloud/iTunes backup to your device or computer.
- Compatible with latest iPad models.
Recover deleted Notes from iCloud Backup
If your deleted notes are available on your iCloud backup, Dr Fone can recover only the specific lost notes. Follow these simple steps to do this.
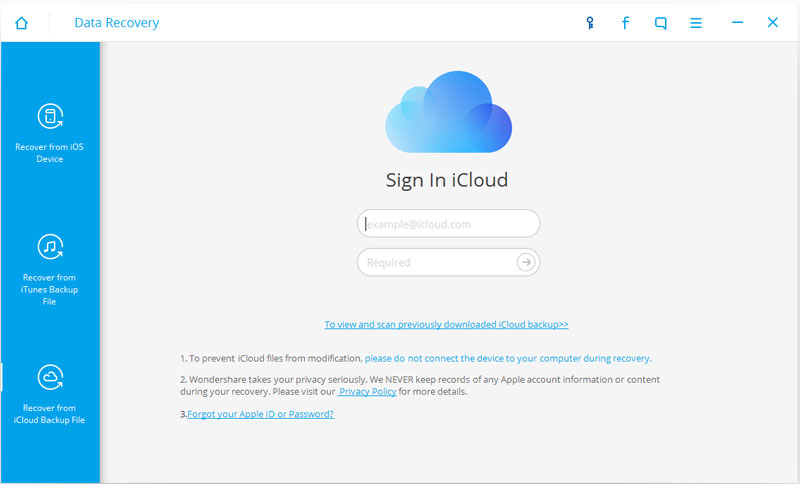
Step 1: Download and install Wondershare Dr Fone for iOS on your computer. Launch the program and then click on “Recover from iCloud Backup file.” Sign in to your iCloud account to continue.
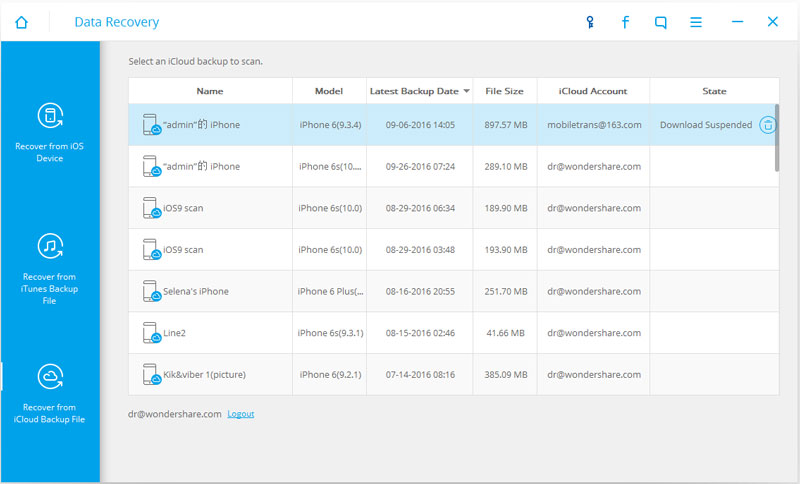
Step 2: You will then see all your available iCloud backup files. Choose the one that has your lost notes and click on the “Download” button.
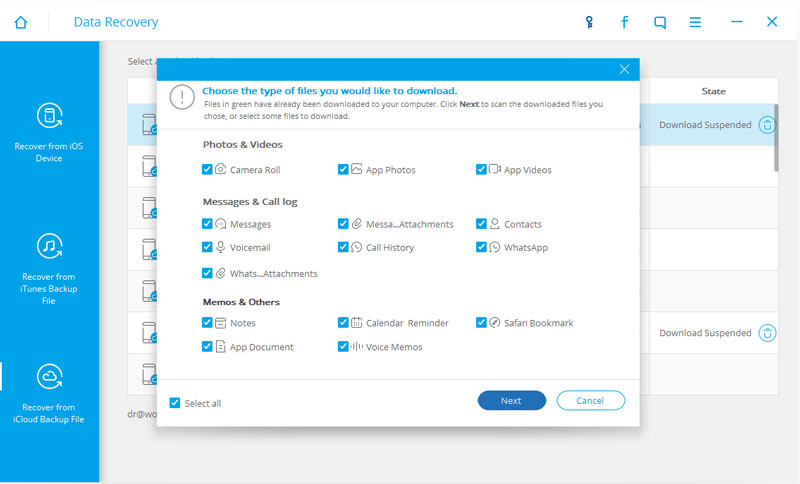
Step 3: In the popup window that appears, select the type of file you would like to download. In this case select “Notes” and click on the “Next” button to begin the process.
Step 4: all Notes available in that iCloud backup file will be displayed in the next window. Select the Notes you lost and click on “Recover.”
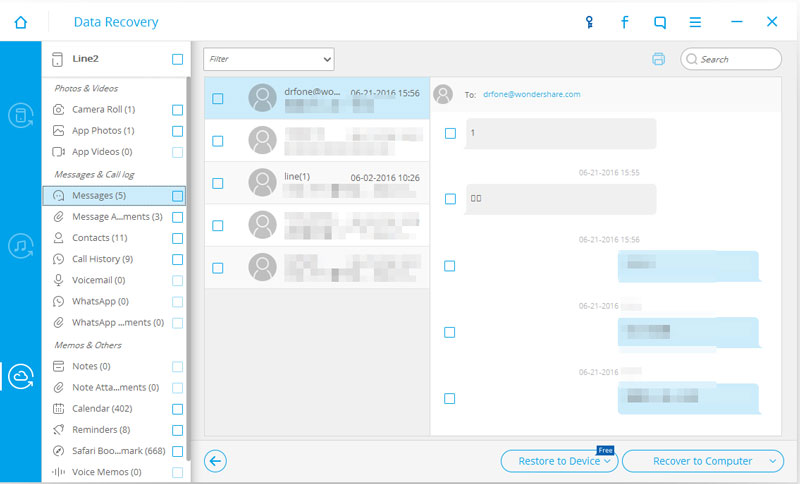
Notes can be recovered directly on to the iPad as long as it is connected to the computer.
/itunes/itunes-data-recovery.html /itunes/recover-photos-from-itunes-backup.html /itunes/recover-iphone-data-without-itunes-backup.html /notes/how-to-recover-deleted-note-on-iphone.html /notes/recover-notes-ipad.html /itunes/itunes-backup-managers.html /itunes/restore-from-itunes-backup.html /itunes/free-itunes-backup-extractor.html /notes/icloud-notes-not-syncing.html /notes/free-methods-to-backup-your-iphone-notes.html /itunes/itunes-backup-viewer.html
Recover Deleted iPad Notes from iTunes backup
In much the same way, you can also recover your deleted notes from your iTunes backup. Here’s how to do it specifically.
Step 1: from the primary window in Dr Fone, click on “Recover from iTunes Backup file. All the iTunes backup files available on your computer will be displayed.
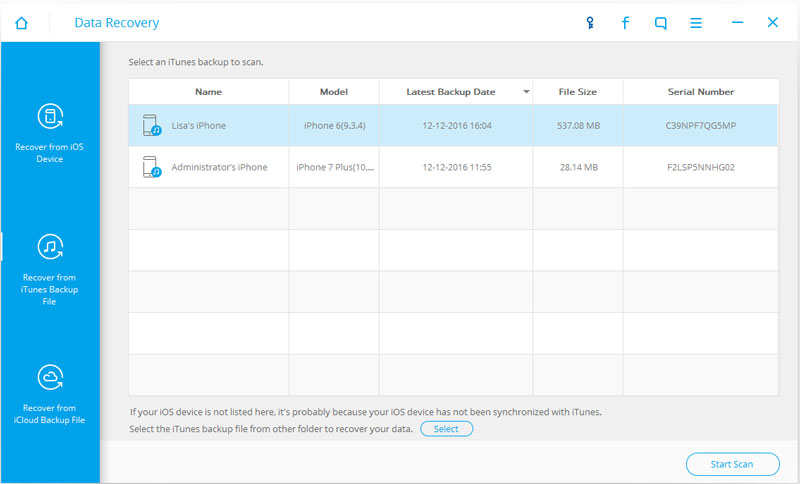
Step 2: Choose the backup file that contains the Notes you want to recover and click on “Start Scan”

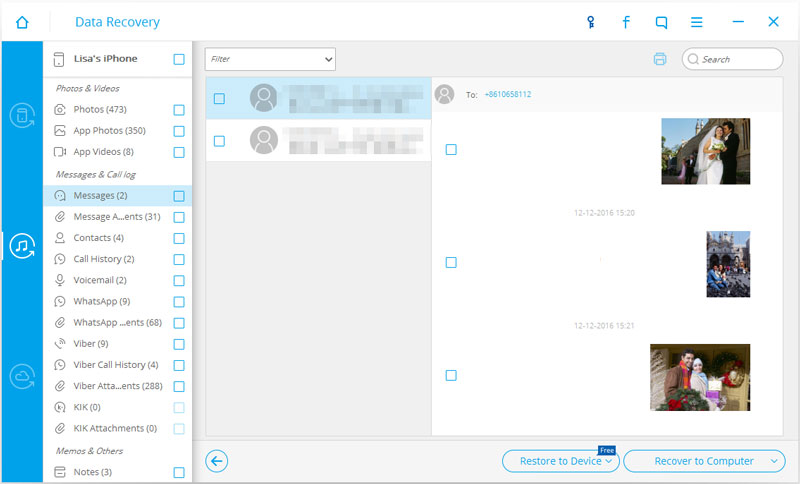
Step 3: The process will take a few minutes and then all the data will be displayed in the next window. Select the Notes you want to recover and then click on “Recover.” You can then choose if you want to recover the files to your device or to your computer.
Part 3: Recover Notes from iPad without Backup
So what if you don’t have a backup for your Notes, can you get them back? With Wondershare Dr Fone the answer to that question is an absolute yes. Here’s how
Step 1: Launch Dr Fone on your computer and then connect your iPad to your computer using USB cables. The program will detect your device and show the “Recover from iOS device” window.
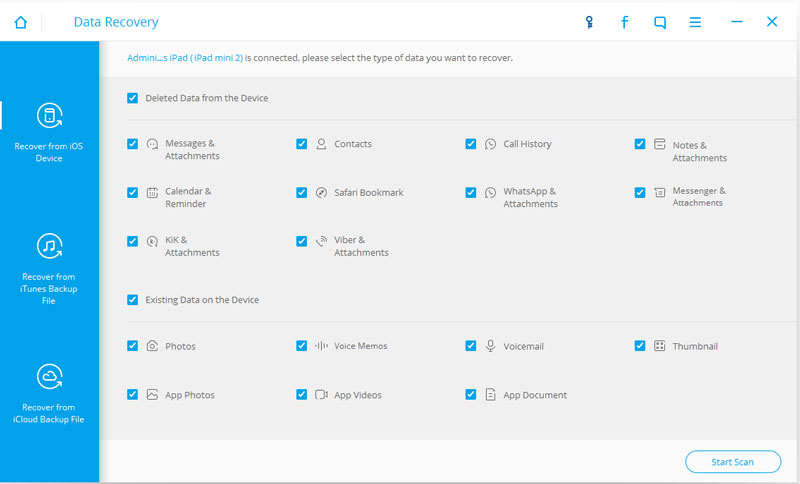
Step 3: Click on “Start Scan” to allow Dr Fone to scan your iPad for all deleted and available files. If you see your Notes at any time during the scan you can simply click on “Pause” to stop the process.
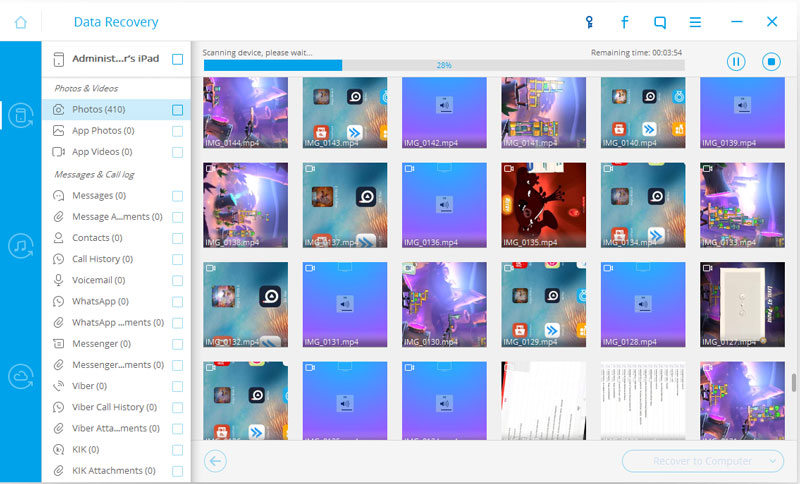
Step 4: Once the scan is complete. You will be able to preview the available and deleted files. Select your lost files and click on “Recover” and just choose “Recover to device” or “Recover to Computer”
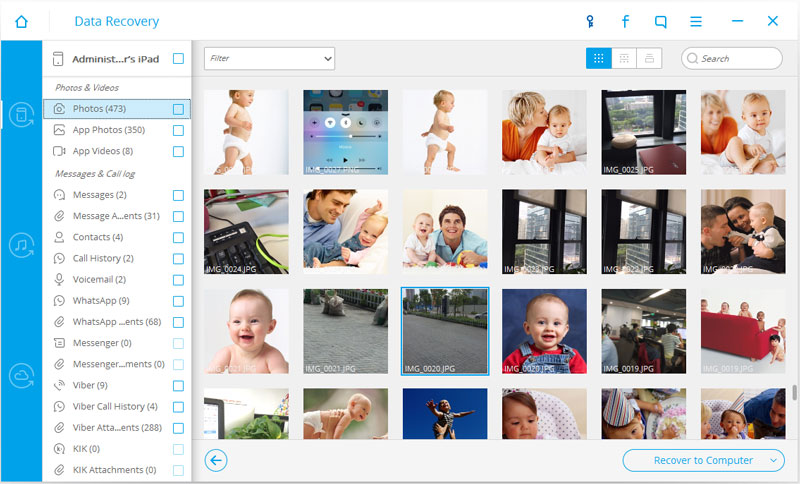
That's how easy Wondershare Dr Fone for iOS makes it for you to get back your deleted Notes whether you have a backup or not. Let us know how it works out for you.
Notes on Devices
- Recover Notes
- Export Notes
- Backup notes
- iCloud notes
- Others


Selena Lee
chief Editor