5 Solutions To Transfer Videos from iPhone to PC/Mac
Apr 27, 2022 • Filed to: Backup Data between Phone & PC • Proven solutions
How to transfer videos from iPhone to computer? If you are also wondering the same, then this would be the last guide that you will read. We all use our iPhone to record numerous videos. Though, just like any other smartphone, the iPhone also has limited storage. Therefore, a lot of people transfer video from iPhone to PC to get more free storage on their device or maintain a backup. This can be done in several ways. In this post, we will teach you how to get videos from iPhone to the computer in 5 different methods.
- Part 1: Transfer videos from iPhone to computer using Dr.Fone - Phone Manager (iOS)
- Part 2: Transfer videos from iPhone to PC via Windows AutoPlay
- Part 3: Transfer videos from iPhone to Mac via Photos app
- Part 4: Transfer videos from iPhone to computer using Dropbox
- Part 5: Transfer videos from iPhone to computer using iCloud
Part 1: Transfer videos from iPhone to computer using Dr.Fone - Phone Manager (iOS)
The easiest and most time-saving way to transfer video from iPhone to PC is Dr.Fone - Phone Manager (iOS). It is a complete device management tool that can transfer almost every major data file between your iPhone/iPad and computer. Compatible with every leading iOS version, it has a desktop application for Mac and Windows. It provides an extremely safe and reliable way to move your data in a user-friendly manner. After following a simple click-through process, you can also learn how to transfer videos from iPhone to PC using Dr.Fone - Phone Manager (iOS).

Dr.Fone - Phone Manager (iOS)
Transfer iPhone Videos to PC/Mac without iTunes
- Transfer, manage, export/import your music, photos, videos, contacts, SMS, Apps, etc.
- Backup your music, photos, videos, contacts, SMS, Apps, etc. to computer and restore them easily.
- Transfer music, photos, videos, contacts, messages, etc from one smartphone to another.
- Transfer media files between iOS devices and iTunes.
- Fully compatible with iOS 7 to iOS 13 and iPod.
1. Launch Dr.Fone toolkit on your Windows or Mac and opt for the "Phone Manager" module from its welcome screen.

2. Then connect your iPhone and trust your computer. Dr.Fone will automatically detect your device and provide the following options.
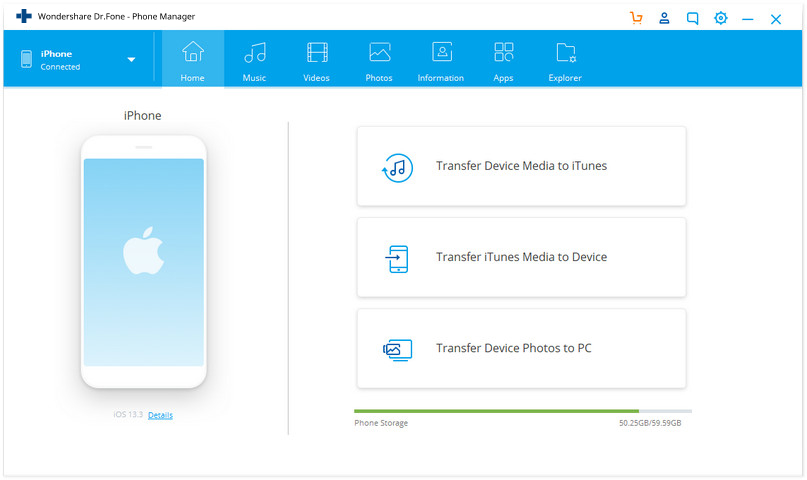
3. Go to the “Videos” tab from the navigation bar to view all the videos that are saved on your iPhone. You can also go to the left panel to view them in a categorized way (music videos, TV shows, and more).
4. Select the videos you wish to transfer from your phone to the computer and go to the Export option on the toolbar.
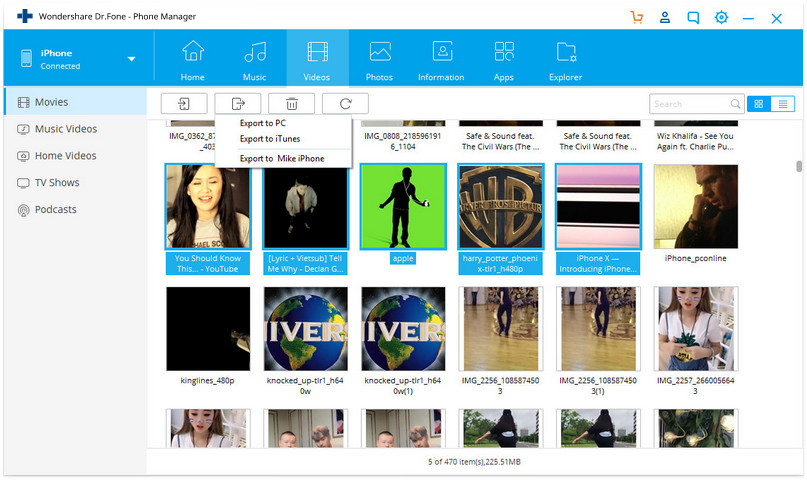
5. From here, you can export the selected videos to the computer or iTunes. To transfer video from iPhone to PC, select the option of “Export to PC” and select the save path on your computer to save the videos.
That’s it! Within seconds, you can learn how to transfer videos from iPhone to a computer using Dr.Fone - Phone Manager (iOS). Afterward, you can visit the destination folder and make further changes or copy the newly transferred data.
Part 2: Transfer videos from iPhone to PC via Windows AutoPlay
If you like to move your iPhone videos to Windows PC, then you can also take the assistance of its AutoPlay feature. The AutoPlay tool might differ from one version of Windows to another, but its core functionality is the same. Whenever an external device is connected to the Windows PC, it enables the AutoPlay feature. You can learn how to transfer videos from iPhone to PC via AutoPlay by following these steps.
1. Connect your iPhone to your Windows PC and wait for it to be detected automatically.
2. Once it is detected, you will get a pop-up message like this. Click on the “Import pictures and videos” option.
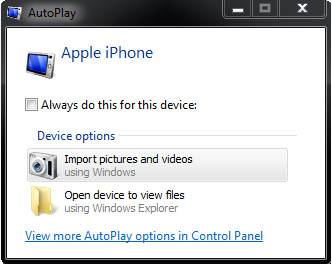
3. Windows will automatically start the transfer process. To customize it, you can click on the “Import Settings” button.
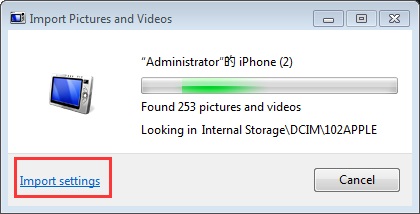
4. It will open the following pop-up window. Here, you can change the destination path for the transferred videos and perform other tasks as well.
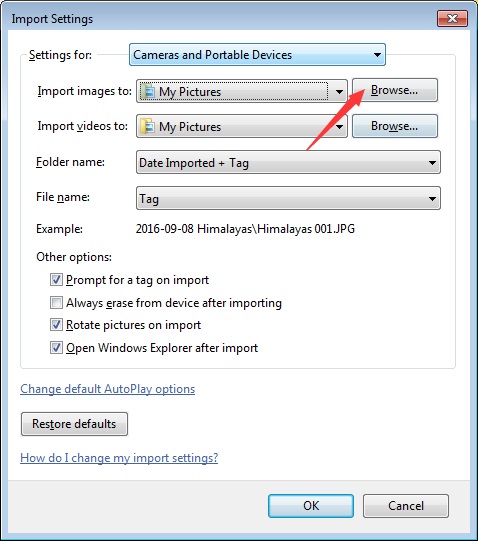
5. Also, if you want, you can select the “Erase after importing” option to get rid of the transferred content from your device afterward.
Part 3: Transfer videos from iPhone to Mac via Photos app
After learning how to get videos from iPhone to Windows PC, let’s discuss how to do the same on Mac. There are numerous ways to move your videos between iPhone and Mac. One of the easiest ways is using the native Photos app. It can help you manage photos and videos on your iPhone and Mac easily. To learn how to transfer videos from iPhone to the computer, all you need to do is follow these steps.
1. Connect your iPhone to Mac and wait for it to be detected automatically. Once it is done, launch the Photos app.
2. Select your device from the left panel and view the saved photos and videos. The will automatically be categorized with respect to their time.
3. You can simply click on the “Import New” button to get the recent unsaved videos directly.
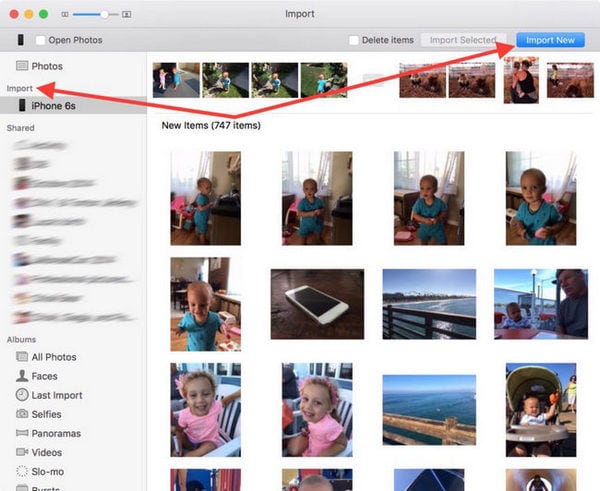
4. Additionally, you can select the videos you wish to move and click on the “Import Selected” button to save these files on your Mac.
Part 4: Transfer videos from iPhone to computer using Dropbox
By following the above-mentioned tutorials, you can learn how to transfer videos from iPhone to PC via a wired connection. Though, if you wish to move your data over the air, then you can use a cloud service like Dropbox. Using Dropbox to learn how to get videos from iPhone to computer is pretty easy.
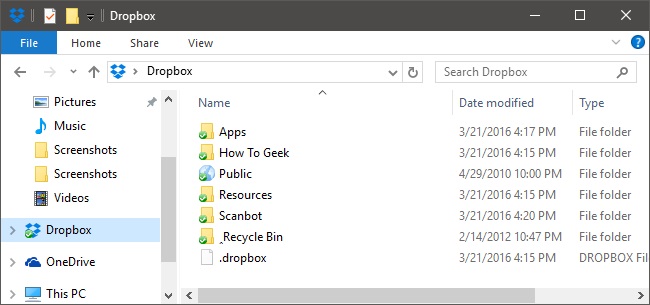
Simply launch the Dropbox app on your iPhone and tap on the “+” icon to upload something. You can also enter a folder (like Uploads) and do the same. This will open a browsing interface from where you can select the videos of your choice.

Afterward, you can visit Dropbox’s website, use its desktop app, or simply visit its folder (if you have installed Dropbox) on your PC. In this way, you can save the shared content from Dropbox to your system manually.
Part 5: Transfer videos from iPhone to computer using iCloud
Just like Dropbox, you can also use iCloud to transfer video from iPhone to PC over the air. Since iCloud is a native solution by Apple, it is quite easy to learn how to transfer videos from iPhone to computer using its dedicated desktop app (for Mac and Windows). It can be achieved by following these steps:
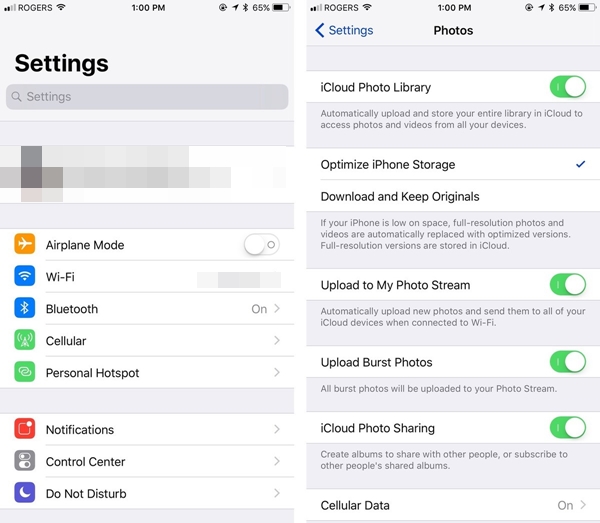
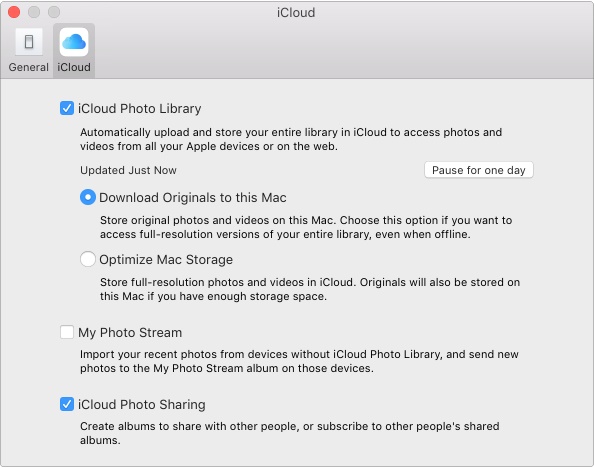
1. Firstly, go to the iCloud settings on your device and turn on the option for iCloud Photo Library. This will automatically upload your photos and videos to iCloud.
2. After that, you can go to iCloud’s website and download the synced videos of your choice. Although, a more preferred option is using the iCloud desktop app.
3. Open the iCloud app on your Mac or Windows PC and turn on the option for Photo sharing.
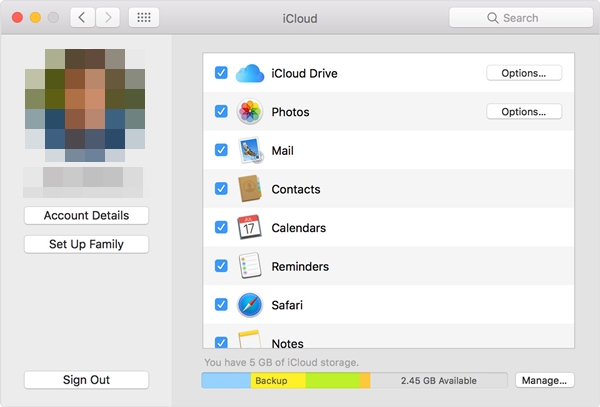
4. Furthermore, you can visit its preferences and make sure the option of the iCloud Photo Library is switched on. You can also decide where you wish to keep videos of original quality or optimize them.
In this way, you can learn how to transfer videos from iPhone to PC in 5 different ways. Although, the most preferred option to transfer video from iPhone to PC is Dr.Fone - Phone Manager. It has a user-friendly interface and will let you manage your data between PC and iPhone easily. Now when you know how to transfer videos from iPhone to PC, you can share this guide with others as well to teach them how to get videos from the iPhone to the computer.
iPhone Video Transfer
- Put Movie on iPad
- Transfer iPhone Videos with PC/Mac
- გადაიტანეთ ვიდეოები iPhone-ზე
- გადაიტანეთ ვიდეოები iPhone-ზე iTunes-ის გარეშე
- გადაიტანეთ ვიდეოები კომპიუტერიდან iPhone-ზე
- დაამატეთ ვიდეოები iPhone-ში
- მიიღეთ ვიდეოები iPhone-დან


Daisy Raines
staff Editor