5 Ways to Do With & Access Android Phone with Broken Screen
May 07, 2022 • Filed to: Topics • Proven solutions
We’ve all been there - your phone slips from your fingers and starts tumbling towards the ground, and that dreaded thought pops into your mind: “Oh no! Please don’t let the screen be broken!”
Your smartphone’s screen is its most crucial component - after all, we use our screens to navigate between apps, send text messages, check email, and watch videos. Unfortunately, it can be a huge pain when it is cracked or broken.
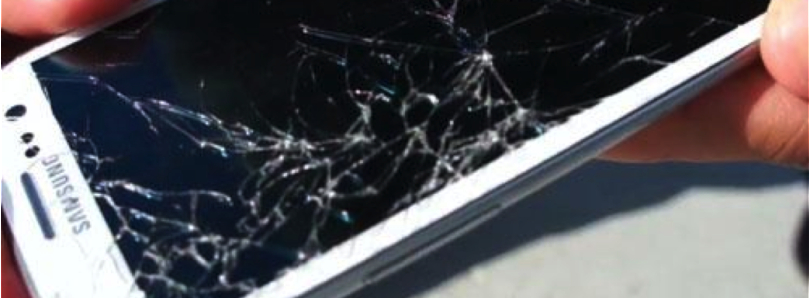
When their phone screen is shattered, many people write off their device as unusable. This is not true! It is still possible to access phone with broken screen, even if it seems shattered beyond repair. Furthermore, you can indeed back up all of your content on an Android phone, allowing you to move your information to a new device and/or restore your existing phone once the screen has been fixed. Whew!
Have you recently smashed your phone’s screen? If so, you are not alone. Read ahead as we take a detailed look into how to ensure safety, access an Android device with a broken screen (to recover your valuable data), and deal with the cracked screen.
- Part 1: Phone screen cracked? Important things first!
- Part 2: Access files on a broken-screen Android phone with a data retrieval tool(the best way)
- Part 3: Access broken-screen Android phone with an Android control tool
- Part 4: Data retrieval tool vs Android control tool
- Part 5: Deal with Android cracked screen correctly
Part 1: Phone screen cracked? Important things first!
Check if you have a broken screen insurance
In older days, the physical damage like a broken/cracked phone screen wasn’t covered under the free service repairs by the manufacturer. But thanks to the insurance scheme these days that ensure that you can get a free broken phone screen replacement if you have insured one. Check if you have one or not. If yes, then walk up to the nearest service center and get your broken phone screen replaced.
Take care of the tiny glass pieces
In case you are trying to wipe off the broken screen pieces. If you’re opting to do so, be extremely cautious throughout or else the tiny glass pieces may hurt your fingers, and eventually, you may even bleed. Therefore, to avoid any such cuts and bruises, ensure proper safety with rubber gloves or other safety equipment. Seal the phone screen with transparent tape or place a screen protector before touching it.
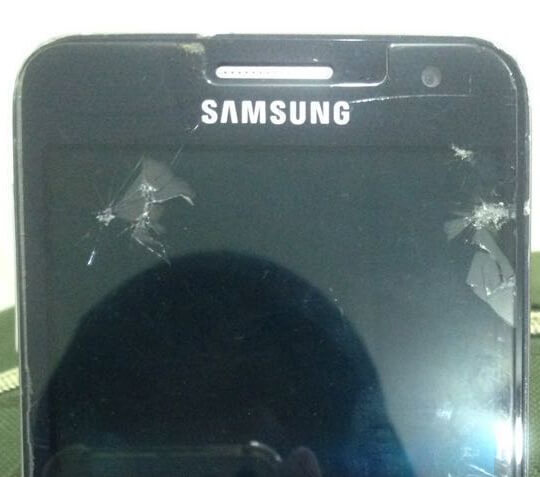
Part 2: How to access phone with broken screen with a data retrieval tool (the best way)
While you are understandably attached to your phone, the essential aspect of any Android device is not its physical shell but instead, the files and software housed inside. Thankfully, the Dr.Fone - Data Recovery (Android) tool is a solution that allows you to easily access all files on your Android phone, even in the case that the screen is broken beyond repair. Dr.Fone - Data Recovery (Android) is the world’s first data retrieval software for broken Android phones and tablets, and it will help you to recover your data with confidence and ease.
Here are just some of Dr.Fone’s many features:

Dr.Fone - Data Recovery (Android)
World's 1st data retrieval software for broken Android devices.
- It can also be used to recover data from broken devices or devices that are damaged in any other way, such as those stuck in a reboot loop.
- Highest retrieval rate in the industry.
- Recover photos, videos, contacts, messages, call logs, etc.
- Compatible with all Android phones, including Samsung Galaxy devices.
The advantages of using Dr.Fone are that it is incredibly simple to use (even for people with no technological skills), very reliable, and accessible to everyone. Unfortunately, for Android 8.0 and later devices, you have to root your device before accessing it using this tool.
How to Use Dr.Fone to Access Files on an Android phone with a broken screen?
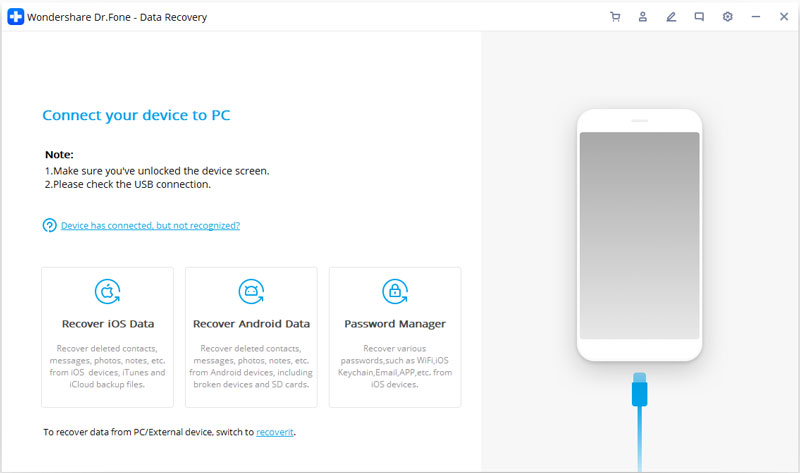
Step 1: Download and install Dr.Fone on your PC. Launch the program, and then select Data Recovery among all the tools.

Step 2: Next, click Recover Android Data.
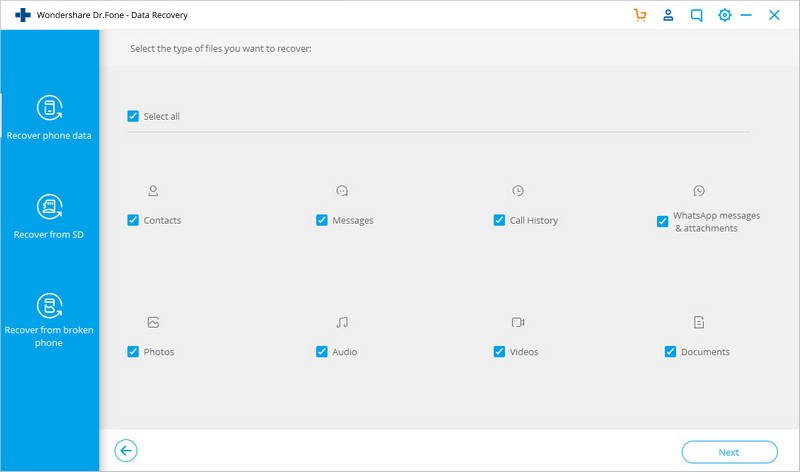
Step 3: Go to Recover from broken phone tab and select the file types you would like to recover. If you want everything, simply click “select all.”
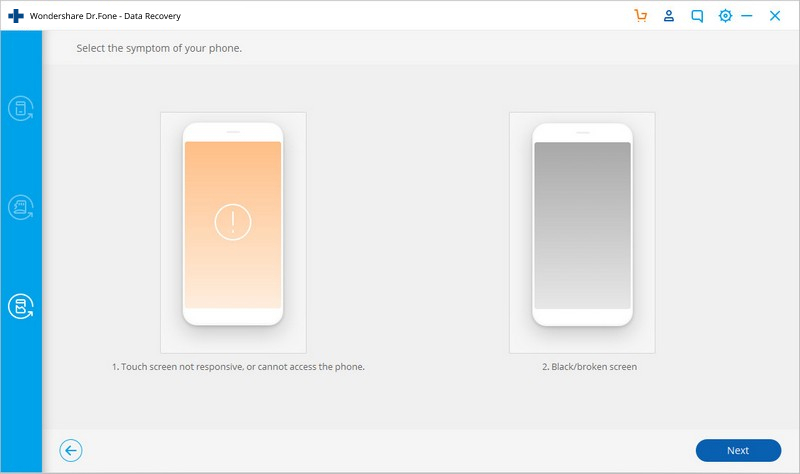
Step 4: Dr.Fone will ask you exactly what is wrong with your phone. Select “Black screen (or screen is broken)” to proceed if the screen is broken.
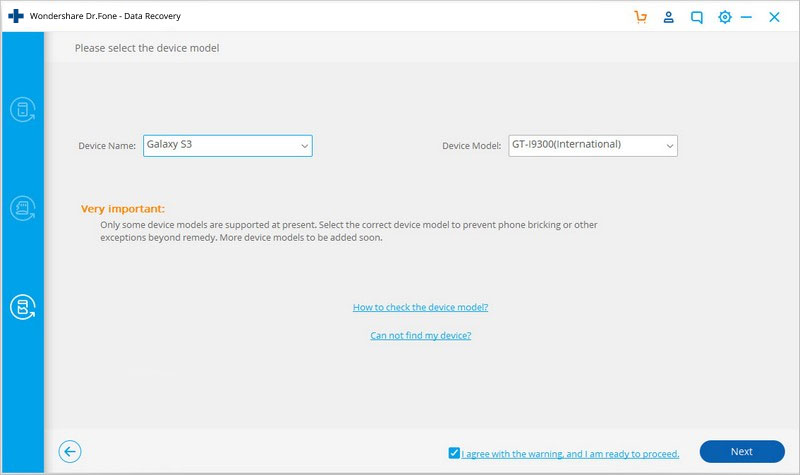
Step 5: In the next window, select your device's correct name and model. Unsure about the right answer? Click on “How to confirm the device model” for guidance.
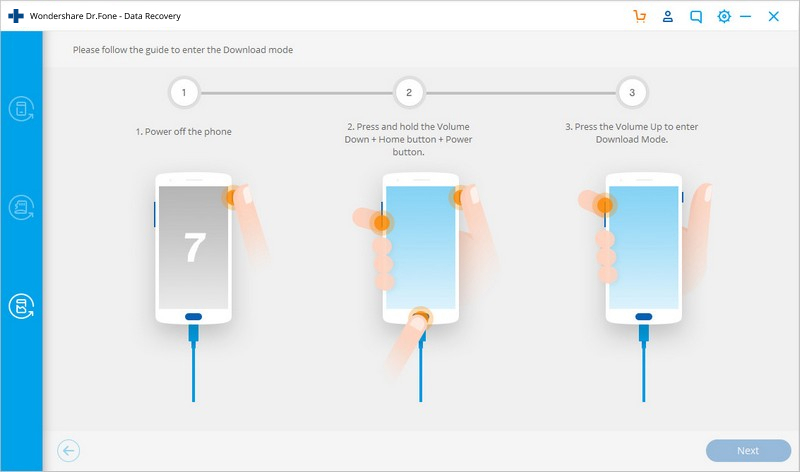
Step 6: In the next window, you will be provided with clear instructions on entering “Download Mode” for your particular device.
Step 7: Once the phone is in download mode, Dr.Fone will start to analyze it and then scan it for all your files.
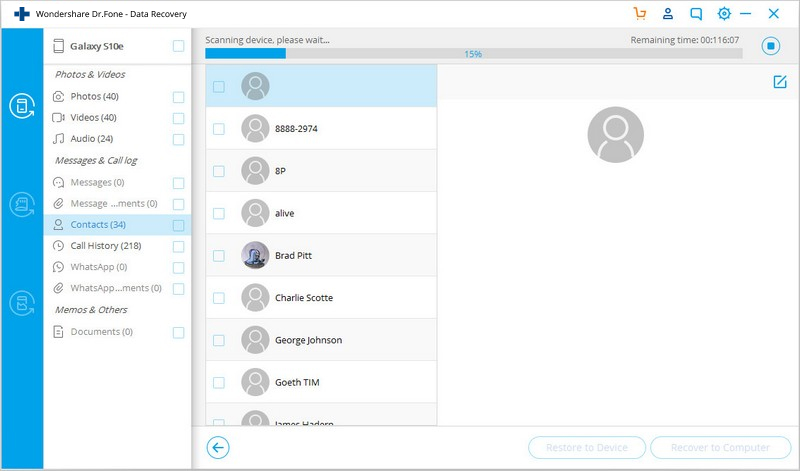
Step 8: After analysis and scanning, all of the files on the device will be displayed in the resultant window. Select the ones you would like to recover and click on “Recover.”
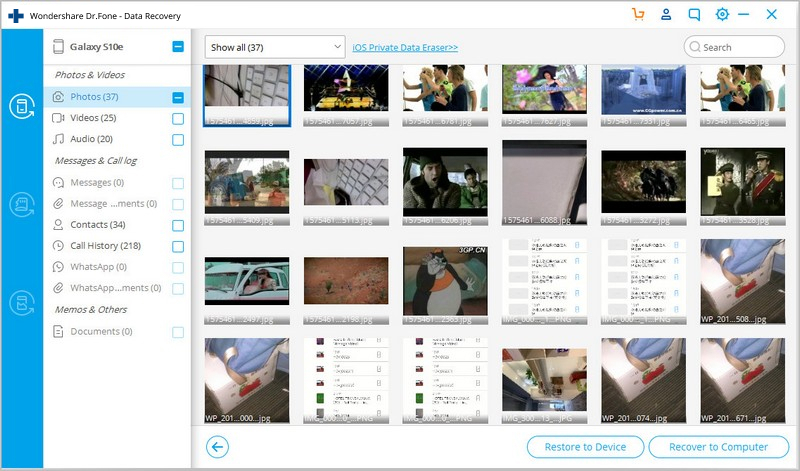
Ta-da! All of your data and information should be safely recovered, allowing you to reinstall it on a new phone or your existing phone once you have the screen repaired.
Part 3: Access Android phone with broken screen with an Android control tool
Do you want to try accessing your Android phone data on your PC without using an external program? This has only recently been made possible, but a new, free tool known as Android Control, which XDA Forum Member k.janku1 develops, can now enable you to gain access to your Android device via a PC and save all of your data. This can be a huge relief if you have broken your phone and panicked about your info!
You will need to have enabled USB debugging on your device for this method to work, and you also need to install ADB on your computer. Here’s how to use Android Control.
Step 1: Install ADB on your PC. You can download it here: http://forum.xda-developers.com/showthread.php?t=2317790. The program will create a shortcut on your desktop that can then be used to open a command prompt.
Step 2: Once the command prompt is open enter the following code:
- Adb shell
- echo "persist.service.adb.enable=1" >>/system/build.prop
- echo "persist.service.debuggable=1" >>/system/build.prop
- echo "persist.sys.usb.config=mass_storage,adb" >>/system/build.prop"
Step 3: Reboot.
Step 4: Simply connect your Android device to your PC, and the Android Control Screen will pop up allowing you to control your device via your computer.
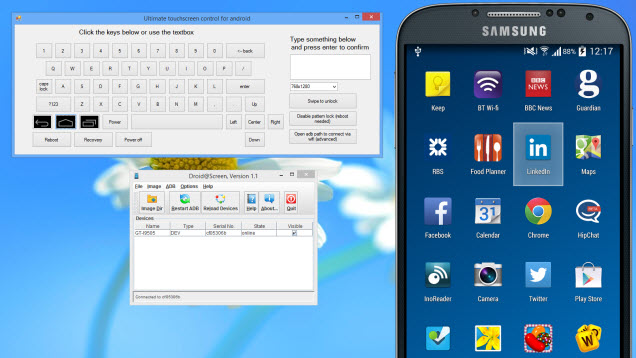
While this solution will work for some, it is best suited to those who love coding and have already installed USB debugging on your phone. Is this you? If so – you’re in luck!
Part 4: Data retrieval tool vs Android control tool
The methods described above are very effective in allowing access to a device with a broken screen, but to be honest: the second option is a more complicated one, and if you are not familiar with programming commands, you might find yourself completely lost.
These methods have some differences that can either make them the ideal solution for you or a complete waste of your time.
What’s best for your lifestyle? Some of the most glaring differences include:
Dr.Fone's toolkit for Android is infinitely more straightforward. To use this program, you only need to connect your phone to your PC and follow simple steps to access your files. However, for Android Control to work, it requires that you have already enabled USB debugging on your device before the accident, so it may not work when you need it most.
Android Control gives you a way to control the device from an external source – you will need to select the files you want to save manually and then copy them to your PC. Conversely, Dr. Fone's toolkit will allow you to recover all of the files on your device and save them to your PC in just one click.
Dr. Fone's toolkit is straightforward to use, even if you don’t consider yourself a tech-savvy individual. On the other hand, Android Control requires that you know how to enable USB debugging and learn how to use ADB. This is beyond the capacity of most users, but tech-savvy individuals will likely prefer this method.
As you can see, one of these methods is very easy to use and helps you to claim control over all of your files in less than 5 minutes. The other, Android Control, does require advanced knowledge of ADB. If you have some degree of knowledge and skill in computing, you will likely prefer Android Control. However, if you are not tech-savvy, Dr.Fone - Data Recovery best fits you.
Whichever method you choose to use, we hope you can get all of your files back – a smashed screen can be extremely stressful, and it’s nice to have this weight off your shoulders!
Part 5: Deal with Android cracked screen correctly
The broken phone screen can be classified into two categories:
- Slightly Broken: The touch glass is not shattered and is in operable condition.
- Completely Shattered: where nothing is visible and is inoperable.
Now, if it is situation #1 that you’re experiencing, you can easily deal with the broken phone screen by applying a screen protector like tempered glass. It will aid in avoiding further screen damage.
You are assuming that only your device’s touch glass was shattered and the display was still working. You can ask some technical friends to have the touch screen repaired or replaced. If you want to perform screen repair DIY, note the following:
You need to get a new touch screen glass for your device from an online store or a nearby market. Ensure to do your research before buying one to get the right touch glass for your device and of good quality. Also, you need to find the DIY tools to perform a screen replacement.
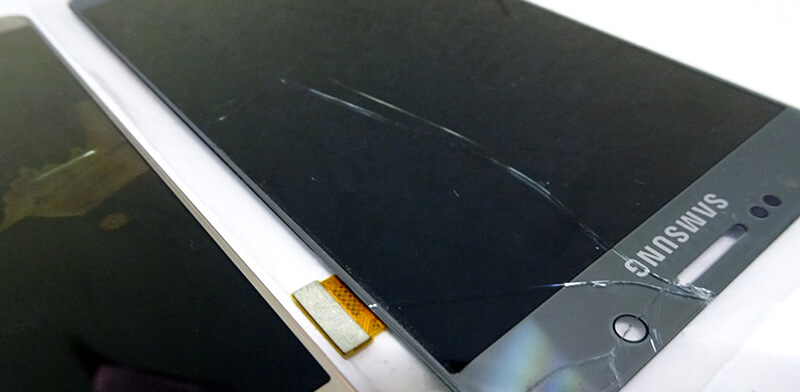
Next, take the help of a hairdryer and blow-dry, hot air over your broken phone screen. This will remove the adhesive of the broken screen. Now, clip out the screen from your device carefully and then replace it with a new touch glass. You can also watch a DIY screen replacement video on YouTube for further guidance.
Note: Usually, performing a DIY fix broken phone screen repair may cost anywhere around $100 to $250. Balance the costs of replacing a screen and getting a new phone yourself.
Want to know more creative videos? Please go to Wondershare Video Community.
You Might Also Like
Unlock Android
- 1. Android Lock
- 1.1 Android Smart Lock
- 1.2 Android Pattern Lock
- 1.3 Unlocked Android Phones
- 1.4 Disable Lock Screen
- 1.5 Android Lock Screen Apps
- 1.6 Android Unlock Screen Apps
- 1.7 Unlock Android Screen without Google Account
- 1.8 Android Screen Widgets
- 1.9 Android Lock Screen Wallpaper
- 1.10 Unlock Android without PIN
- 1.11 Finger printer Lock for Android
- 1.12 Gesture Lock Screen
- 1.13 Fingerprint Lock Apps
- 1.14 Bypass Android Lock Screen Using Emergency Call
- 1.15 Android Device Manager Unlock
- 1.16 Swipe Screen to Unlock
- 1.17 Lock Apps with Fingerprint
- 1.18 Unlock Android Phone
- 1.19 Huawei Unlock Bootloader
- 1.20 Unlock Android With Broken Screen
- 1.21.Bypass Android Lock Screen
- 1.22 Reset A Locked Android Phone
- 1.23 Android Pattern Lock Remover
- 1.24 Locked out of Android Phone
- 1.25 Unlock Android Pattern without Reset
- 1.26 Pattern Lock Screen
- 1.27 Forgot Pattern Lock
- 1.28 Get Into A Locked Phone
- 1.29 Lock Screen Settings
- 1.30 Remove Xiaomi Patter Lock
- 1.31 Reset Motorola Phone that is Locked
- 2. Android Password
- 2.1 Hack Android Wifi Password
- 2.2 Reset Android Gmail Password
- 2.3 Show Wifi Password
- 2.4 Reset Android Password
- 2.5 Forgot Android Screen Password
- 2.6 Unlock Android Password Without Factory Reset
- 3.7 Forgot Huawei Password
- 3. Bypass Samsung FRP
- 1. Disable Factory Reset Protection (FRP) for Both iPhone and Android
- 2. Best Way to Bypass Google Account Verification After Reset
- 3. 9 FRP Bypass Tools to Bypass Google Account
- 4. Bypass Factory Reset on Android
- 5. Bypass Samsung Google Account Verification
- 6. Bypass Gmail Phone Verification
- 7. Solve Custom Binary Blocked


Daisy Raines
staff Editor