IPhone-y süpürmek üçin doly gollanma
Mar 07, 2022 • Filed to: Erase Phone Data • Proven solutions
Thinking about selling or donating your iPhone to make way for a new one? Think again. Our devices contain valuable data, whether we realise it or not. Even when you have deleted these important personal information, there is still the possibility to recover them for malicious use.
- Part 1. how to wipe an iphone with 1 click
- Part 2. How to wipe a locked iPhone
- Part 3. How to wipe your iPhone that is stolen
Part 1. how to wipe an iphone with 1 click
Dr.Fone - Data Eraser (iOS)
Easily Delete All Data from Your Device
- Simple, click-through, process.
- Your data is permanently deleted.
- Nobody can ever recover and view your private data.
- Works greatly for iPhone, iPad and iPod touch, including the latest models.
How to Use Dr.Fone - Data Eraser (iOS) to Wipe an iPhone Data
Avoid going through the rooting process to restore your iPhone to its factory settings. These steps will help you erase your device entirely and ensure that no personal data remains in your iPhone.
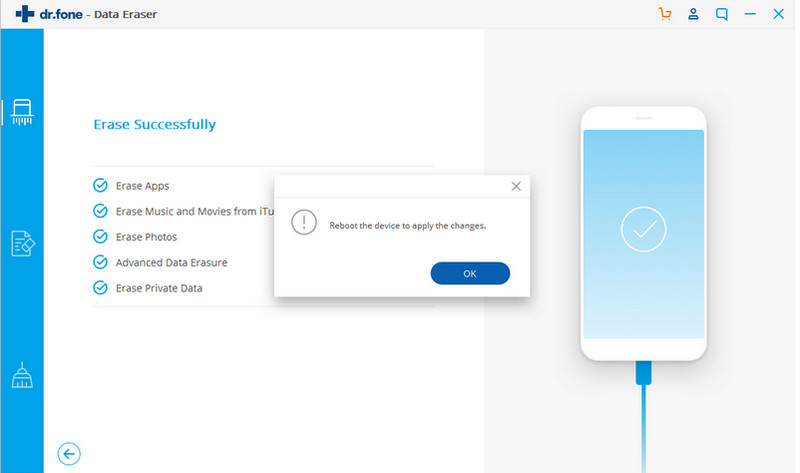
Step 1. Run the program and choose "More Tools" > "iOS Full Data Eraser".
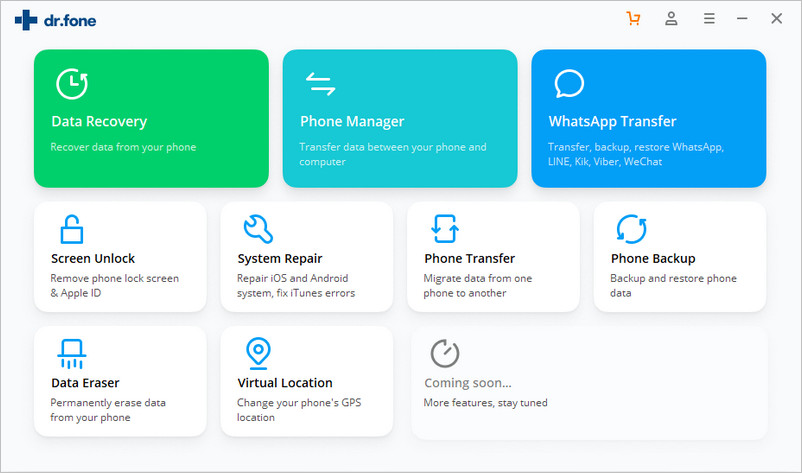
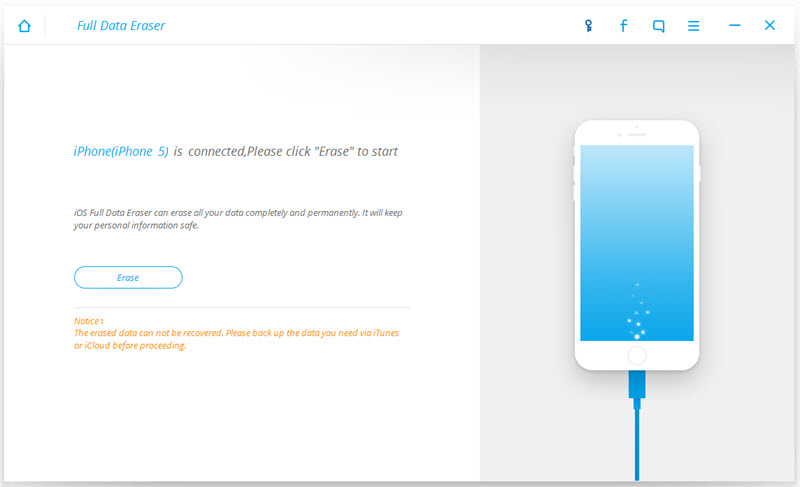
Step 2. Click "Erase" to begin the work.
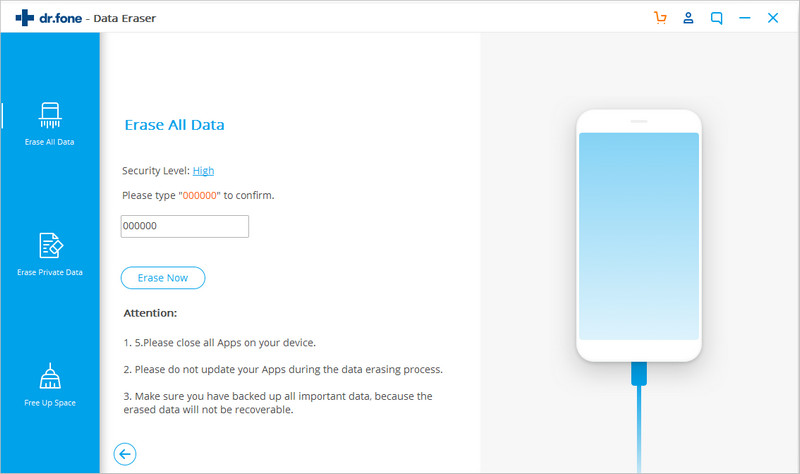
Step 3. To confirm the command, type in ‘delete’ in the text box. Click “Erase now”
Step 4. Make sure that your iPhone stays connected to your computer throughout the erasing
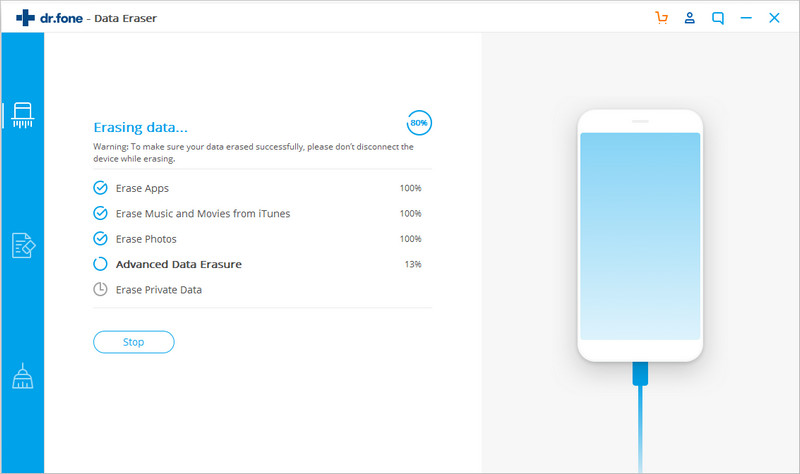
You should be able to see an "Erase Completely" message once the whole process is complete.
Part 2. How to wipe a locked iPhone
Have you forgotten the passcode for your old iPhone? Do you need to wipe any information contained in that iPhone before giving it to someone else? Here is how you can erase personal information and the iPhone’s passcode:
Step 1. Link up the iPhone to a computer with iTunes.
Step 2. Force restart the iPhone (press and hold the “Sleep/Wake” and “Home” buttons together) while it is connected to the computer. Do this long enough to prompt the iPhone into Recovery Mode (indicated by the Apple logo).
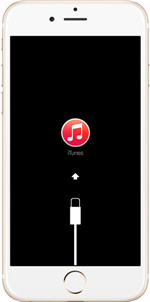
Step 3. Once the iPhone is in Recovery Mode, there should be a command window shown on your computer. Click on “Restore”.
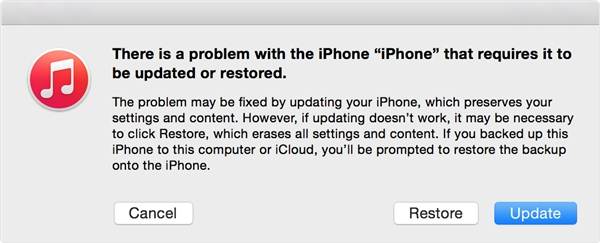
This will delete the iPhone’s passcode and content. iTunes will then download and install the operating system on the iPhone.
Step 4. Once this is done, the iPhone will be like brand new. The new owner will be able to set up the device like a new unit would.
Note: If it takes more than 15 minute to download and install the software, the iPhone will exit Recovery Mode. You will need to repeat steps 2 and 3.
Part 3. How to wipe your iPhone that is stolen
You just realised that your iPhone is no longer with you. In your rush, you are not sure if it was stolen in the busy train or if it fell out of your pocket as you ran to catch the train that you are now on. You then remember that you have important information is stored in your iPhone.
What should you do? You definitely do not want to be a victim of identity theft.
There are a couple of options for you:
OPTION 1: “Find My iPhone” is enabled
The “Find My iPhone” feature is a nifty program to let you locate any of your iOS devices. Once it is located, you can take the necessary steps to protect yourself from malicious attempts on your data
Step 1. From a computer or laptop, log into icloud.com/find. Alternatively, you can use the “Find My iPhone” app on another iOS device.
Step 2. Open the “Find My iPhone” tab and select your iPhone’s name. You should be able to see its location on a map.
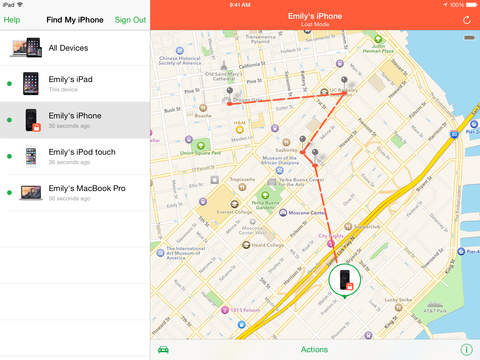
If it is nearby, click on the “Play Sound” button to alert you its current whereabouts.
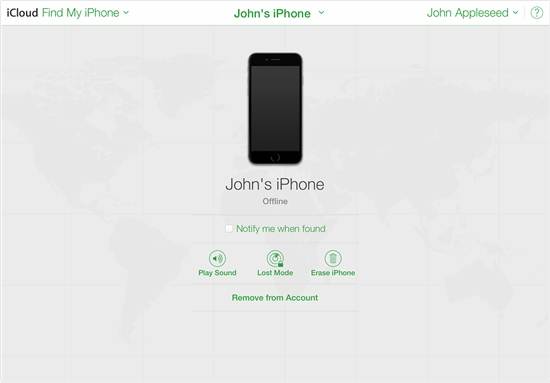
Step 3. Enable the “Lost Mode” to lock your iPhone remotely with a four-digit combination passcode. It will then display a custom message on your missing iPhone’s Lock Screen – custom it with a contactable number so that someone could contact you.
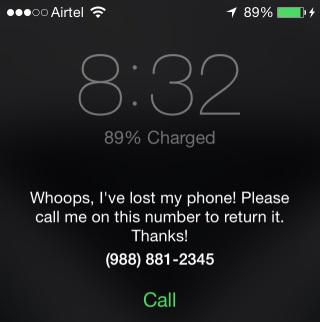
While in “Lost Mode”, you will be able to track the movement of your device and prevent anyone from making purchases with your Apple Pay account.
Step 4. Report your stolen or lost iPhone to the local law enforcers.
Step 5. If it remains missing over a period of time that you are not comfortable with (this may as well be as soon as you realise that it is gone), erase you iPhone. Once you click on “Erase iPhone”, every data will be deleted from the device. You will not be able to track it anymore. Once you remove the iPhone from your iCloud account after erasing its content, Activation Lock will be disabled. A new person will then be able to use the device.
Note: Steps 3 and 5 can only be done when the phone is online. You can still enable the command – it will only be effective once the phone goes online again. Do not remove the device before it goes online because these commands will be void if you do so.
OPTION 2: “Find My iPhone” is not enabled
Without enabling the “Find My iPhone” feature, you will not be able to locate your iPhone. However, you can still protect yourself from data theft.
Step 1. Change the password of your Apple ID – this will prevent anyone from get into your iCloud storage or use other service on your lost iPhone.
Step 2. Change the passwords of other accounts on your iPhone e.g. social networking sites, internet banking, email account etc.
Step 3. Report your stolen or lost iPhone to the local law enforcers.
Step 4. Report your stolen or lost iPhone to your telco provider – they will disable your account so that people will not be able to use your SIM to make phone calls, send messages and use your data.
Erase Phone
- 1. Wipe iPhone
- 1.1 Permanently Wipe iPhone
- 1.2 Wipe iPhone Before Selling
- 1.3 Format iPhone
- 1.4 Wipe iPad Before Selling
- 1.5 Remote Wipe iPhone
- 2. Delete iPhone
- 2.1 Delete iPhone Call History
- 2.2 Delete iPhone Calendar
- 2.3 Delete iPhone History
- 2.4 Delete iPad Emails
- 2.5 Permanently Delete iPhone Messages
- 2.6 Permanently Delete iPad History
- 2.7 Delete iPhone Voicemail
- 2.8 Delete iPhone Contacts
- 2.9 Delete iPhone Photos
- 2.10 Delete iMessages
- 2.11 Aýdym-sazy iPhone-dan pozuň
- 2.12 “iPhone” programmalaryny pozuň
- 2.13 “iPhone” belliklerini pozuň
- 2.14 iPhone beýleki maglumatlary pozuň
- 2.15 iPhone resminamalaryny we maglumatlary pozuň
- 2.16 “iPad” -dan filmleri pozuň
- 3. “iPhone” -y pozuň
- 3.1 Conthli mazmuny we sazlamalary pozuň
- 3.2 Satmazdan ozal “iPad” -y pozuň
- 3.3 Iň oňat iPhone maglumatlary pozmak programma üpjünçiligi
- 4. “iPhone” -y arassalaň
- 4.3 “iPod touch” -y arassalaň
- 4.4 “iPhone” -da gutapjyklary arassalaň
- 4.5 “iPhone” keşini arassalaň
- 4.6 Iň ýokary iPhone arassalaýjylary
- 4.7 “iPhone” ammaryny boşadyň
- 4.8 iPhone-da e-poçta hasaplaryny pozuň
- 4.9 “iPhone” -y çaltlaşdyryň
- 5. “Android” -i arassalaň / süpüriň
- 5.1 Android Keşini arassalaň
- 5.2 Keş bölümini süpüriň
- 5.3 Android suratlaryny pozuň
- 5.4 Satmazdan ozal Android-i süpüriň
- 5.5 Samsung-ny süpüriň
- 5.6 Android-i uzakdan süpüriň
- 5.7 Iň ýokary Android güýçlendirijileri
- 5.8 Iň ýokary Android arassalaýjylary
- 5.9 Android taryhyny pozuň
- 5.10 Android tekst habarlaryny pozuň
- 5.11 Iň oňat Android arassalaýyş programmalary


Alice MJ
staff Editor