

How to Back up iPad Files to External Hard Drive

Apr 27, 2022 • Filed to: Backup Data between Phone & PC • Proven solutions
Do you want to back up iPad files to an external hard drive if some unexpected incidents happened that could cause major data loss? Have you decided to sell your old iPad, so you're eager to back up all the files on your iPad before the deal? Whatever the reason is, you may realize that it's not an easy thing to back up ipad to external hard drive. Apple allows you to export the photos and video shot from your iPad whenever you connect the iPad to the computer via a USB cable, but it's still far from being enough. Because sometimes, you also want to back up music, contacts, messages and more. As helpful as iTunes is, the iPad backup file will be directly accessible through iTunes, so you can still back up iPad files to the external hard drive.
Option One: Back up iPad Files to External Hard Drive with Easy Way
A third party tool can give you the solution for backing up iPad to the external hard drive easily.With the tool you will have confident to work out the difficulties. I highly recommend you a easier way with iPad backup tool – like Dr.Fone - Phone Manager (iOS). It lets you back up iPad music, playlists, movies, photos, contacts, SMS, music videos, TV shows, audiobook, iTunes U and podcasts to an external hard drive. Besides, the files backed up are very easy to read and use.
Dr.Fone - Phone Manager (iOS)
Back up iPad Files to External Hard Drive
- Transfer, manage, export/import your music, photos, videos, contacts, SMS, Apps etc.
- Backup your music, photos, videos, contacts, SMS, Apps etc. to computer and restore them easily.
- Transfer music, photos, videos, contacts, messages, etc from one smartphone to another.
- Transfer media files between iOS devices and iTunes.
- Fully compatible with iOS 7, iOS 8, iOS 9, iOS 10, iOS 13 and iPod.
Backing up iPad files to the external hard drive to save them and share with other people is not possible to do it directly without using any software. We are going to share about wondershare TunesGo which is great software to back up ipad or iphone or any idevice files to any other device or external hard drive. This software is developed from Wondershare. The ipad backup platform is available for all users from the Dr.Fone - Phone Manager (iOS). The software is the best way to transfer files to computer and other devices.
How to Back up iPad Files to External Hard Drive
Step 1. Connect the iPad and the external hard drive to the PC
First of all, use USB cables to connect both your iPad and the external hard drive to the PC. Run Dr.Fone and select "Phone Manager". When your iPad is connected, it will show up in the primary window of the wondershare TunesGo. Also, the external hard drive will be shown on your My Computer.

Note: The Windows and Mac versions of the TunesGo software support backing up files for iPad mini, iPad with Retina display, iPad 2, iPad Air, The New iPad and iPad running with iOS 5, iOS 6, iOS 7, iOS 8,iOS 9 and the latest 13 to an external hard drive.
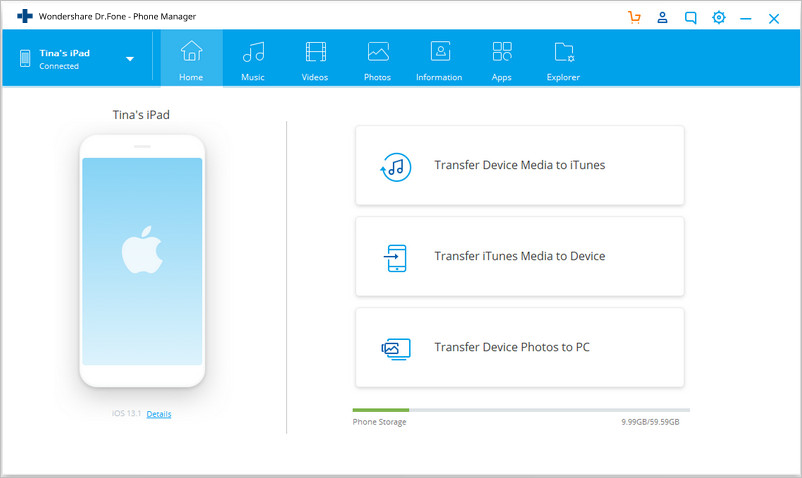
Step 2. Back up all your iPad files to an external hard drive with one click
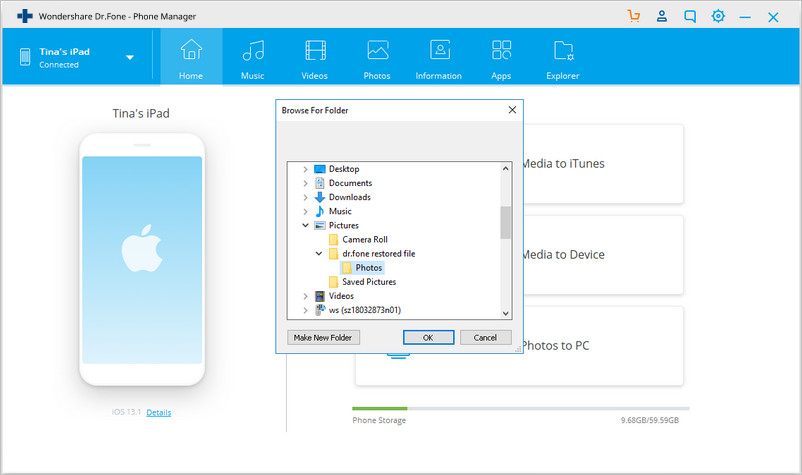
In the primary user interface of Dr.Fone, move your cursor Transfer Device Photos to PC. Then, browse your computer to find a folder on the external hard drive where you want to export and save your music files or you can create new folder also. Select your folder here and click on OK. At that point, this software will back up all the photos from your iPad to the external hard drive.
Step 3. Back up the iPad files which you want to the external hard drive
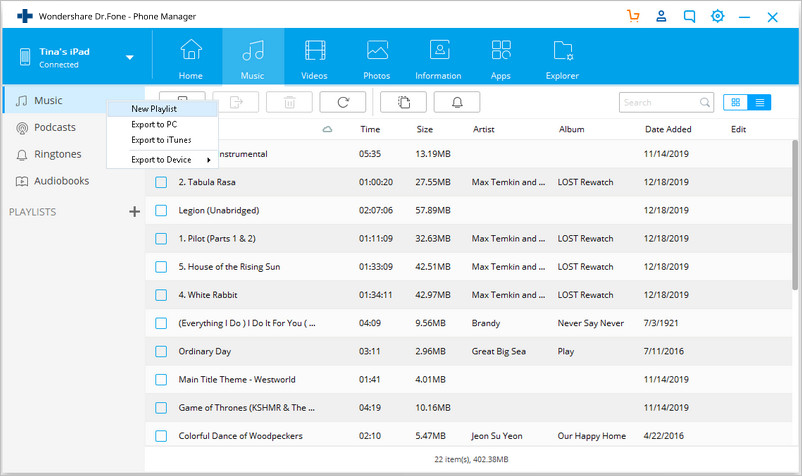
If you want to back up iPad music, videos, contacts and SMS too, then on the top of the main interface, separately click on Music, Videos, Photos, Information. The corresponding window will appear.
By clicking Music, you can back up music, podcasts, audiobook and iTunes U.
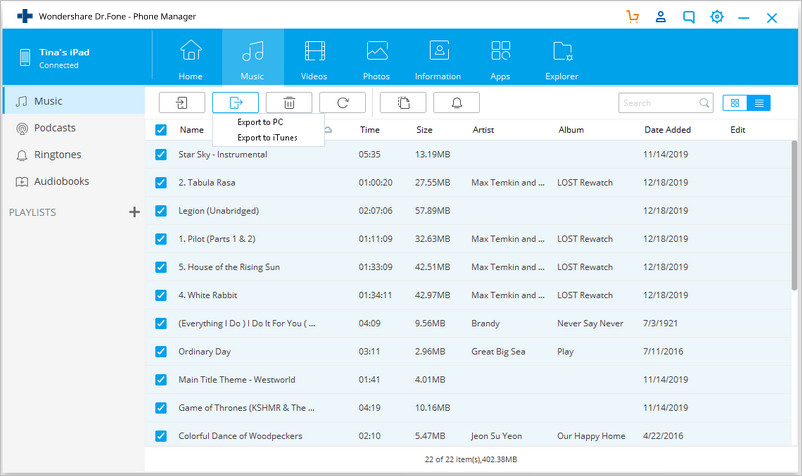
To export playlist, right-click the selected playlist which you want to export to your external hard disk under PLAYLISTS section and select Export to PC from the drop down list.
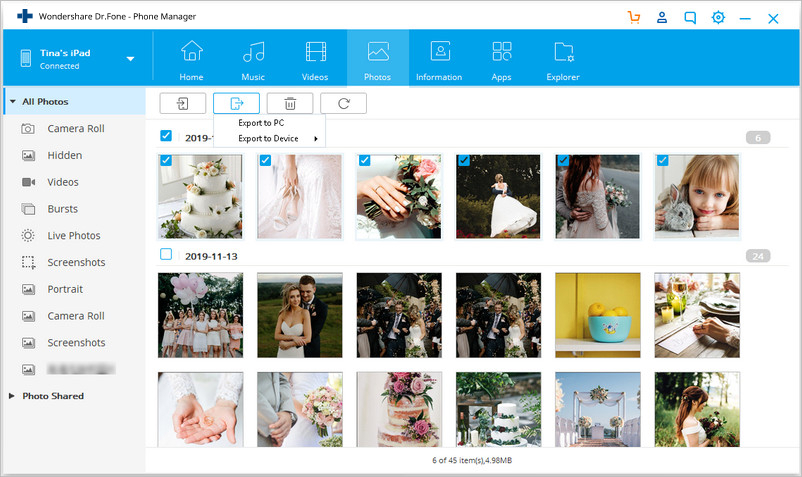
To export photos, click Photos to choose and select photos, then click Export > Export to PC to back up the selected iPad photos to the external hard drive.
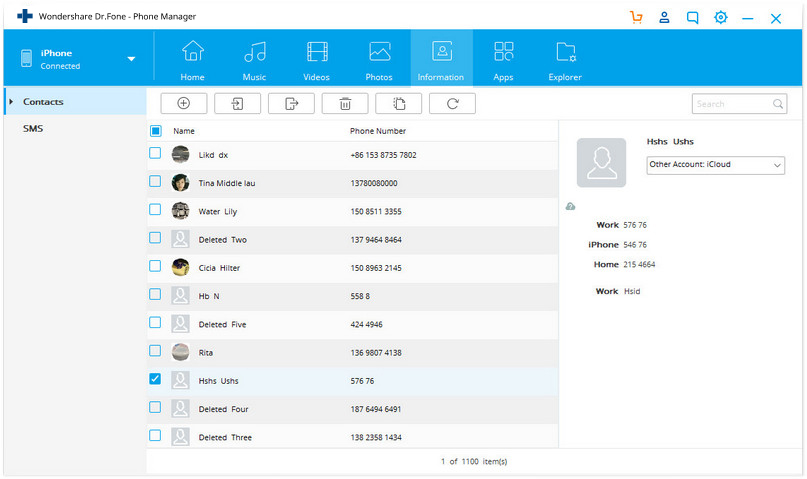
To export contacts, click Information > Contacts, then the contacts will be shown by list, select the contacts you want to back up to the external hard drive, click Export, from the drop list, select one fromat to keep the contacts: to Vcard File, to CSV File, to Windows Address Book, to Outlook 2010/2013/2016.
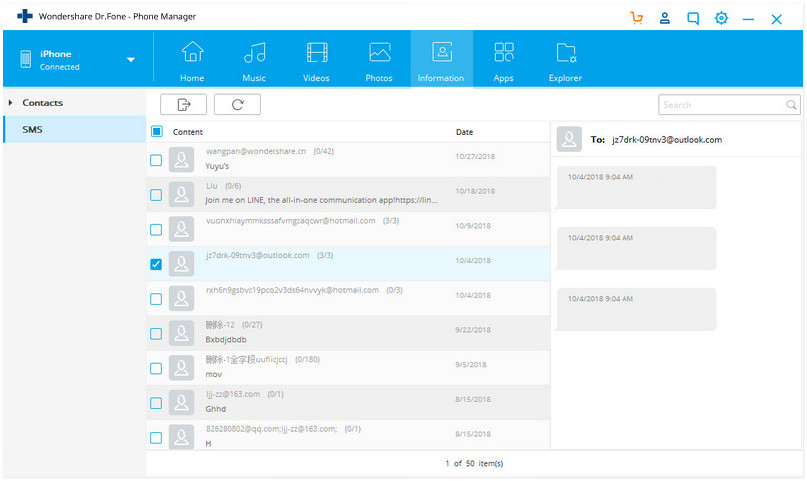
To export SMS, then tick the iMessages, MMS & text messages, after that, click Export, select Export to HTML or Export to CSV from the drop down list.
See, that's the easy guide about how to back up iPad (including iOS 13 supported) to an external hard drive. With the help of this software, you can also back up files on the iPad to iTunes or other iOS devices without a hitch.
After you backed up the iPad files to PC you need, you can drag manually,copy or cut all the files to the external drives or keep them in your PC.
Option Two: Back up iPad Files to External Hard Drive with iTunes Manually
The first option to back up iPad files to external hard drive is transferring your file manually with iTunes. However, it is a lenthy and complecated way to do. So keep following our guide to discuss it in detail. Before that, you need to have some basic knowledge about command to do it. However, we will direct you to the folder straight away without difficulties.
Step 1. If you are running itunes previously then quit it first and connect your external hard drive with your mac. If need create a new folder in the external hard drive.
Step 2. Open finder window and press Command+Shift+G on Mac and then enter this path: ~/Library/Application Support/MobileSync/. If you are using Windows 7, 8, or 10, the backup location for you is going to ~\Users\(username)\AppData\Roaming\Apple Computer\MobileSync\Backup\, while Windows XP users can locate to ~\Users\(username)/Application Data/Apple Computer/MobileSync/. You can also access quickly by searching the appdata in "start" search bar.
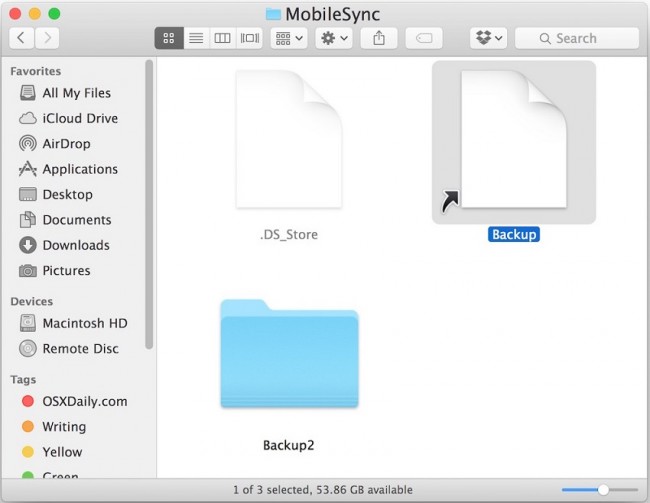
Step 3. Now in this above directory open the folder “Backup” and copy this folder, then paste it to the folder which you have created in the external hard drive. After copying folder backup you can delete the old folder.
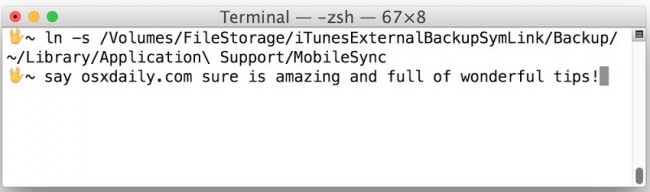
Step 4. After doing that launch terminal app which you can find in /Application / utilities and then enter the following command
ln -s /Volumes/FileStorage/iTunesExternalBackupSymLink/Backup/ ~/Library/Application Support/MobileSync. In this example the name of external hard drive “File Storage” and backup folder name of iTunes is ‘iTunesExternalBackupSymLink’, so you can adjust them according to your requirement. Here we only show the example from Mac below.
Step 5. Now you have to quit the terminal and confirm that a symbolic link is created or not. You can confirm it by going to “~/Library/Application Support/MobileSync/” in the finder option from Mac and the location of Windows has shown before. Here you can see file with name “backup” name and arrow key. There is now a direct link between that “Backup” and the location specified on the external hard disk.
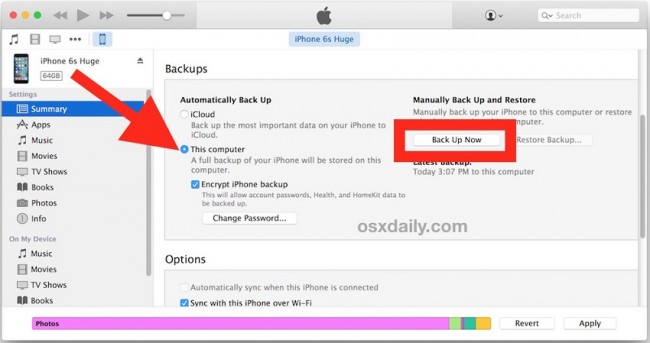
Step 6. Now open itunes and connect your iPad with your computer using a usb cable. Select you device in the iTunes interface. Go to “Summary” and select “This Computer” as backup location and then click on “backup now” option.
Why not download Dr.Fone to have a try? If this guide helps, don't forget to share it with your friends.


iPad Tips & Tricks
- Make Use of iPad
- iPad Photo Transfer
- Transfer Music from iPad to iTunes
- Transfer Purchased Items from iPad to iTunes
- Delete iPad Duplicate Photos
- Download Music on iPad
- Use iPad as External Drive
- Transfer Data to iPad
- Transfer Photos from Computer to iPad
- Transfer MP4 to iPad
- Transfer Files from PC to iPad
- Transfer Photos from Mac to ipad
- Transfer Apps from iPad to iPad/iPhone
- Transfer Videos to iPad without iTunes
- Transfer Music from iPad to iPad
- Transfer Notes from iPhone to iPad
- Transfer iPad Data to PC/Mac
- Transfer Photos from iPad to Mac
- Transfer Photos from iPad to PC
- Transfer Books from iPad to Computer
- Transfer Apps from iPad to Computer
- Transfer Music from iPad to Computer
- Transfer PDF from iPad to PC
- Transfer Notes from iPad to Computer
- Transfer Files from iPad to PC
- Transfer Videos from iPad to Mac
- Transfer Videos from iPad to PC
- Sync iPad to New Computer
- Transfer iPad Data to External Storage
Alice MJ
staff Editor