

How to Transfer Photos or Pictures from Mac to iPad or iPad mini

Apr 27, 2022 • Filed to: Backup Data between Phone & PC • Proven solutions
iMac was the first PC without legacy. It was the first Macintosh machine to have a USB port, however no floppy circle drive. Hence, all Macs have included USB ports. Through the USB port, equipment producers could make items perfectly with both x86 PCs and Macs.
On the other hand, the iPad is known to be one of the most influential tablets around the world. The iPad had created the entrance of the market for tablets. iPad can be used to do all the daily choirs that you do on your computer or your laptop. It is easier to use since the iPad's are very handy. The excellent speed and outstanding display quality have allowed Apple to lead the tablets industry since its start.
Now everyone wants an iPad. It's essential to know how to transfer your photos from iMac to iPad (or to transfer videos from Mac to iPhone or iPad), so you can bring and appreciate the loved moments anytime and anywhere.
Part 1. Transfer Photos from Mac to iPad Using Easy Way
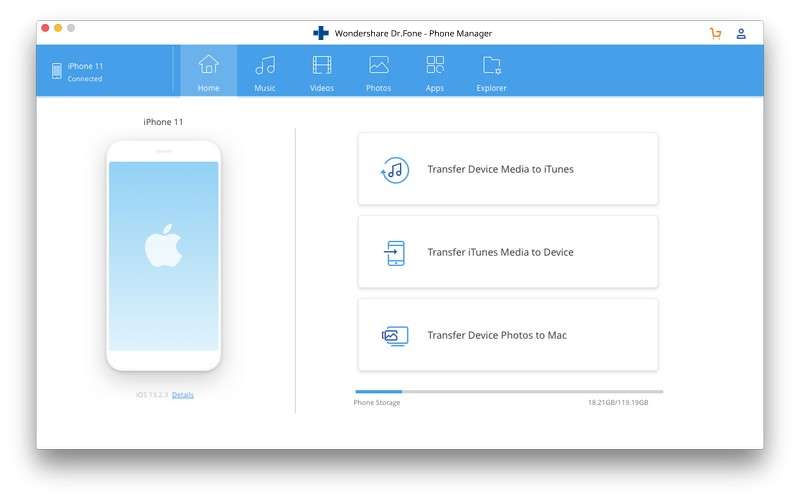
Now, are you ready to know another way to transfer photos from Mac to iPad? These days, due to the complicated steps from iTunes, third party tools appear to be the alternative options for users which is easier and fast. Dr.Fone - Phone Manager (iOS), as an example, is a renowned desktop software, which is an iTunes companion. Just as iTunes, it also enables you to transfer pictures from Mac to iPad. It even works better. Importantly, it won't remove any photos during the photo transfer.
Dr.Fone - Phone Manager (iOS)
Transfer MP3 to iPhone/iPad/iPod without iTunes
- Transfer, manage, export/import your music, photos, videos, contacts, SMS, Apps, etc.
- Backup your music, photos, videos, contacts, SMS, Apps, etc. to computer and restore them easily.
- Transfer music, photos, videos, contacts, messages, etc from one smartphone to another.
- Transfer media files between iOS devices and iTunes.
- Fully compatible with iOS 7, iOS 8, iOS 9, iOS 10, iOS 11, iOS 12, iOS 13 and iPod.
Step 1. Download and install the Mac iPad photo transfer
If you have a Windows-based PC, try the windows version to transfer photos from PC to iPad.
Step 2. Connect the iPad with your Mac via a USB cable. Dr.Fone - Phone Manager (iOS) will detect your iPad and display its info in the starting window.
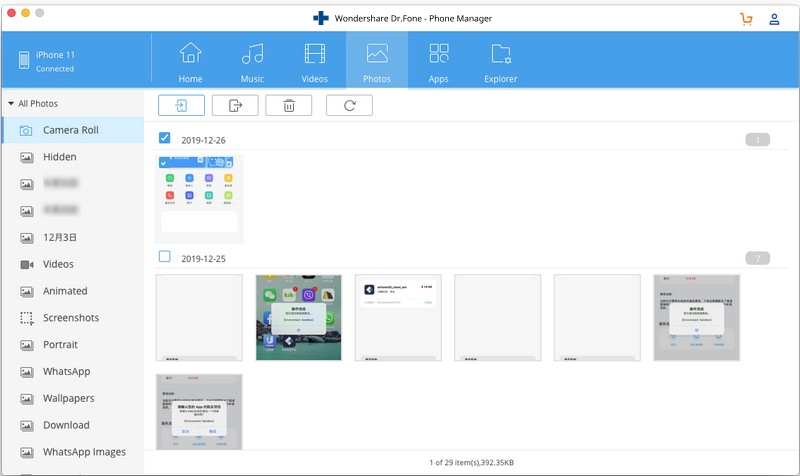
Step 3. Click "Photos" at the top of the main interface to reveal the Photo window. Then select Photo Library on the left sidebar, you can see the "Add" icon on the top of the window. Click it to browse your Mac computer for photos you want to transfer to the iPad. After finding them, select them, and click "Open". And then you'll see progress bars showing the transferring process.
Part 2. How to Use iTunes to Transfer Photos/Pictures from Mac to iPad
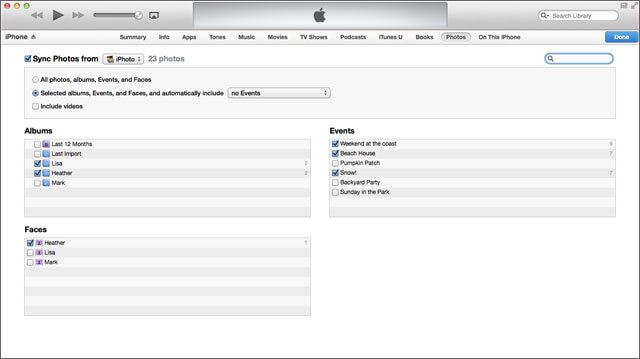
As you know, iTunes for Mac gives you the power to transfer photos from Mac to iPad. These pictures will be saved in the Photo Library. Before following this method, one thing you should be very clear, that is, iTunes will remove all existing photos when transferring photos to the iPad. Therefore, you'd better think twice whether you really want to transfer photos to iPad from Mac with iTunes.
Anyway, here is the tutorial. Let's have a look.
Step 1. Open iTunes on Mac and connect your iPad to Mac with a USB cable. Your iPad will be soon detected by iTunes and shown in iTune's primary window.

Step 2. Now click on the Photos tab which next to the location of the previous iPhone button.

Step 3. Tick Sync Photos and choose to sync all or selected photos. Then, go to the right lower corner and click Apply.
Part 3: 3 iPad Apps Help to Move Photos from Mac to iPad
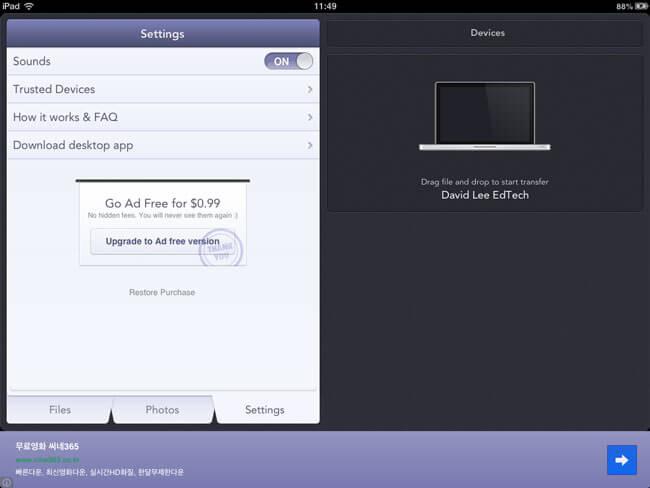
1. Photo Transfer App
The photo transfer app permits you to rapidly transfer photos between your iPhone, iPad, Mac, or PC utilizing your neighborhood WiFi network. It works on iOS 5.0 or later. It also helps you define what tasks they need to do first and what tasks can be done later, hence justifying its popularity around the world when it comes to filing sharing between devices and computer-like iMac and iPad.
Learn more about the photo transfer app here!
Follow the easy steps below to copy photos from Mac to iPad:
Step 1. Be sure that your iPad and your Mac are using the same WiFi network.
Step 2. Photo Transfer App needs to be run on your iPad first.
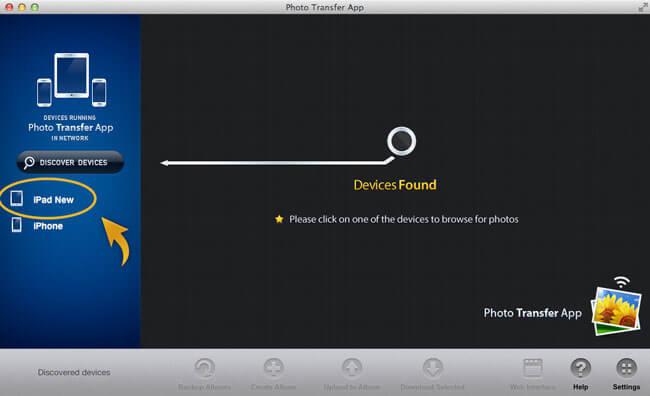
Step 3. Run the desktop Photo Transfer App on your Mac. After that, select the 'Discover Devices' button.

Step 4. Select the photos to transfer in the coming window.
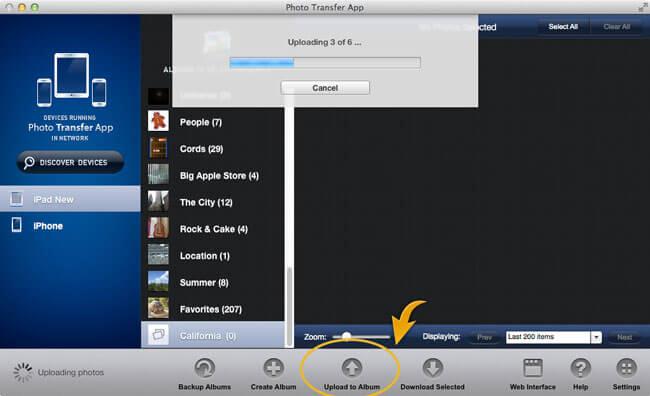
Step 5. Click the 'Upload to Album' button to start the transfer.

2. Dropbox
Dropbox is a record facilitating administration. Clients can use Dropbox to make an uncommon envelope on each of their laptops or computers. Dropbox provides a freemium plan for the users, where clients can have free usage with a limited size while paid memberships can have more storage. All fundamental clients are offered to begin 2 GB of free online storage room. Dropbox is widely used for photos and other files sharing on iPads. It allows storage up to 100GB for a specific amount with 99$ a year. This price is pretty reasonable for the services it provides.
Learn more about Dropbox here
Here are the steps to share your photos from iMac to iPad:
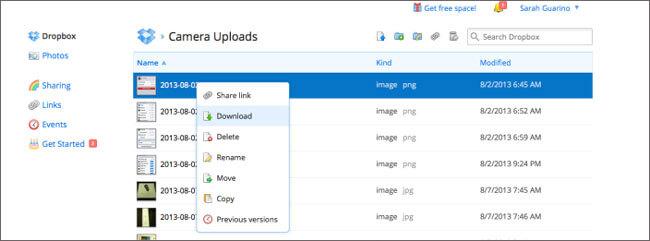
Step 1. Get Dropbox installed on your Mac.
Step 2. Launch Dropbox on your computer and choose the Public folder and drag-n-drop your photo files into it.
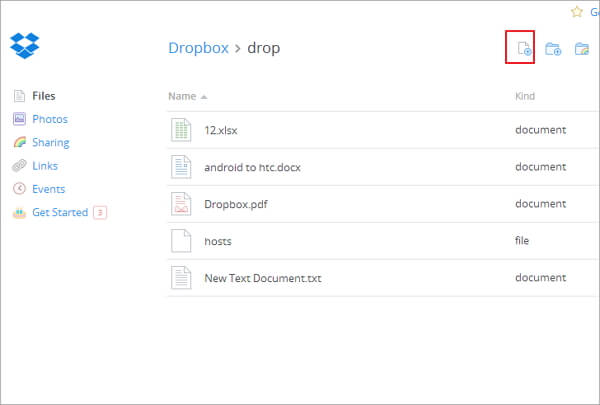
Step 3. Install Dropbox on your iPad and open the Public folder to download the photos.
Step 4. In this way, you can also transfer pictures from Macbook to iPad.
3. Instashare
With Instashare, you can easily download photos from Mac to iPad. It's compatible with iOS 5.1.1 or later. You don't have to join with the web page, simply utilize neighborhood WiFi or Bluetooth to do iPad photo transfer. You don't have to enter the email and password, instead, just run the app and transfer photos between Mac and iPad.
Learn more about Instashare here
It is very helpful to move photos from Mac to iPad through these steps:
Step 1. Install Instashare on your Macbook for transferring photos to iPad
Step 2. Install Instashare on your iPad.
Step 3. Drag photo into the iPad that shows up in your Instashare app.
Step 4. Click on 'Allow' to transfer the Photos.


iPad Tips & Tricks
- Make Use of iPad
- iPad Photo Transfer
- Transfer Music from iPad to iTunes
- Transfer Purchased Items from iPad to iTunes
- Delete iPad Duplicate Photos
- Download Music on iPad
- Use iPad as External Drive
- Transfer Data to iPad
- Transfer Photos from Computer to iPad
- Transfer MP4 to iPad
- Transfer Files from PC to iPad
- Transfer Photos from Mac to ipad
- Transfer Apps from iPad to iPad/iPhone
- Transfer Videos to iPad without iTunes
- Transfer Music from iPad to iPad
- Transfer Notes from iPhone to iPad
- Transfer iPad Data to PC/Mac
- Transfer Photos from iPad to Mac
- Transfer Photos from iPad to PC
- Transfer Books from iPad to Computer
- Transfer Apps from iPad to Computer
- Transfer Music from iPad to Computer
- Transfer PDF from iPad to PC
- Transfer Notes from iPad to Computer
- Transfer Files from iPad to PC
- Transfer Videos from iPad to Mac
- Transfer Videos from iPad to PC
- Sync iPad to New Computer
- Transfer iPad Data to External Storage
Selena Lee
chief Editor