How to Transfer MP4 to iPad?
Apr 27, 2022 • Filed to: iPhone Data Transfer Solutions • Proven solutions
I have downloaded many videos from website like YouTube, Facebook and I would like to put them on my iPad so I can watch them on iPad while travelling. Please advise, thanks.
iPad can support limited video formats, including .mp4, .mov and certain .avi extension. Nowadays majority of the devices usually support MP4 video files owing to its high quality and better features as compared to other video types. MP4 files are comparatively small in size but still maintain video quality. Many people will want to transfer MP4 to iPad for an enjoyment on the go, and this post will introduce the methods on how people can finish the task easily.
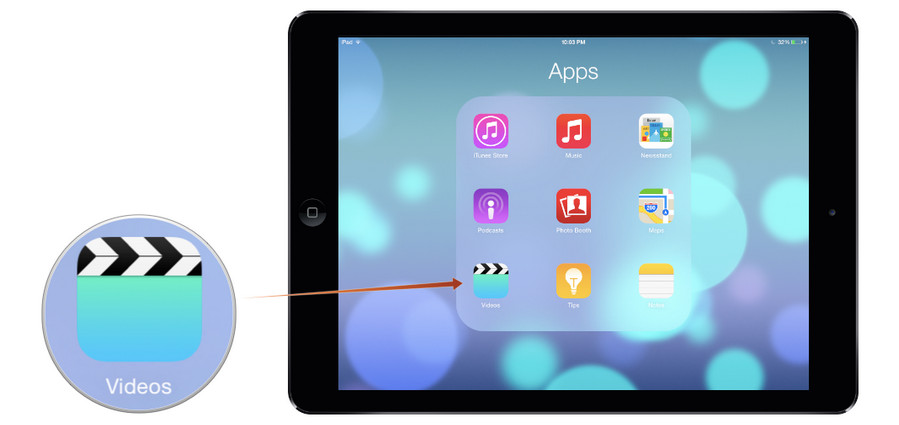
Part 1. Transfer MP4 to iPad without iTunes
If you are looking for an option to transfer MP4 to iPad without iTunes, A tool for iPad transfer is a perfect option for you! You can transfer MP4 to iPad with Dr.Fone - Phone Manager (iOS) directly with simple clicks.
Dr.Fone - Phone Manager (iOS) is a smart phone manager and iPad transfer program with which you can easily transfer videos, music, photos, playlists, contacts and more with no effort. Dr.Fone - Phone Manager (iOS) allows you to transfer files among iOS devices, iTunes and computers with ease. The iPad Transfer software does not only transfers media and other files from one computer to iPad, iPhone, iPod and Android, but also manage and organize the files on your device. You can also create your own playlists and add albums on your device and synchronize with all Apple devices. The following guide will show you how to transfer MP4 to iPad without iTunes.

Dr.Fone - Phone Manager (iOS)
Transfer MP4 to iPad/iPhone without iTunes
- Transfer, manage, export/import your music, photos, videos, contacts, SMS, Apps etc.
- Backup your music, photos, videos, contacts, SMS, Apps etc. to computer and restore them easily.
- Transfer music, photos, videos, contacts, messages, etc from one smartphone to another.
- Transfer media files between iOS devices and iTunes.
- Fully compatible with iOS 7, iOS 8, iOS 9, iOS 10, iOS 11 and iPod.
How to Transfer MP4 to iPad with Dr.Fone - Phone Manager (iOS)?
Step 1. Download and Install Dr.Fone
Download and install Dr.Fone on your computer, then start it. Choose "Phone Manager" from the primary window.

Step 2. Connect iPad to Transfer MP4 Videos
Connect iPad to computer with the USB cable, and the program will automatically recognize your iPad. Then you'll see the file categories at the top of the main interface.
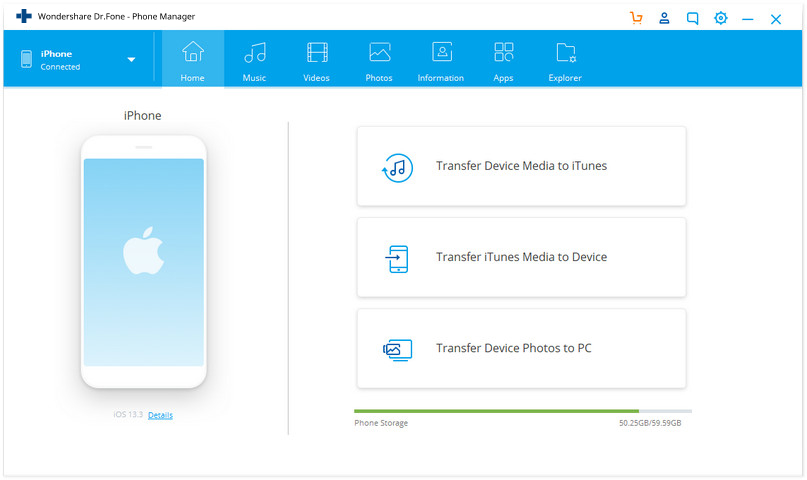
Step 3. Add MP4 Files to iPad
Choose Videos category, and you'll see the sections of different video files in the left sidebar, along with the contents in the right part. Now click the Add button in the software window, and select Add File or Add Folder to add MP4 videos from computer to your iPad.
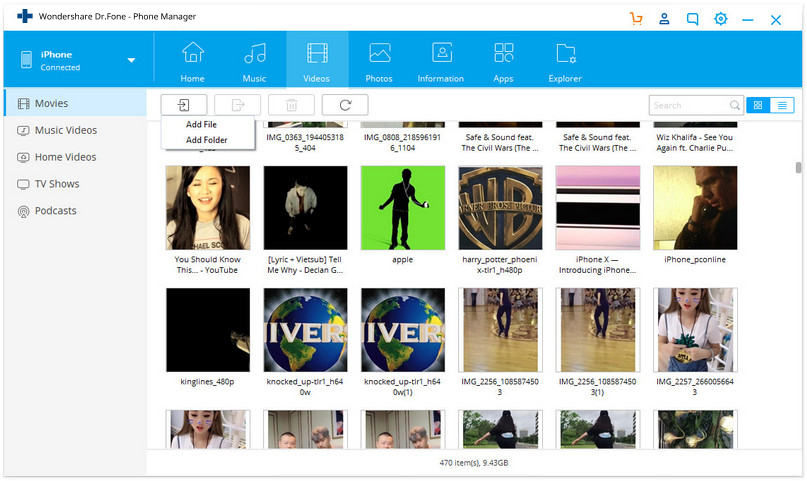
If you are going to transfer the video files which are not compatible with iPad, Dr.Fone will help you to convert then transfer the video files.
So that's it. Dr.Fone - Phone Manager (iOS) will help you to transfer MP4 to iPad within short time and maintain the original files in your iPad. Moreover, this program enables you to manage other media files on transfer files to your iPhone, iPad or iPod. If you are interested in this program, just free download it to have a try.
Part 2. Transfer MP4 to iPad with iTunes
You can easily transfer MP4 to iPad with iTunes. For the ones who have never tried this before may find it difficult to do with iTunes, but with a step-by-step guide you can easily transfer the videos. iTunes can play any video file format and you can easily transfer MP4 files from your PC or MAC to iPad. To transfer the files make sure you meet the following requirements.
What You Need:
- A Mac or PC with iTunes installed on it
- An iPad
- Compatible MP4 video files on your PC or Mac
- A USB cable to connect iPad to PC
Note: This guide will talk about syncing movies via USB cable. If you are using Wi-Fi transfer of iTunes, the USB cable is not necessary.
Transfer MP4 to iPad with iTunes
Step 1. Open iTunes
Install and open iTunes on your PC. If you are first time using iTunes, you need to log in with your Apple ID.
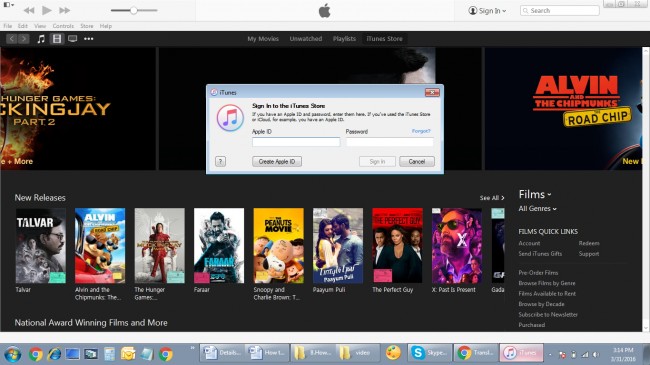
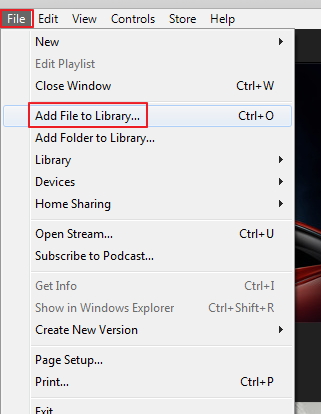
Step 2. Add MP4 Files to iTunes Library
Select File>Add File to Library and then select folder from where you wish to add MP4 file from your PC to iTunes and click Open.
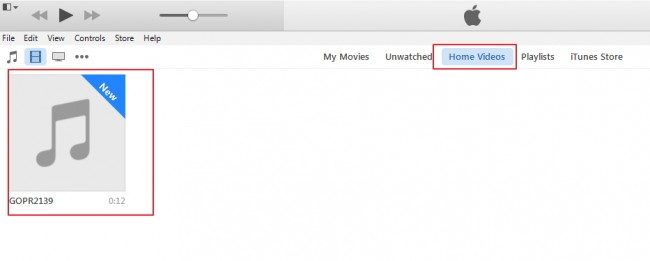
Step 3. File is Added to iTunes Library
The MP4 file will be added to iTunes Movie Library and you are able to view the added movies by choosing Movies category.
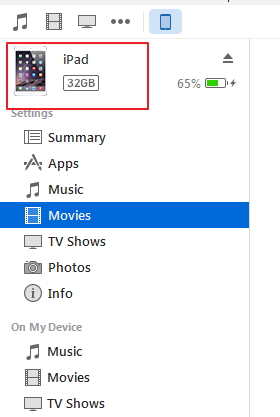
Step 4. Connect iPad to PC
Using the USB cable, connect iPad to PC and it will be visible in iTunes interface.
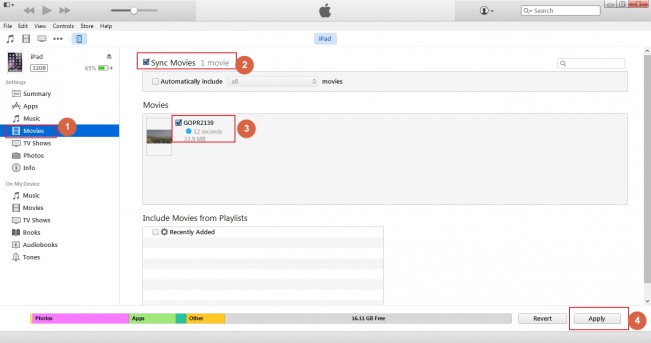
Step 5. Sync Movies
On left side panel under iPad, select the option of Movies and then check option of “Sync Movies” on the right hand side. Now select the movies that you wish to transfer to iPad and finally press “Apply”.
Step 6. Find Synced Video in iPad
The progress of the syncing will be visisble and the video will be transferred to iPad and you can check the video under “Videos” app on iPad from iTunes.

iPad Tips & Tricks
- Make Use of iPad
- iPad Photo Transfer
- Transfer Music from iPad to iTunes
- Transfer Purchased Items from iPad to iTunes
- Delete iPad Duplicate Photos
- Download Music on iPad
- Use iPad as External Drive
- Transfer Data to iPad
- Transfer Photos from Computer to iPad
- Transfer MP4 to iPad
- Transfer Files from PC to iPad
- Transfer Photos from Mac to ipad
- Transfer Apps from iPad to iPad/iPhone
- Transfer Videos to iPad without iTunes
- Transfer Music from iPad to iPad
- Transfer Notes from iPhone to iPad
- Transfer iPad Data to PC/Mac
- Transfer Photos from iPad to Mac
- Transfer Photos from iPad to PC
- Transfer Books from iPad to Computer
- Transfer Apps from iPad to Computer
- Transfer Music from iPad to Computer
- Transfer PDF from iPad to PC
- Transfer Notes from iPad to Computer
- Transfer Files from iPad to PC
- Transfer Videos from iPad to Mac
- Transfer Videos from iPad to PC
- Sync iPad to New Computer
- Transfer iPad Data to External Storage


James Davis
staff Editor