Mar 07, 2022 • Filed to: Backup Data between Phone & PC • Proven solutions
In today’s time we all are busy in our tight schedules with our devices in our hands with no security of the data inside it. To keep our data safe there are various methods to store them in the secondary storage, make their backups in the mobile itself, in drop box or by Google backup. The data mainly consists of the photos of any individual which means a lot to each one of us so to keep them secure.
Part 1: Copy and Paste Photos to PC
The basic idea is to keep it stored in the memory card which is the secondary storage device connected to our cell phones for expandable memory and which is removable. So , by storing the photos in it we can keep the pictures secure. It is the easiest way to keep our photos managed even if the mobile gets damaged and its data formats our important pictures are saved in the memory card and which can be restored in any device by connecting to it.
Steps to be followed
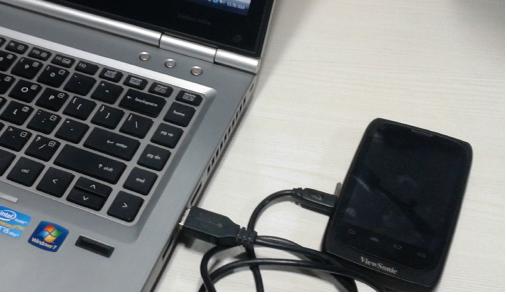
1. Plug your device to your system via USB.
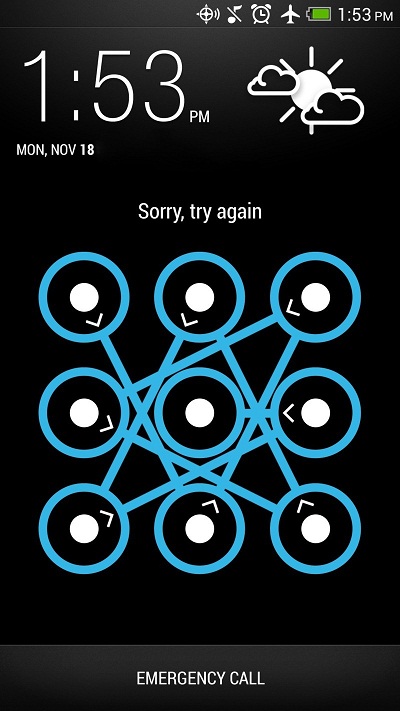
2. Unlock your android device
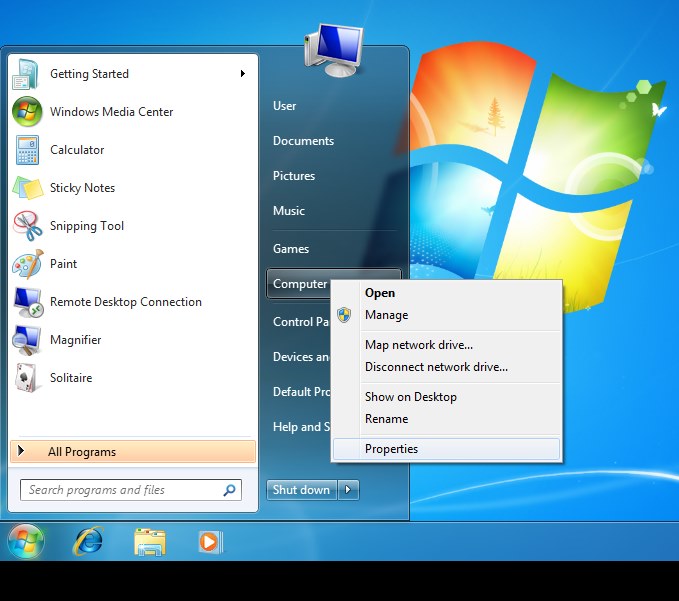
3. Open My Computer or can start my computer from start menu.
4. Double Click on your Android device from the list then double click on internal storage or SD card and select the file you want to transfer to your system. Drag the image and drop it in your system.
Part 2: Android Data Backup & Restore - Dr.Fone - Phone Backup (Android)
The other commonly used idea to protect the photos of anyone in an android set is by transferring the photos from the cell phone to the PC with the help of the Dr.Fone - Phone Backup (Android) software. It is an app with great results in the transfer of data and backup storage which enables the data transfer from android to PC which backups all data in just one click. It is one of the securest ways to backup the data and then restore it.

Dr.Fone - Phone Backup (Android)
Flexibly Backup and Restore Android Data
- Selectively backup Android data to computer with one click.
- Preview and restore backup to any Android devices.
- Supports 8000+ Android devices.
- There is no data lost during backup, export or restore.
How to backup Android photos with Dr.Fone - Phone Backup (Android)
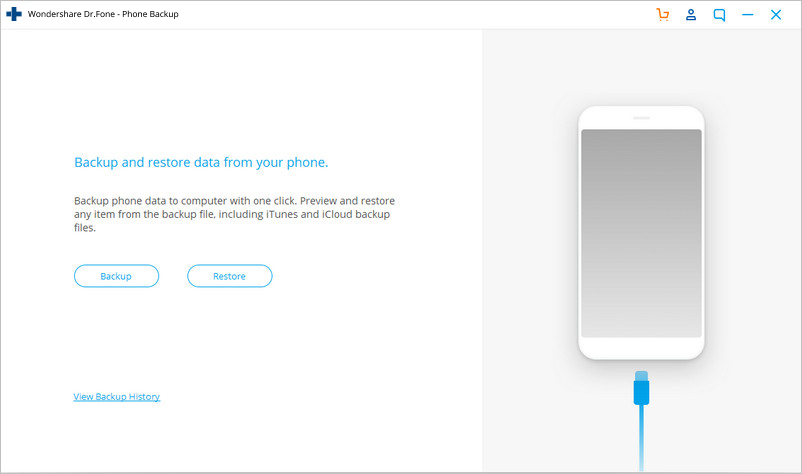
1. Install Dr. Fone into your system and connect your android device with it. Select Phone Backup. The message will appear on screen, device is connected. You can either select “Backup” or “Restore” option or also can see backup history while clicking on “View Backup History” at the bottom.
2. While selecting “Backup” option in step 1, all the files will display on the screen and you can select the file you need to backup. At the ends click on “Backup”.
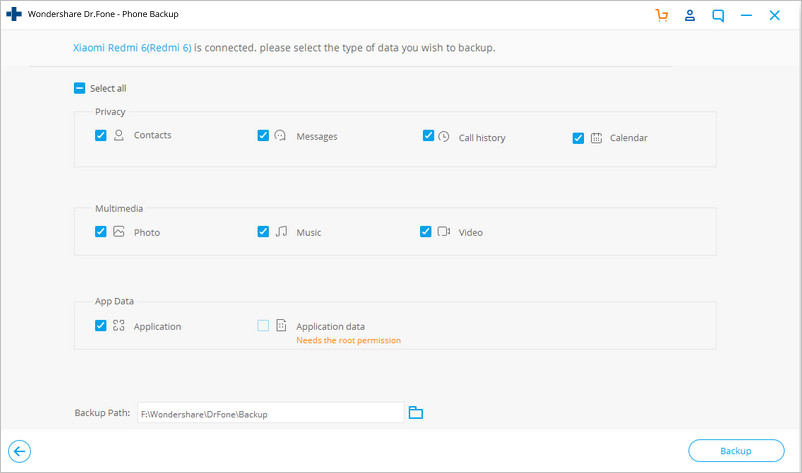
3. After step 2, software will start backing up those selected files while showing the types of files. You can click on “Cancel” button to cancel that backup.
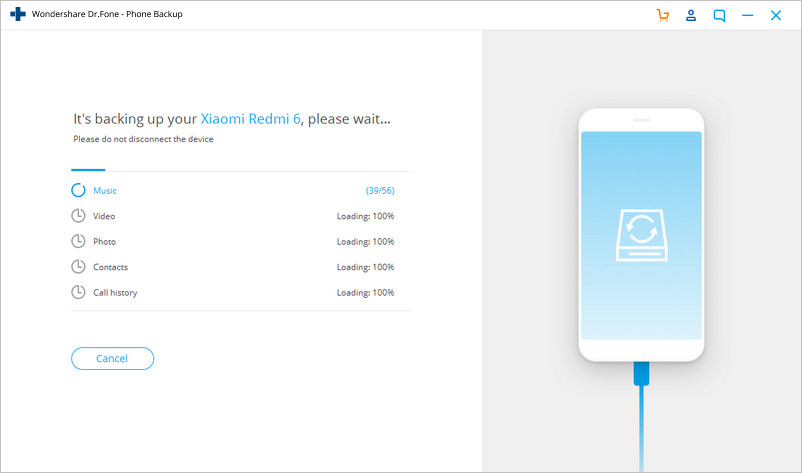
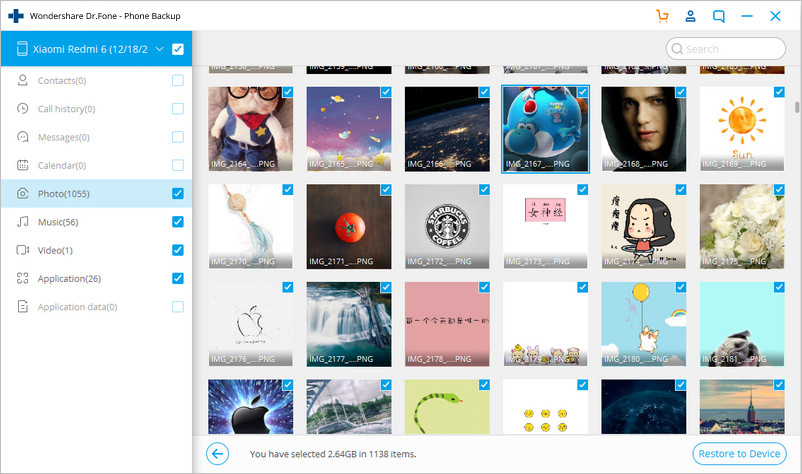
4. When backup will finished, the message will display on screen. and by clicking on “View the Backup” you can see all the files you require.
5. Now if you want to restore any file select “Restore”, in step 1. Select the files you want to restore to your device and click on "Restore to Device" button.
Part 3: Android Auto Backup
If you want to restore your data automatically you need to follow these steps.
1. Switch on your android device and tap “Menu” icon to open the list.
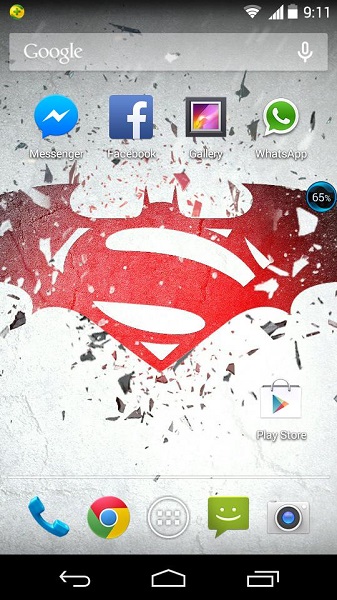
2. After step 1 select “Photos” icon and open Google+
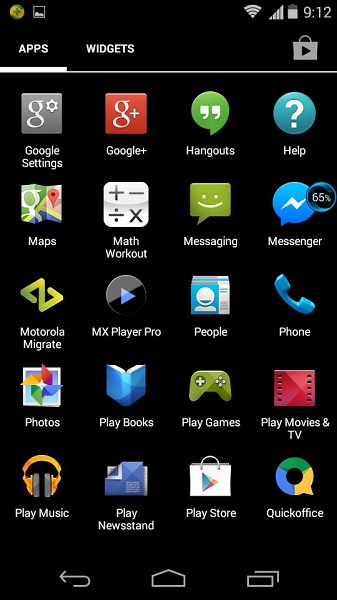
3. Now after step 2 select “Menu” icon on upper left corner.
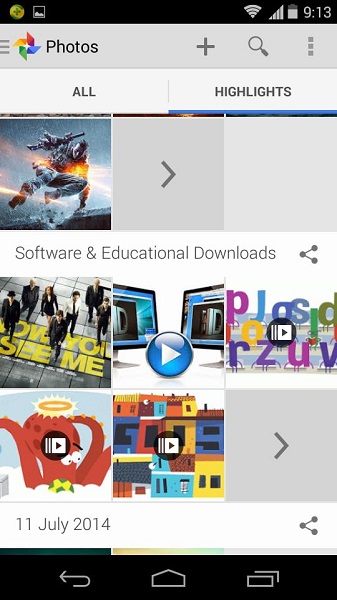
4. Select “Setting” from drop down and click on “Auto Backup”.
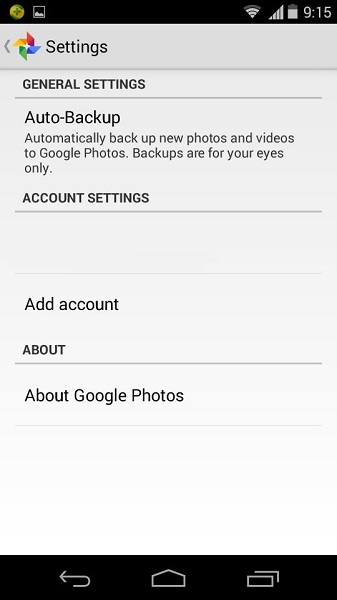
5. After step 4 you will notice your photos will automatically start backup process.
Part 4: Backup Android Photos with Drop Box
Having fear of losing data due to some device problem the one convenient solution to it is the Dropbox whose android app has a feature of camera uploads in its settings which directly backups and stores the videos and pictures of your android device to the Dropbox folder. Now, the pictures and videos will automatically get stored in the cloud. The steps to use Camera Upload in an Android are-:
1. Initially, download and install the latest version of Dropbox for the android device from Google Play Store. Now, if you have installed the app for the first time it will ask to set the settings of the Dropbox. Now make an account or click on “Sign Up”. If having account already then click on “Sign in”.

2. Further, enable the camera uploads which will automatically save the images and videos of your device by making a New Folder by the name of Camera Uploads in Dropbox. Or when you are logged in, click on “Photos” icon, Select the “Turn On” button to enabling the backup for picture.
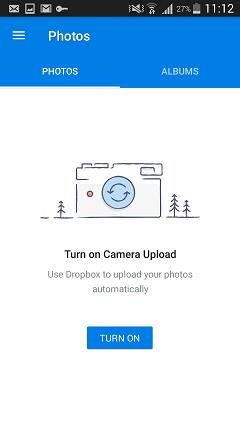
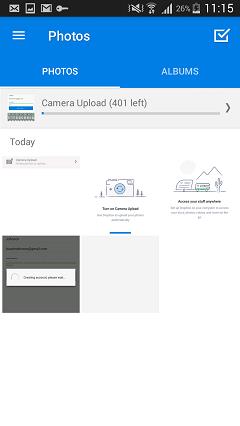
We only initially get 2 GB space to keep our data in Dropbox. It does not delete any type of data without user permission.
Part 5: Automatically Backup Android Photos with Google+
First of all, open the Google+ app, afterwards open the menu. Click on the settings on the right corner and click on Camera and Photos. Now, select Auto Backup and on it. Their either be an error received by the user which will be removed by giving way the access of Google+ to the user photos.
The Google+ is an auto backup with full security as the pictures stored by any user are stored always in private space of each. If user enables the Auto Backup, photos and videos automatically gets stored in Google+.
1. First you need to download Google Photos app from Google Play Store and download it into your device.
2. Install the app and create account, click “Sign in” to log in. After that click on “Settings” and turn on the “Backup & Sync” option.
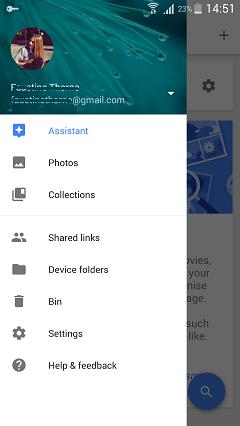
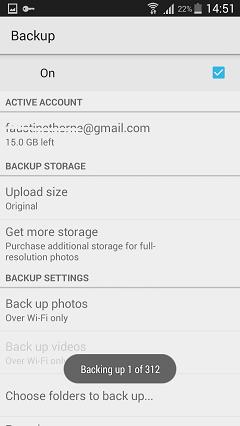
3. After 2nd step, click on “choose folder to backup”, where all picture files will store into your phone will appear in a list and select those you need to backup and the process will begin.
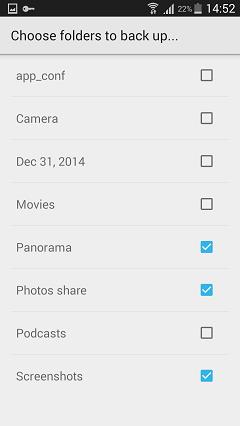
4. You can see all your backup images from your device while login into Google Photos
Part 6: Mobiletrans
Another best solution for this is Wondershare MobileTrans which is compatible to all the latest device. It is one click phone to computer backup and phone to phone transfer software. The main feature is that it is compatible for different kinds of operating systems.

MobileTrans Phone Transfer
Transfer contacts from Android to iPhone in 1 click!
- Easily transfer photos, videos, calendar, contacts, messages and music from Android to iPhone/iPad.
- Takes less than 10 minutes to finish.
- Enable to transfer from HTC, Samsung, Nokia, Motorola and more to iPhone 7/SE/6s (Plus)/6 Plus/5s/5c/5/4S/4/3GS that run iOS 10/9/8/7/6/5.
- Works perfectly with Apple, Samsung, HTC, LG, Sony, Google, HUAWEI, Motorola, ZTE, Nokia and more smartphones and tablets.
- Fully compatible with major providers like AT&T, Verizon, Sprint and T-Mobile.
- Fully compatible with Windows 10 or Mac 10.12
How to backup android photos to computer using mobiletrans:
Step 1
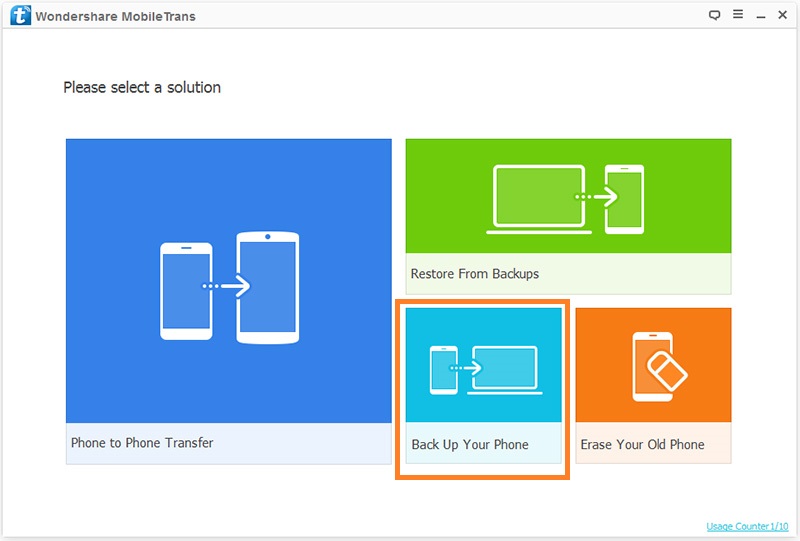
Download and install the Wondershare MobileTrans. Once program is installed launch it and connect mobile with computer using a cable and click on “Back up Your Phone” option.
Step 2
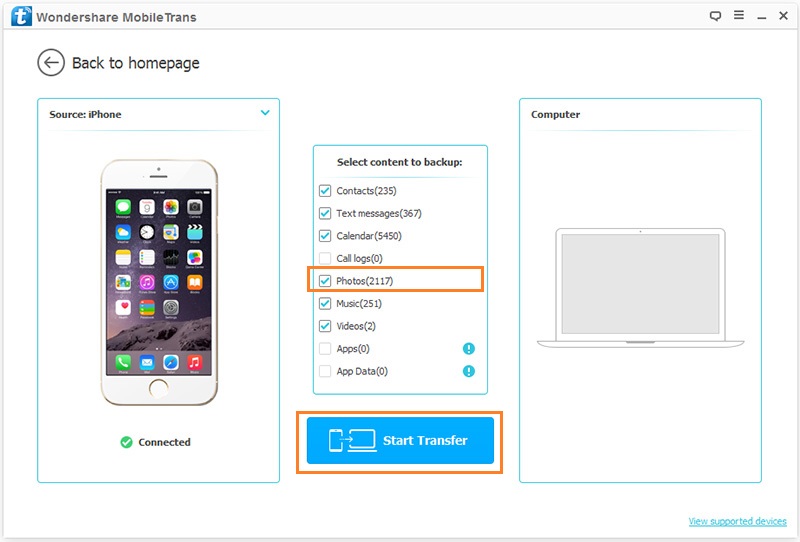
Mobiletrans will show you all available files on your mobile now. Select the Photos here and click on Start Transfer button under available files.
Step 3
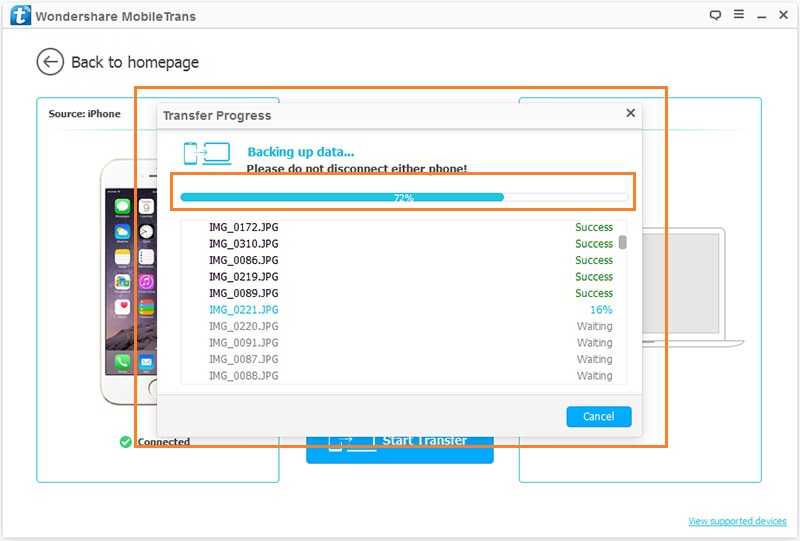
Program will start transferring files to computer now and finish it in some time depending on photos library size. You can see progress bar on the top. Please do no disconnect phone until transfer is completed.
Android Backup
- 1 Android Backup
- Android Backup Apps
- Android Backup Extractor
- Android App Backup
- Backup Android to PC
- Android Full Backup
- Android Backup Software
- Restore Android Phone
- Android SMS Backup
- Android Contacts Backup
- Android Backup Software
- Android Wi-Fi Password Backup
- Android SD Card Backup
- Android ROM Backup
- Android Bookmark Backup
- Backup Android to Mac
- Android Backup and Restore (3 Ways)
- 2 Samsung Backup


Alice MJ
staff Editor