Takeaways to Bypass Gmail Phone Verification
Apr 27, 2022 • Filed to: Bypass Google FRP • Proven solutions
Many-a-times we do not wish to feed in our contact details, especially our phone number to create a Gmail Account. Some people fear the possibility of getting hacked and others are not comfortable with sharing their phone numbers due to privacy issues. The task then seems impossible because at any given point of time you will be prompted to give your phone number along with other details to successfully set up your account.
Nonetheless, it is possible to bypass the Gmail Phone verification step while creating your Google Account. The methods listed in this article are very useful to bypass Gmail phone verification on your PC and Android phone as well. You will also learn about how to make a Gmail account without giving your real phone number.
Recommended FRP Bypass Tools to Bypass Google Account Verification: Samsung Reactivation/FRP Lock Removal Tools.
Part 1: Make a Gmail Account without Giving the Real Phone Number
Making a Gmail Account without giving the real phone number might seem like an impossible task because Google will time and again prompt you to feed your phone number and that too, a real one.
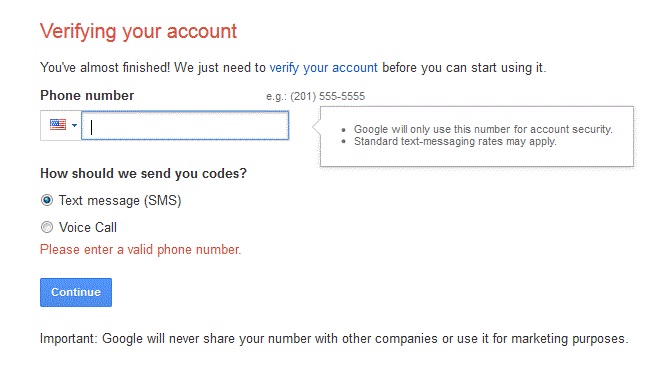
Yes, Google will recognize a fake/incorrect phone number and immediately ask you to verify it.
Nevertheless, BlueStucks player is one such software that helps to bypass the Gmail Phone verification step on the computer and enables us to make an Account without a real phone number. It requires 2GB space on RAM to function normally and is itself a 320MB emulator, giving you the feel of using a native Android on your computer. Please note that avoiding the phone number verification step on an Android-based smartphone is not a difficult task and hence can be skipped easily without the help of such third-party software.
The most recent BluStucks player version no longer supports such tasks but other ways can help you.
Part 2: How to Bypass Gmail Phone Verification on PC for PC Users
It is easy to bypass Gmail phone verification on the PC. The process does not take much of your time and creates your account without a real phone number. Follow the instruction given below to make a Gmail ID and Password without your phone number on the computer.
Run Google Chrome on the computer and wait for its main window to open.
Now navigate to its “Settings” and select the “Sign in to Chrome” option as shown in the screenshot below.
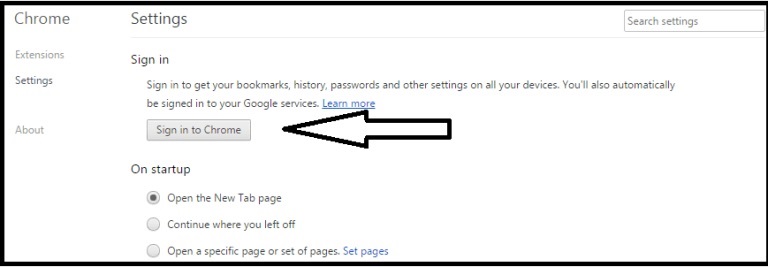
Note: if you are already logged in, do not forget to log out first.
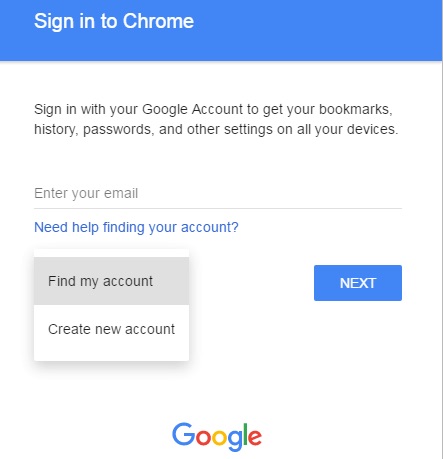
You will now see the “Sign in to Chrome” window open up on the computer’s screen. Here you are required to select “More” and then choose “Create new Account”.
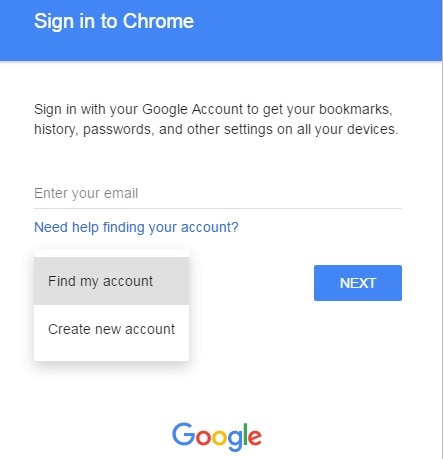
Finally, the signup page will open where you can feed in your full name, date of birth, and other details before clicking "Next".
Now type in a suitable username and password. Confirm the password if need be and then hit “Next”.
You will not see a window to feed in your contact number. Here, hit “Skip”.
Finally, agree to the terms and conditions by clicking on a small box and your Gmail Account will be created without a phone number.
You may also bypass Gmail Phone verification while setting up an account for your Android phone. Want to know how? Keep reading!
Part 3: How to Bypass Gmail Phone Verification on Android Mobile Phone For Phone Users
Many of us use Android smartphones and prefer keeping a Gmail account to backup all our data on to it. If you are looking for ways to bypass Gmail phone verification on your phone, here is what you need. Given below are two ways that will help you:
Method 1: Via Android Settings.
This method is suitable for Android phone users who wish to create an account but bypass the Gmail phone verification step. Follow the step-by-step instructions given below:
Visit “Settings” on your Android phone and scroll down to select “Accounts” in the “General” option.
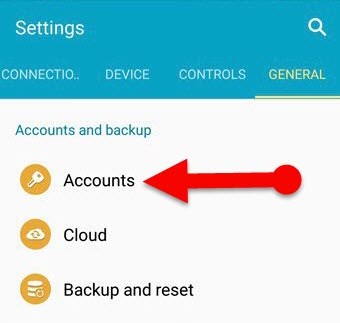
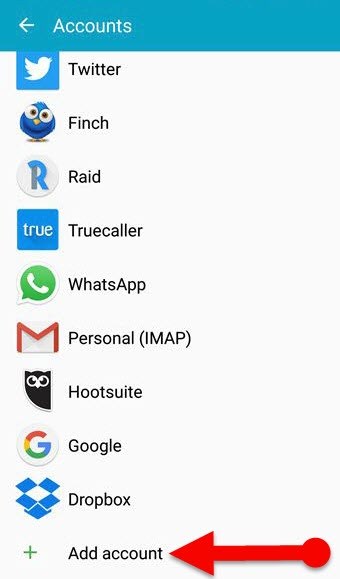
Now select “Add Account” option and from the list that opens before you, choose “Google Account” and move ahead.
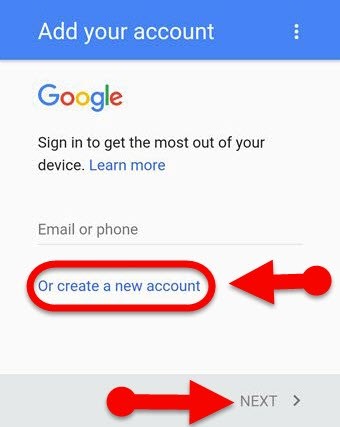
You will now see the “Add your account” screen. Here you are required to select “Or create a new account”.
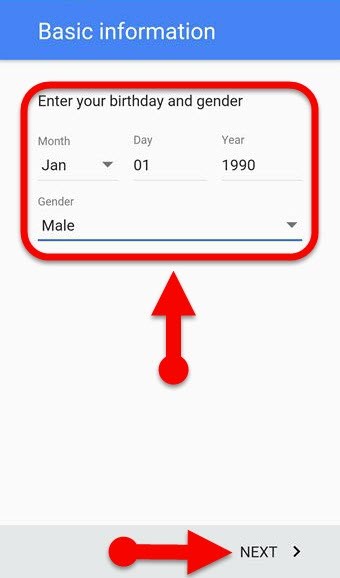
Fill in your details correctly and hit “Next” as shown in the screenshot below.
You will now be required to type in a suitable username for logging in in the future. Do so and hit “Next”.
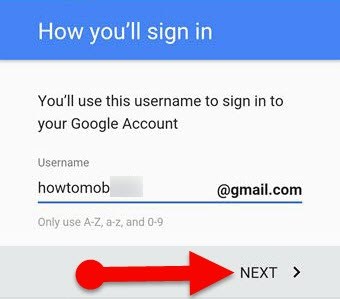
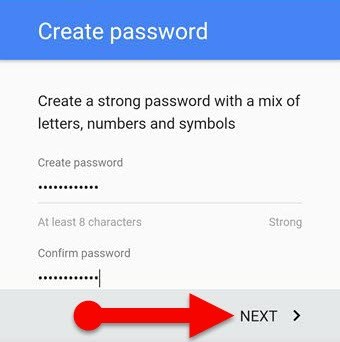
In this step, you will be asked to create a strong password. Follow the instruction on the screen to do so before hitting “Next”.
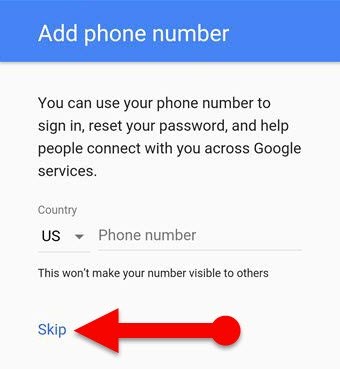
Finally, the “Add phone number” screen will appear. Here, do not enter your contact details and simply hit “Skip”.
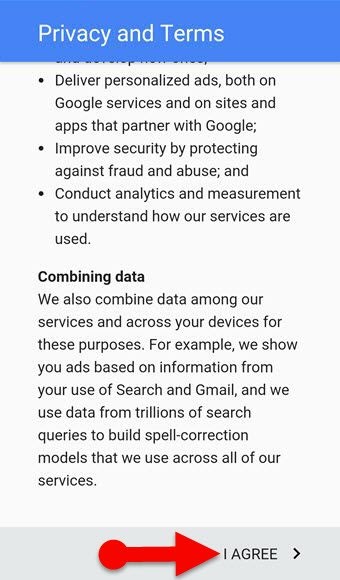
Select “I Agree” on the next window that opens before you to successfully create your Gmail ID and Password without a phone number.
Method 2: Via Google Sign up Page.
This method can also be regarded as a technique to befool Google by feeding in an incorrect date of birth. All you need to do is:
Visit the Google Sign Up web page on the Chrome browser.
Now feed in all your details accurately until you reach the DOB field.
Herein, submit your date of birth as 15 or younger to give the impression that you are too young to own a phone.
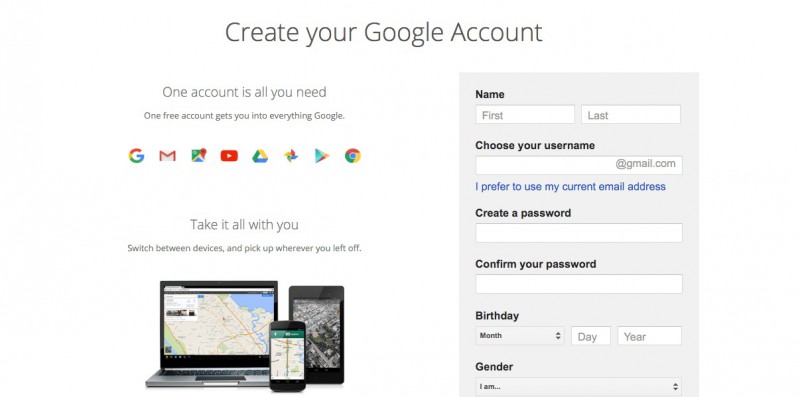
Now hit “Next Step” and follow the instructions on the screen to set your account without feeding in your phone number.
Simple, isn't it? These were a few ways to bypass Gmail phone verification on your PC and Android phone.
Method 3: Via Dr.Fone [Recommend].
Next, we will recommend Dr.Fone-Screen Unlock, a really effective and convenient solution. This software could help bypass Google FRP on Samsung devices with ease. Let me introduce more about it!
- It provides solution for users who doesn’t know the system version of their devices.
- It will teach you step by step.
- The whole process only needs a few minutes.
No matter which Android system your phone uses, or even you don't know the OS version of your tool, the first few steps are the same.
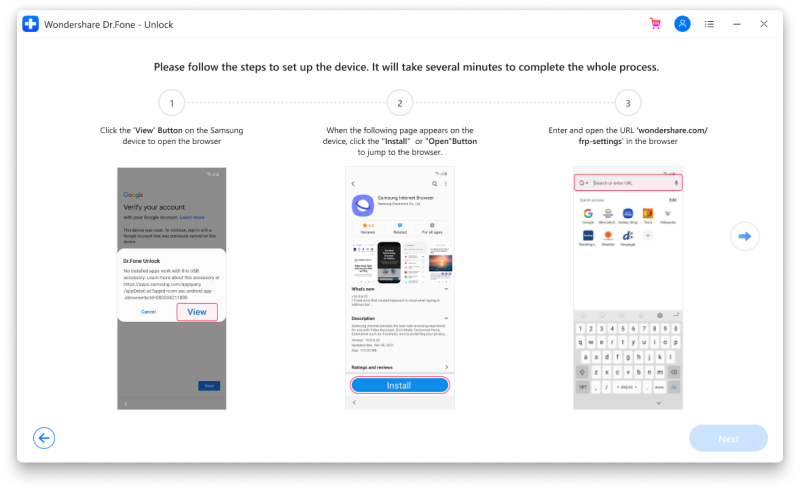
Step 1: Connect your phone to Wi-Fi and choose “Screen Unlock” on Dr.Fone. Then tap "Unlock Android Screen/FRP".
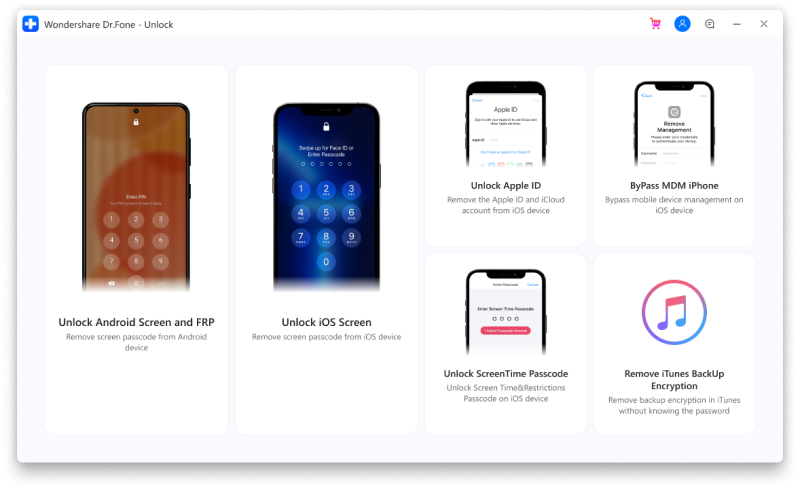
Step 2: Connect your tool with computer and click on "Remove Google FRP Lock".
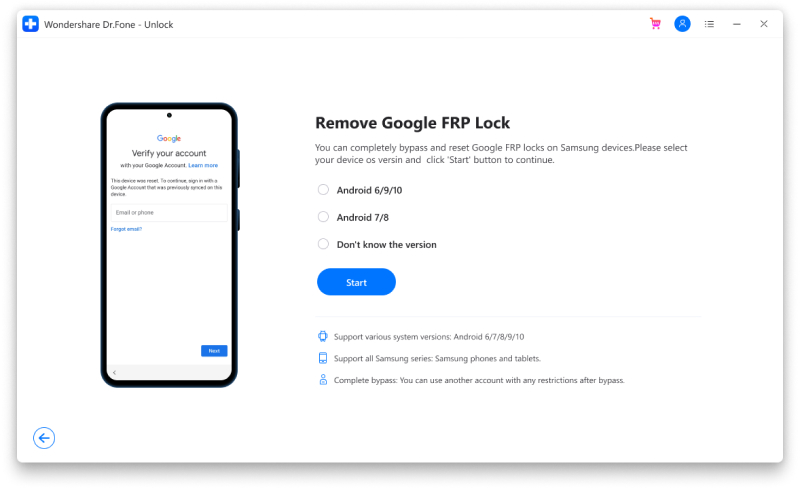
Step 3: If your Samsung tool uses Android6/9/10, you could choose the first button and you will receive a notification on your phone.
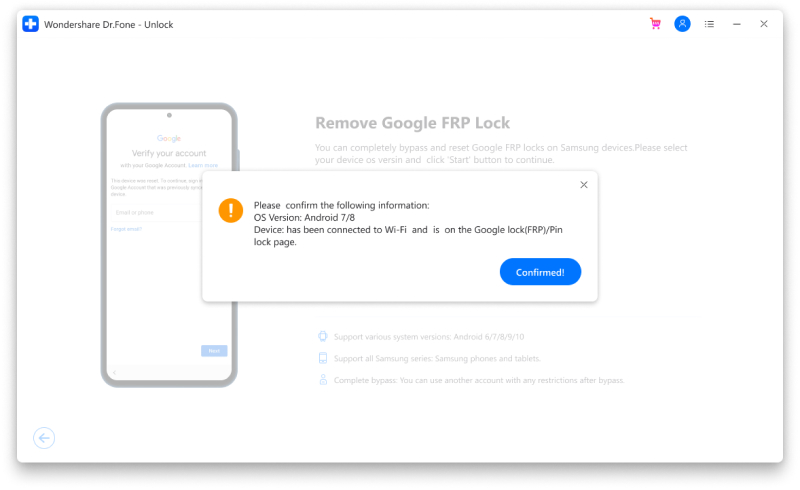
Step 4: Check and follow the notification and the steps to remove FRP. Tap "View" to go ahead. And that will guide you to the Samsung App Store. Next, install or open the Samsung Internet Browser. Then, enter and redirect the URL "drfonetoolkit.com" in the browser.
Step 5: Click "Android6/9/10", "Open Settings" and "Pin" one after another.
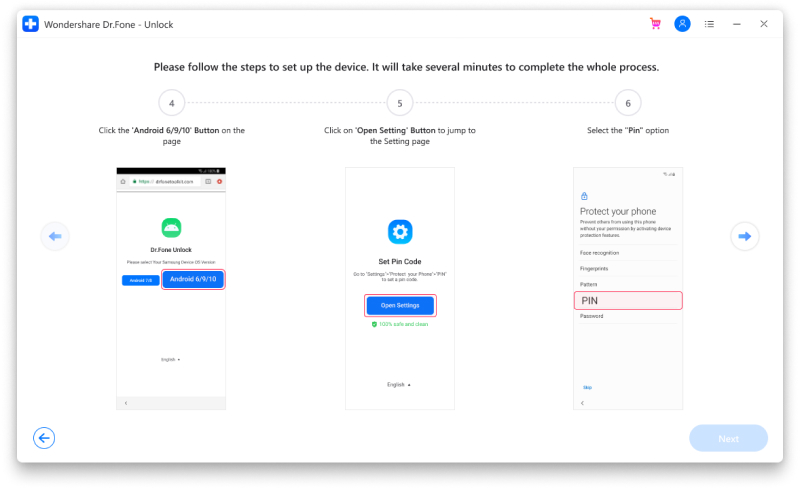
Now, you just need to follow the instructions on your phone screen and you will bypass Google account quickly. If you are not sure of your phone version because you bought a second-hand phone and cannot contact the buyer, or you are using Android 7/8, the guide page in our website will provide more information for you!
Conclusion
It is not impossible to create a Gmail account without a phone number. All you need to do is follow the steps given above to bypass Gmail phone verification and your Gmail account will be ready in no time. Please remember to register a recovery e-mail ID after you have created an account without verifying your contact number to not get any prompts to do so in the future. So what are you waiting for? Simply, use these tips to avoid submitting your phone number to try to make a new Gmail ID and Password today!
Bypass FRP
- Android Bypass
- 1. Disable Factory Reset Protection (FRP) for Both iPhone and Android
- 2. Best Way to Bypass Google Account Verification After Reset
- 3. 9 FRP Bypass Tools to Bypass Google Account
- 4. Bypass Factory Reset on Android
- 5. Bypass Samsung Google Account Verification
- 6. Bypass Gmail Phone Verification
- 7. Solve Custom Binary Blocked
- iPhone Bypass


James Davis
staff Editor