Android enjamlaryndan suratlary nädip pozmaly?
Mar 07, 2022 • Filed to: Erase Phone Data • Proven solutions
Almost everyone uses Android smartphones and most of the Android devices these days come with a camera. In fact, to be frank, no one these days is ready to buy a smartphone without cameras, because everyone loves to keep their memories alive by taking pictures and videos while living in the moment. We document our lives right from our birth, through adulthood, to old age by taking photos and videos. Hence, photos do the best in preserving all our memories through good and bad times. But have you ever lost all those treasured photos of yours, if not, can you imagine how you would feel if you were to lose them accidentally? It would shatter our heart into a million pieces. Memories once lost cannot be retrieved very easily. That is why it is important to keep backups of your pictures and videos. And, backups have to be done every now and then to avoid losing any photos or videos. While having photos in your smartphone will help you recollect your memories whenever you want, you may face a situation in which you may have to delete those photos permanently from your device. For instance, a very personal picture that you do not want anyone to see, must be deleted permanently and knowing how to delete photos from Android will help you do that. When you are planning to give away your Android device, you cannot risk your photos being recovered by others. Hence it is important to know how to delete photos from Android.
Thus, in this article today, we will learn how to backup and also how to delete photos from Android.
Part 1: Backup Photos to Google Drive and Delete Photos on Android
This is an age where we take thousands and thousands of pictures of our lovely moments with our family and friends during our lifetime. Given that Android devices come with two cameras, one of them for selfies, we click many pictures of ourselves too. However, to fit them all in our Android devices, even with the increased memory of the devices these days, can be a bit challenging. Still, we cannot afford to lose any of them. That’s when, creating backups of these photos comes in handy. While you can always use a hard disk or pen drive to create backups, you would have to carry them with you all the time to have immediate access to the photos saved in it. Also, there is a chance of them being lost or getting stolen, and that you would never want. Therefore, saving photos on a cloud based service is the best of all options for creating backups as they can be accessed anywhere and everywhere whenever you need.
Google Drive is an excellent choice for this and is free to use for most part. If you are going to delete photos from Android devices, go ahead and create a backup in Google Drive first. Here are the simple steps to achieve that easily.
Step 1: Download Google Drive on your device
Go to Play Store and download the Google Drive application. Install and open it on your Android device and set up your Google Drive by linking it with your preferred email id.
Step 2: Select the “Upload” option
Once the account is set up and ready to use, tap on the Red Plus icon at the right bottom of the screen. In the pop-up that appears, tap on the “Upload” option.
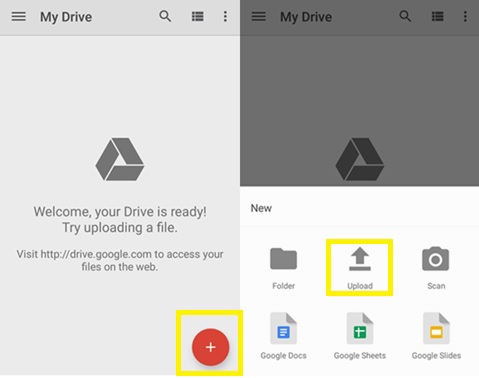
Step 3: Select files for uploading
Now, select all the files you wish to upload to Google Drive for backups. You can navigate between different folders of your Android device by selecting the folder from the left side of the screen.
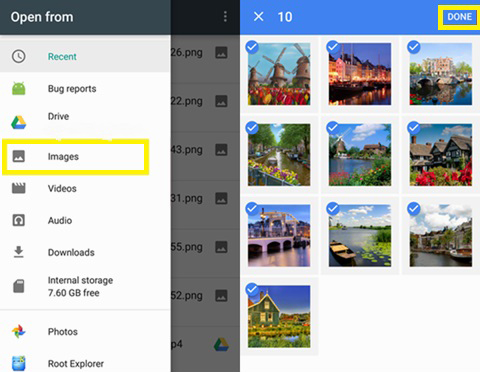
After selecting all the necessary photos tap on “DONE” option in the top right corner of the screen.
Now all the files you selected for backup will be uploaded and saved to in your Google Drive account. You can now proceed to the next section to learn how to delete photo from Android and delete photos from Android.
Part 2: How to delete photos on Android permanently without recovery?
Suratlaryňyzy Google Drive-a ýükläniňizden soň, Dr.Fone - Data Eraser (Android) ulanyp, enjamyňyzdan hemişelik pozup bilersiňiz. . Android Data Eraser is a great tool that will help you erase everything on an Android device permanently and leave behind a phone that has the settings of a brand new device. However, using Dr.Fone Android Data Erase toolkit will delete all the information from your device permanently and they cannot be recovered. Now, to avoid losing other data, you must create a backup of all the information stored on your Android device beforehand. You can third-party apps to make a backup or even transfer all the other data to your computer. Alternatively, you can create a backup by using external storage devices like hard disks and USB flash drives. After you have ensured that you have backed up all the important details on your smartphone, you can delete photos from Android.

Dr.Fone - Data Eraser (Android)
Fully Erase Everything on Android and Protect Your Privacy
- Simple, click-through process.
- Wipe your Android completely and permanently.
- Erase photos, contacts, messages, call logs and all private data.
- Supports all Android devices available in the market.
Here are the steps on how to delete photo from Android.
Step 1: Launch Dr.Fone toolkit
Download the latest version of Dr.Fone toolkit and install it on your computer. Launch the program on your PC by double-clicking on the shortcut icon. Select the “Android Data Eraser” toolkit among all the other toolkits.

Step 2: Connect your Android device and the PC
Using an original USB cable, connect your Android device to the computer. USB debugging must be enabled in the smartphone for erasing the data in it. For versions of Android above 4.2.2, a pop message will appear. Tap on “OK”.
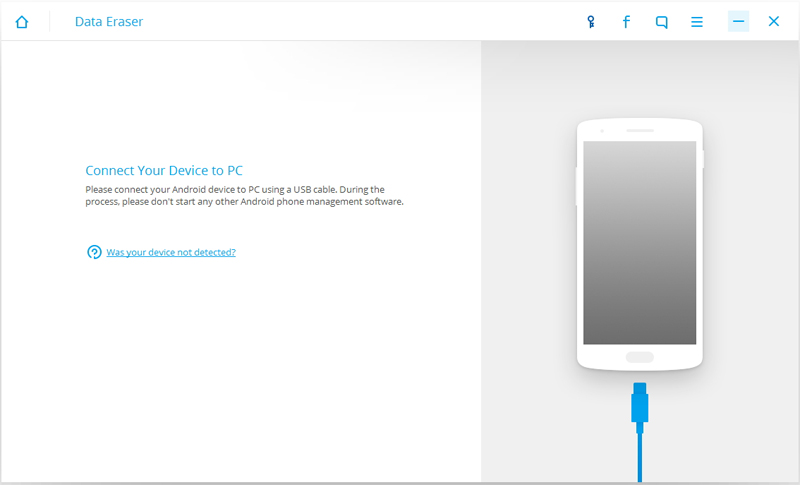
Step 3: Erase all the data
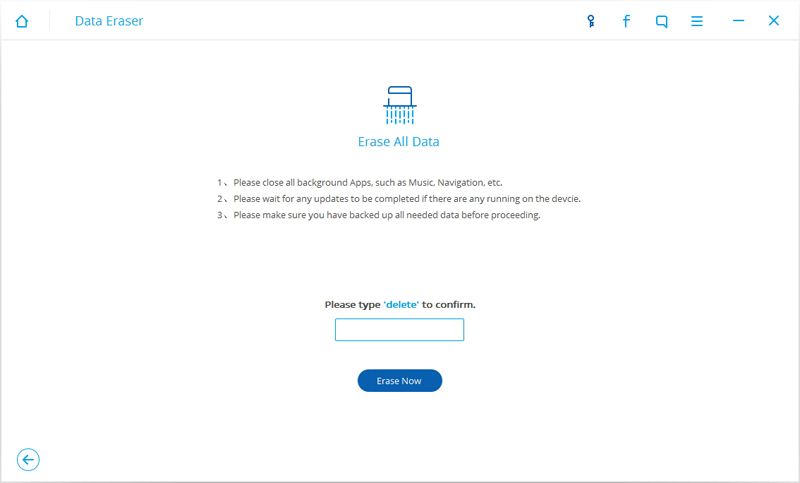
Iki enjam birikdirilenden soň “Datahli maglumatlary pozuň” düwmesi peýda bolar. Smartfonyňyzdaky ähli maglumatlary pozup başlamak üçin onuň üstüne basyň.
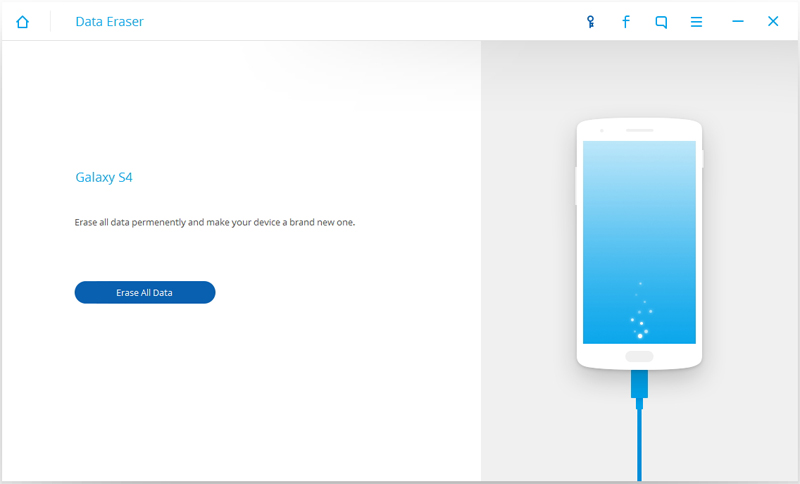
Görkezilýän tekst gutusyna “pozmak” sözüni girizip, pozmak prosesini tassyklamaly. Indi enjamyňyzdan ähli maglumatlary hemişelik ýok etmek üçin “Indi pozuň” düwmesine basyň.
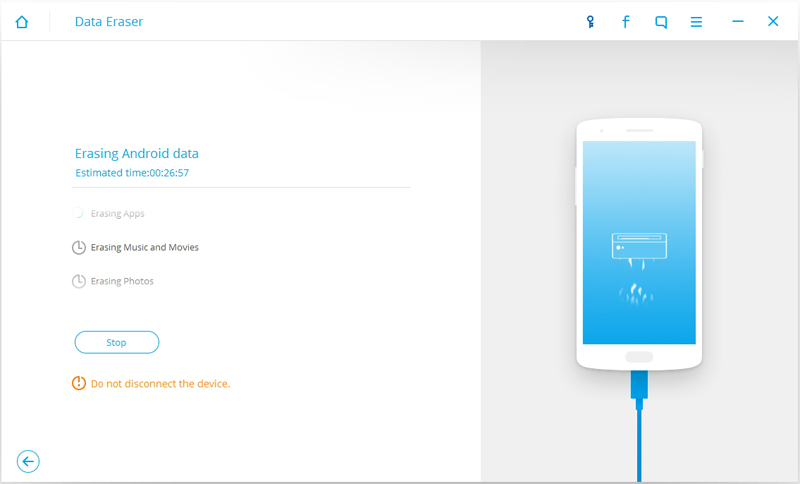
Amal dowam edýärkä, enjamy aýyrmaň.
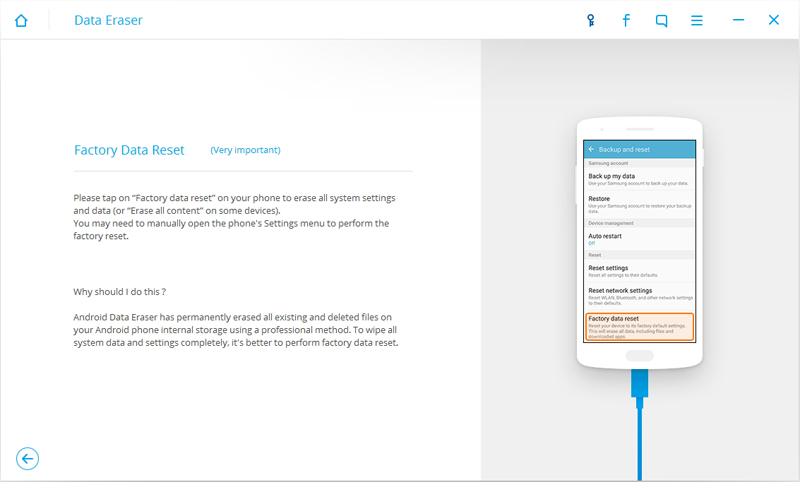
4-nji ädim: Smartfonyňyzy zawod sazlamalaryna täzeden düzüň.
After all the data is erased, Dr.Fone program will ask you to do a Factory Data Reset on your Android device. Tap on “Factory Data Reset” or “Erase All Data” on your smartphone.
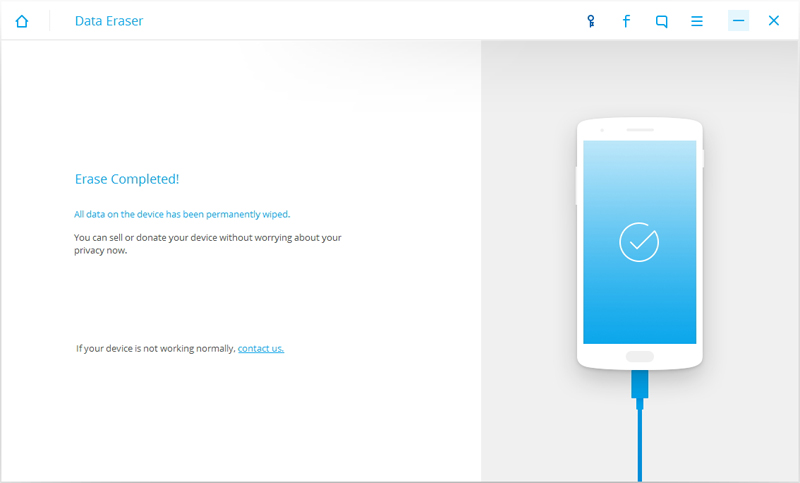
Now your Android device is all cleared up and has the settings of a brand new device.
Thus, this is the solution for how to delete photos from Android easily and that too permanently using the Android Data Eraser toolkit. However, you must keep in mind that along with the photos, all other data stored in the Android device will also be lost. Hence it is important to make sure that you have all the data backed up before jumping into the deletion process.
Telefony pozuň
- 1. “iPhone” -y süpüriň
- 1.1 “iPhone” -y hemişelik süpüriň
- 1.2 Satmazdan ozal iPhone süpüriň
- 1.3 “iPhone” -y formatlaň
- 1.4 Satmazdan ozal “iPad” -y süpüriň
- 1.5 Uzakdan süpürmek iPhone
- 2. “iPhone” -y pozuň
- 2.1 “iPhone” jaň taryhyny pozuň
- 2.2 “iPhone” senenamasyny pozuň
- 2.3 “iPhone” -yň taryhyny pozuň
- 2.4 “iPad” e-poçtalaryny pozuň
- 2.5 iPhone habarlaryny hemişelik pozuň
- 2.6 “iPad” taryhyny hemişelik pozuň
- 2.7 “iPhone Voicemail” -ni pozuň
- 2.8 “iPhone” aragatnaşyklaryny pozuň
- 2.9 iPhone suratlaryny pozuň
- 2.10 iMessages-i pozuň
- 2.11 Aýdym-sazy iPhone-dan pozuň
- 2.12 “iPhone” programmalaryny pozuň
- 2.13 “iPhone” belliklerini pozuň
- 2.14 iPhone beýleki maglumatlary pozuň
- 2.15 iPhone resminamalaryny we maglumatlary pozuň
- 2.16 “iPad” -dan filmleri pozuň
- 3. “iPhone” -y pozuň
- 3.1 Conthli mazmuny we sazlamalary pozuň
- 3.2 Satmazdan ozal “iPad” -y pozuň
- 3.3 Iň oňat iPhone maglumatlary pozmak programma üpjünçiligi
- 4. “iPhone” -y arassalaň
- 4.3 “iPod touch” -y arassalaň
- 4.4 “iPhone” -da gutapjyklary arassalaň
- 4.5 “iPhone” keşini arassalaň
- 4.6 Iň ýokary iPhone arassalaýjylary
- 4.7 “iPhone” ammaryny boşadyň
- 4.8 iPhone-da e-poçta hasaplaryny pozuň
- 4.9 “iPhone” -y çaltlaşdyryň
- 5. “Android” -i arassalaň / süpüriň
- 5.1 Android Keşini arassalaň
- 5.2 Keş bölümini süpüriň
- 5.3 Android suratlaryny pozuň
- 5.4 Satmazdan ozal Android-i süpüriň
- 5.5 Samsung-ny süpüriň
- 5.6 Android-i uzakdan süpüriň
- 5.7 Iň ýokary Android güýçlendirijileri
- 5.8 Iň ýokary Android arassalaýjylary
- 5.9 Android taryhyny pozuň
- 5.10 Android tekst habarlaryny pozuň
- 5.11 Iň oňat Android arassalaýyş programmalary


Elisa MJ
işgär redaktory