How to Recover Contacts, SMS, Photos from Samsung S8/S8 Edge?
Apr 28, 2022 • Filed to: Tips for Different Android Models • Proven solutions
Samsung is back with its latest offering of S8 and S8 Edge. It is one of the biggest smartphone manufacturers in the world and has certainly taken a huge leap with its flagship device. Samsung S8 is packed with plenty of high-end features and is sure to take the smartphone market by a storm. The device has been recently launched and if you are a proud owner of it, then you have come to the right place.
An Android phone can be crashed due to plenty of reasons. You might end up losing your data due to a faulty update or even a hardware malfunction. In this guide, we will let you know how to perform Samsung S8 data recovery. This will make sure that you won’t lose your entire data in the future by recovering it back even after a crash.
Part 1: Tips for successful Samsung S8 data recovery
Just like any other Android smartphone, Samsung S8 is quite vulnerable to security threats and malware. Though, it has a pretty good firewall, but your data can get corrupted due to plenty of reasons. Ideally, you should always take a timely backup of your data to avoid losing it entirely. If you already have its backup, then you can just recover it, whenever needed.
Nevertheless, even if you haven’t taken its backup recently, you can still perform the needed steps in order to perform Samsung S8 data recovery. These suggestions will help you to recover your data in an ideal manner.
• When you delete a file from your Android phone, it doesn’t actually get deleted at first. It remains intact as long as something else gets overwritten on that space. Therefore, if you have just deleted an important file, don’t wait anymore or download anything else. Your phone might allocate its space to the newly downloaded data. The sooner you run recovery software, the better results you would get.
• While you can always recover data from your phone’s memory, there are times when even an SD card can get corrupt as well. When a part of your data gets corrupted, don’t jump into conclusion. Take out the SD card of your device and then analyze whether it is the card, the phone memory, or both of these sources that you need to recover.
• There are plenty of Samsung S8 data recovery applications that are out there. Though, not all of them are quite effective. You should always use a reliable software to perform the recovery operation to get fruitful results.
• The recovery process might change from one device to another. Most of the times, you can recover data files like contacts, messages, photos, audios, videos, in-app data, documents, and more. While selecting a recovery software, make sure it has a good track record and provides a way to recover different types of data.
Now when you know what are the things you need to take care of before running a recovery software, let’s process and learn how to recover data from a Samsung device.
Part 2: Recover data from Samsung S8/S8 Edge with Android Data Recovery
Android Data Recovery is one of the most reliable data recovery applications out there. It is a part of the Dr.Fone toolkit and provides a secure way to recover data files from an Android device. Already compatible with more than 6000 devices, it runs on both Windows and Mac. With it, you can easily recover different kinds of data files like call logs, messages, videos, photos, audios, documents, and a lot more. It can help you retrieve files from your phone’s internal memory as well as an SD card.
The application comes with a 30-day free trial and provides a way to perform flexible and safe recovery. You can always download it from its official website right here. If you need to perform Samsung S8 data recovery with Dr.Fone’s Android Data Recovery, then you need to follow these steps. To make things easier for you, we have divided the tutorial into three parts.

Dr.Fone toolkit- Android Data Recovery
World's 1st Android smartphone and tablet recovery software.
- Recover Android data by scanning your Android phone & tablet directly.
- Preview and selectively recover what you want from your Android phone & tablet.
- Supports various file types, including WhatsApp,Messages & Contacts & Photos & Videos & Audio & Document.
- Supports 6000+ Android Device Models & Various Android OS.
I: For Windows Users
1. To start with, launch the Dr.Fone interface on your Windows system and choose the option of “Data Recovery” from the list.

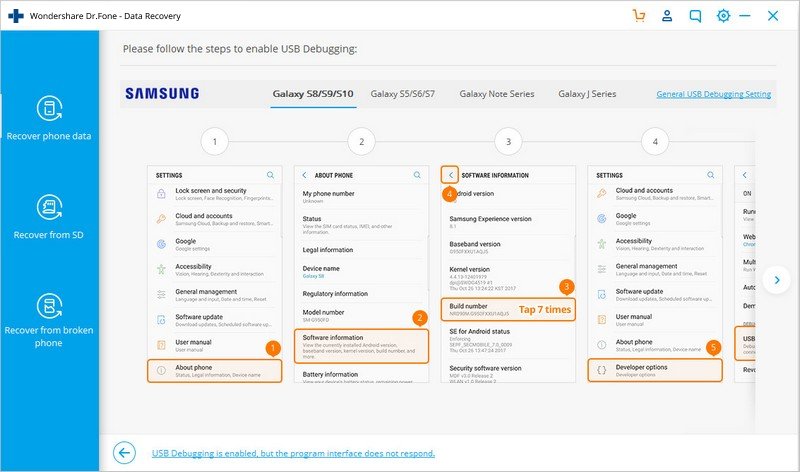
2. Before you connect your Samsung device, make sure that you have enabled the USB Debugging feature. To do so, you need to enable “Developers Options” by visiting Settings > About Phone and tapping the “Build Number” feature seven times. Now, just visit Settings > Developer Options and enable the feature of USB Debugging.
3. Now, connect your device to your system using a USB cable. If you get a pop-up message regarding the USB Debugging permission, then simply agree to it
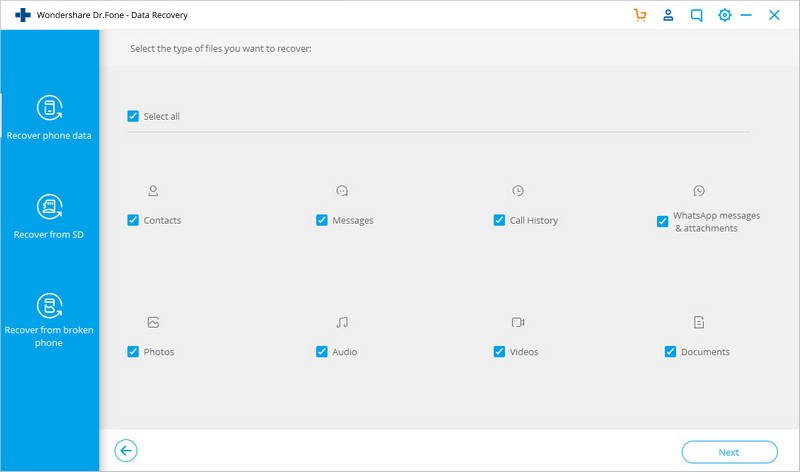
4. Let the interface automatically detect your device. You would be asked to select the type of files you want to recover. Just make your selections and click on the “Next” button.
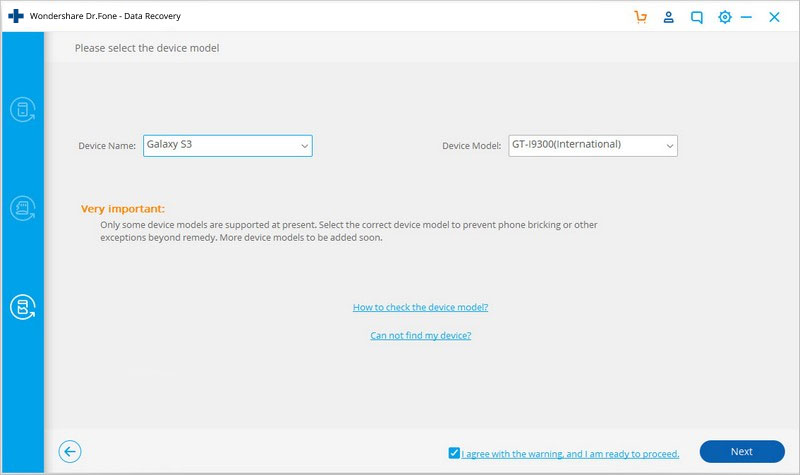
5. The interface will ask you to select a mode for the Samsung S8 data recovery process. We recommend using the “Standard Mode” to get ideal results. After making your selection, click on the “Start” button to initiate the process.
6. Give the application some time as it will analyze your phone and try to recover the lost data. If you get a Superuser authorization prompt on your device, then simply agree to it.

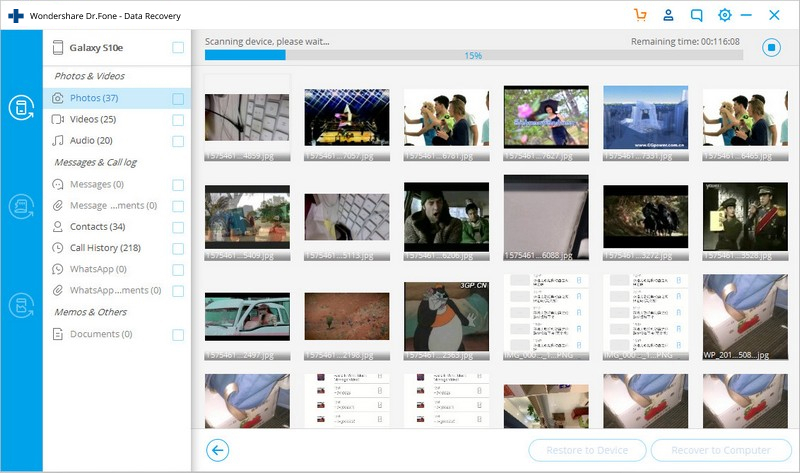
7. The interface will display different types of data that it was able to recover from your device. Just select the data you want to recover and click on the “Recover” button to get it back.
II: SD Card Data Recovery
1. After launching the interface, select the Data Recovery toolkit option and go for the Android SD Card Data Recovery feature. Afterward, connect your SD card to the system (with a card reader or the Android device itself).
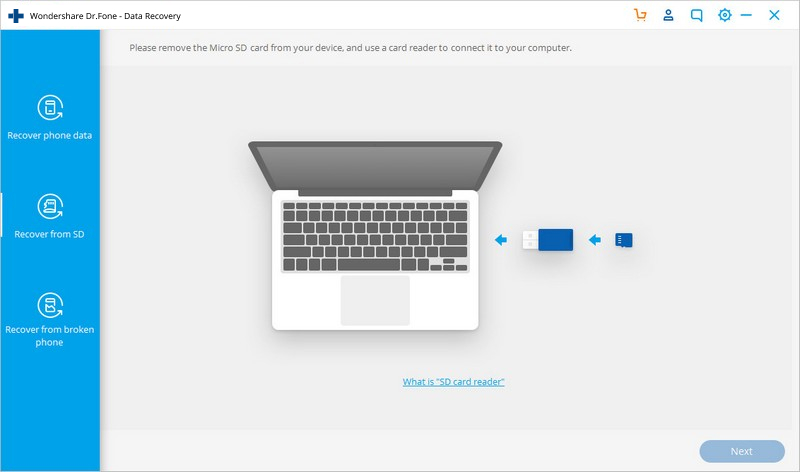
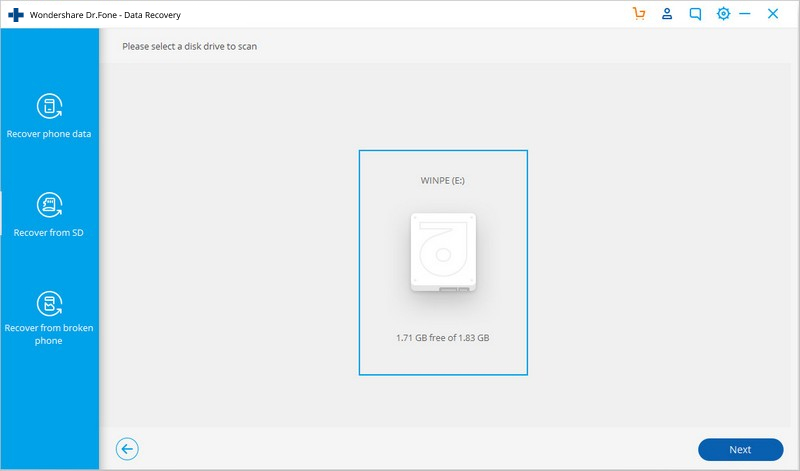
2. The interface will automatically detect your SD card. Click on “Next” to continue.
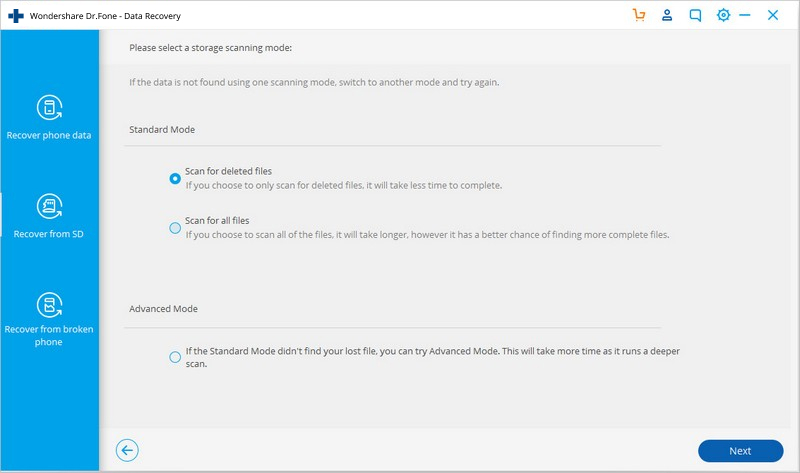
3. You would be asked to select a mode for the recovery process. You can initially choose the standard mode. If you don’t get desirable results, then you can try the advanced mode afterward. After making your selection, click on the “Next” button.
4. Give the application some time as it will try to recover the lost files from the SD card.
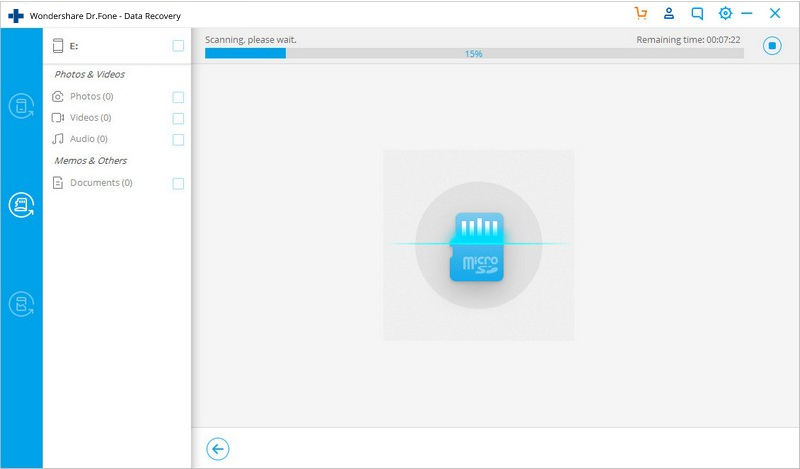
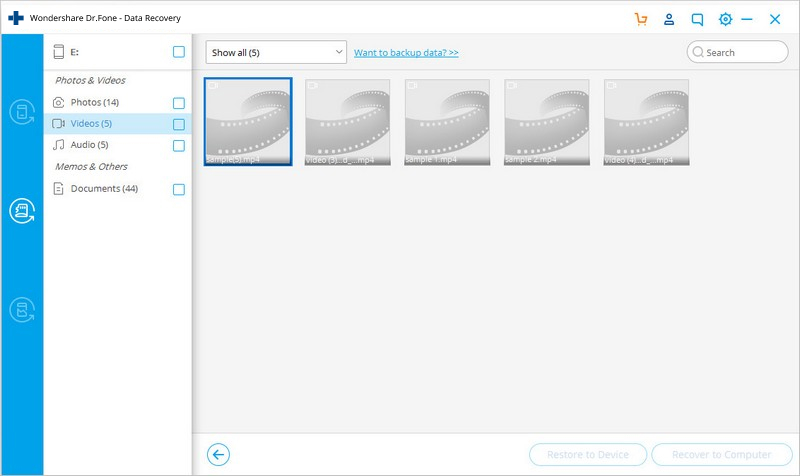
5. After a while, it will display the files that it was able to recover from the SD card. Simply select the files that you want back and click on the “Recover” button.


Selena Lee
chief Editor