[Easy] How to Screenshot iPhone 12/11/XR/8/7/6?
Apr 27, 2022 • Filed to: Mirror Phone Solutions • Proven solutions
iPhones are best known for their advanced technology. Isn’t it?. But the thing that makes them unique is their state-of-the-art sensors, cameras, Bionic chips, and displays. This is why photos and screenshots on iPhone have no match. But how to screenshot on iPhone 12, 11, X, or so on is what makes all the difference. Now you might be wondering what is the best way to do it? Well, keep on reading to find the one.
Part 1: How to Screenshot iPhone using MirrorGo?
Wondershare MirrorGo for iOS is one of the advanced tools to control your iPhone from the computer itself. It can also record your iPhone’s screen besides mirroring. You only need a Wi-Fi connection to connect them together. But if you are wondering that’s it. You need to reconsider. You can also take screenshots using MirroGo. The screenshots will be stored on your PC and that too at your chosen path.
So are you excited about using this feature to get some of the best screenshots?

MirrorGo - iOS Screen Capture
Here we go then.
Step 1: Launch MirrorGo.Download the latest and compatible version of MirrorGo, install it, and launch it.
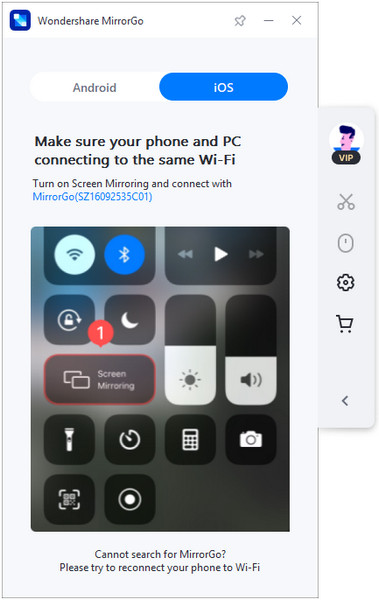
Once installed successfully, connect your iPhone and PC with the same Wi-Fi network for mirroring. Once they are connected, slide down the screen of your iPhone and choose “MirrorGo”. It will be under “Screen Mirroring
By the way, If you fail to find the MirrorGo option, you have to disconnect the Wi-Fi and have to reconnect it.
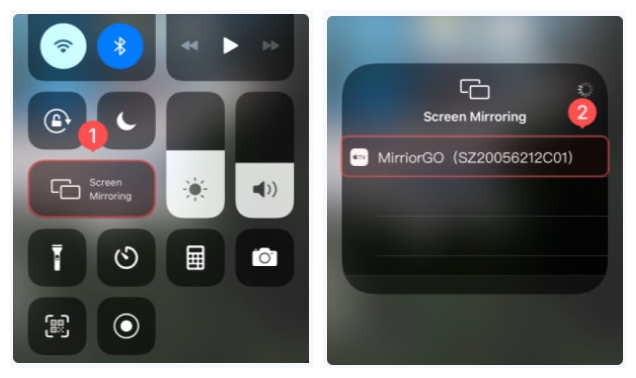
Once the screen is mirrored successfully, you will find your iPhone’s screen on the PC.
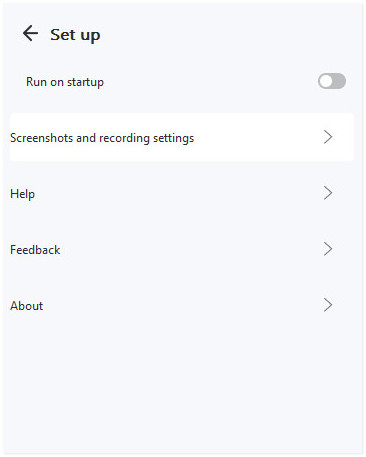
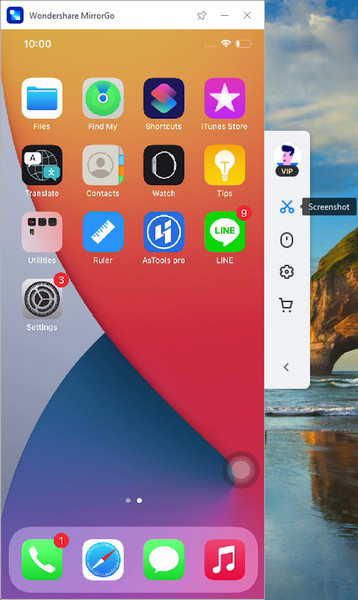
Step 3: Select the PathSelect the saving path where you want to save your screenshots. For this click on the “Settings” and go to “Screenshots and recording settings”.
You will see the option “Save to”. Guide the path and all taken screenshots will be stored at the selected location.
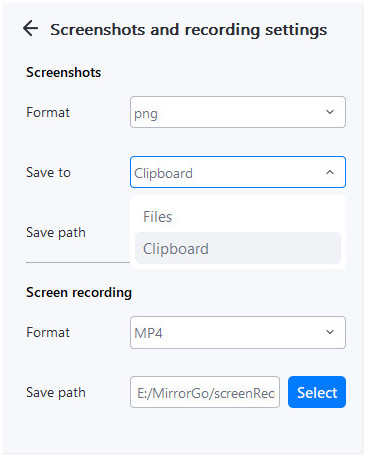
Now all you need to do is to take a screenshot and it will be stored on the selected location on the local drive. You can also paste it directly to another place or on the clipboard after tapping on the screenshot.
Teil 2. How to Screenshot on different iPhone Models with Physical buttons? (12/11/XR/8/7/6)
If you are wondering how to screenshot on iPhone 11, 12, or even older models like XR, 8, 7, or 6 then you can easily do so using the physical buttons. You need not use the screen for the same. You can easily do so by using a combination of buttons for different models.
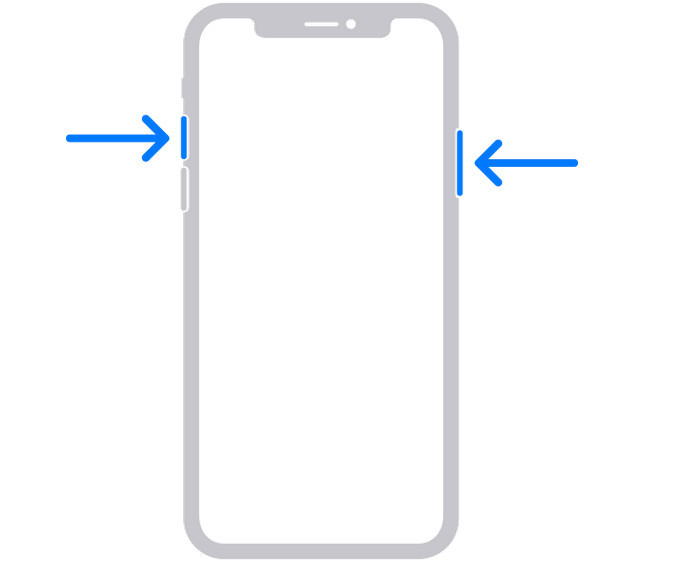
How to go for a Screenshot on iPhone models with Face ID
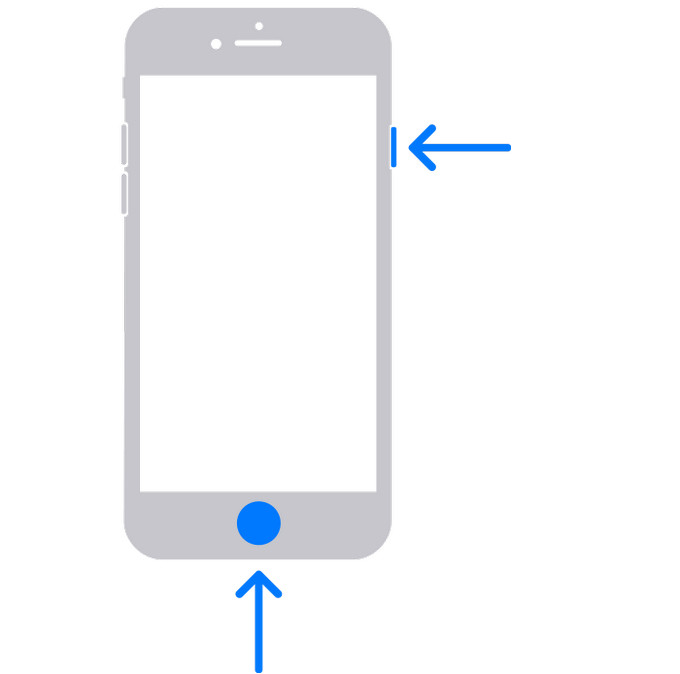
How to go for a Screenshot on iPhone models with Touch ID and Side Button
Press the side button and Home button together. Once pressed, quickly release them. Once the screenshot is taken you will see a temporary thumbnail on the lower-left corner of your iPhone’s screen. All you need to do is to tap the thumbnail to open it. You can also go with swiping to the left to dismiss it. In this case, you can view it later.
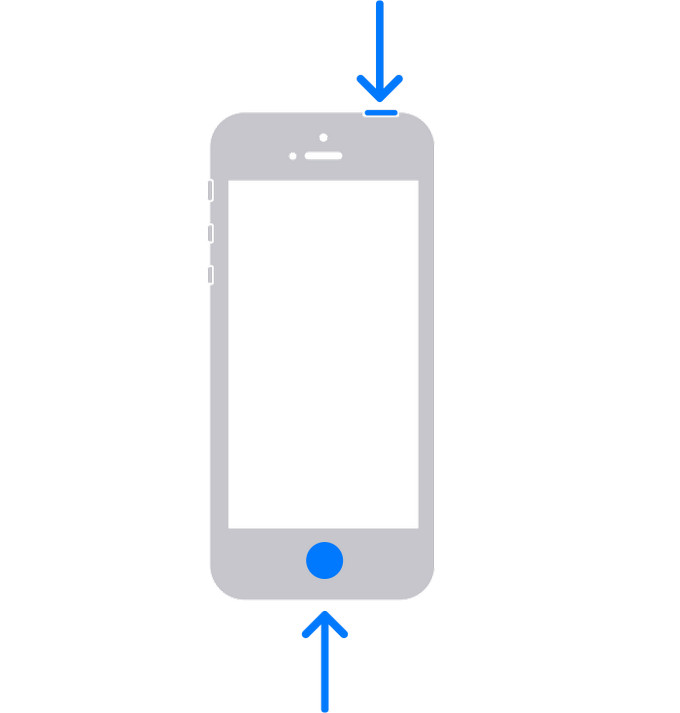
How to go for a Screenshot on iPhone models with Touch ID and top button
Press together the home button and top button. Once pressed, release them immediately. The screenshot will be taken and you will be provided with a temporary thumbnail on the lower-left corner of your iPhone’s screen. You can swipe left to dismiss the thumbnail or you can tap it to open and view the screenshot.
Note: Once you have taken the screenshots, you can easily view them by going to “Photos” followed by “Albums” and then “Screenshots”.
Part 3: How to take a long Screenshot on iPhone?
There come several instances when you have to take a long screenshot on an iPhone or a screenshot of the whole page. In this case, most people take separate screenshots and then combine them together. In another case, they go for a screen recording.
Do you fall in the same category?
Come on! It's an iPhone.
Why get involved in the hectic process when you can easily take a long screenshot at once?
You might be wondering how?
Well, here is the process.
You need not go with some special technique or a third-party app. You have to take the normal screenshot.
- Pressing together the side button and the volume button for iPhone models with Face ID.
- Pressing together the side button and Home button for iPhone with Touch ID and side button.
- Pressing together the home button and top button for iPhone with Touch ID and top button.
Once taken, tap on the thumbnail or the preview. Now tap on the “Full Page” option from the preview window. It is situated at the top.
You will find a slider on the left. This will present you with the highlight of the full-page for which you want to take a screenshot. You are required to hold and drag the slider. You can drag the slider all the way down for taking the screenshot of a full page. You can also stop dragging the slider in between. This will create a screenshot up to that point only. Once you are done with it, select stop to capture a screenshot.
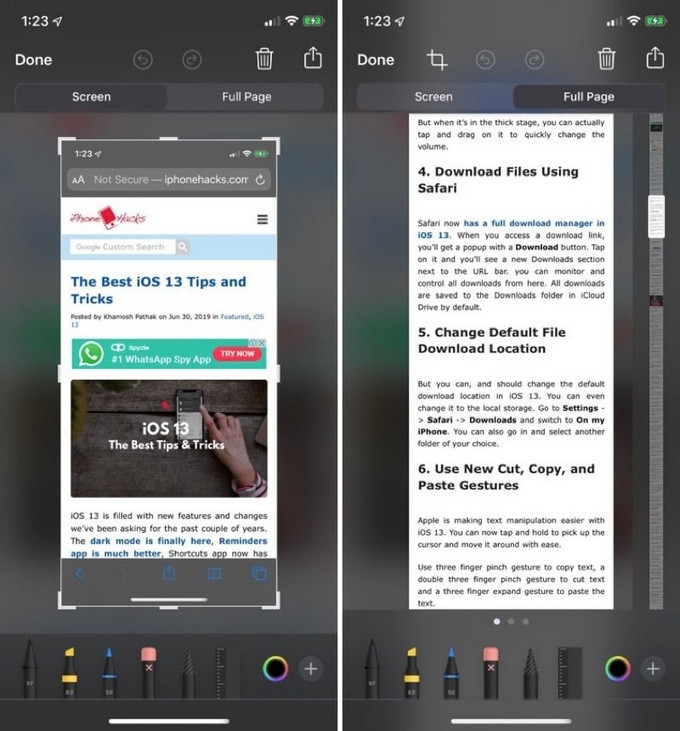
Once you click on “Done”, select “Save PDF to Files”. Now you can either go with “iCloud Drive” to store screenshots on the iCloud or you can choose “On My Phone” to store it on the device itself. If you want to store the file on any third-party cloud storage, you can also do so for the one that has been set up in the Files app.
Fazit:
When it comes to taking a screenshot on iPhone X, 11, 12, or on older versions the method matters a lot. This is why you have been presented with this resolute dossier. So, go ahead and use the best technique to capture the screenshot. It doesn’t matter whether you want to take a screenshot of a screen or a whole page at once. You can easily do so by the ways that are presented to you. So what are you waiting for? Try doing it now and be a part of the fun.
სარკე ტელეფონსა და კომპიუტერს შორის
- აიფონის სარკე კომპიუტერზე
- აიფონის სარკე Windows 10-ში
- Mirror iPhone კომპიუტერზე USB მეშვეობით
- აიფონის სარკე ლეპტოპზე
- iPhone ეკრანის ჩვენება კომპიუტერზე
- iPhone-ის სტრიმინგი კომპიუტერზე
- iPhone ვიდეოს სტრიმინგი კომპიუტერში
- iPhone სურათების სტრიმინგი კომპიუტერში
- აიფონის ეკრანის გადატანა Mac-ზე
- iPad Mirror კომპიუტერზე
- iPad-ზე Mac Mirroring
- გააზიარეთ iPad-ის ეკრანი Mac-ზე
- გაუზიარეთ Mac ეკრანი iPad-ს
- ანდროიდის სარკე კომპიუტერზე
- ანდროიდის სარკე კომპიუტერზე
- ანდროიდის ასახვა კომპიუტერზე უსადენოდ
- ტელეფონის გადაცემა კომპიუტერზე
- Android ტელეფონის გადაცემა კომპიუტერზე WiFi-ის გამოყენებით
- Huawei Mirrorshare კომპიუტერში
- ეკრანის სარკე Xiaomi კომპიუტერზე
- Mirror Android-ზე Mac-ზე
- სარკისებური კომპიუტერი iPhone/Android-ზე


ჯეიმს დევისი
პერსონალის რედაქტორი