

Best Ways to Transfer Files to iPad from PC or Laptop

Apr 27, 2022 • Filed to: Backup Data between Phone & PC • Proven solutions
Try to transfer files from PC to iPad? When having an iPad, you may like to import music, videos, and photos and more to it now and then, you can enjoy them freely. But, it’s not easy to do that. If your iPad is new, you can add files to it by just syncing iTunes with it. What if you have had this iPad for some time? If you still do that, you will lose some data on your iPad. It’s annoying, especially when the files on your iPad are original.
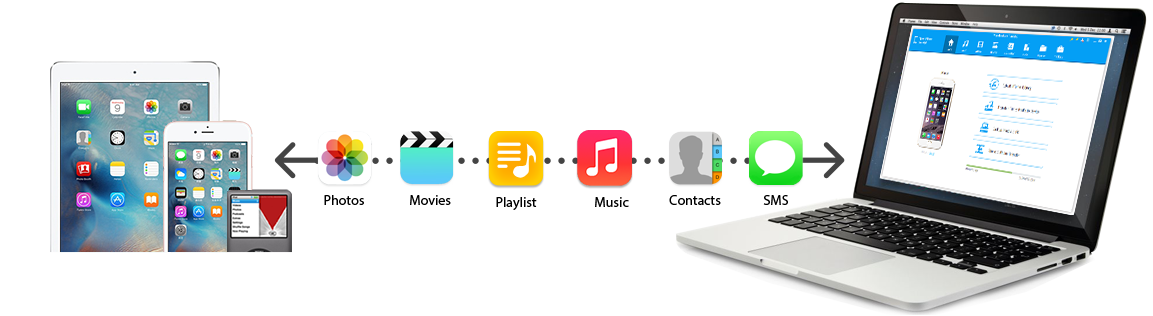
But don't' worry, here in this article, we will bring you the best ways of how to transfer files from PC to iPad. Vast of other services can be used for file transfer, and this article will present to you six ways. Transferring files is something we all need in one moment, whether it is music transfer, sharing videos, back up your contacts, or for other files. Every solution has its benefits. Besides, We will introduce Dr.Fone - Phone Manager (iOS) to you, which is also one of the best solutions when it comes to transferring files from PC to iPad. Carefully watch the next several methods of how to transfer files from PC to iPad.
- Part 1: Transfer Files from PC to iPad Using iPad Transfer Tool
- Part 2: Transfer Files from PC to iPad Using iTunes
- Part 3: Transfer Files from PC to iPad Using iCloud Drive
- Part 4: Transfer Files from PC to iPad Using Dropbox
- Part 5: Transfer Files from PC to iPad Using Google Drive
- Part 6: Transfer Files from PC to iPad Using Email
Part 1: Transfer Files from PC to iPad Using iPad Transfer Tool
A good way of transferring files to your iPad is using iTunes, but we will present here the easier solution, and probably even better than you used in previous actions! Follow the next few steps on how to transfer files from computer to iPad with Dr.Fone - Phone Manager (iOS) instead of iTunes.
First of all, download Dr.Fone - Phone Manager (iOS) in your computer to transfer files from PC to iPad. Then, follow us to check out the simple steps below. Here, just take the Windows version as an example.
Dr.Fone - Phone Manager (iOS)
Transfer Music, Photos, Videos to iPod/iPhone/iPad without iTunes!
- Transfer, manage, export/import your music, photos, videos, contacts, SMS, Apps, etc.
- Backup your music, photos, videos, contacts, SMS, Apps, etc. to computer and restore them easily.
- Transfer music, photos, videos, contacts, messages, etc from one smartphone to another.
- Transfer media files between iOS devices and iTunes.
- Fully compatible with iOS 7 to iOS 13 and iPod.
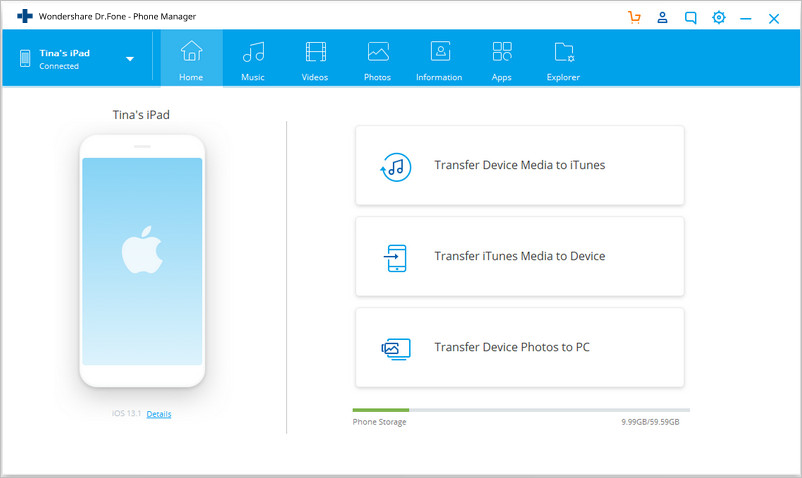
Step 1. Run the iPad Transfer Program
Download and install Dr.Fone on your computer. Start it and select "Phone Manager". Now connect iPad to computer with the USB cable, and the software will automatically recognize your iPad.
Step 2. Transfer Files from PC to an iPad
Here I’d like to share with you how to transfer music, videos, playlist, photos, and contacts to your iPad one by one.
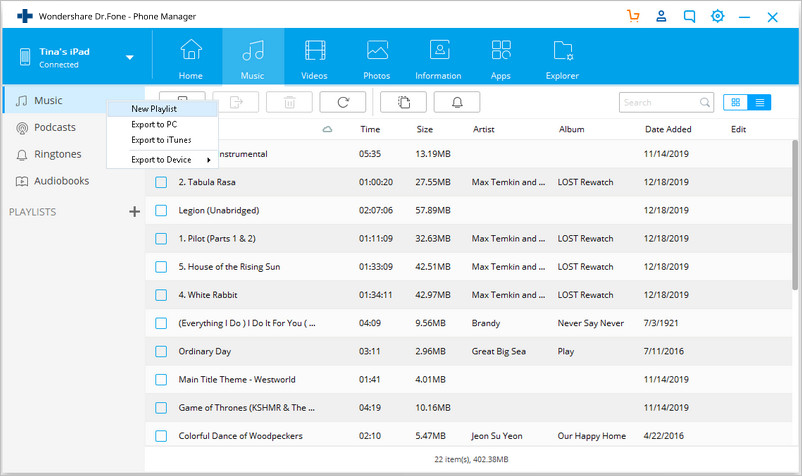
Choose "Music" category at the top of the main interface, and you'll see different sections of audio files in the left sidebar, along with the contents in the right part. Now click the "Add" button, and select "Add File or Add Folder" to add music files from your computer to the iPad. If the music files are not compatible with the iPad, the program will help you to convert them.
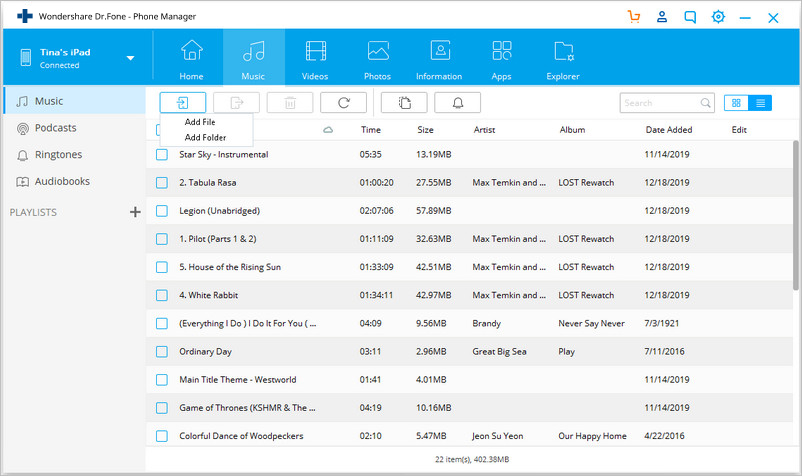
Note: This PC to iPad transfer platform is fully compatible with iPad mini, iPad with Retina display, The New iPad, iPad 2, and iPad Pro.
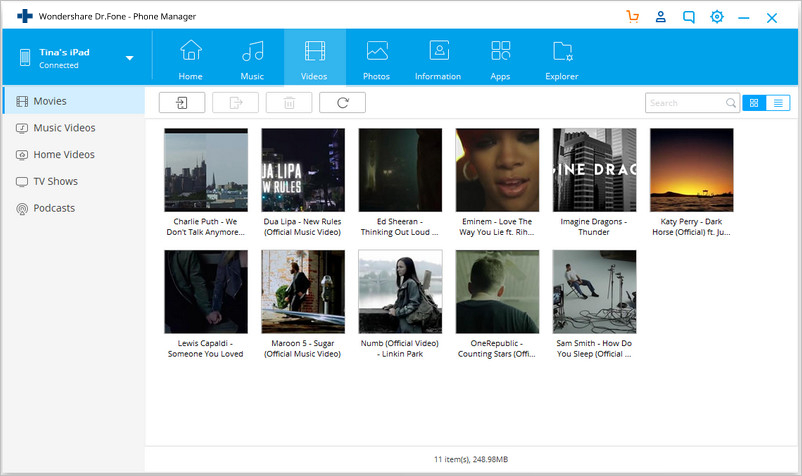
It’s the same to import videos to your iPad. Click "Videos">"Movies" or "TV Shows" or "Music Videos" or "Home Videos">"Add".
You can also create a new playlist on your iPad directly with the help of Dr.Fone - Phone Manager (iOS). You only need to right-click on one playlist and choose the "New Playlist" to create a new playlist on your computer.
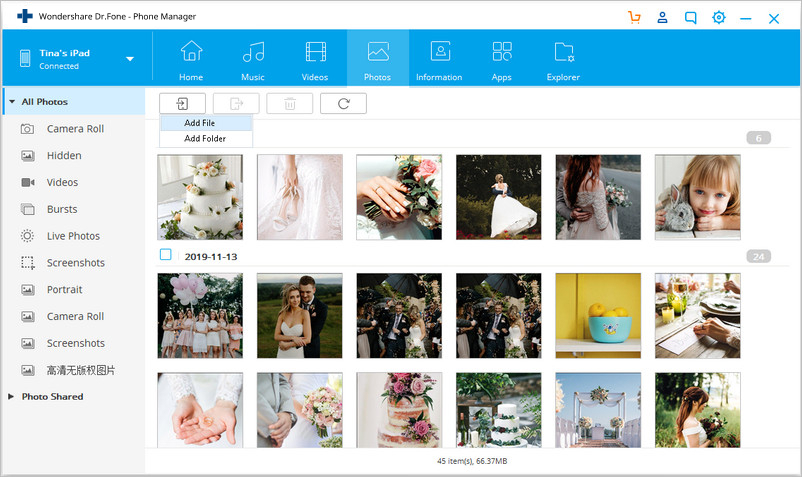
If you intend to copy your favorite photos from your PC to your iPad, you should click the "Photos" tab. Camera Roll and Photo Library will show up in the left sidebar. Click the Add button, and select Add File or Add Folder to add music files from the computer.
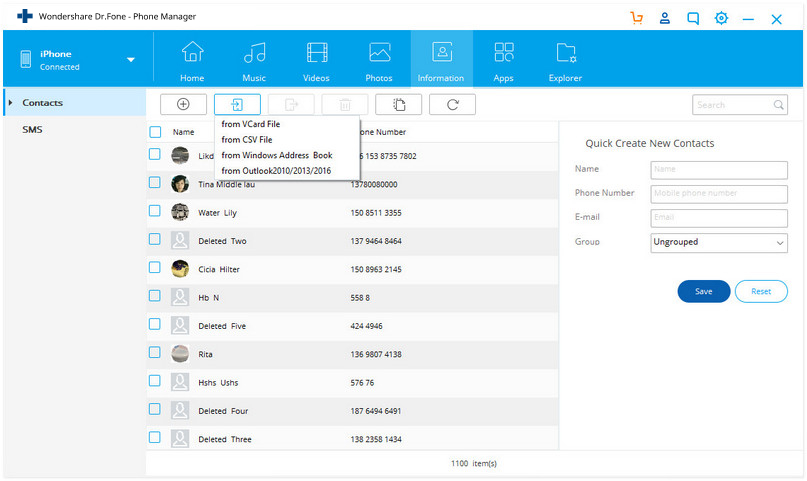
If you prefer to use an iPad to do your job, you may want to transfer contacts in it. To import contacts, you just need to click "Information" and then "Contacts" tab. Click the Import button in the window, and you'll see several options: from vCard File, from CSV File, from Windows Address Book, and Outlook 2010/2013/2016.
Note: At present, the Mac version doesn’t support transferring contacts from PC to iPad.
That’s the tutorial about how to transfer files from computer to iPad. Now, just download this computer to iPad transfer to have a try!
Key Features of Dr.Fone - Phone Manager (iOS)
- Directly transfer music, videos, contacts, and photos between iOS and Android devices.
- Transfer audio and video from iDevice to iTunes and PC.
- Import and convert music and video to iDevice friendly formats.
- Make any photos or video from Apple devices or PC to GIF images
- Delete photos/videos by batch with a single click.
- De-duplicate the repeated contacts
- Selectively transfer exclusive files
- Fix & optimize ID3 tags,covers,song information
- Export & Backup text messages, MMS & iMessages
- Import & Export contacts from major address books
- Transfer music, photos without iTunes restrictions
- Perfectly backup/restore iTunes library.
- Be compatible with all iOS devices, including iPhone13/12/11, iPad Pro, iPad Air, iPad mini, etc.
- Fully compatible with iOS 15/14/13
Part 2. Transfer Files from PC to iPad Using iTunes
Follow the next steps to learn how to transfer files from PC to iPad with iTunes.
Step 1. To start the process, you have to connect your iPad to your computer via USB cable. In the menu, select the iPad icon.
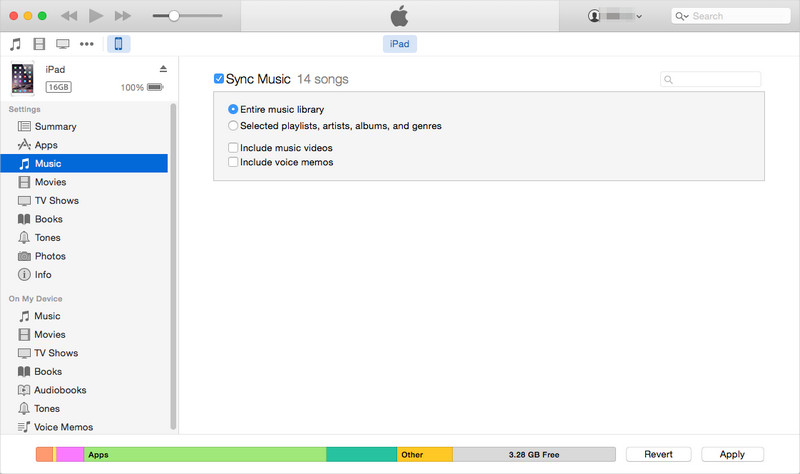
Step 2. Add music to iTunes Library from your PC. After doing so, on the left side will be listed all the files available for transfer. Click on Music and select the ones you wish to transfer
Step 3. Check Sync music which will make iTunes synchronize music to iPad. Here, you can select a category in which you want to transfer files. Simply enter it and select files for transfer.
Step 4. When it is done, you need to click on "Apply or Sync" to finish the process and select all the files you wish to transfer.
You may like to find out more here: How to Transfer Files from iPad to PC
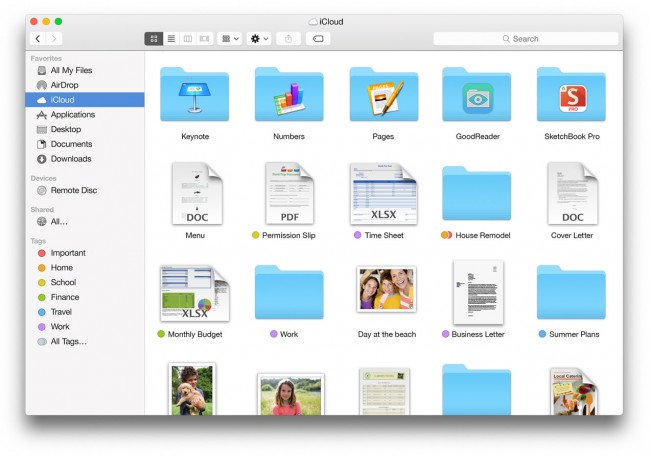
Part 3: Transfer Files from PC to iPad Using iCloud Drive
For those who want to transfer their files with iCloud drive, here is the answer.
Step 1. First, you need to have iCloud. You have to make sure your PC operating system is Windows 7 or later version. Next, you can download iCloud from the Apple website and you should have an Apple account.
Step 2. Open iCloud on your PC
Step 3. To share files with your iPad, you have to drag files to iCloud Drive Folder. Keep in mind that free accounts are limited to 5GB.
Step 4. When your files are done with the transfer, enter the files through the applications that are used to open them.
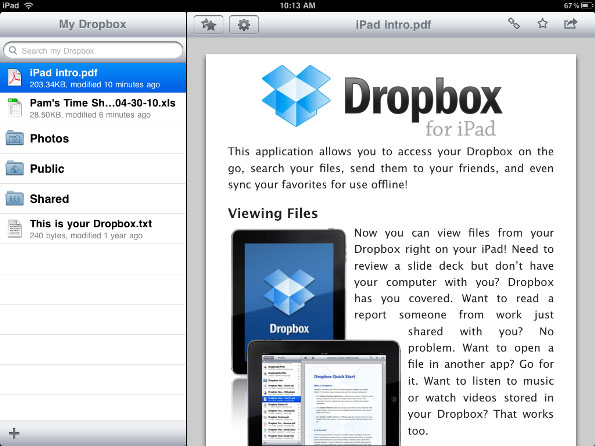
Part 4: Transfer Files from PC to iPad with Dropbox
For those who use Dropbox to transfer files, the following content should be carefully read. We will assume that you already have an account, and if you do not have it, you should create it. Here, you are limited to 2GB of space.
Step 1. Install Dropbox on your PC or laptop
Step 2. When you want to transfer files, simply drag them to the Dropbox folder
Step 3. The next thing you should do is install the Dropbox application on your iPad. When you finished download, log in with your account.
Step 4. Open the file you wish to use.
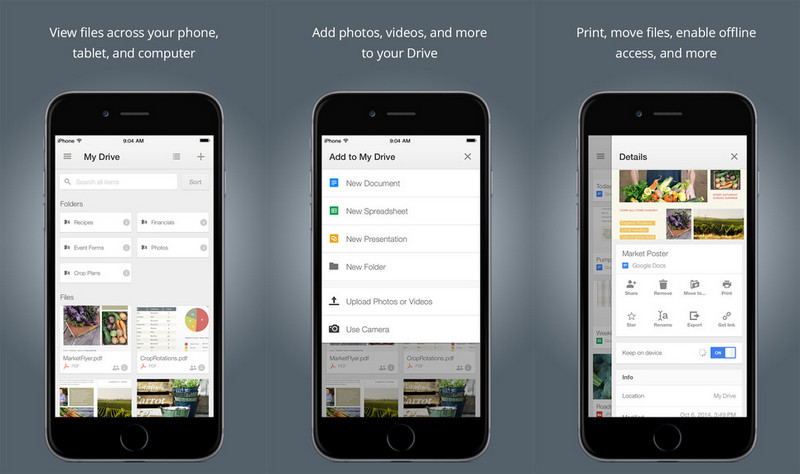
Part 5: Transfer Files from PC to iPad using Google Drive
Google Drive-ის გამოყენება ალბათ ერთ-ერთი ყველაზე მარტივი გზაა, რადგან ბევრ მომხმარებელს უკვე აქვს შექმნილი ანგარიშები. ჩვენ გასწავლით, როგორ გადაიტანოთ მონაცემები კომპიუტერიდან iPad-ზე Google Drive-ის გამოყენებით შემდეგ ნაბიჯებში. ჩვენ ვივარაუდებთ, რომ შესული ხართ თქვენს კომპიუტერში თქვენი Google ანგარიშით. 15 GB სივრცე არის თქვენთვის, უფასოდ.
ნაბიჯი 1. გადაიტანეთ ფაილები, რომელთა გადატანა გსურთ თქვენს iPad-ზე Google Drive-ის ვებსაიტის ფანჯარაში. ისინი ავტომატურად აიტვირთება.
ნაბიჯი 2. ჩამოტვირთეთ და დააინსტალირეთ Google Drive App Store-დან თქვენს iPad-ზე.
ნაბიჯი 3. როდესაც ეს დასრულდება, შედით თქვენს ანგარიშში და შეეხეთ ფაილებს, რომლებიც ადრე ატვირთეთ
რეკომენდაცია: თუ იყენებთ რამდენიმე ღრუბლოვან დისკს, როგორიცაა Google Drive, Dropbox, OneDrive და Box თქვენი ფაილების შესანახად. ჩვენ წარმოგიდგენთ Wondershare InClowdz- ს, რათა გადაიტანოთ, სnyc და მართოთ თქვენი ღრუბლოვანი დისკის ყველა ფაილი ერთ ადგილას.
Wondershare InClowdz
მიგრაცია, სინქრონიზაცია, ღრუბლების ფაილების მართვა ერთ ადგილას
- გადაიტანეთ ღრუბლოვანი ფაილები, როგორიცაა ფოტოები, მუსიკა, დოკუმენტები ერთი დისკიდან მეორეში, როგორიცაა Dropbox Google Drive-ში.
- შექმენით თქვენი მუსიკის, ფოტოების, ვიდეოების სარეზერვო ასლები ერთში, შეიძლება გადაიტანოთ მეორეში ფაილების დასაცავად.
- ღრუბლოვანი ფაილების სინქრონიზაცია, როგორიცაა მუსიკა, ფოტოები, ვიდეოები და ა.შ. ერთი ღრუბლოვანი დისკიდან მეორეზე.
- მართეთ ყველა ღრუბლოვანი დისკი, როგორიცაა Google Drive, Dropbox, OneDrive, box და Amazon S3 ერთ ადგილას.
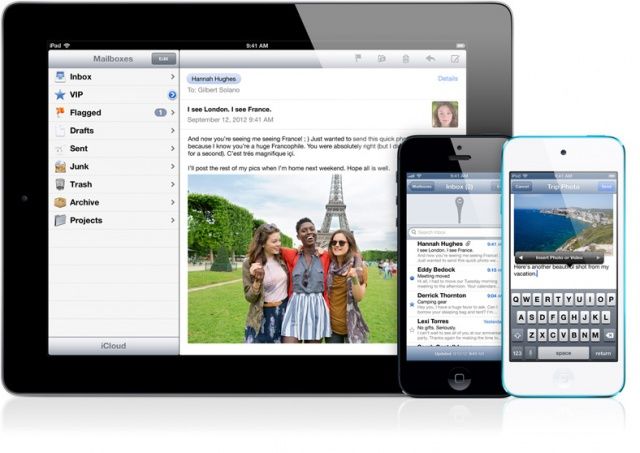
ნაწილი 6: გადაიტანეთ ფაილები კომპიუტერიდან iPad-ზე ელექტრონული ფოსტით
ფაილის გადასატანად ელ.ფოსტის გამოყენება არ არის მოთხოვნადი, რადგან თქვენ აგზავნით ელ.წერილს საკუთარ თავს. მომდევნო ნაბიჯებში ჩვენ გაჩვენებთ, თუ როგორ გადააგზავნოთ ფაილები ერთი ანგარიშიდან მეორეზე. ასევე, თუ არ გაქვთ ორი ანგარიში, უნდა შექმნათ ერთი დამატებითი.
ნაბიჯი 1. თქვენს მიერ გამოყენებული პროგრამის მიხედვით, ინტერფეისი შეიძლება განსხვავდებოდეს, მაგრამ ყველა მათგანს ექნება ღილაკი "მიმაგრება" . იპოვეთ და აირჩიეთ ის, რომ აირჩიოთ ფაილები, რომელთა გადატანა გსურთ. ამ პროცედურის მცირე მინუსი არის ის, რომ ისინი შეზღუდულია მაქს. 30 მბ.
ნაბიჯი 2. გაუგზავნეთ შეტყობინება საკუთარ თავს
ნაბიჯი 3. გახსენით შეტყობინება და უბრალოდ გადმოწერეთ მიმაგრებული ფაილები.
მას შემდეგ რაც წაიკითხავთ ყველა იმ მეთოდს, რომელიც ჩვენ წარმოგიდგინეთ თქვენი კომპიუტერიდან ან ლეპტოპიდან ფაილების iPad-ზე გადასატანად, თქვენზეა დამოკიდებული, აირჩიოთ თქვენთვის საუკეთესო გამოსავალი. თუ თქვენ უნდა გადაიტანოთ დიდი ფაილები ან მათი დიდი რაოდენობა, ალბათ საუკეთესო გამოსავალი არის Google Drive, რადგან ის გთავაზობთ 15 გბ სივრცეს. თუ თქვენ გაქვთ ერთი პატარა ფაილი, რომელიც უნდა გადაიტანოთ, ელფოსტა საუკეთესო ვარიანტია. მიუხედავად ამისა, დააკავშიროთ თქვენი iPad კომპიუტერთან iPad Transfer პროგრამით ფაილების გადასატანად, ჩვენ გირჩევთ Dr.Fone - Phone Manager (iOS), რადგან დადასტურებულია, რომ ის საუკეთესოა ამ სფეროში. ის გთავაზობთ სხვადასხვა ფუნქციებს და, რა თქმა უნდა, შეუძლია დააკმაყოფილოს ყველა საჭიროება.


iPad-ის რჩევები და ხრიკები
- გამოიყენეთ iPad
- iPad ფოტო გადაცემა
- მუსიკის გადატანა iPad-დან iTunes-ზე
- გადაიტანეთ შეძენილი ნივთები iPad-დან iTunes-ში
- წაშალეთ iPad-ის დუბლიკატი ფოტოები
- ჩამოტვირთეთ მუსიკა iPad-ზე
- გამოიყენეთ iPad როგორც გარე დისკი
- გადაიტანეთ მონაცემები iPad-ზე
- გადაიტანეთ ფოტოები კომპიუტერიდან iPad-ზე
- MP4 გადაიტანეთ iPad-ზე
- გადაიტანეთ ფაილები კომპიუტერიდან iPad-ზე
- გადაიტანეთ ფოტოები Mac-დან ipad-ზე
- გადაიტანეთ აპლიკაციები iPad-დან iPad/iPhone-ზე
- გადაიტანეთ ვიდეოები iPad-ზე iTunes-ის გარეშე
- მუსიკის გადატანა iPad-დან iPad-ზე
- გადაიტანეთ შენიშვნები iPhone-დან iPad-ზე
- iPad-ის მონაცემების კომპიუტერზე/მაკზე გადატანა
- გადაიტანეთ ფოტოები iPad-დან Mac-ზე
- გადაიტანეთ ფოტოები iPad-დან კომპიუტერზე
- გადაიტანეთ წიგნები iPad-დან კომპიუტერზე
- გადაიტანეთ აპლიკაციები iPad-დან კომპიუტერზე
- მუსიკის გადატანა iPad-დან კომპიუტერზე
- PDF-ის გადატანა iPad-დან კომპიუტერზე
- გადაიტანეთ შენიშვნები iPad-დან კომპიუტერზე
- გადაიტანეთ ფაილები iPad-დან კომპიუტერზე
- გადაიტანეთ ვიდეოები iPad-დან Mac-ზე
- გადაიტანეთ ვიდეოები iPad-დან კომპიუტერზე
- iPad-ის ახალ კომპიუტერთან სინქრონიზაცია
- iPad-ის მონაცემების გარე საცავში გადატანა
ჯეიმს დევისი
პერსონალის რედაქტორი