
4 Ways to Transfer Photos from iPhone to iPad

Apr 27, 2022 • Filed to: Data Transfer Solutions • Proven solutions
We all like to keep our important data files like photos and videos handy. To quickly access them on different devices, it is important to learn how to transfer photos from iPhone to iPad. There are already several ways to transfer photos from iPhone to iPad. In this guide, we will make you familiar with four of these techniques. So what are you waiting for? Read on and learn how to get photos from iPhone to iPad without much trouble.
Part 1: Transfer Photos from iPhone to iPad in One Click
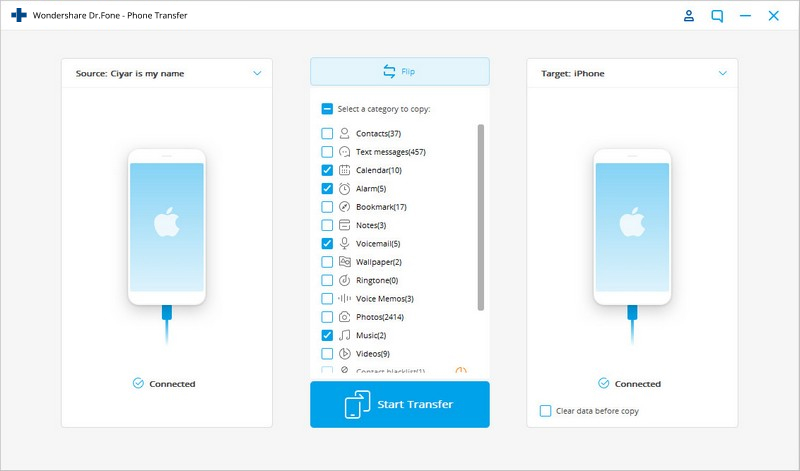
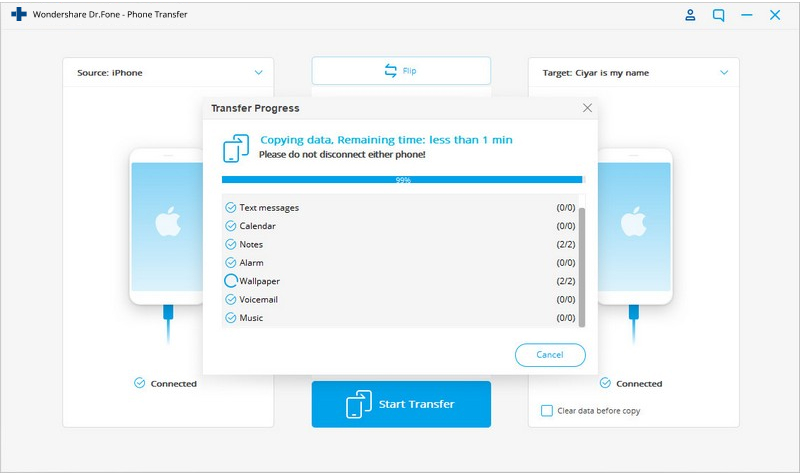
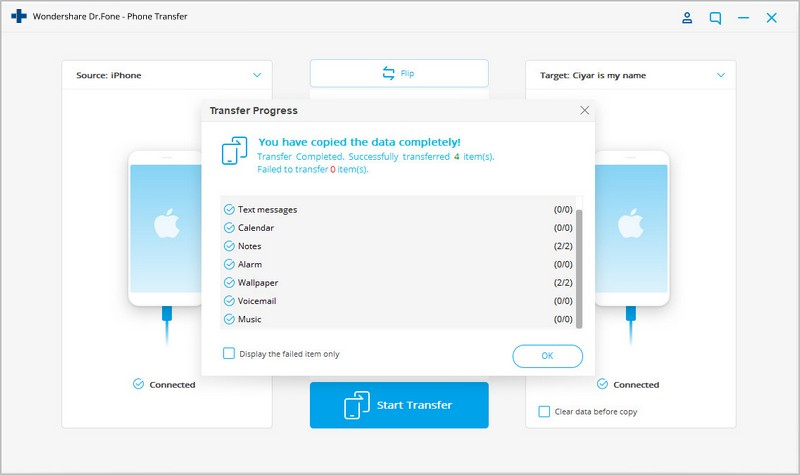
Dr.Fone - One Click Switch is undoubtedly one of the best ways to transfer photos from iPhone to iPad. It is a complete phone management application that can be used to move your content from one device to another in an effortless manner.
Dr.Fone - Phone Transfer
One Click to Transfer Photos from iPhone to iPad
- Easy transfer of all kinds of information, including music, videos, pictures, contacts, emails, applications, call logs etc. between iPhone XS/X/8 (Plus)/7 (Plus).
- Work and transfers information directly and in real time between two cross-operating system.
- Support the transfer of information between Apple, Samsung, HTC, LG, Sony, Huawei and other smart phones and tablets.
- Works great with the products from major providers like AT&T, Verizon, Sprint and T-Mobile.
- Completely compatible with the latest iOS 13 and Android 9.0 and computer system Windows 10 and Mac 10.13.
Just follow these instructions to move all photos from iPhone to iPad:

You may be interested in:
5 Ways to Transfer Photos from iPhone to PC with/without iTunes
How to Transfer Photos from iPhone to iPhone without iCloud
How to Transfer Everything from Old iPhone to your new iPhone
Part 2: Transfer Photos from iPhone to iPad using AirDrop
To make it easier for its users to move their content from one iOS device to another wirelessly, Apple has come up with its dedicated AirDrop feature. With it, you can share absolutely anything among Apple devices on the air. It is a fast and easy way to transfer photos from iPhone to iPad. To learn how to get photos from iPhone to iPad via AirDrop, follow these steps.


After following these steps, you would be able to learn how to transfer photos from iPhone to iPad effortlessly.
Part 3: Transfer Photos from iPhone to iPad using Photo Stream
Photo Stream is another popular alternative to access your recent photos on different devices. Apple came up with this tool for the same purpose, as it supports a maximum of 1000 pictures (or uploads from the last 30 days). Unlike iCloud Photo Library, Photo Stream doesn’t consume your iCloud storage. Additionally, the quality of the images is optimized according to the device.
Therefore, it is not an ideal way to take a backup of your data. Though, if you simply want to access your photos on various iOS devices, then this would be a perfect solution. To learn how to get photos from iPhone to iPad instantly, start by unlocking your iPhone and visiting its Settings > iCloud > Photos. Turn on the option of My Photo Stream on it.

Repeat the same process for your iPad and wait for a while for your recent photos to be synced. Make sure that you are using the same iCloud credentials. Afterward, you would be able to access various uploads from the last 30 days on multiple devices seamlessly. Simply go to your iPad's Photo Library and open the "My Photo Stream" album to view these pictures.

Part 4: Transfer photos from iPhone to iPad using Message
If none of the above-mentioned solutions would work, then simply take the assistance of iMessage to transfer photos from iPhone to iPad manually. The technique might work for a handful of pictures, but it would be pretty time-consuming if you wish to send multiple images. Also, it will consume the network data on your device as well. To learn how to transfer photos from iPhone to iPad via iMessage, follow these steps.
2. Tap on the camera icon (thumbnail of the photo library) nearby the stickers and App store icon.

3. From here, you can choose to click a picture from the camera or attach an existing image from your phone’s Photo Library.

Attach the image from photo library and send it to the recipient. You can also send it to yourself or save it as a draft too. If you are not using iMessage, then you can also take the assistance of any other messaging app as well (like WeChat, WhatsApp, Line, Skype, etc.) to send photos to any other device.
განაგრძეთ და მიჰყევით თქვენს სასურველ ვარიანტს, რომ გადაიტანოთ ფოტოები iPhone-დან iPad-ზე უპრობლემოდ. ახლა, როდესაც იცით, როგორ გადაიტანოთ ფოტოები iPhone-დან iPad-ზე, შეგიძლიათ მარტივად შეხვიდეთ თქვენს საყვარელ სურათებზე თქვენი არჩევანის მოწყობილობაზე. თუ თქვენ უკვე იცნობთ სურათების რამდენიმე მოწყობილობაზე გადატანის მარტივ გზას, თავისუფლად გაუზიარეთ იგი ჩვენს მკითხველს ქვემოთ მოცემულ კომენტარებში.


iPhone ფოტო გადაცემა
- ფოტოების იმპორტი iPhone-ზე
- გადაიტანეთ ფოტოები Mac-დან iPhone-ზე
- გადაიტანეთ ფოტოები iPhone-დან iPhone-ზე
- გადაიტანეთ ფოტოები iPhone-დან iPhone-ზე iCloud-ის გარეშე
- გადაიტანეთ ფოტოები ლეპტოპიდან iPhone-ზე
- გადაიტანეთ ფოტოები კამერიდან iPhone-ზე
- გადაიტანეთ ფოტოები კომპიუტერიდან iPhone-ზე
- iPhone ფოტოების ექსპორტი
- გადაიტანეთ ფოტოები iPhone-დან კომპიუტერში
- გადაიტანეთ ფოტოები iPhone-დან iPad-ზე
- ფოტოების იმპორტი iPhone-დან Windows-ში
- გადაიტანეთ ფოტოები კომპიუტერში iTunes-ის გარეშე
- გადაიტანეთ ფოტოები iPhone-დან ლეპტოპზე
- გადაიტანეთ ფოტოები iPhone-დან iMac-ზე
- ამოიღეთ ფოტოები iPhone-დან
- ჩამოტვირთეთ ფოტოები iPhone-დან
- ფოტოების იმპორტი iPhone-დან Windows 10-ში
- მეტი iPhone ფოტო გადაცემის რჩევები
სელენა ლი
მთავარი რედაქტორი