The Ultimate Guide to Manage Contacts on S20/S9/S8
Apr 27, 2022 • Filed to: Tips for Different Android Models • Proven solutions
For almost every smartphone user, contacts hold an utmost importance. After all, our smartphone is of no use if it doesn’t have updated contacts. Though, in order to keep your contacts handy or move them from one device to another, you need to manage them beforehand. If you have a Samsung Galaxy S8 or S9, then you should also take some added measures to manage contacts on S9. This includes the editing, deleting, adding, and updating of contacts. Also, you should know how to move your contacts from one device to another. In this guide, we will cover it all in an extensive manner.
Part 1: How to add a new contact on S20/S9/S8?
In order to manage contacts on S9 or S8, you first need to know how to add a new contact. Just like other Android smartphones, the technique is quite simple. If you are a beginner or a new user of Android, then you can learn how to add contacts on S9 or S8 by following these steps.
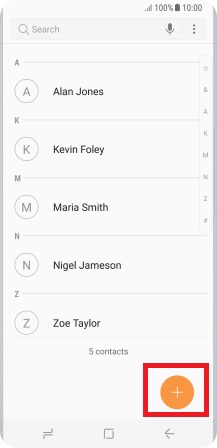
1. Simply unlock your device and launch the Contacts app.
2. This will display a list of all the saved contacts on the device. Tap on the “+” icon to add a contact.
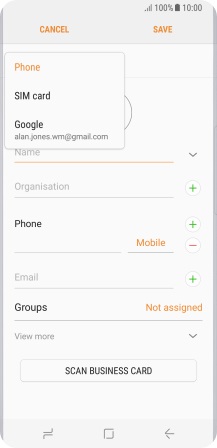
3. It will launch an interface to add a new contact. You can get the same interface by going to the phone app, typing a number, and tapping on the add button.
4. From the dropdown, select where you wish to save your contact (phone, Google account, or SIM card).
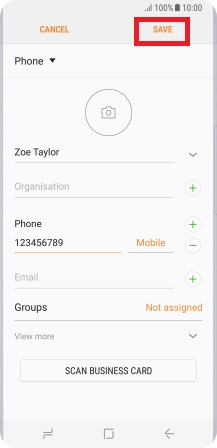
5. Fill the basic information like the contact details, name, email, and so on.
6. Once you are done, tap on the “Save” button.
Part 2: How to edit a contact on S20/S9/S8?
There are times when we need to edit contacts on S20/S9/S8 as well, such as edit the name, number, email, change profile picture etc. Once the contact has been saved, it can easily be edited as well. In this way, you can manage contacts on S9 or S8 without any hassle.
1. To start with, launch the Contacts app on the device and select the contact you wish to edit.
2. Once the contact is opened, you can tap on the Edit icon on the right upper conner.
3. This will make all the essential fields editable. You can simply alter any crucial detail like their name, contact number, etc.
4. After making the relevant changes, just tap on the Save icon.
This will save the edits made to the respective contact.
Part 3: How to delete contacts on S20/S9/S8?
Too many times, we get duplicate contacts on our Android devices. If you have synced your Google account with your phone and have copied all the contacts in bulk, then it can lead to the occurrence of duplicate contacts. There could be a few other reasons for deleting a contact as well that can help us manage contacts on S9.
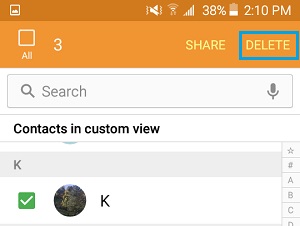
1. In order to delete any contact, unlock the device and go to the Contacts app.
2. Now, select the contacts you wish to delete. You can select multiple contacts as well.
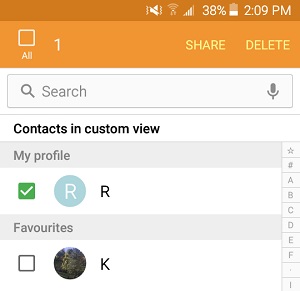
3. Tap on the trash icon and confirm your choice. This will simply delete the selected contacts.
Part 4: How to add a photo to contact on S20/S9/S8?
There are a lot of people who wish to add a photo to a contact as it makes them easier to recognize the caller. Ideally, it is an important step to manage contacts on S9 or S8 and will make your smartphone experience easier as well. To change the contact profile picture, just follow these steps.
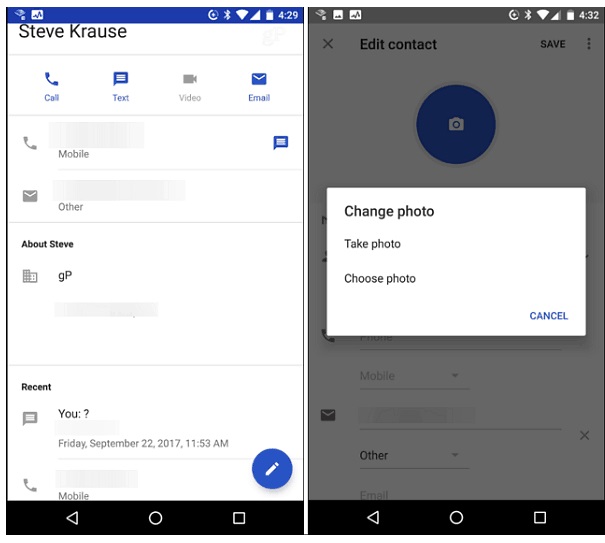
1. Go to the contacts app on your device and open the contact of your choice.
2. Tap on the edit icon to make relevant changes.
3. Once you will tap on the photo section, you will get an option to either upload a photo or take it.
4. If you choose to take a photo, then the camera app on the device will be launched and you can take a live photo.
5. By tapping on the “Upload a photo” option, the gallery on your device will be opened. From here, you can browse to the relevant location and select the photo you wish to assign to the contact.
6. If needed, you can crop the photo and save it to assign the photo to the contact.
Part 5: Best Samsung Galaxy S9/S20 contacts manager
If you don’t want to go through any unwanted hassle while managing contacts on S9 or S20, then you can simply try Dr.Fone - Phone Manager (Android). This Android device manager will let you transfer all kinds of data between your smartphone and the computer. Besides importing and exporting your contacts, you can also delete them, merge duplicate contacts, delete any contact, add a new contact, and do so much more. Not only to manage contacts on S9, you can also use it to manage other kinds of media files like photos, videos, music, etc. It is compatible with all the leading versions of Android devices and has a user-friendly interface. Here are some easy ways to manage contacts on S9/S20 using Dr.Fone - Phone Manager (Android).

Dr.Fone - Phone Manager (Android)
Manage S9 Contacts, Messages, Photos, Videos, Music Easily!
- Transfer files between Android and computer, including contacts, photos, music, SMS, and more.
- Manage, export/import your music, photos, videos, contacts, SMS, Apps etc.
- Transfer iTunes to Android (vice versa).
- Manage your Android device on computer.
- Fully compatible with Android 8.0.
1. Import contacts to S20/S9/S8
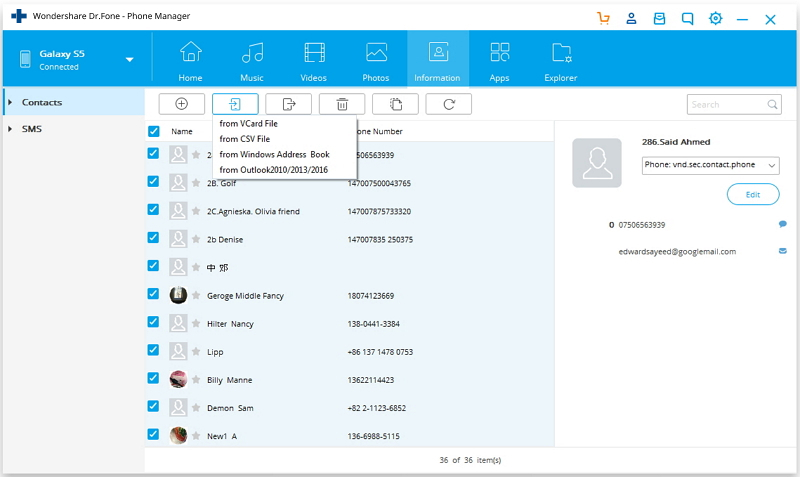
To start with, simply connect your Android device to the system and launch Dr.Fone toolkit. Go to the "Phone Manager" module and visit the “Information” tab. From the left panel, you can select “Contacts”. This will display all the contacts on the device. In order to import contacts, click on the import icon. This will give you an option to import contacts from a vCard, CSV, or other formats.
2. Export contacts from S20/S9/S8
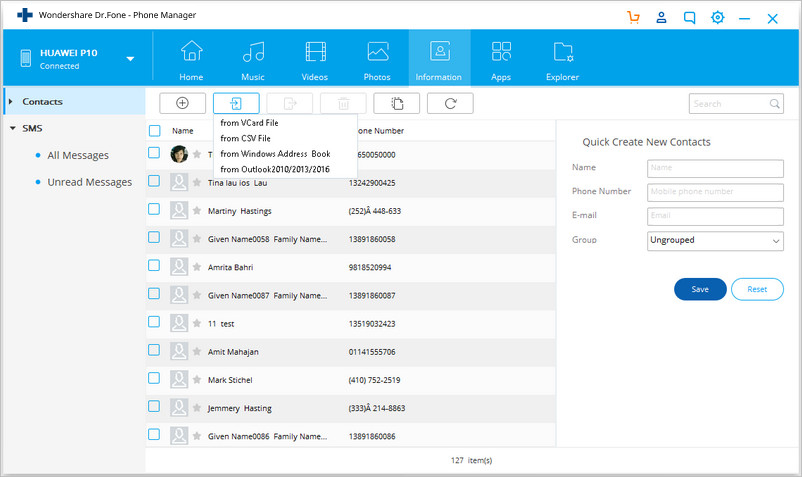
If you want to maintain a backup of your contacts, then you can also export them to a different format as well. To do this, select the contacts that you wish to move and click on the export icon. You can select the format (CSV, vCard, etc.) of your choice or can directly move the selected contacts to any other device as well.
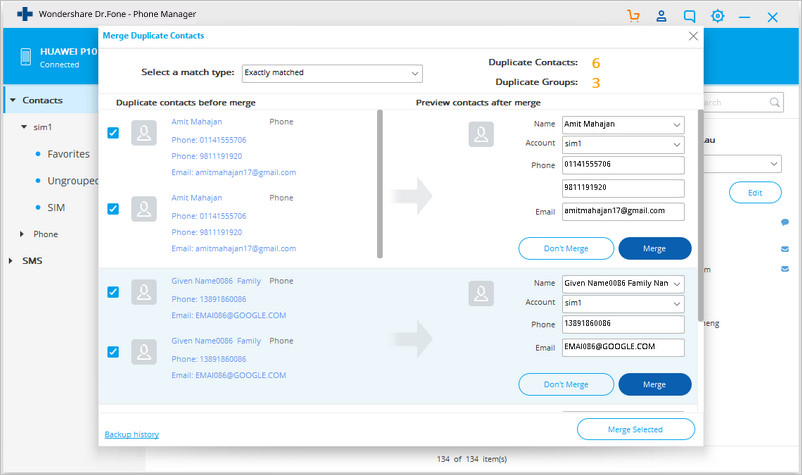
3. Merge duplicate contacts
If you have too many duplicate contacts on your device, then you can choose to merge them as well. Go to the Merge option in the Information > Contacts tab of the interface. From here, you can select the contacts you wish to merge and select a type of match. After making your selection, click on the “Merge selected” button.
4. Add, edit, or delete contacts
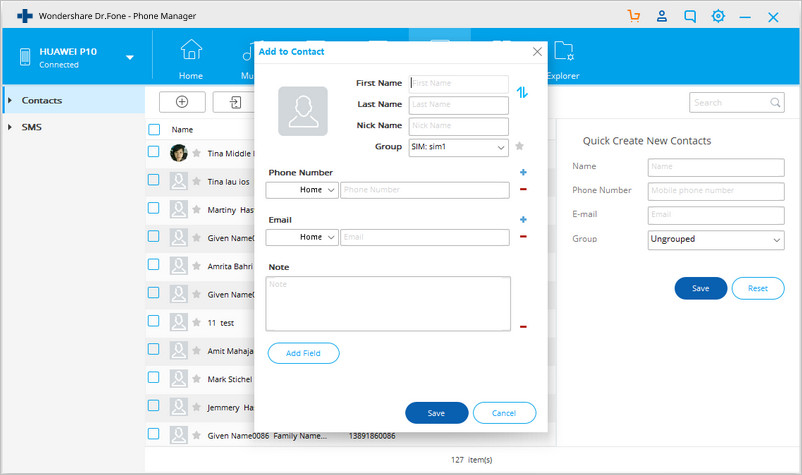
Using Dr.Fone - Phone Manager (Android), you can easily manage contacts on S9 by adding, deleting, or editing any contact. The information tab will already have a list of all the contacts saved on your device. To delete any contact, just select it and click on the trash icon (delete button).
In order to edit a contact, you can just double-click it. This will give you an option to edit any field. If you wish to add a new contact, then click on the “+” icon on the toolbar. This will launch a new pop-up where you can add the relevant information and save the contact.
5. Manage groups
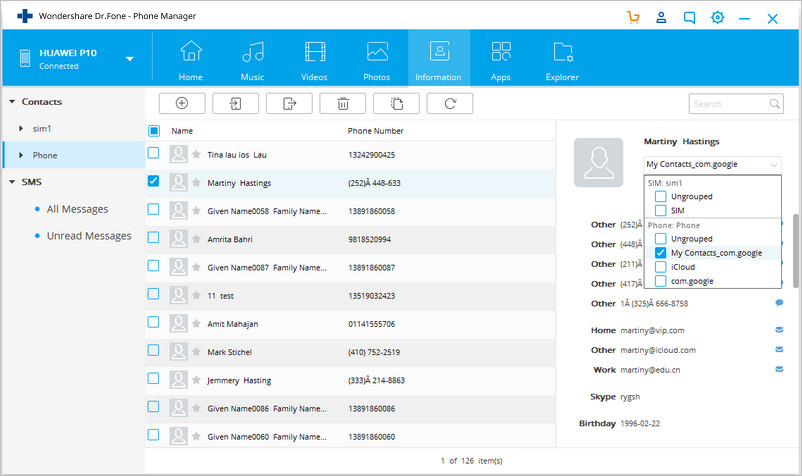
You can also categorize your contacts into different groups as well. If you want, you can also create a new contact as well. Simply drag a contact and drop it into any other group. You can also double-click it and allocate it to any group.
By taking the assistance of Dr.Fone - Phone Manager (Android), you can easily manage contacts on S9 and all the other popular Android smartphones as well. It has an easy to use interface and comes with tons of advanced features that will let you transfer your data from one device to another seamlessly. It would be a one-stop solution to every need of yours regarding the overall management of your smartphone data.
Samsung S9
- 1. S9 Features
- 2. Transfer to S9
- 1. Transfer WhatsApp from iPhone to S9
- 2. Switch from Android to S9
- 3. Transfer from Huawei to S9
- 4. Transfer Photos from Samsung to Samsung
- 5. Switch from Old Samsung to S9
- 6. Transfer Music from Computer to S9
- 7. Transfer from iPhone to S9
- 8. Transfer from Sony to S9
- 9. Transfer WhatsApp from Android to S9
- 3. Manage S9
- 1. Manage Photos on S9/S9 Edge
- 2. Manage Contacts on S9/S9 Edge
- 3. Manage Music on S9/S9 Edge
- 4. Manage Samsung S9 on Computer
- 5. Transfer Photos from S9 to Computer
- 4. Backup S9


Alice MJ
staff Editor