[3 Proven Ways] How to Delete iCloud Email?
Apr 28, 2022 • Filed to: Remove Device Lock Screen • Proven solutions
As an enterprise iDevice user, you may want to delete your email from iCloud for several reasons. There may be instances when you want to unify messaging via email under one brand account. In a similar vein, the chances are that you wish to shut down an older account tied to a service that you no longer offer. Indeed, there are many different reasons you may want to delete the iCloud email. You will see more reasons later.

But whatever be the case, you can do it yourself without getting some iDevice expert to help you with it. All you have to do is to go through this do-it-yourself guide. Interestingly enough, you will learn multiple ways of getting that done. Plus, you will find out that the step-by-step instructions are easy to comprehend. Sure, it is a promise from us, so you can trust us to keep to our words. Without much ado, let’s get to the heart of today’s tutorial.
Part 1. How to delete an email in Mail on iCloud.com
Just before you learn how to perform this task, you should note that when you delete the email, it goes straight to the trash mailbox. Afterward, the message stays in the trash mailbox for 30 days before the system permanently erases it. With that fact established, let’s walk you through the steps straight away.
Step 1: Go to Mail on iCloud.com and choose the particular message you wish to get rid of.
Step 2: As shown in the toolbar below, select the delete option.

However, if you do not see the image in the options, you should go to the sidebar and choose Preferences. Once you are there, deselect the Show Archive icon in the toolbar.
Step 3: The next action is to click on the Delete or Backspace key. Drag the message you wish to delete to the Trash, which you can locate in the sidebar. At this point, you have accomplished your mission.
Part 2. Can't delete the iCloud email address? Change email aliases
Before showing you how you can use this technique, you need to understand what an Apple alias means. It is like a nickname that helps you keep your real email address private, thus introducing a layer of security. When you send emails through it, the recipients don’t get to see your real email address. With that said, you can delete your email address by changing your alias. To alter it, follow the outlines below.
Step 1: From the Mail in iCloud.com, tap the Settings popup menu in the sidebar of your device. Afterward, choose Preferences.
Step 2: At this stage, you will have to click on Accounts. Go to the Alias in the Addresses list and select it.
Step 3: To change it, go to Change the Label. Once you have done that, enter the new label in the field provided. Note that the Alias labels are only available in Mail on iCloud.
Step 4: Go ahead and choose the new color for the label by selecting the label of your choice.
Step 5: Change the full names by entering the name of your choice. When you have done that, then click on Done.
Part 3. How to delete iCloud email account without a password by deleting Apple ID
Do you wish to learn how to delete an iCloud email account without a password? If so, your storm is over! You see, you can use Dr.Fone’s complete delete guide to do that. The good thing is that it is pretty easy and convenient. To do it, you should follow the steps below:
Step 1: Boot your computer, install, and launch the Dr.Fone toolkit. Afterward, you have to connect your iDevice to the computer using the lightning cable. Then, take the next step.
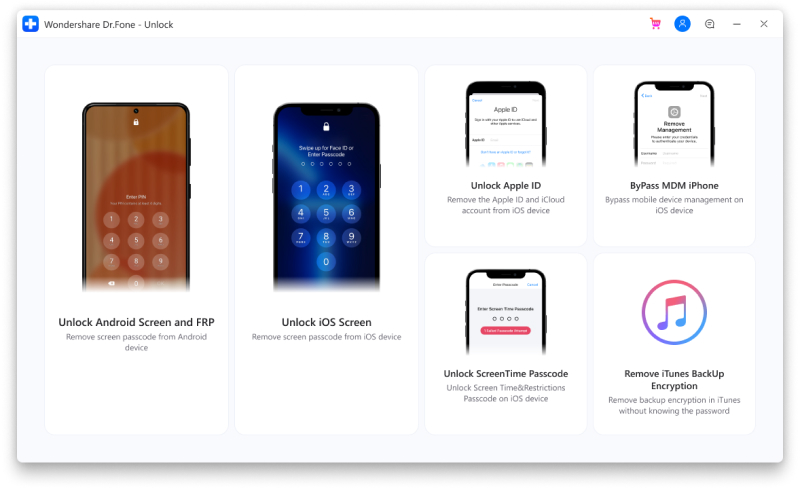
Step 2: Click on Screen Unlock on the toolkit as shown in the diagram below. You will see it on the Home interface.

Step 3: Afterward, you have to tap the Unlock Apple ID to initiate the process of deleting your iCloud account. The image below gives a clearer picture of what you should do.

Step 4: Tap on Trust this Computer on your iDevice to allow the toolkit to access it. Note that the toolkit cannot have access to your iDevice without this step. That said, this process will delete all your files, meaning that you need to back them up first.
The detailed instructions for performing this task are on the screen. Later, the toolkit will display certain device information, such as model and system version. You confirm it, and you have accomplished the task. The process is fast and easy. So, you do not have to be a techie to be able to perform it.
Step 5: Here, Dr.Fone gives you some instructions to reset your iDevice from settings as shown in the image. Oh yes, a warning sign will pop up, asking you to click on Unlock. Go ahead and click on it.

Once you complete that, you now have to reboot your iDevice. The process will unlock your device and erase your iCloud account. However, the process takes some seconds.
Furthermore, ensure that you do not interrupt the device-computer connection. Having made it thus far, you have deleted the existing iCloud account and will need to sign in to iCloud with a new Apple ID. Interestingly enough, you do not need a password to do this. As promised, the process is fast and easy. So, you do not have to be a techie to be able to perform it.
Conclusion
In conclusion, you have learned the multiple ways of deleting your iCloud email and email account. Aside from entrepreneurs, everyday iDevice users may have one reason or another to wish to delete their emails from their iCloud account. It is noteworthy that when you clear the email in your iCloud account, you are freeing up more space for apps, photos, music, etc. Still, it is easier to navigate on your iDevice when you have a clean iCloud. All these reasons and more explain why you need to clear your iCloud email.
In this tutorial, you have seen how to delete the iCloud email without seeking professional assistance. Just as promised, you saw several ways of performing the task. Interestingly, you can also do that by deleting your Apple ID as shown in the last step (Part 3). With this easy-to-understand guide, you can get the most out of your iDevice without hassles. As you probably know, an iCloud account is a crucial part of your Apple ID. Little wonder you can perform critical tasks from this account. Having come thus far, you should go ahead and try it!
iCloud
- iCloud Unlock
- 1. iCloud Bypass Tools
- 2. Bypass iCloud Lock for iPhone
- 3. Recover iCloud Password
- 4. Bypass iCloud Activation
- 5. Forgot iCloud Password
- 6. Unlock iCloud Account
- 7. Unlock iCloud lock
- 8. Unlock iCloud Activation
- 9. Remove iCloud Activation Lock
- 10. Fix iCloud Lock
- 11. iCloud IMEI Unlock
- 12. Get Rid of iCloud Lock
- 13. Unlock iCloud Locked iPhone
- 14. Jailbreak iCloud Locked iPhone
- 15. iCloud Unlocker Download
- 16. Delete iCloud Account without Password
- 17. Remove Activation Lock Without Previous Owner
- 18. Bypass Activation Lock without Sim Card
- 19. Does Jailbreak Remove MDM
- 20. iCloud Activation Bypass Tool Version 1.4
- 21. iPhone can not be activated because of activation server
- 22. Fix iPas Stuck on Activation Lock
- 23. Bypass iCloud Activation Lock in iOS 14
- iCloud Tips
- 1. Ways to Backup iPhone
- 2. iCloud Backup Messages
- 3. iCloud WhatsApp Backup
- 4. Access iCloud Backup Content
- 5. Access iCloud Photos
- 6. Restore iCloud from Backup Without Reset
- 7. Restore WhatsApp from iCloud
- 8. Free iCloud Backup Extractor
- Unlock Apple Account
- 1. Unlink iPhones
- 2. Unlock Apple ID without Security Questions
- 3. Fix Disabled Apple Account
- 4. Remove Apple ID from iPhone without Password
- 5. Fix Apple Account Locked
- 6. Erase iPad without Apple ID
- 7. How to Disconnect iPhone from iCloud
- 8. Fix Disabled iTunes Account
- 9. Remove Find My iPhone Activation Lock
- 10. Unlock Apple ID Disabled Activation Lock
- 11. How to Delete Apple ID
- 12. Unlock Apple Watch iCloud
- 13. Remove Device from iCloud
- 14. Turn Off Two Factor Authentication Apple


James Davis
staff Editor
Generally rated4.5(105participated)