[8 Quick Fixes] Unfortunately, Snapchat has Stopped!
Apr 27, 2022 • Filed to: Fix Android Mobile Problems • Proven solutions
Have you ever been deep in conversation with a loved one or friend, taking advantage of all the funny filters and games Snapchat has to offer when you’ve suddenly been presented with the ‘Unfortunately, Snapchat has Stopped’ error code? This is usually followed by the app crashing back to the main menu.
If so, don’t worry; you’re not alone. Snapchat crashing in this way is nothing new, but it can be incredibly annoying when it keeps happening and stops you from enjoying the conversations you care about.
Fortunately, there are plenty of solutions out there to help you out and get the app working again as it should do. Today, we’re going to explore them all to help you get back to what you were doing before and as though there was never a problem.
- Part 1. Install Snapchat again from Google Play Store
- Part 2. Check for new Snapchat Updates
- Part 3. Wipe the cache of Snapchat
- Part 4. Fix the system issues that caused Snapchat stopping
- Part 5. Check for the Android update
- Part 6. Connect to another Wi-Fi
- Part 7. Stop using the custom ROM
- Part 8. Reset the factory settings of your Android
Part 1. Install Snapchat again from Google Play Store
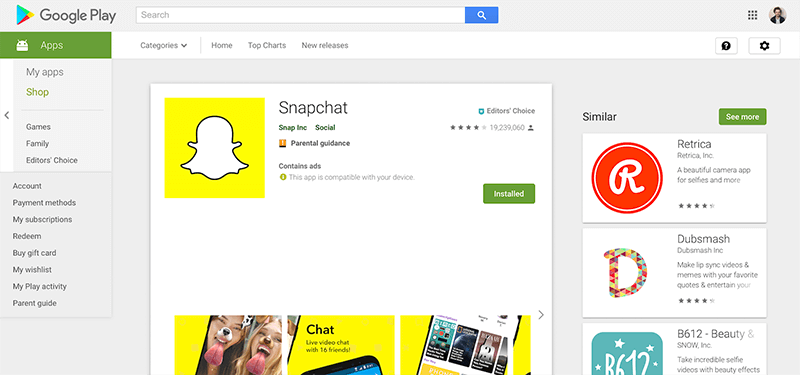
One of the best ways to resolve the Snapchat crashing problem or Snap Map not working issue is to delete the app and reinstall it again. When you’re using your phone, there is data continually flowing around and data being sent here, there, and everywhere.
During these processes, bugs can occur, and if they can’t sort themselves out, the best thing to do is to reset your app and start from a fresh installation. Here’s how to do it.
Step One Hold down the Snapchat app from your main menu and press the ‘x’ button to uninstall the app.
Step Two Open the Google App Store from your device and search ‘Snapchat’ in the search bar. Find the official app page and download the app onto your device.
Step Three The app will automatically install itself once downloaded. Open the app, sign in to your account using your log-in details, and you should be able to use the app like normal.
Part 2. Check for new Snapchat Updates
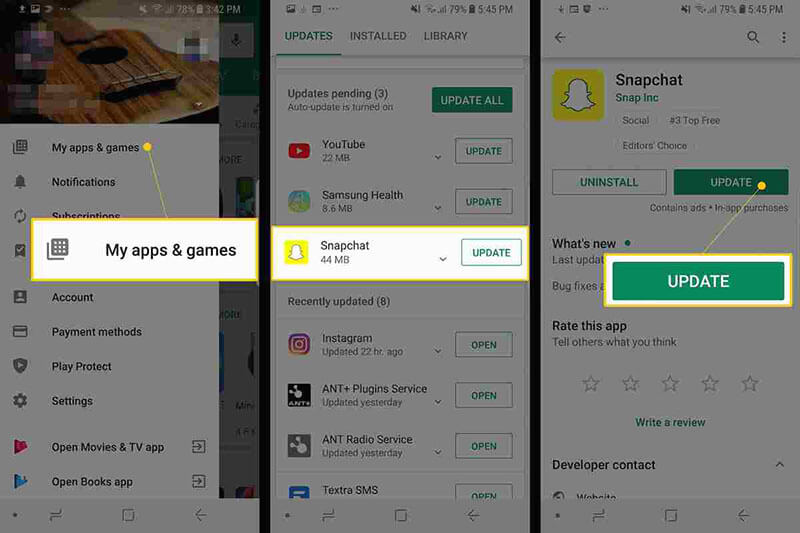
Hand in hand with the problem above, sometimes a bug can restrict Snapchat from working, or perhaps your personal update settings. If you receive a Snapchat from someone with an upgraded version, this can crash your app.
Here’s how to make sure you’re running the latest version of Snapchat is Snapchat isn’t responding.
- Launch the Play Store and navigate to the My Apps and Games page
- Tap the Update button
- The app will now automatically update to the latest version
Part 3. Wipe the cache of Snapchat
If you have a lot of data in your Snapchat cache, this can cause the app to become overloaded in which you’ll need to clear it to start again and refresh the app. This is a common problem that can cause Snapchat has stopped working error.
Here’s how to fix it.
- Open the Snapchat app and tap the Profile icon on the top left-hand side of your screen
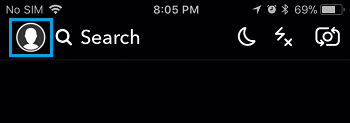
- Tap the Settings gear icon on the top right

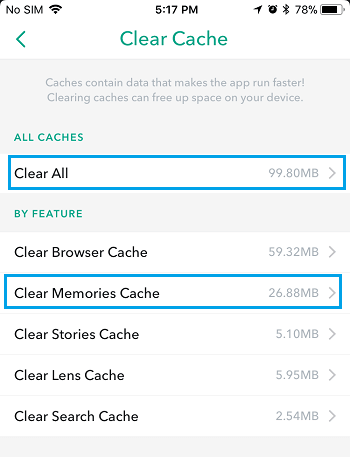
- Scroll down the Settings menu and tap the Clear Cache option
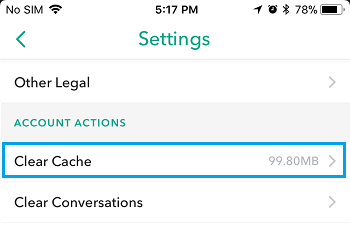
- Here, you can choose to Clear All, but you can select individual areas if you prefer
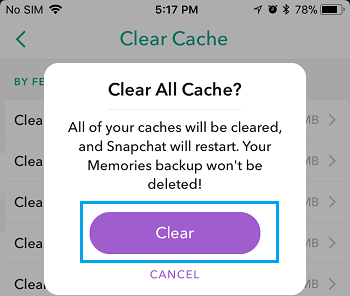
- Tap the Confirm option to clear your cache preference completely
Part 4. Fix the system issues that caused Snapchat stopping
If you’re experiencing the Snapchat crashing on Android often, or you’re experiencing similar errors with other apps, this can be an indication that there’s something wrong with your Android operating system.
The best way to fix this is to repair your device using the software known as Dr.Fone - System Repair (Android). This is a powerful repair system that can completely recover your device from any errors, including the Snapchat keeps crashing error.

Dr.Fone - System Repair (Android)
Dedicated repair tool to fix Snapchat crashing on Android
- Recover your device from any problem, including black screen or unresponsive screen
- Supports over 1000+ unique Android devices, models, and brands
- Trusted by over 50+ million customers around the world
- Can fully repair faults with your Android device’s firmware in a few simple steps
- One of the most user-friendly applications in the world
To help you make the most of this Android repair software and to fix your Snapchat not responding error, here’s a step-by-step guide on how to use it.
Step OneDownload the Dr.Fone - System Repair (Android) software to your computer. Install the software to your Mac or Windows computer by following the onscreen instructions.
Once completed, open the software, so you’re on the main menu.

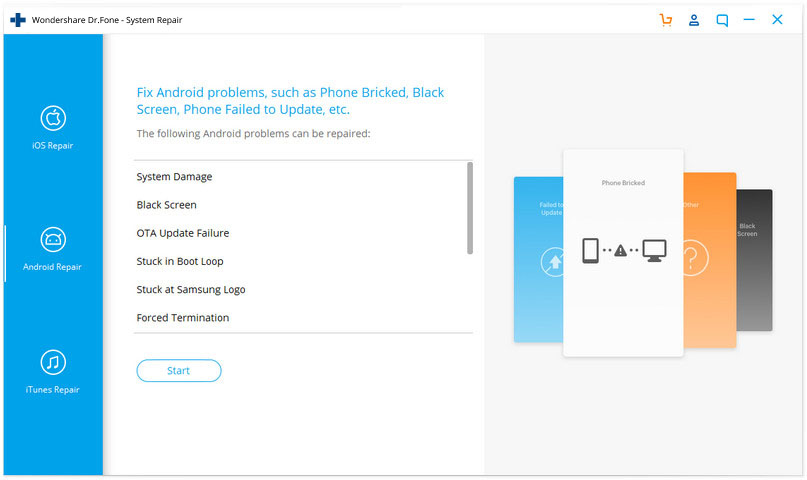
Step Two From the main menu, click the System Repair option, followed by the Android Repair option. Of course, if you have an iOS device you want to repair in the future, the option is there if you want it. Also, connect your Android device to your computer using the USB cable.
Step Three Confirm details.
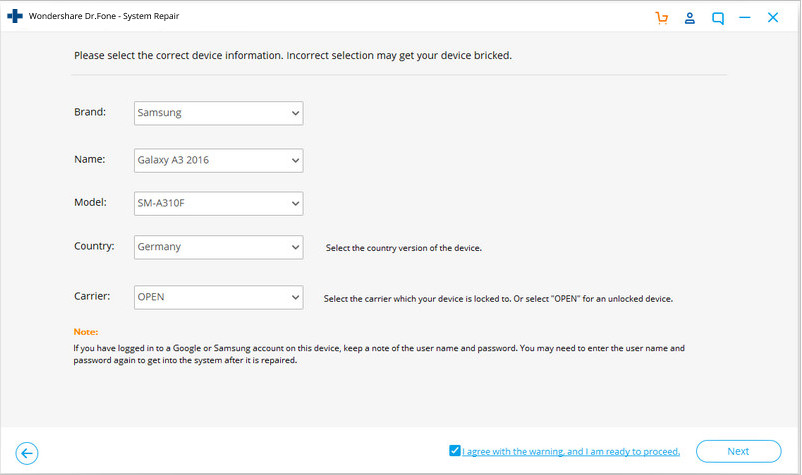
On the next screen, use the drop-down menus to confirm the model, brand, operating system, and carrier of your device. Click Next to confirm the details are correct.
Step Four You’ll now need to put your phone into Download Mode, sometimes referred to as Recovery Mode. For this, you can follow the onscreen instructions. Make sure your device stays connected to your computer throughout this process.
The method will slightly differ depending on whether your device has a home button, so make sure you follow the right instructions for your individual device.
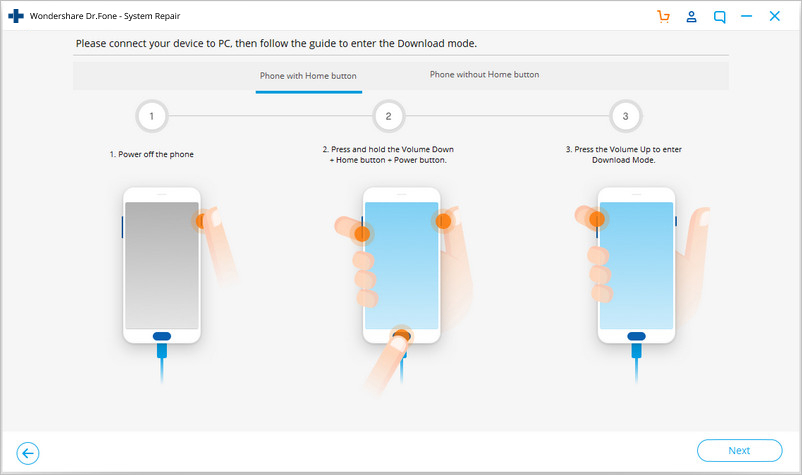
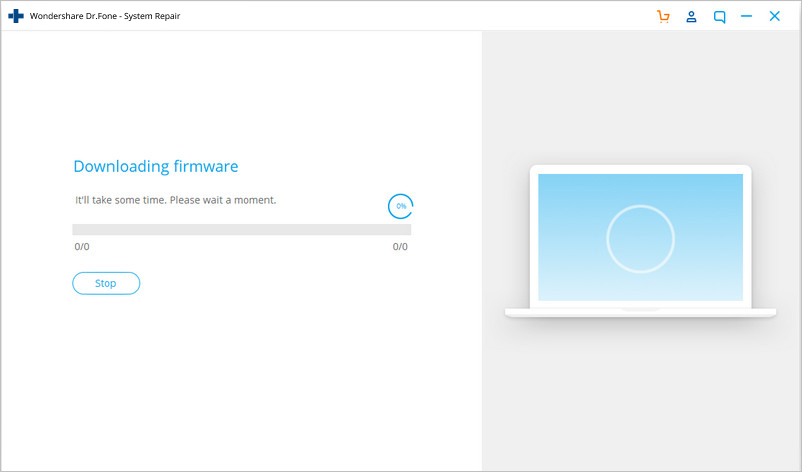
Step Five Once in Download Mode, the software will now download and install a fresh version of your Android device’s operating system. This can take some time, so make sure your device stays connected, and your computer stays on and doesn’t shut down.
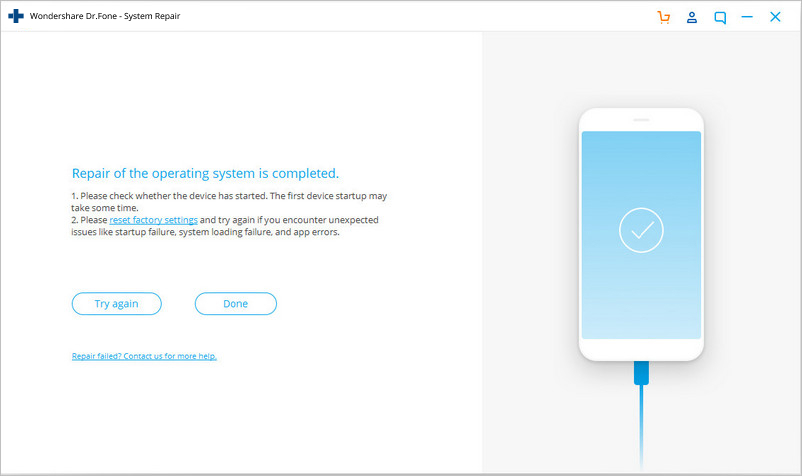
Step Six That’s it! Once you see the screen saying your device has been repaired, you’ll be able to close the Dr.Fone - System Repair (Android) software, disconnect your phone, and can start using Snapchat as normal without the Snapchat not responding error coming up!
Part 5. Check for the Android update
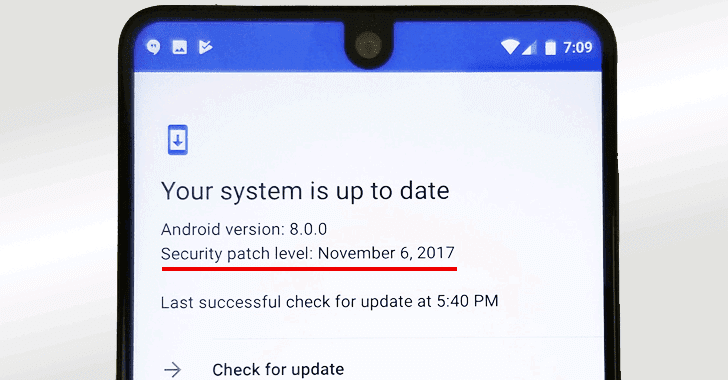
Similar to some of the other solutions we’ve listed above, if you’re using an outdated version of the Android operating system, but the latest version of Snapchat is coded to the most recent, this can be a cause for the Snapchat crashing on Android problem to occur.
Fortunately, it’s easy to check to make sure you’re running the latest version of Android and to download and install the update if you need it. Here’s how, which will help to sort out your Snapchat keeps crashing Android problems.
Step One Open the Settings menu on your Android device and select the About Phone option.
Step Two Tap the ‘Check for Updates’ option. If an update is available, you’ll then have the option to Install Now or Install Overnight. If no update is available, you’ll see a notification stating your device is up to date and no action is needed.
Part 6. Connect to another Wi-Fi
In some cases, you may be trying to connect to a Wi-Fi network that’s not very stable. This may keep cutting the connection to your device, which in turn is causing Snapchat to crash on Android.
To resolve this, you can simply try connecting to another Wi-Fi network or a data plan to see whether this is the problem. If so, changing network and then using the Snapchat app should stop any error messages from occurring.
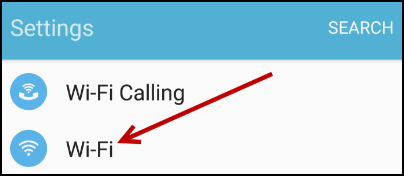
Step One Open the Settings menu on your Android device, followed by the Wi-Fi option.
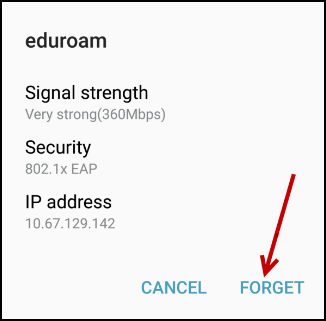
Step Two Tap the new Wi-Fi network you’re currently connected to, and then tap the ‘Forget’ option, to stop your phone connecting to it.
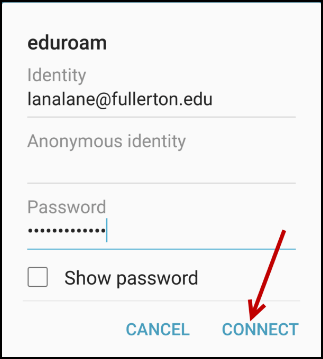
Step Three Now tap the new Wi-Fi network you want to connect to. Insert the Wi-Fi security code and connect. Now try reopening and using the Snapchat to see if you can use it.
Part 7. Stop using the custom ROM
If you’re running a custom Android ROM on your device, with some versions of the ROM and some apps, you’re going to experience errors simply because of the way the apps and the ROMs are coded and designed.
Unfortunately, there’s no easy fix to this, and if you want to continue using the app, you’ll need to reflash your Android device back to its original firmware, and then wait until the ROM developers update the ROM to be compatible with social apps like Snapchat.
However, this reflashing process is simple thanks to the Dr.Fone - System Repair (Android) software that we listed above. To follow the detailed step-by-step guide, follow the steps on Part 4 of this article, or follow the quick guide instructions below.
- Download and install the Dr.Fone - System Repair (Android) software to your computer
- Connect your Android device to your Windows computer using the USB cable
- Open the software and click the Repair option.
- Select the Android device repair option
- Make sure your carrier and device information are correct
- Put your device into Download Mode by following the onscreen instructions
- Allow the software to repair your Android device automatically
Part 8. Reset the factory settings of your Android
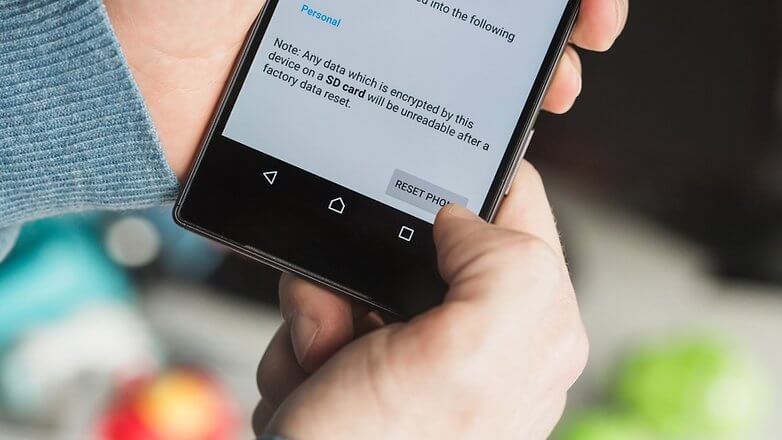
One of the last resorts you can take is factory resetting your Android device back to its original settings. From the day you first started using your device, you’ve been using the system and downloading files and apps, and over time this increases the chances of creating a bug.
However, by resetting your device to factory settings, you can reset these bugs and get your apps and device working again free from the Unfortunately, Snapchat has stopped error message. Here’s how to factory reset your device.
Make sure you back up your personal files from your device first like your photos and music files because factory resetting your device will clear your device’s memory.
Step One Tap the Settings menu on your device and click the Backup and Reset option.
Step Two Click the Reset Phone option. That’s it! The phone will take several minutes to complete the process, after which your phone will be reset to its original state.
Android Stopping
- Google Services Crash
- Android Services Fail
- TouchWiz Home has stopped
- Wi-Fi not working
- Bluetooth not working
- Video not playing
- Camera not working
- Contacts not responding
- Home button not responding
- Can't receive texts
- SIM not provisioned
- Settings stopping
- Apps Keeps Stopping


Alice MJ
staff Editor
Generally rated4.5(105participated)