

[Fixed] Your iPhone Could Not Be Activated

May 12, 2022 • Filed to: Remove Device Lock Screen • Proven solutions
Available data of global smartphone market share from Q1 2018 - Q1 2021 indicates that Apple (iPhone) is the second-biggest most sought-after smart device. Without a doubt, people fall over themselves to use the smartphone series because it takes breathtaking innovation to the next frontier. In other words, iDevices have all the cutting-edge features anyone could ask for in today’s smartphone technology – and even more!
Despite the innovation that goes into them, its users sometimes run into one glitch or another. For instance, “Your iPhone could not be activated because the activation server cannot be reached” is relatively common. If you just encountered this challenge, you have nothing to worry about, as this guide will explain why that is and how to overcome it in 2021.
Part 1: Likely Causes of the Error Message
If you just noticed the error message, the chances are that you have just reset your iDevice to factory settings or restored it. Another cause could be that you have just jailbroken your phone to bypass its iCloud activation lock. Additionally, you unlocked it using another network as opposed to the network the previous user was used. Still, the error message could be a result of an upgrade. There are other instances where you stumble into the error, typically setting up the smart device. By and large, it happened because the server was temporarily unavailable at the time. When you face that challenge, techies always advise that you contact your iDevice’s customer support for assistance. Guess what, you cannot do that if someone just gifted you the phone or you bought it as a secondhand phone. But where there’s a will, there’s away!
Part 2: Troubleshoot
Did you see the error message: “Your iPhone could not be activated because the activation server cannot be reached”? Well, the obstacle here is that you cannot activate your iDevice. You don’t have anything to worry about because there are several ways you can tackle that challenge. You have to troubleshoot it yourself. Nope, you don’t need to give it to a phone repairer to fix it for you. You should follow the techniques below to solve the problem at once.
2.1 Wait for some time
Well, the first step you should consider in resolving that challenge is as simple as waiting. Remember, you are likely receiving that error message because the server is not available. Therefore, the chances are that you may be able to have access to it after waiting for a while. Yes, they are always busy because the cellphone maker has millions of users trying to access their servers at the same time. Therefore, waiting for some time can do the magic for you.
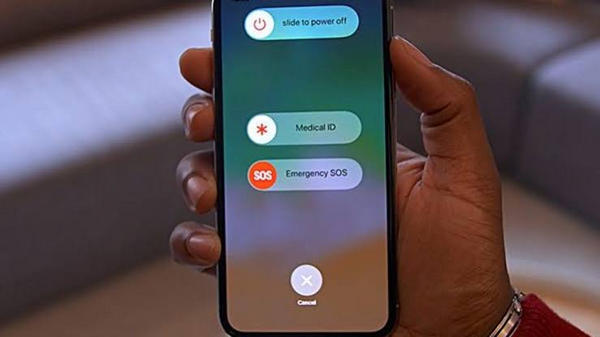
2.2 Restarting your Smartphone
If you have waited for some time and tried several times, but you cannot activate it, you should consider restarting the phone. This will certainly wow you. If you are using iOS 10 and later, restarting your device could be the game-changer. Gently hold the power button until the slider shows up and then slide it to turn off the cellphone. Wait for a while and reboot it. Afterward, try to activate it again.
2.3. Network Error
In truth, Apple may not necessarily be the “culprit”; you should check your network to be sure that everything is working well. Try another WiFi and establish a connection again. Once you have established the connection, try to connect again. If this does not help, then you should consider taking the next step.
2.4 iTunes
Indeed, you can do lots of things with your iTunes, including resolving that activation challenge. To use iTunes for this purpose, you should follow the outlines below:
Step 1: Connect your iDevice to your PC using a USB cable. Turn it off and reboot it.
Step 2: Now, download, install and launch iTunes on your computer
Step 3: You will have to wait for iTunes to detect and activate your smartphone for you
Step 4: Specific messages will pop up, showing that the app detected the error. These messages include “Set up as New” and “Restore from Backup.” Once you see these messages, it means that the app has activated your iDevice. Go ahead and pop the champagne!
Here are some tips for you, though:
- Ensure you have the iTunes latest version
- Make sure your smartphone has an internet connection
If the app says that the SIM card is not compatible, it means that your “woos” is far from over. However, you don’t sweat it; just take the next line of action as detailed below.
Part 3: Bypass iCloud Activation Lock with Dr.Fone Toolkit
You have tried several techniques to activate your iDevice at this juncture, but they don’t work. However, Dr.Fone - Screen Unlock (iOS) is a time-tested web tool for activating the device and having full access to it. This go-to, all-in-one toolkit allows users to activate the smart device on the go. It is not your fault that you cannot activate your smartphone, so Dr.Fone Toolkit takes that burden off your shoulder. Put simply; you should not troubleshoot it any further. The good thing is that you don’t have to be a techie to use this hands-on toolkit.
To activate in a jiffy, follow the outlines below:
Step 1: Download Dr.Fone software to your computer.
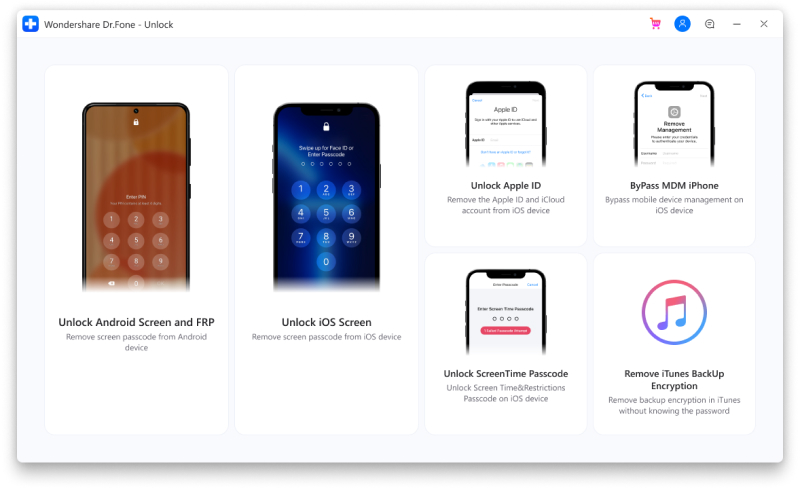
Step 2: Launch the app and tap Screen Unlock from the main menu.

Step 3: Tap on Unlock Apple ID > Remove Active Lock.
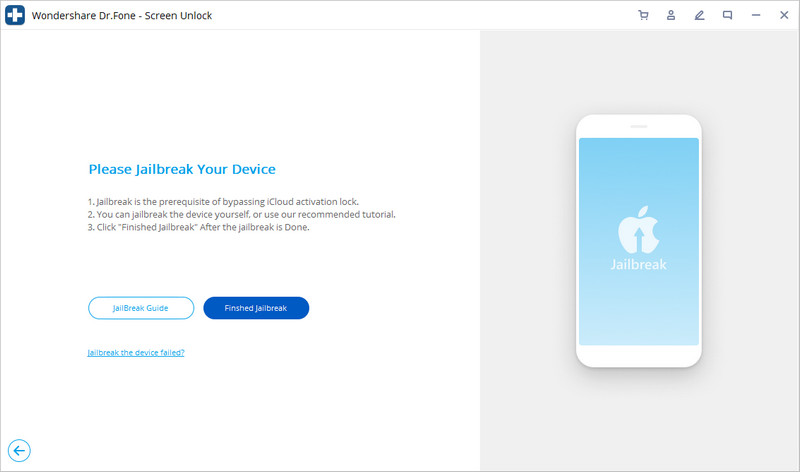
Step 4: Jailbreak your iPhone.
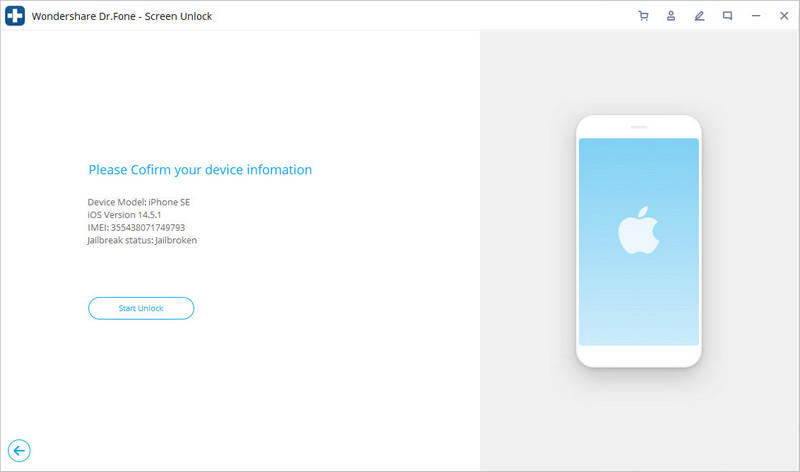
Step 5: You confirm your iDevice model and other details. Make sure you do that carefully. Once you are done, tap. Start to kick off the process.
Step 6: Stay patient. Your device will reboot the moment the app has completed the process. Now that the software has bypassed the activation lock, you can start exploring your smartphone.
At this point, the software has already done the work for you. No, you don’t need iTunes for it. This method is simple and straightforward from the foregoing, so you don’t have to bother troubleshooting it any longer. What are you waiting for? You can enjoy your cellphone now.
Part 4: How to Know that Apple Has Activated your Phone
Having read up to this point, you may be wondering: “How do I know that Apple has activated my smartphone?” Simple! Make your way to the Settings>>Cellular and then scroll down to the bottom of the list. Here, the device will reveal the date you rest it. Since you did that yourself, the date, you activated it will tally with the information on your smartphone.
Conclusion
In a nutshell, “Your iPhone could not be activated because the activation server cannot be reached” is one of the several error messages that iPhone users run it. However, this step-by-step tutorial has shown you how to tackle it. The good thing is that you don’t have a professional repairer to activate it. All you have to do is follow the outlines in this guide. More often than not, using the troubleshoot technique works. However, you should employ the Dr.Fone Toolkit method where it fails. The moment you have activated it, you can now enjoy your iDevice. Now, you have nothing stopping you. Try the Dr.Fone Toolkit now!


iCloud
- iCloud Unlock
- 1. iCloud Bypass Tools
- 2. Bypass iCloud Lock for iPhone
- 3. Recover iCloud Password
- 4. Bypass iCloud Activation
- 5. Forgot iCloud Password
- 6. Unlock iCloud Account
- 7. Unlock iCloud lock
- 8. Unlock iCloud Activation
- 9. Remove iCloud Activation Lock
- 10. Fix iCloud Lock
- 11. iCloud IMEI Unlock
- 12. Get Rid of iCloud Lock
- 13. Unlock iCloud Locked iPhone
- 14. Jailbreak iCloud Locked iPhone
- 15. iCloud Unlocker Download
- 16. Delete iCloud Account without Password
- 17. Remove Activation Lock Without Previous Owner
- 18. Bypass Activation Lock without Sim Card
- 19. Does Jailbreak Remove MDM
- 20. iCloud Activation Bypass Tool Version 1.4
- 21. iPhone can not be activated because of activation server
- 22. Fix iPas Stuck on Activation Lock
- 23. Bypass iCloud Activation Lock in iOS 14
- iCloud Tips
- 1. Ways to Backup iPhone
- 2. iCloud Backup Messages
- 3. iCloud WhatsApp Backup
- 4. Access iCloud Backup Content
- 5. Access iCloud Photos
- 6. Restore iCloud from Backup Without Reset
- 7. Restore WhatsApp from iCloud
- 8. Free iCloud Backup Extractor
- Unlock Apple Account
- 1. Unlink iPhones
- 2. Unlock Apple ID without Security Questions
- 3. Fix Disabled Apple Account
- 4. Remove Apple ID from iPhone without Password
- 5. Fix Apple Account Locked
- 6. Erase iPad without Apple ID
- 7. How to Disconnect iPhone from iCloud
- 8. Fix Disabled iTunes Account
- 9. Remove Find My iPhone Activation Lock
- 10. Unlock Apple ID Disabled Activation Lock
- 11. How to Delete Apple ID
- 12. Unlock Apple Watch iCloud
- 13. Remove Device from iCloud
- 14. Turn Off Two Factor Authentication Apple
James Davis
staff Editor
Generally rated4.5(105participated)