How to Recover Data from iPhone in Recovery Mode?
Apr 28, 2022 • Filed to: Fix iOS Mobile Device Issues • Proven solutions
"My iPhone automatically went into recovery mode when I connected it to my Mac. This caused iTunes to prompt me to restore my iPhone to its factory settings. Now it is stuck in recovery mode because I am not willing to lose all my data because I never backup my iPhone. What should I do?"
Sometimes, your iPhone will involuntarily go into recovery mode. Unless you frequently backup your iPhone, you are at risk of losing all your data. What should you do in this situation? Here are some.
What you can do when your iPhone is in recovery mode?
DO NOT do anything if your iPhone involuntarily goes into recovery mode. The only official way to exit recovery mode is to restore your iPhone with iTunes. Do not do this especially if you do not back up your iPhone regularly because restoring your iPhone this way will wipe clean all data and content.
- Part 1: Fix iPhone in recovery mode without losing data
- Part 2: Recover data from your iPhone in recovery mode
Part 1: Fix iPhone in recovery mode without losing data
Dr.Fone - System Repair enables users to fix your iPhone stuck in recovery mode, froze on the Apple logo or black screen of death. Most importantly, the software will not cause any data loss while repairing your iPhone's operating system.

Dr.Fone - iOS System Recovery
Fix your iPhone in recovery mode without losing data.
- Safe, simple, and reliable.
- Safely fix with various iOS system issues like stuck in recovery mode, white Apple logo, black screen, looping on start, etc.
- Fix other iPhone errors or iTunes errors, such as error 4005, iPhone error 14, iTunes error 50, error 1009, and more.
- Work for all models of iPhone, iPad, and iPod touch.
- Trusted by millions of users around the world and has received rave reviews.
How to fix the iPhone in recovery mode with Dr.Fone
Step 1: Select the "System Repair" option
Launch Dr.Fone and select the "System Repair" on the software interface.

Connect your iPhone to your Mac or PC with a USB cable. The software should be able to detect your iPhone. Click "Start" to initiate the process.
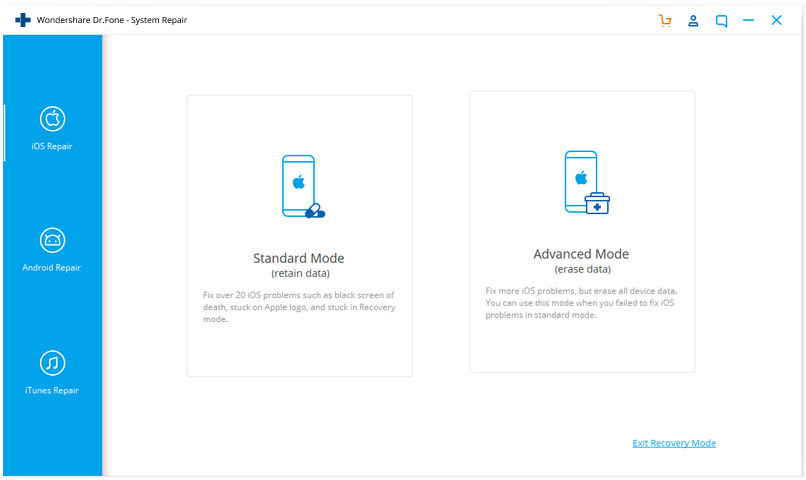
Step 2: Download and select firmware
You will need to download the right firmware for your iPhone to fix the device. Dr.Fone should be able to recognize the model of your iPhone, suggest which iOS version that is best for your iPhone for you to download.
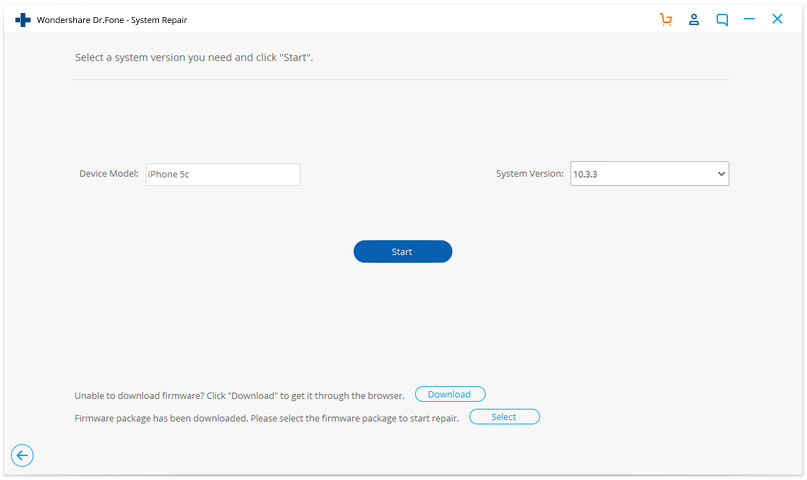
Click on "Download" and wait until the software finishes downloading and installing it to your iPhone.
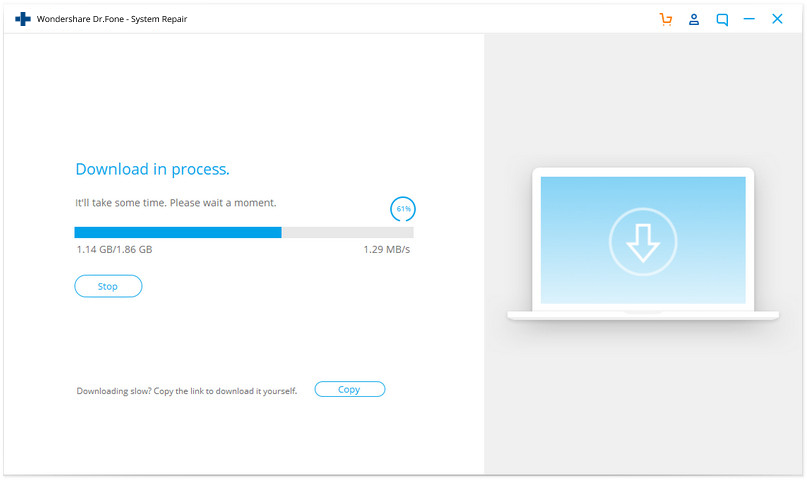
Step 3: Fix your iPhone in recovery mode
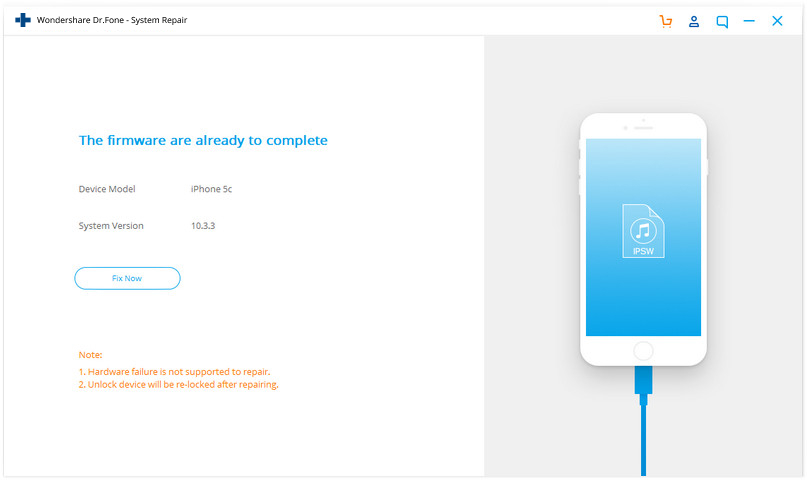
Once the download is complete, click Fix Now, the software will continue repairing your iOS, get it out of recovery mode. This should take a few minutes. The software will restart your iPhone to normal mode.
Part 2: Recover data from your iPhone in recovery mode
"How to recover data from iPhone in recovery mode?", you may ask.
The only possibility to recover data from iPhone is by using iTunes and iCloud backup. Yes, to recover data from the iTunes and iCloud backup files.
You may say, "I know that already, tell me something useful!"
But do you know there is a tool to recover iPhone data in a much SMARTER way than iTunes and iCloud themselves, like:
- Allows you to preview what is exactly backed up in iCloud and iTunes.
- Allows you to select only desired items to recover.
Its name is Dr.Fone - Data Recovery (iOS). It is the world's first iPhone data recovery software built for both Windows and Mac. By using this software, you will be able to safely retrieve your contacts, messages, pictures, notes, etc. from your iPhone. Other media files are also supported to recover from iphone5 and before models. However, if you have not backup data to iTunes before, the media file like music, the video will be difficult to recover from iPhone directly.

Dr.Fone - Data Recovery (iOS)
World's 1st iPhone and iPad data recovery software
- Recover data from your iPhone in recovery mode fast and easily.
- Recover photos, videos, contacts, messages, notes, call logs, and more.
- Compatible with all iOS devices.
- Preview and selectively recover what you want from the iPhone.
- Fully compatible with the latest iOS version.

How to recover data from iPhone from iCloud / iTunes backup in a smarter way
Step 1: Connect iPhone with computer
Launch the software on your computer and select Recover. With a USB cable, connect your iPhone to your Mac or PC. It should be able to automatically detect your iPhone and have the "Recover from iOS Device", "Recover from iTunes Backup File", and "Recover from iCloud Backup File" tabs active in the window.
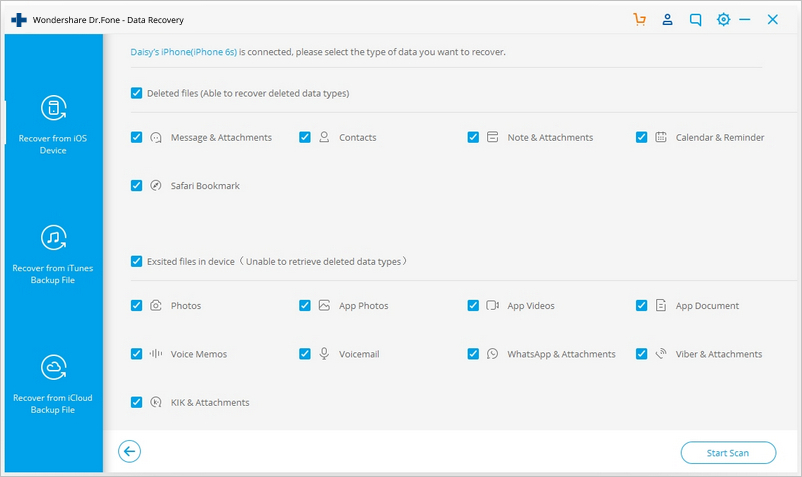
Step 2: Scan your iPhone
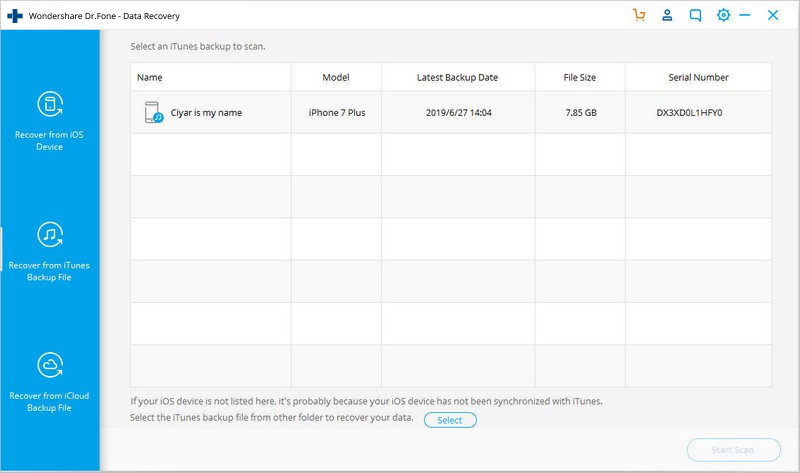
Click on the "Recover from iTunes Backup File" tab, and you will find all the iTunes backup files detected. Select one of them and click "Start scan".
Note: If you need to recover iPhone data from iCloud backup files, click "Recover from iCloud Backup File", log in to your iCloud account, and download the iCloud backup files before previewing them in the same way as iTunes backup files.
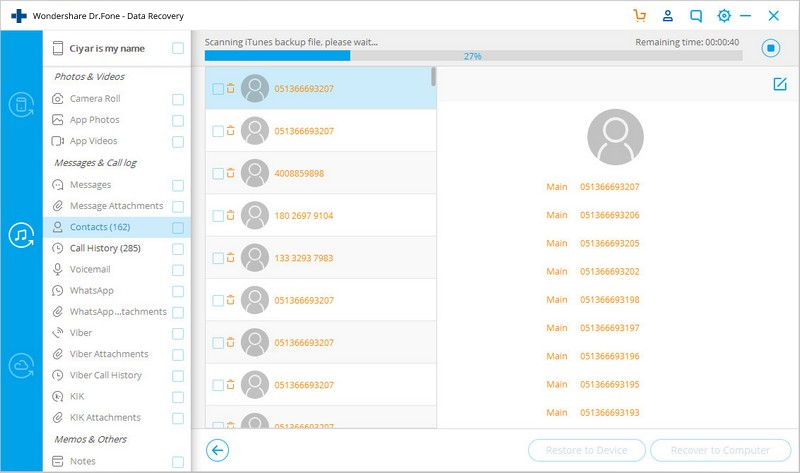
The tool starts scanning your iPhone for lost and deleted data. The software will take several minutes to complete. While it is doing its work, you will be able to see retrievable data in a list. If you found specific data that you want during this process, just click the "Pause" or "End" icon to stop the process.
Step 3: Preview and recover data from iPhone
Бағдарламалық жасақтама iPhone сканерлеуді аяқтағаннан кейін сіз қалпына келтіруге болатын элементтердің тізімін көре аласыз. Қажетті деректерді табуға көмектесетін бірнеше сүзгі опциялары бар. Әрбір файлда не бар екенін көру үшін оның не екенін көру үшін файл атауын басыңыз.
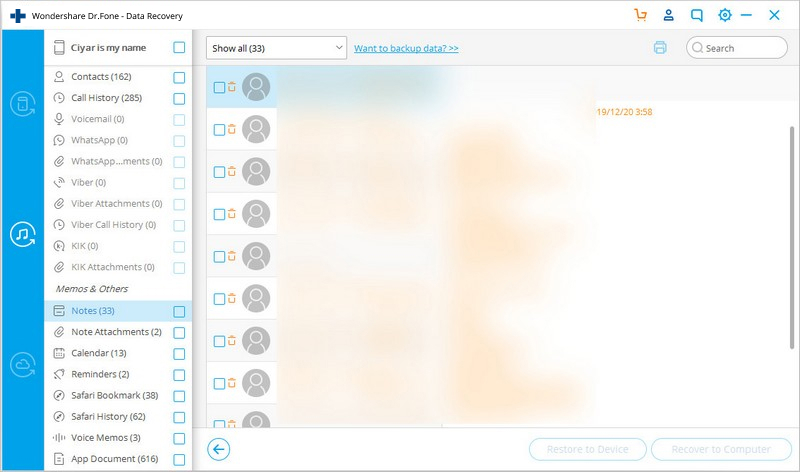
Қалпына келтіргіңіз келетін деректерді анықтағаннан кейін файл атауларының жанындағы құсбелгілерді қойыңыз. Қажеттілердің барлығын таңдағаннан кейін «Компьютерге қалпына келтіру» түймесін басыңыз.
iPhone мұздатылған
- 1 iOS мұздатылған
- 1 Мұздатылған iPhone түзетіңіз
- 2 Мұздатылған қолданбалардан шығуға мәжбүрлеу
- 5 iPad қатып қалады
- 6 iPhone қатып қалады
- 7 iPhone жаңарту кезінде қатып қалды
- 2 Қалпына келтіру режимі
- 1 iPad iPad қалпына келтіру режимінде тұрып қалды
- 2 iPhone қалпына келтіру режимінде тұрып қалды
- 3 iPhone қалпына келтіру режимінде
- 4 Деректерді қалпына келтіру режимінен қалпына келтіру
- 5 iPhone қалпына келтіру режимі
- 6 iPod қалпына келтіру режимінде тұрып қалды �
- 7 iPhone қалпына келтіру режимінен шығыңыз
- 8 Қалпына келтіру режимінен тыс
- 3 DFU режимі
- DFU режимінде 1 iPhone
- 2 iPhone DFU режиміне кіріңіз
- 3 DFU режимінің құралдары
- 4 DFU режимінде тұрып қалған iPhone телефонын қалпына келтіріңіз
- 5 DFU режимінде iPhone/iPad/iPod сақтық көшірмесін жасаңыз
- 6 iPhone/iPad/iPod құрылғысын DFU режимінен қалпына келтіріңіз
- 7 DFU режимінде iPhone құрылғысынан деректерді қалпына келтіріңіз


Селена Ли
бас редакторы