Apr 27, 2022 • Filed to: Data Recovery Solutions • Proven solutions
Like any other technological system, Android is not without its fair share of problems. One of the most common issues that Android users face is the android.process.media error. If you have encountered this problem lately, you don’t need to worry, this article will clearly explain what exactly causes this error and how to fix it safely.
- Part 1. Why this error pops up?
- Part 2. Backup your Android Data First
- Part 3. How to Fix "Android. Process. Media" Error
Part 1. Why this error pops up?
There are several reasons why this error can occur repeatedly and it is worth noting the various reasons why this happens so that you can avoid the problem in the future. Some of the most common ones include:
- 1. Moving from one custom ROM to another can cause this error to occur
- 2. A failed firmware upgrade may also be to blame
- 3. A virus attack can also result in this error among many others
- 4. Restoring apps via a Titanium backup is also a major cause
- 5. Failure of certain apps such as the download manager and the media storage
Part 2. Backup your Android Data First
It is always a good idea to back-up your data especially before embarking on any attempt to fix any problem with your device. This way you will always have your data with you just in case something goes wrong and you lose all your data. Dr.Fone - Phone Backup (Android) will help you easily backup your Android device. The application will allow yout to backup what you want from your device.

Dr.Fone - Phone Backup (Android)
Flexibly Backup and Restore Android Data
- Selectively backup Android data to computer with one click.
- Preview and restore backup to any Android devices.
- Supports 8000+ Android devices.
- There is no data lost during backup, export or restore.
Follow the steps below to learn how to backup your phone in steps.
Step 1. Download, install and run the program
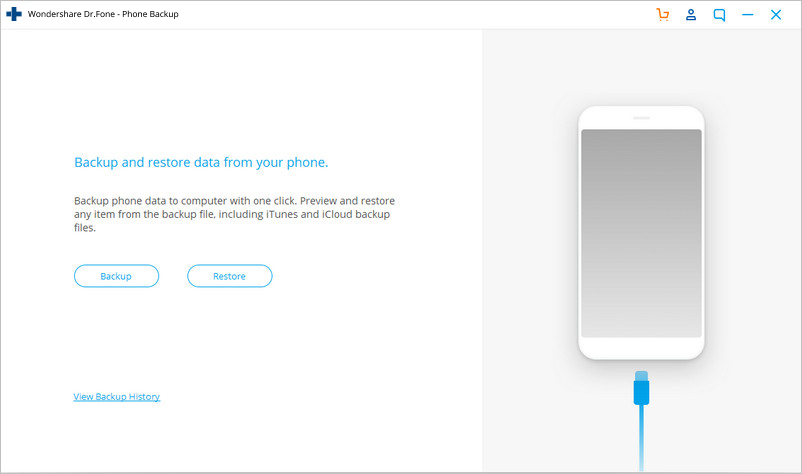
Click the download link above to get the software installed your computer. Then run it. The primary window of the software looks like below.

Step 2. Connect your device
Then connect your device to the computer and make sure that it can be recognized by your computer. Then click on "Phone Backup" on Dr.Fone toolkit.
Step 3. Choose file type and begin to backup
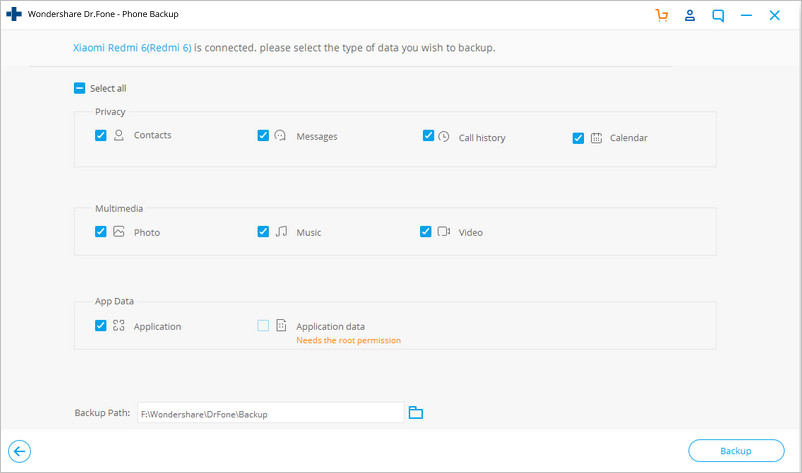
When your device is displayed on the window of the program, check the type that you need to backup and click "Backup" to begin. The rest will be done by the program.
Part 3. How to Fix "Android. Process. Media" Error
With a full backup of your Android device, you can now embark on a mission to fix the error.There are several methods to clear this error. We have outlined three of the most effective solutions here.
Method 1: Clear the cache and data on your device
Step 1: Go to "Setting> Applications> Manage Applications and find Google Services framework.
Step 2: Next, find Google Play from the same Manage Applications page.
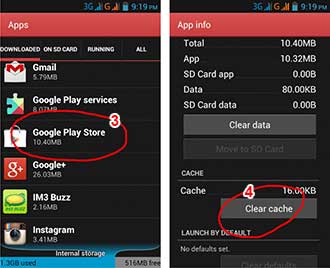
Step 3: Tap on it and then Tap on clear cache.
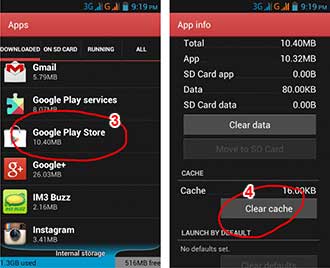
Step 4: Press the back button to go back to Google Services framework and then choose Force stop > clear cache > OK
Step 5: Next you need to open Google Play and when presented with an error, click OK
Step 6: Turn of the device and then turn it back on. Go to Google Services framework again and turn it on to see if the issue has been resolved.
Method 2: Check Google Sync & Media Storage Settings
Step 1: Go to Settings > Accounts and Personal> Google Sync and uncheck all the check-boxes to stop the Google Synchronization.
Step 2: Disable and Clear all Media Storage data by going to Settings> Apps> All Apps. Find the Media Storage> Clear Data> Disable
Step 3: Use the same method as above to clear the Download Manager data
Step 4: Turn off your device and then turn it on
This Should clear the error message for good.
Method 3: Fix the error by using a delicated repair tool

Dr.Fone - System Repair (Android)
Fix android process media has stopped issue in one click
- Fix all Android system issues like black screen of death, won't turn on, system UI not working, etc.
- Industry's 1st tool for one click Android repair. Without any data loss.
- Supports all the new Samsung devices like Galaxy S8, S9, etc.
- Step-by-step instructions provided. No technicals skills required.
Step 1. Connect your Android device
After launching Dr.Fone, click on "System Repair" from the main window.

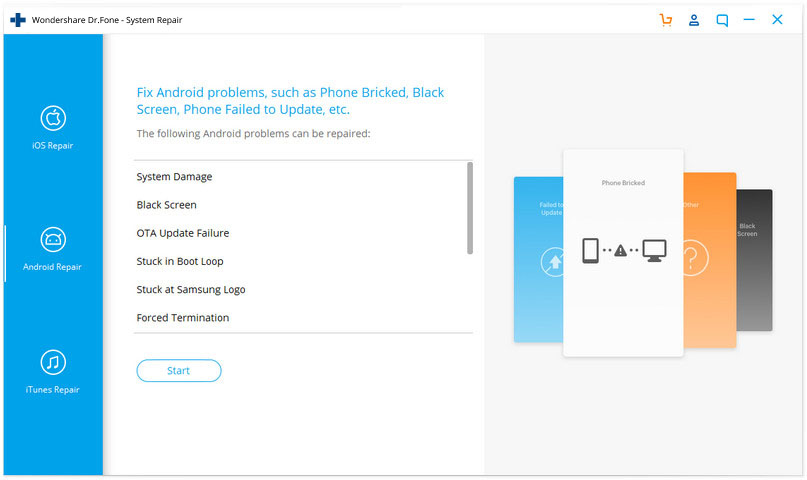
Then connect your Android device with the correct cable and choose "Android Repair" among the 3 options.
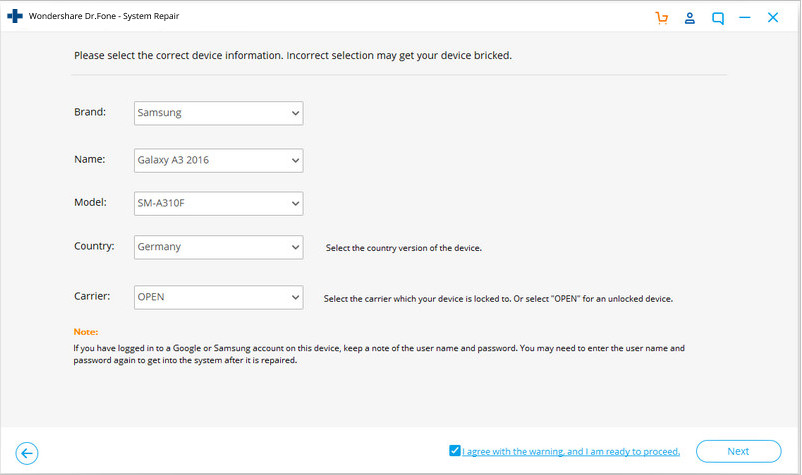
In the device information interface, remember to select the correct information. Then confirm the warning and click "Next".
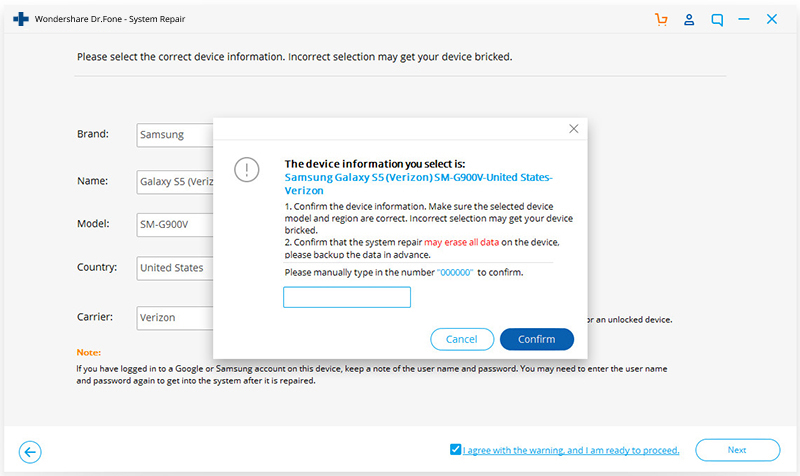
To confirm the Android repair may erase all data on your device, you need to type in "000000" to proceed.
Step 2. Repair your Android device in Download mode.
Read and follow the guide here to boot your Android device in Download mode.
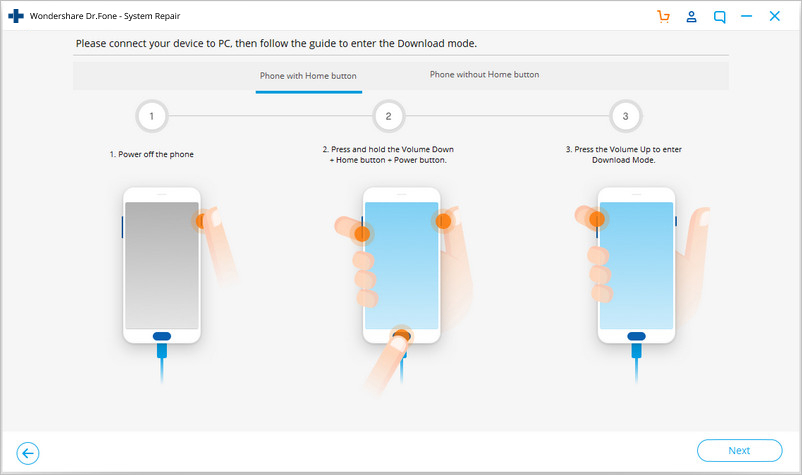
Then click "Next" to start downloading the firmware.
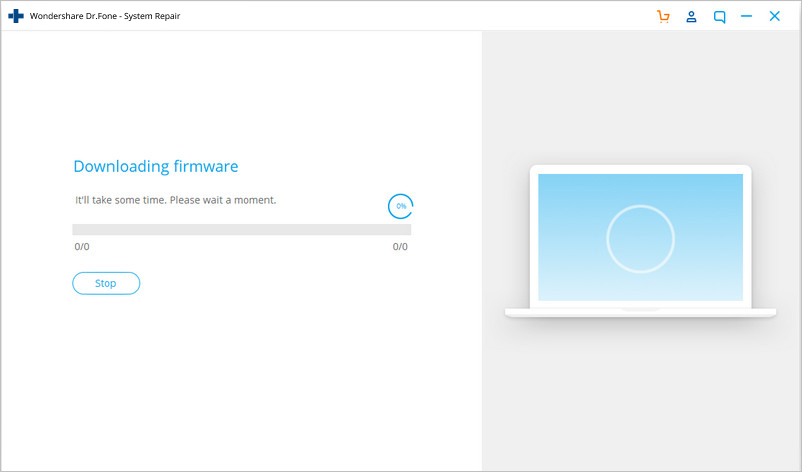
It may take a while, so you could have a cup of coffee to wait for the repairing process completed.
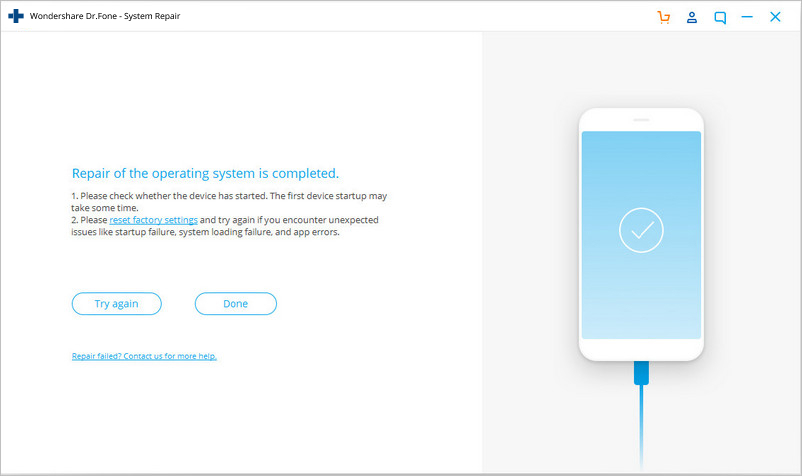
It is our hope that when faced with this fairly common error, you will not panic. This is a fairly mild issue that can easily be fixed as we have seen above. If all else fails, performing a factory reset on your device should be able to fix the problem.
Android System Recovery
- Android Device Issues
- Process System Isn't Responding
- My Phone Won't Charge
- Play Store Not Working
- Android System UI Stopped
- Problem Parsing the Package
- Android Encryption Unsuccessful
- App Won't Open
- Unfortunately App Has Stopped
- Authentication Error
- Uninstall Google Play Service
- Android Crash
- Android Phone Slow
- Android Apps Keeps Crashing
- HTC White Screen
- Android App Not Installed
- Camera Failed
- Samsung Tablet Problems
- Android Repair Software
- Android Restart Apps
- Unfortunately the Process.com.android.phone Has Stopped
- Android.Process.Media Has Stopped
- Android.Process.Acore Has Stopped
- Stuck at Android System Recovery
- Huawei Problems
- Huawei Battery Problems
- Android Error Codes
- Android Tips


Alice MJ
staff Editor
Generally rated4.5(105participated)