3 Way to Recover Data before Unlocking iPod Touch
Apr 28, 2022 • Filed to: Data Recovery Solutions • Proven solutions
3 Ways to Recover Data before Unlocking iPod Touch
There are three ways you can recover data from your locked iPod Touch and then proceed to unlock the device safely. Let's take a look at all three.
1.Sync the Data with iTunes before Unlocking iPod Touch
Follow these very simple steps to sync content on your iPod Touch with your computer.
Step 1: Launch the iTunes program from your computer and then connect the iPod Touch to your computer using a USB cable. You should see the iPod Touch appear as an icon in the upper-left corner.

Step 2: Click on this device icon and then look under Settings on the left part of the window for a list of the types of content types you can sync.
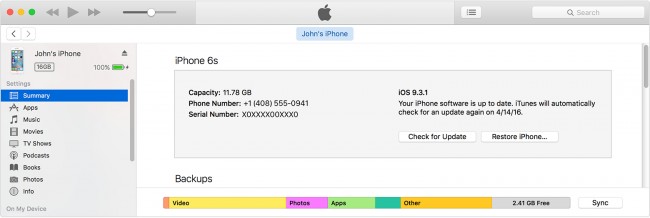
Step 3: Click on the Content type that you want to sync. You should then see additional options to customize the sync settings.
Step 4: Repeat the process for each content type that you want to sync and then click "Apply" to save the sync settings. If syncing doesn't start automatically, click "Sync."
2.Recover Data from iCloud before Unlocking iPod Touch
If you have forgotten your passcode you first of all need to erase the device and then recover the data on the device by restoring from an iCloud Backup. Here's how to do it.
Step 1: From another device go to https://www.icloud.com/ find and sign in with your Apple ID.
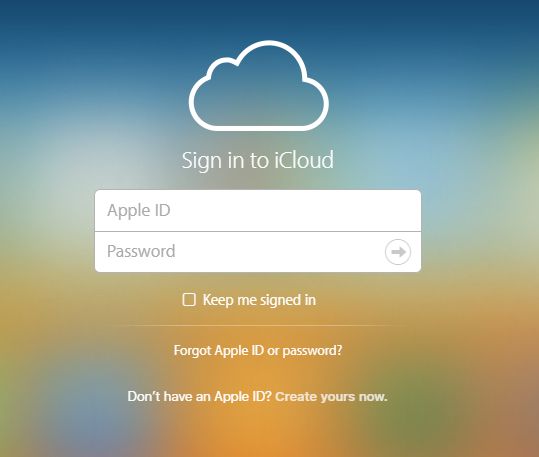
Step 2: Click on "All Devices" and then select the iPod Touch you want to erase.
Step 3: Click "Erase iPod Touch." This will erase the device and its passcode and the device will go back to the set up screen.
Step 4: Turn on the iPod and follow the prompts on the setup screen until you get to the Apps & Data Screen. Here choose, "Restore from iCloud Backup."
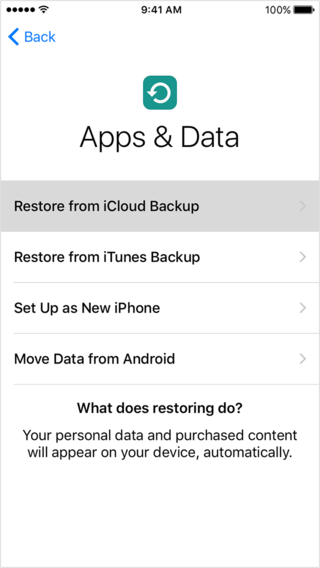
Step 5: Sign in with your Apple ID and select the backup and ensure that you stay connected to Wi-Fi to complete the process.

3.The Best Way to Recover Data from your Locked iPod Touch
You can certainly use iCloud or sync with iTunes to recover your data before unlocking your device. But by far the easiest, quickest and most reliable way to recover data from your locked iPod Touch is to use Dr.Fone - iPhone Data Recovery. This recovery program gives you three ways to recover your data and can be used to recover data from your device even if it has been damaged.

Dr.Fone - iPhone Data Recovery
Scan and recover data from iPhone X/8/7SE/6S Plus/6S/6 Plus/6/5S/5C/5/4S/4/3GS!
- Enable to recover data directly from iPhone, iTunes backup and iCloud backup without erasing any data.
- Retrieve data types covering videos, photos, music, contacts, etc.
- iPhone X/8/7, iPhone 6S/6S Plus/SE and the latest iOS version are all compatible.
- Troubles like deletion, device loss, jailbreak, iOS update,etc. all can be fixed
- Allow to preview and selectively choose the file you want to recover
Let's look at how you can use Dr.Fone to recover data from a locked iPod Touch.
1.Recover Directly from the iPod
Step 1: You can download the tool and start up to enter into the "Recover" mode. Besides, using the factory USB cacle to connect the iPod Touch to your computer is also neccessary. It will take seconds for detecting your iPod devices and then you can open the "Recover from iOS device" window.
Note: if you have not backup the data before, it will be hard to scan the media content, which means it will be difficult to recover.
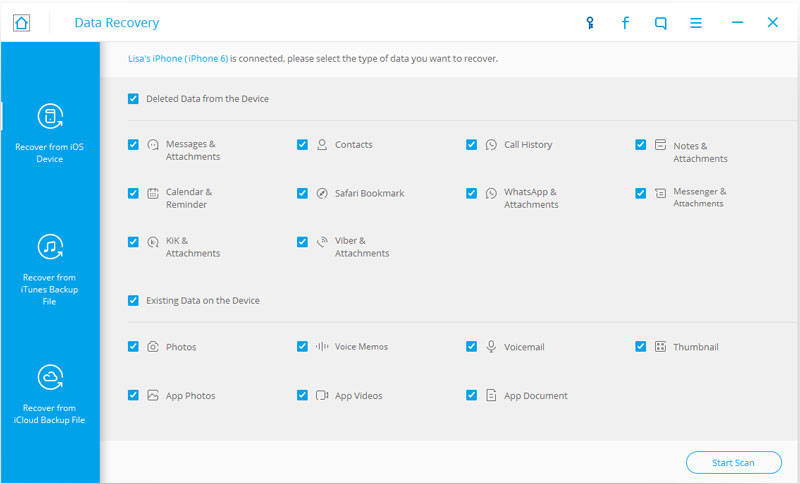
Step 2: Click "Start Scan" and the program will begin an analysis of your device. The process may take minutes depending on the total amount of data on your device. You can click on the "Pause" button to stop the process.
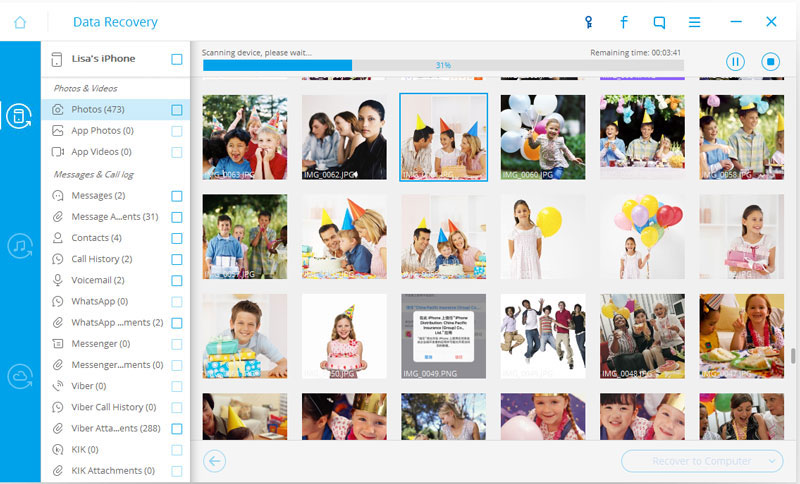
Step 3: Once the scanning is completed, all your photos, messages, Apps contacts, call history etc. on the left sidebar as the following interface shows. Select the data you would like to recover and then click on "Recover to Computer" or "Recover to Device."
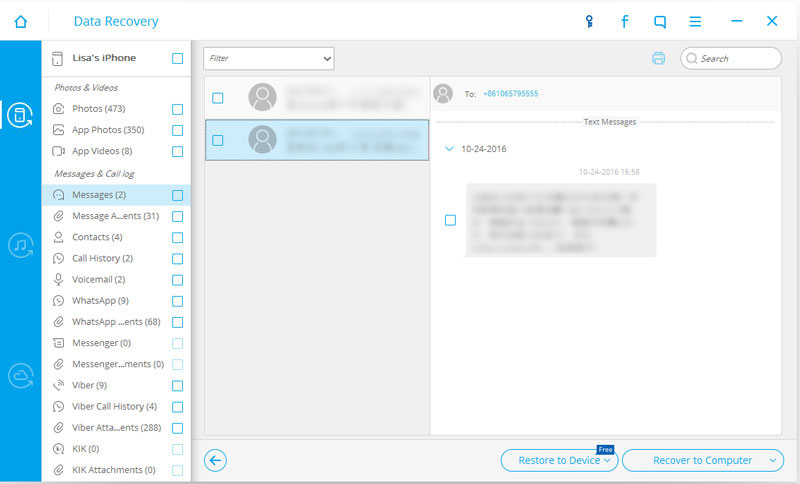
2. Option 2: Recover from iTunes Backup File
You can also choose to recover the data from an iTunes backup file. To do this, follow these steps.
Step 1: Launch Dr Fone on your computer and then click "Recover from iTunes Backup File." The program will detect all the iTunes Backup files on the computer.
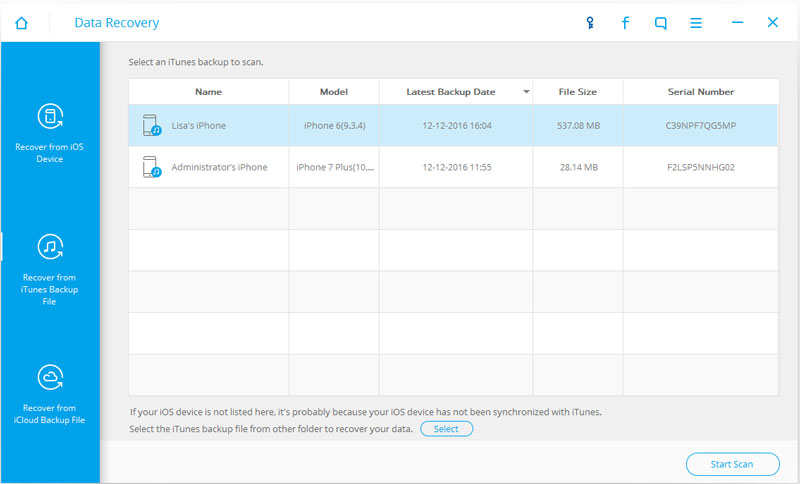
Step 2: Choose a recent iTunes backup file or the one that contains the data you want to recover and then click "Start Scan." Once the scan is complete, you can select the files you want to recover and then click "Recover to Device" or "Recover to Computer."
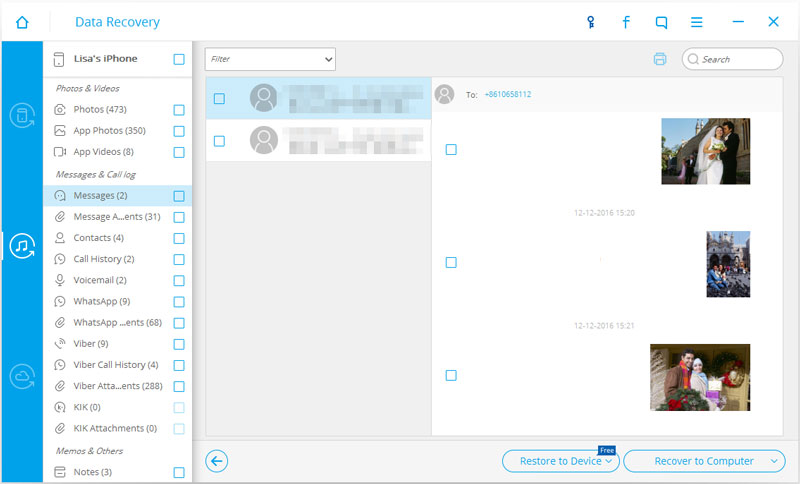
3.Option 3: Recover from iCloud Backup File
If you had backed up to iCloud before, you can also recover data from your iCloud backup files without having to erase the device first. To do this, you can follow these very simple steps.
Step 1: Launch the program and then select "recover from iCloud Backup file." Sign in to your iCloud account.
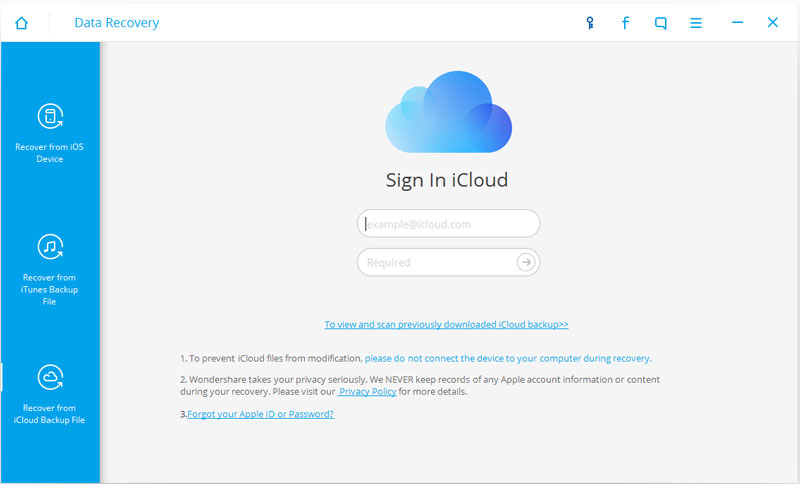
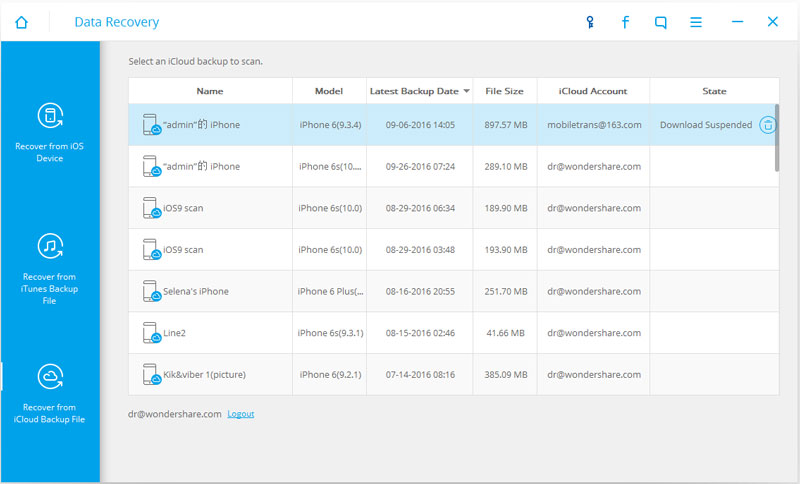
Step 2: Select the data you want to recover from iCloud Backup file and then click on "Download."
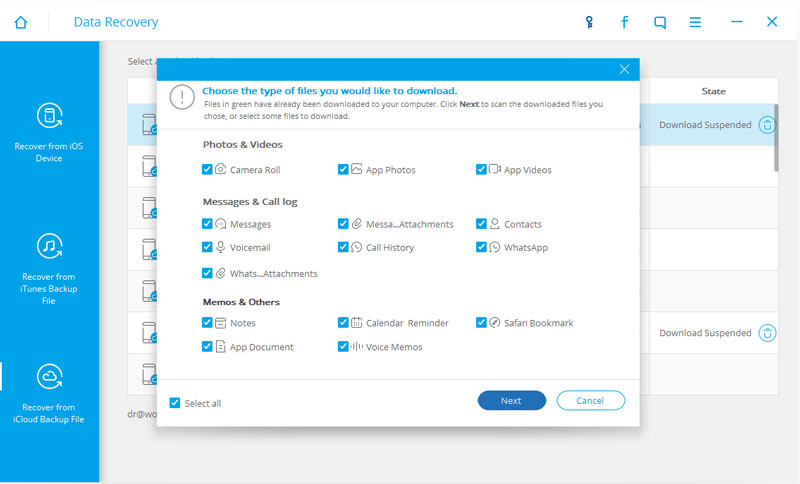
Step 3: Select the types of files you want to recover and then click "Start Scan" on the pop-up window.
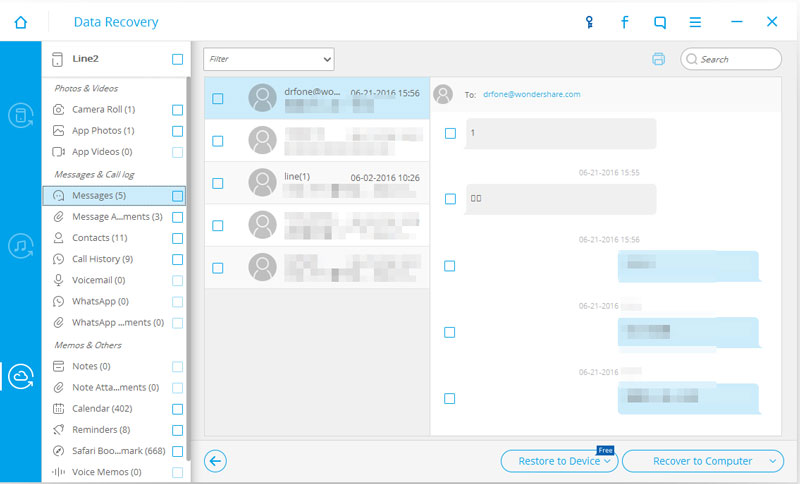
Step 4: You can either choose "Recover to Device" or "Recover to Computer." to recover the data you want.
The next time you get locked out of your iPod Touch, don't worry too much about data loss. Dr.Fone should retrieve the data in no time.
Video on How to Recover Data before Unlock iPod Touch
iPhone Data Recovery
- 1 iPhone Recovery
- Recover Deleted Photos from iPhone
- Recover Deleted Picture Messages from iPhone
- Recover Deleted Video on iPhone
- Recover Voicemail from iPhone
- iPhone Memory Recovery
- Recover iPhone Voice Memos
- Recover Call History on iPhone
- Retrieve Deleted iPhone Reminders
- Recycle Bin on iPhone
- Recover Lost iPhone Data
- Recover iPad Bookmark
- Recover iPod Touch before Unlock
- Recover iPod Touch Photos
- iPhone Photos Disappeared
- 2 iPhone Recovery Software
- Tenorshare iPhone Data Recovery Alternative
- Review top iOS Data Recovery Software
- Fonepaw iPhone Data Recovery Alternative
- 3 Broken Device Recovery


Selena Lee
chief Editor