Solutions for iTunes Backup Session Failed
Mar 07, 2022 • Filed to: Manage Device Data • Proven solutions
One of the several reasons why we are so inclined to our gadgets and the technology is the fact that they are advancing to a higher and a better level on a daily basis. The major concern with these devices is not the performance because when it comes to moving from one platform to another the first thing we can think of is whether the platform we are moving to is secure enough to actually rely on or not.
Technology and gadgets have reached a point where no one would have expected it to be a few years back, however the fact still remains that they are not secure enough to ensure 100% security of your data and files. For over-coming this problem we make backups, but several people have been facing issues with backup problems, which is tagged as the “iTunes backup Session failed”. If you are one of those people, then you have landed at the right place because this article would discover the solution for iTunes backup Session failed.
- Importance of Backups
- Solution 1: Recover data from an old iTunes backup
- Solution 2: Using the official solution from Apple
Importance of Backups
If you have been using an iPhone or any other gadgets, then you would definitely agree with me if I said backups are the best and the most efficient way of ensuring the safety of your data. Hardware failures are unpredictable and they can end up into severe problems for the user. Don’t give your data a chance to be deleted or lost and make sure you make regular backups of your device and your data.
Another reason for keeping backups is that you can restore all the data into a new phone if you ever lose your phone by any chance or decide to upgrade your phone, irrespective of the reason.
Solution 1: Recover data from an old iTunes backup
iTunes is a very good and effective software for handling all your backup history, but at times it gets sluggish and at time it tends to give errors which can be a real pain. However, there are alternative software through which you can get your data recovered from iTunes by following just a few simple steps, the one such software is the Dr.Fone - iPhone Data Recovery.

Dr.Fone - iPhone Data Recovery
Recover data from iTunes backup easily & flexibly.
- Recover photos, videos, contacts, messages, notes, call logs, and more.
- Compatible with latest iOS devices.
- Preview and selectively recover what you want from iPhone, iTunes and iCloud backup.
- Export and print what you want from the iTunes backup to your computer.
Steps to restore iTunes backup
The best thing about Dr.Fone is that it is not only specific to one functionality, rather it can help you with anything and everything related to iOS backup and restore. Following are the steps you have to follow in order to recover data from a previous iTunes Backup.
Step 1: Install Dr.Fone - iPhone Data Recovery
The installation process is extremely easy and the self-guided installation process will easily get the software installed onto your PC. Simply head over to Dr.Fone - iPhone Data Recovery.
Step 2: Choose Recovery Mode
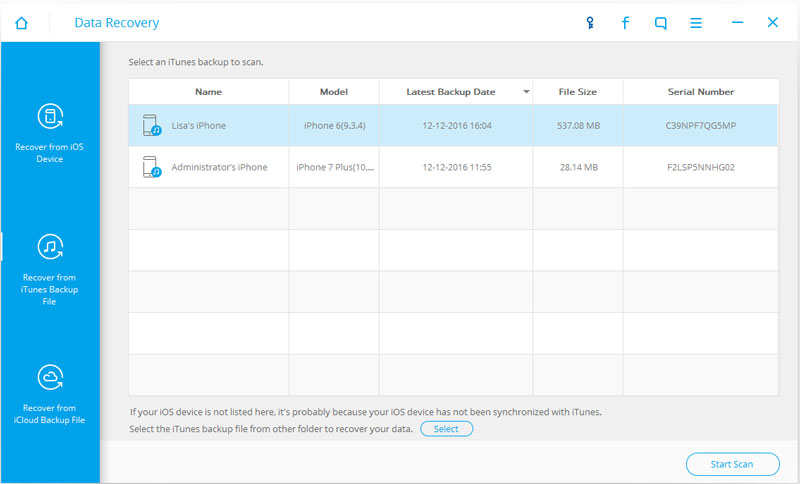
After installing Dr.Fone you will be able to choose from several option, in this case we will several “Recover from iTunes Backup File” because that is what we want to do.
Step 3: Scan Data from the Backup File
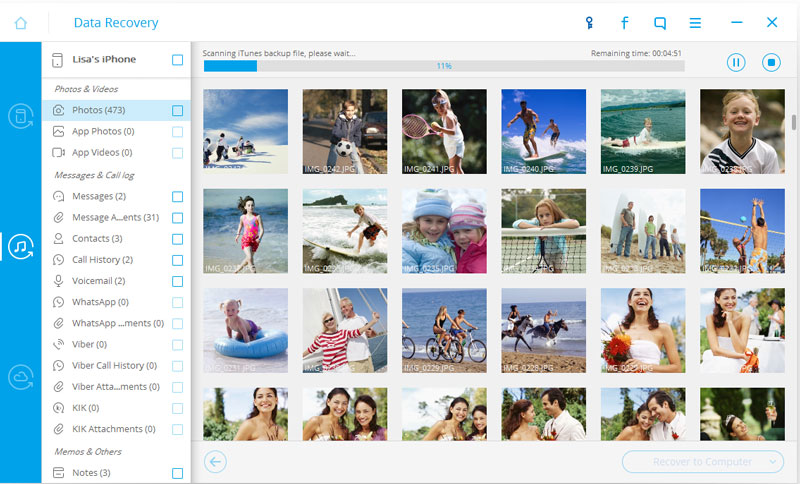
Choose the iTunes backup file that you want to recover from by clicking over the “Select” button. One you have selected the right backup file you need to click “Start Scan”.
Step 4: View the Files and Recover from iTunes Backup
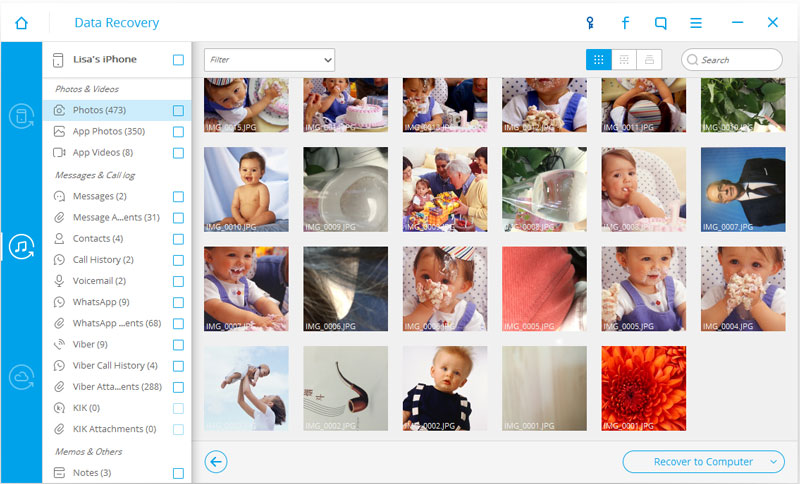
Once the scanning is complete, you will be prompted with a screen where you can select the files that you want to recover. After choosing the files you want to recover, click “Recover” this will prompt two recovery options of whether you want to recover to your iOS device or your computer.
After selecting the respective option, you will be done within no time. So, this is one of the solution for iTunes backup Session failed.
Solution 2: Using the official solution from Apple
Step 1: Restart your PC and iOS device
Once you restart either of the devices, initiate the backup once again.
Step 2: Unplug any other USB devices
At times the problem can be resolved by disconnected all the USB devices that are connected to your PC, except for the keyboard, mouse and the iOS device. After ensuring that there are no other devices, initiate the backup again.
Step 3: Check your Windows Security Options
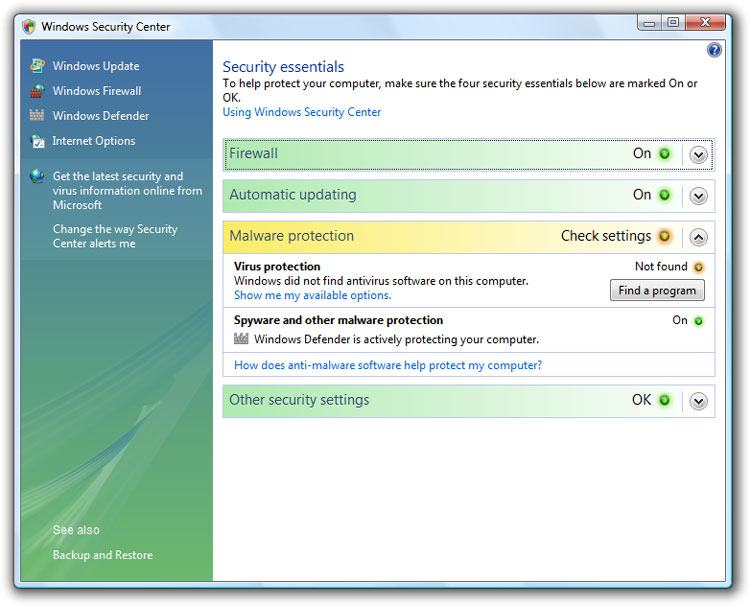
Windows comes with a built-in firewall and anti-virus software, please make sure that the security software is disabled and try backing up again.
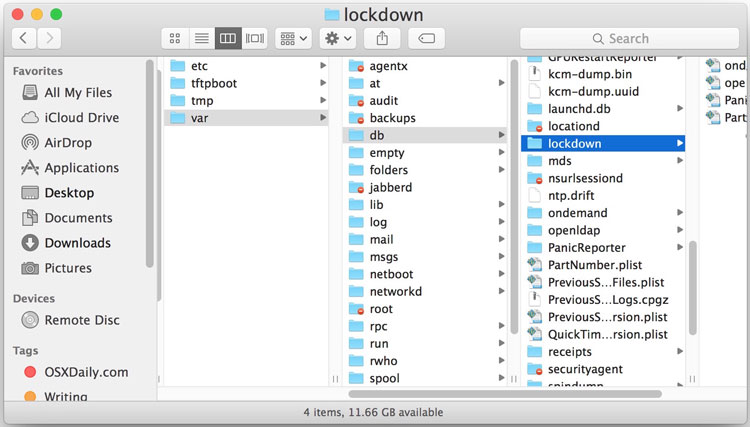
Step 4: Reset the Lockdown Folder
Please make sure that the lockdown folder has been reset before you try again to back up using iTunes.
Step 5: Free Storage
Usually the backups are quite big in size and they require a larger storage area, make sure you have enough free space on your hard disk.
Step 6: Secondary Computer
If nothing else works out, please try backing up using any other computer that you know would have none of the above issues.
iTunes
- iTunes Backup
- Restore iTunes Backup
- iTunes Data Recovery
- Restore from iTunes Backup
- Recover Data from iTunes
- Recover Photos from iTunes Backup
- Restore from iTunes Backup
- iTunes Backup Viewer
- Free iTunes Backup Extractor
- View iTunes Backup
- iTunes Backup Tips


James Davis
staff Editor