

How to View Photos on iTunes Backup?

Apr 28, 2022 • Filed to: Manage Device Data • Proven solutions
Part 1: View photos on iTunes backup with Dr.Fone
Once you have made a backup of your device with iTunes, you are certain that your data will be safe in case anything happens with your phone. However, there might be situations when you will need some particular contact data or some certain photos to recover from your backup. The good news is that there is an excellent software out there that will help you with recovering any kind of data from your iTunes backup. Moreover, it is actually an iTunes backup viewer, so you can browse through all the messages, contacts, and photos you have on the backup you have made and choose what you need to recover.
The software in question is Dr.Fone - iPhone Data Recovery. It offers you a complete solution for restoring your contents, including photos, messages, call history and other stuff…not only it can do the job of recovering the data you might have accidentally deleted, but you also can view iTunes backup and choose the files you need to be recovered and extract them to your computer. This is especially great if you have the need to recover your photos from your backup and extract them to your PC in order to save them and look at them whenever you want.
Dr.Fone - iPhone Data Recovery
Recover files from your iTunes backup easily & flexibly.
- Provide with three ways to recover iPhone data.
- Recover photos, videos, contacts, messages, notes, call logs, and more.
- Compatible with latest iOS devices.
- Preview and selectively recover what you want from iPhone, iTunes and iCloud backup.
- Export and print what you want from the iTunes backup to your computer.
Steps to view photos on iTunes backup
Step 1. The first thing you need to do is to make sure you have Dr.Fone installed on your PC or your laptop. You can do this simply by clicking the below button.
Step 2.The installation will finish in less than a couple of minutes, and you will then have the option of starting Dr. Fone for iOS. Click on Start Now.

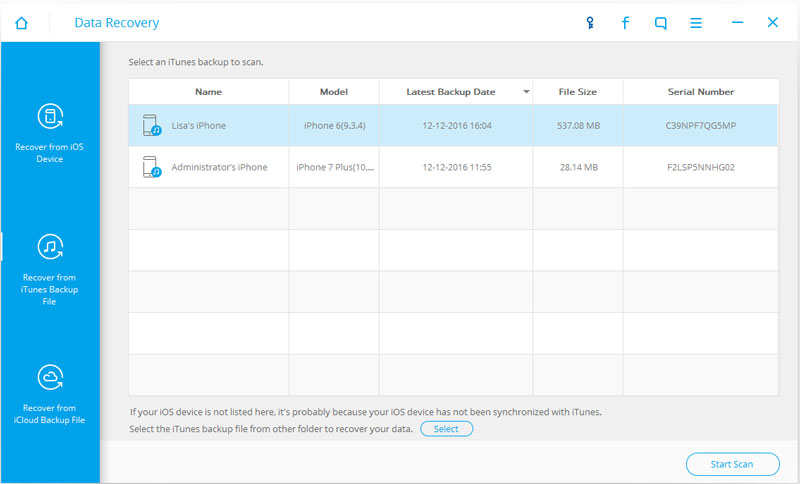
Step 3. Once you have started the software, choose "Recover from iTunes Backup File" option you will have at the left side of the screen. When you have chosen this option, Dr. Fone for iOS will automatically scan all the backups you have made until now, you just need to choose the backup you want to make a recovery from. Alternatively, you have a ‘Select’ button at the bottom of your screen. This serves so you can choose a folder where your backup is located in and add it to the list Dr. Fone offers, so you can proceed with recovery of your photos.
Once you notice the wanted backup, click on it and choose ‘Start Scan’ at the bottom right part of the screen.
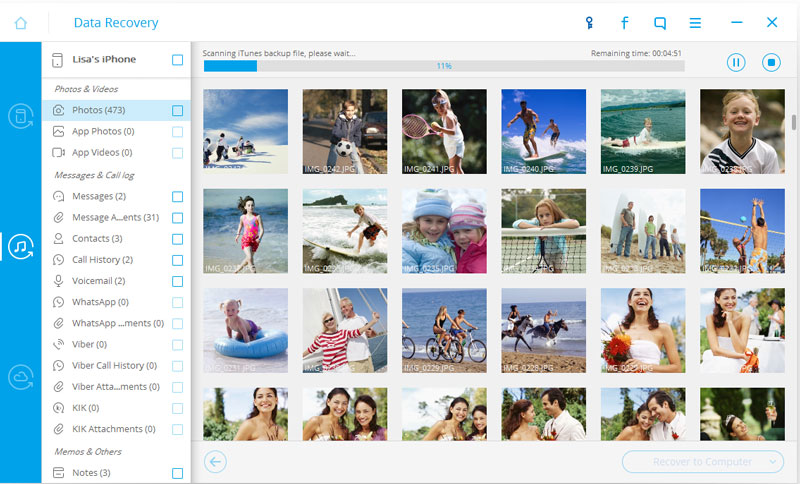
Step 4. Please keep in mind it might take a few minutes for the software to scan all the data you have in your backup file. You will notice the progress bar at the top of the screen and the data showing up.
Step 5. You now have your personal iTunes backup viewer. If you didn’t already, click on the photos tab on the left to show all the photos you have in your backup. The last thing remaining now is to mark the photos you want to be extracted with a tick. Once you are satisfied with the selection, choose Recover to Computer at the bottom of the screen and start the recovery.
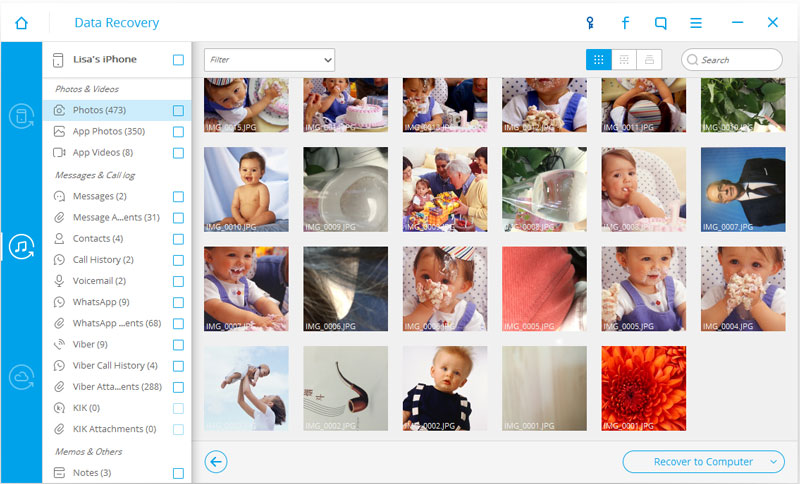
That’s it! You have successfully view photos on iTunes backup.
Part 2: How to delete photos from iTunes
There is one other thing you might want to do before making an iTunes backup on your device, and that is deleting the unwanted photos. These are the photos you are not satisfied with, the ones you simply don’t look nice in, or just don’t need them anymore. Doing this will enable for your backup to take up less space, and you will be able to make a backup quicker and have a faster access to view iTunes backup with Dr. Fone for iOS. Here’s the instruction on how to delete unwanted photos from iTunes.
Step 1. You will need iTunes software installed on your PC or laptop. This is done easily, head to the Apple website and download it. It is recommendable that your iTunes is updated to its latest version.

Step 2. Once installed, launch iTunes and connect your device (iPhone, iPad or iPod) with an original USB cable. You might use the one that is not original, but in order to be sure nothing goes wrong, please use the original one.

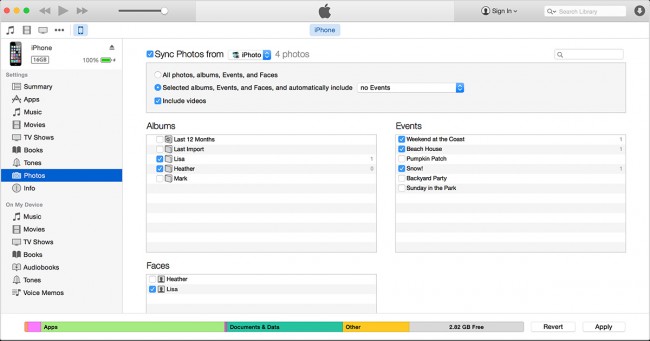
Step 3. Select your wanted device from the devices list on the left. Next, click on the Photos tab under your device’s menu list.
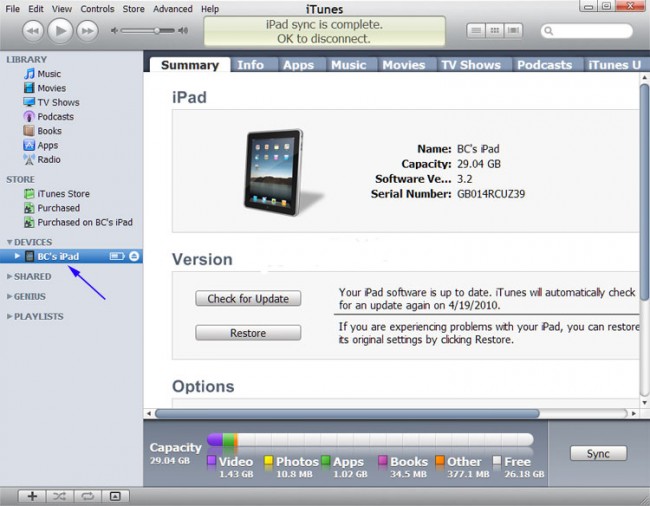
Step 4.Click on ‘Sync Photos’ and then choose ‘Selected Albums’. Simply deselect the albums or collections you wish to delete. Once you are satisfied with your choice, click on the 'Apply' button and you are done with the guide.


iTunes
- iTunes Backup
- Restore iTunes Backup
- iTunes Data Recovery
- Restore from iTunes Backup
- Recover Data from iTunes
- Recover Photos from iTunes Backup
- Restore from iTunes Backup
- iTunes Backup Viewer
- Free iTunes Backup Extractor
- View iTunes Backup
- iTunes Backup Tips
Selena Lee
chief Editor